
R60 2013 Countryman S (Codename: Stormtrooper)
#1
 02-28-2013, 07:42 PM


Join Date: Feb 2013
Location: South Louisiana
Posts: 61
Likes: 0
Received 0 Likes
on
0 Posts
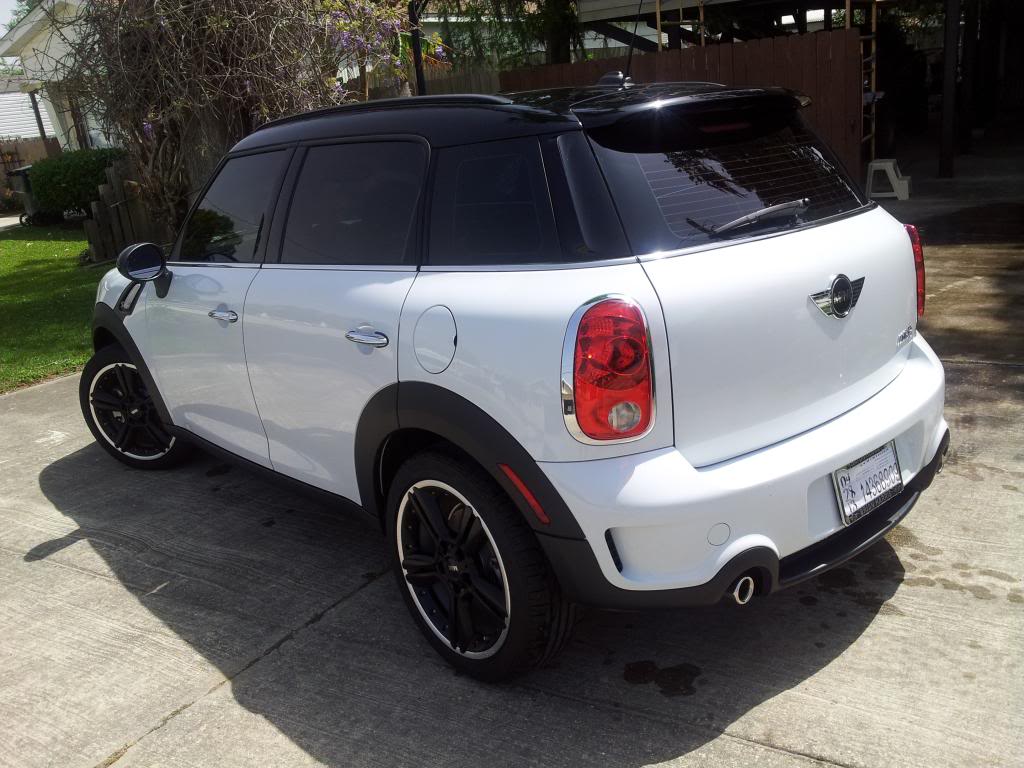
2013 Countryman S (Codename: Stormtrooper)
Hello all,
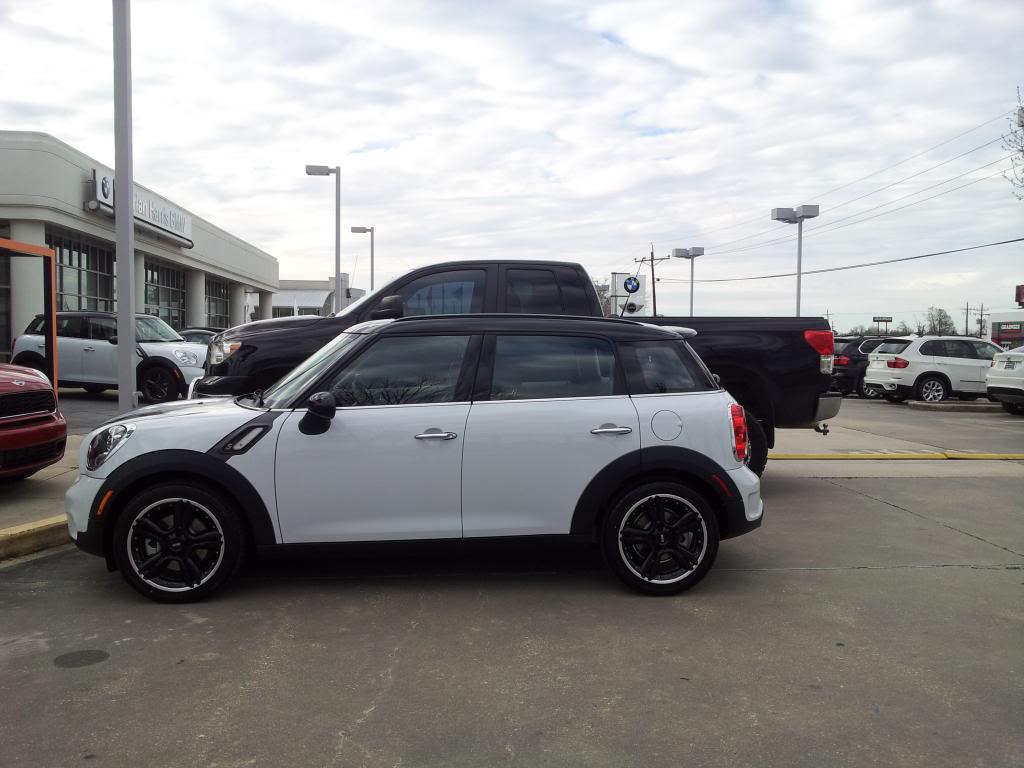
I am a new owner. I bought myself a 2013 Cooper Countryman S today.
Got a manual with the sport package. Traded out a 2010 tundra with 35" tires for it and so far i like it (other than feeling like my butt is scraping the road because i am so low). I am not the type to leave things stock though so i look forward to playing with my new toy. I am also looking forward to enjoying the gas mileage that comes with my new go-cart.
I already have some JL audio speaker i pulled from my Tundra. Two 6.5" and two 6x9's, one HD900/5 amp and a 13.5W5 low profile sub. Not sure if i will be able to fit them in my Cooper but i will certainly be looking into it over the weekend. Will take pics along the way.....
Last edited by goofballtech; 03-24-2013 at 02:19 PM.

#3
02-28-2013, 09:07 PM
Join Date: Feb 2013
Location: South Louisiana
Posts: 61
Likes: 0
Received 0 Likes
on
0 Posts
I have seen all the movies but am not a fanatic myself. The name fits pretty well though, I think.

#6
03-01-2013, 10:52 PM
Join Date: Feb 2013
Location: South Louisiana
Posts: 61
Likes: 0
Received 0 Likes
on
0 Posts
Had a bit of time to play today. Pulled the speaker out from under the drivers seat so i can pull measurements to see what i can fit under there. I have the speaker still out. Will post some pics of measurements tomorrow if anyone needs them for future.
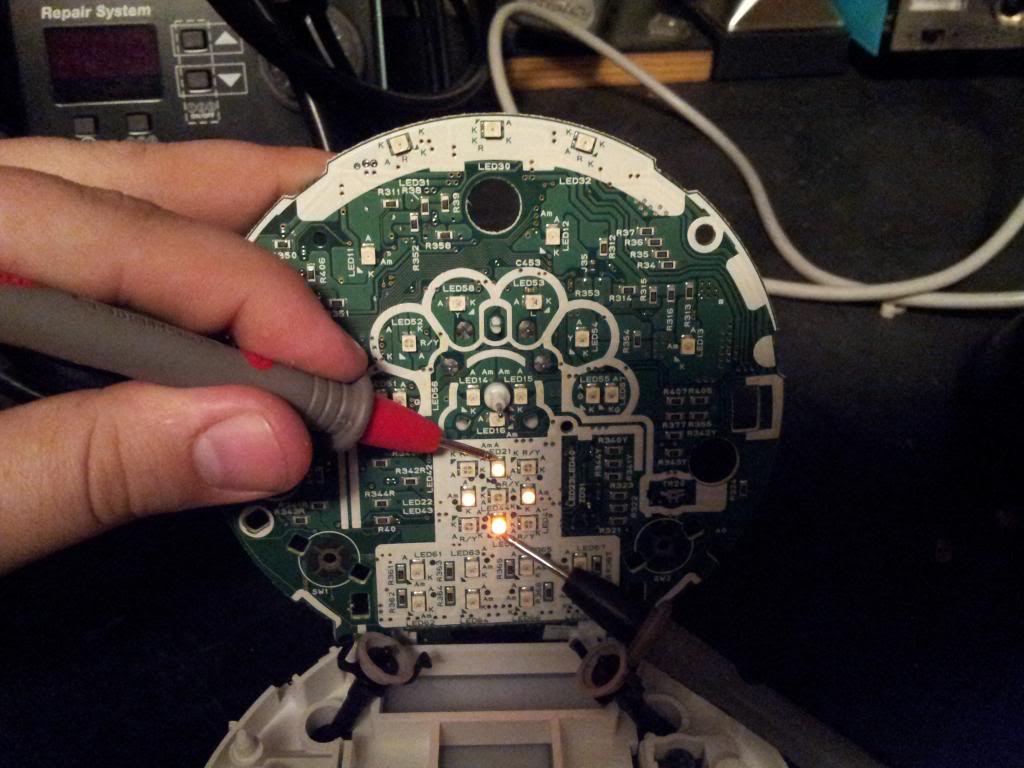
Also had a few PLCC-2's from when i did the dash on my tundra and wanted to play so i did the backlighting on my Tech.
Also took a few pics that might help someone else in the future.
*Disclaimer, if you have no idea what is in the pictures then an LED change may not be a good option for you without a lot of research on what equipment and experience you should have to get it done without burning up your circuit boards.
Tach Opened up
Last edited by goofballtech; 03-24-2013 at 02:14 PM.
#7
03-01-2013, 10:57 PM
Join Date: Feb 2013
Location: South Louisiana
Posts: 61
Likes: 0
Received 0 Likes
on
0 Posts
Needle is red but i will likely end up going blue. Also need to pick up some hobby paint for needle backing color.....
Just in case someone need this one day i checked to see where the single color led's were on the tach.....
Odometer Panel backlight LEDs

Digital Speedo Backlight LED's
Needle and Digits

Just in case someone need this one day i checked to see where the single color led's were on the tach.....
Odometer Panel backlight LEDs
Digital Speedo Backlight LED's
Needle and Digits
Last edited by goofballtech; 03-24-2013 at 02:14 PM.
Trending Topics
#8
03-02-2013, 05:36 AM
Join Date: Feb 2013
Location: South Louisiana
Posts: 61
Likes: 0
Received 0 Likes
on
0 Posts


#9
03-02-2013, 02:17 PM
Join Date: Feb 2013
Location: South Louisiana
Posts: 61
Likes: 0
Received 0 Likes
on
0 Posts
Side Note. Taking out the speedo sucks......
There are quite a few t-20 screws in this process as well as some T-27.
In order to remove the center plastics around the stereo and a/c in the 2013 countryman you need to first remove the glove compartment and lower the section of the dash below the steering wheel.
I started on the passenger side, for no particular reason.
First thing i did was remove the small section nearest the door. A firm tug pulled it free.
Remove the three screws across the top of the glove compartment just inside the lid.

Remove the larger two bold that were revealed when pulling the side piece away. one is right were the plastic of the door trim meets the glove box. Kid of hiding in there and fun to get to.

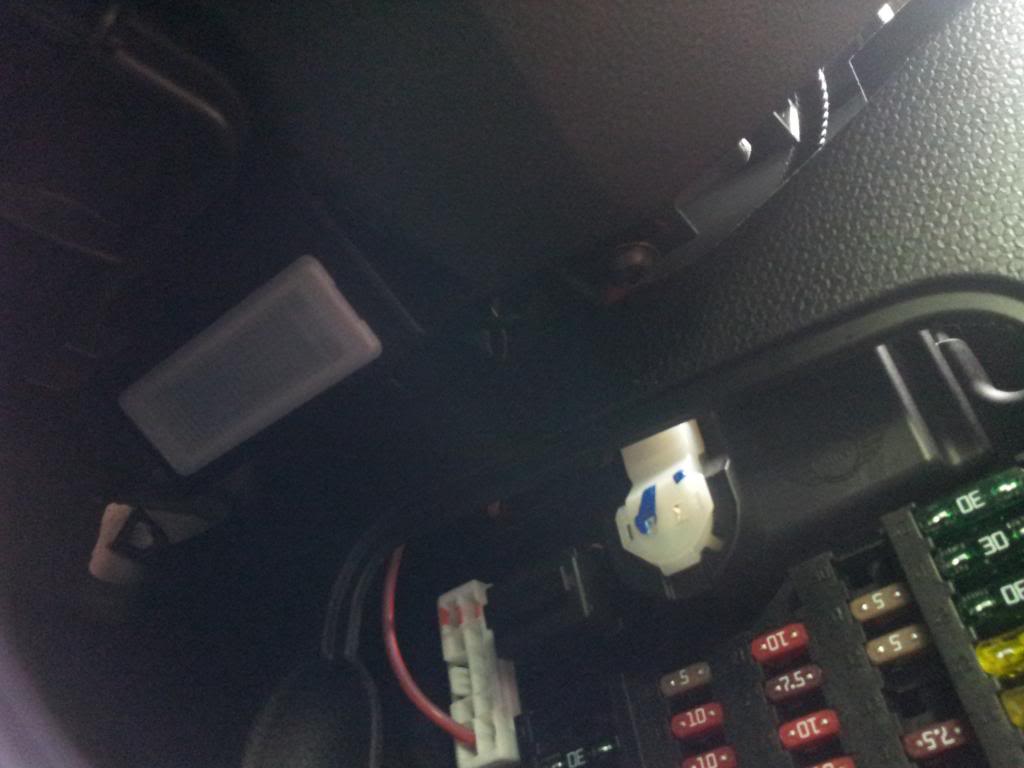
There are 2 more screws that are accessed by laying down on the floor and looking up. The one picture is on the fuse box side.
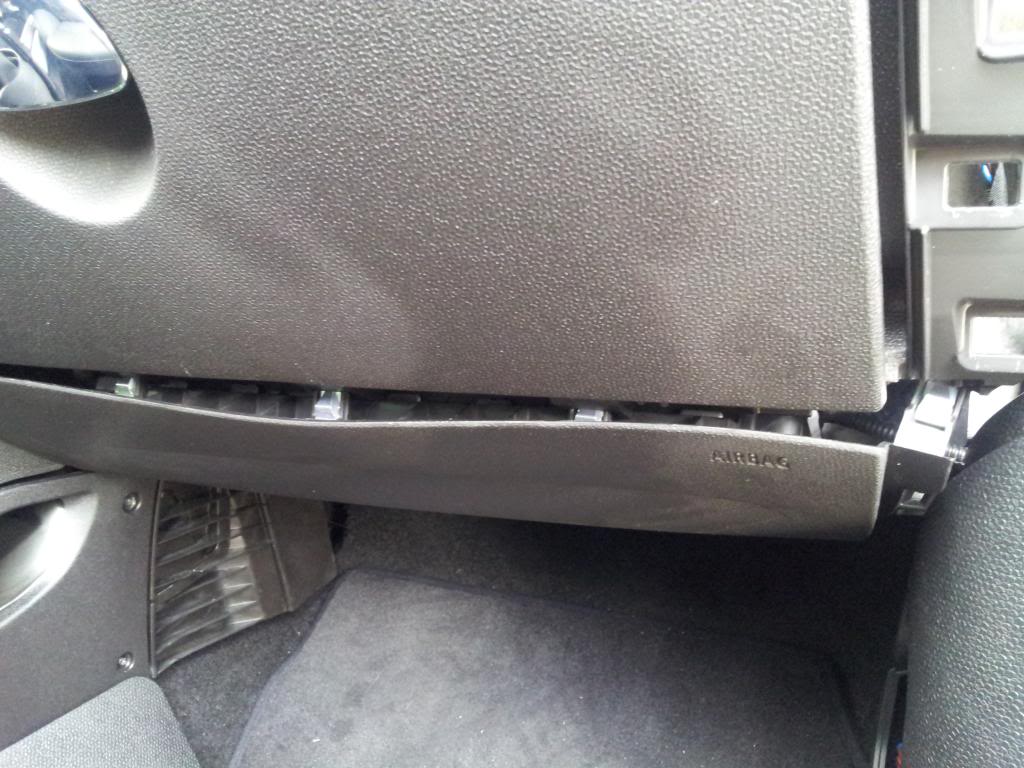
Pull down gently to pop the tabs out that hold the air bag cover in place. There is another screw under the glove box on the side closest to the console. You have to hold down a bit on the air bag cover to see it hiding in there.
Once all the screws are free you can lean the top of the compartment out toward you the pull up and work the bottom away form the dash. There is a plug for the light. you can give it a firm tug and it will pull away.

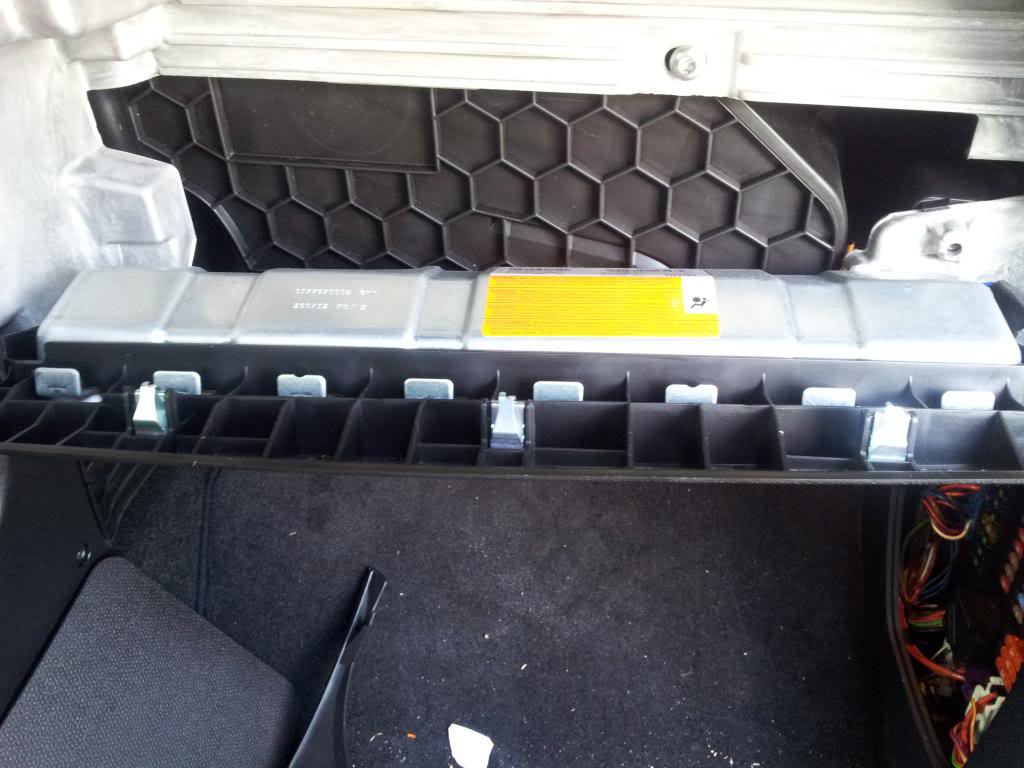
Once the compartment is out of the way you see the air bag assembly. The left side of the rubber cover is in the way of a screw you will need to access so push the plastic up and unhook it form the metal tabs on the airbag unit. The plastic is soft so it's not hard to manipulate. Remove the two screws that hold in the center console section that were once covered by the passenger side dash.
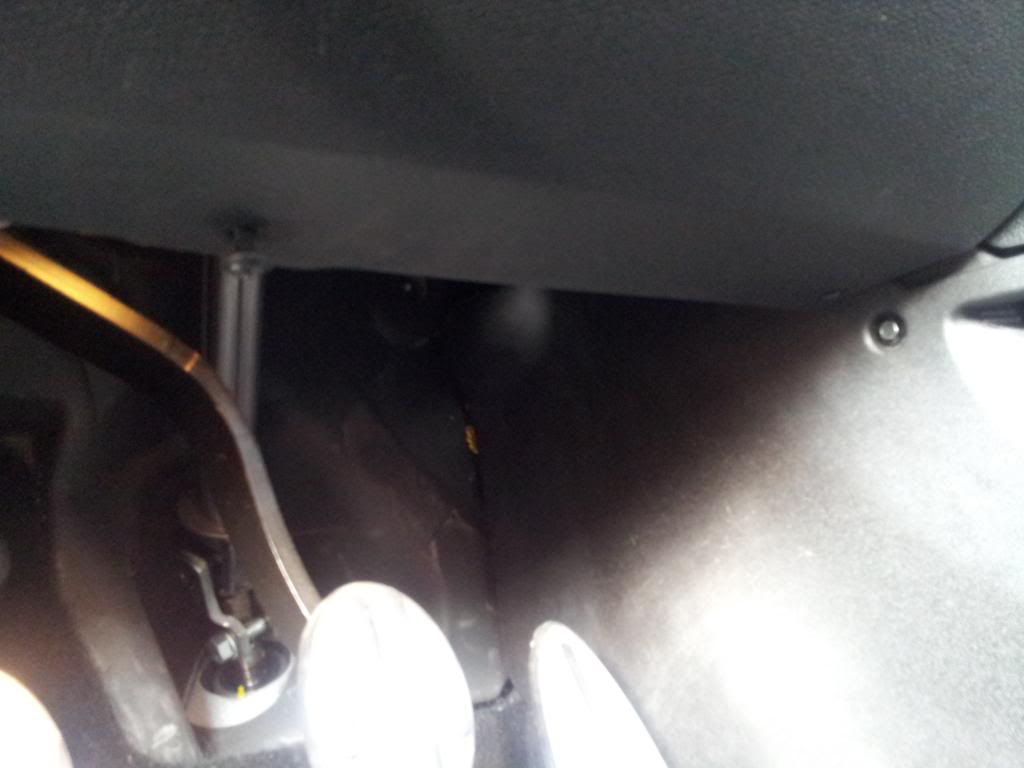
Moving on to the driver's side. There are two screws directly above the pedals. Remove these first.
Also remove the part closest to the door on this side.
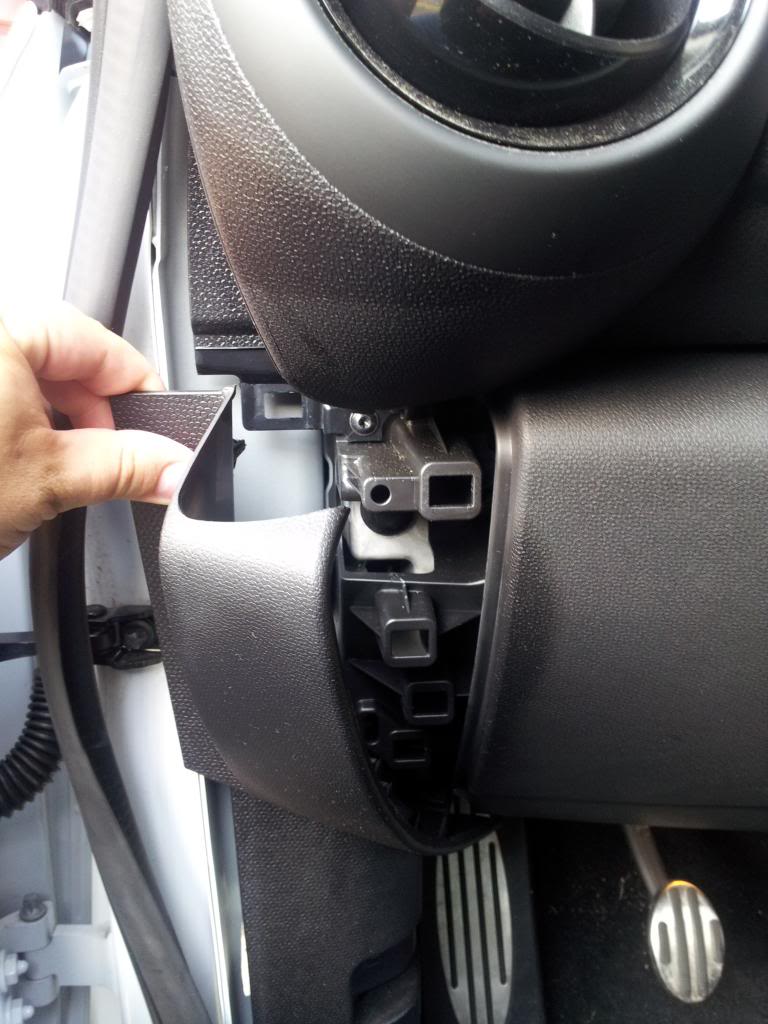
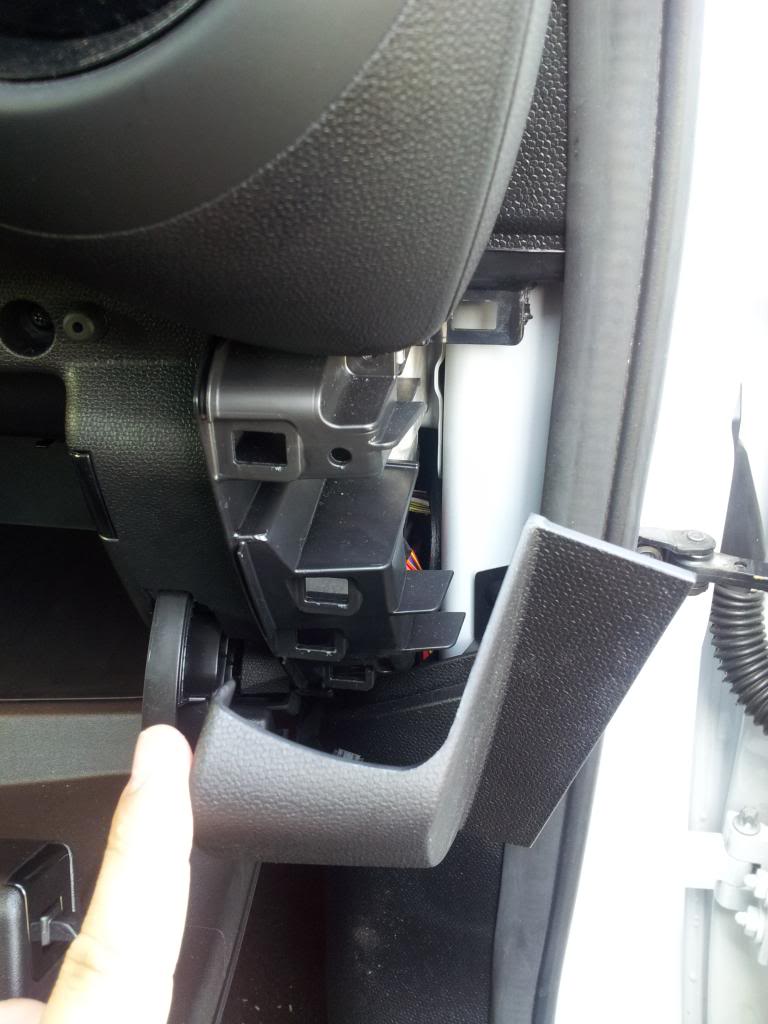
Pull directly out toward the drivers seat and the piece around the steering wheel will come free. there are a few metal tabs as well as a few plastic ones holing it in place.

once pulled away you will see the cable that runs to the key/start button, there is no need to disconnect this. just let it hang but be careful not to tug to hard and risk damage.
Remove the two screws now reveled that hold the center console in place.
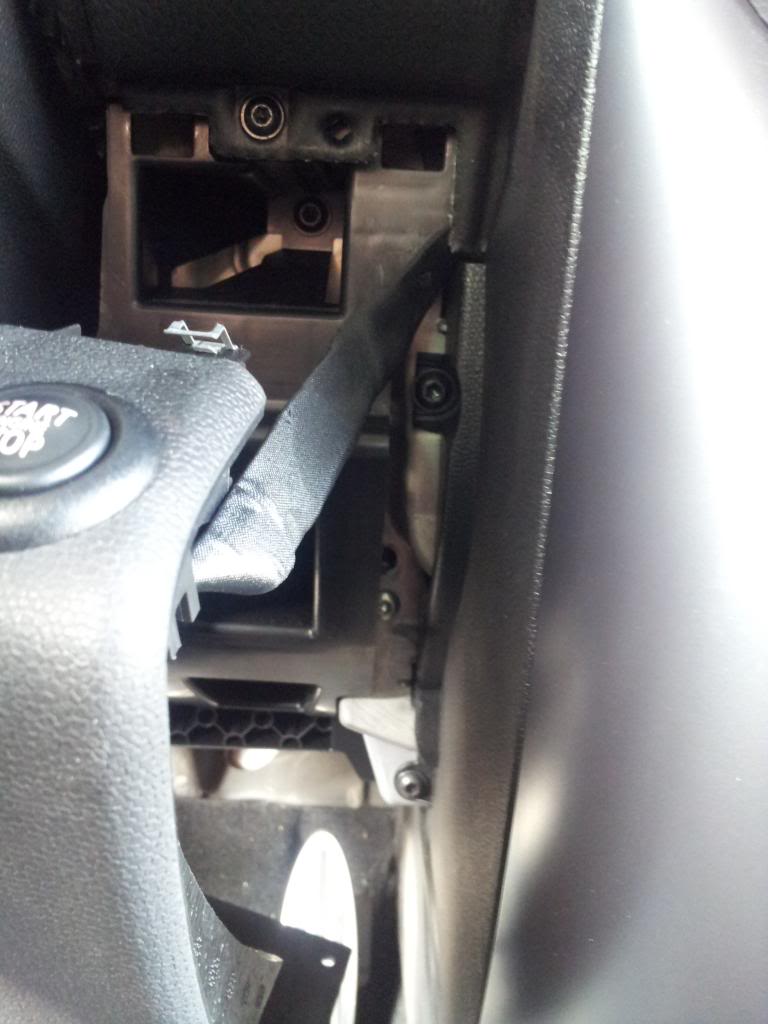
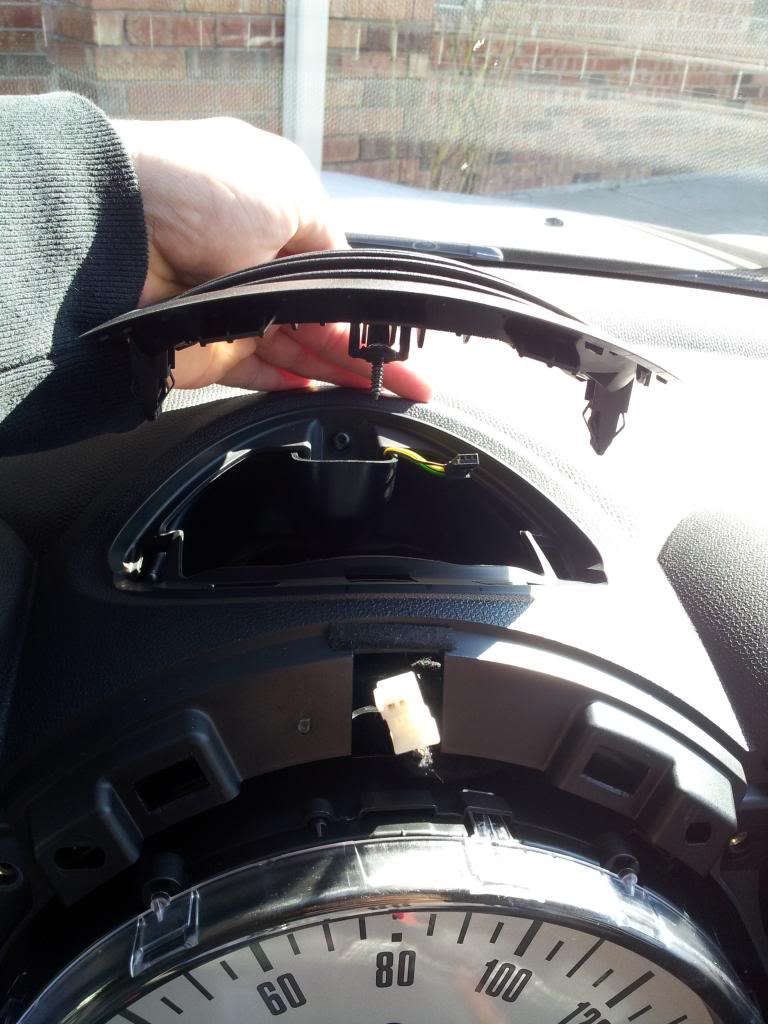
Now we move up top to the mickey mouse plastic gauges/vent face pull off.
You will need good sturdy force but be careful because the vent portions are quite flimsy once free. Once free the only connection point is the wires to the hazard flasher button. A pick of some variety will assist in pulling it off.

The ac grill hides two screws. The light sensor slides right out if you get a finger nail under it to revel a hidden screw below it. Use the same pick as the hazard light connector to remove the sensor plug. Once that is removed stick a finger in that hole and gently pull up. The grill will pop free and come up revealing another screw. Once you undo that screw you can pull the next layer away slowly from the top working your way down.
Once the mickey mouse is out of the way you will need to pull the gray hard plastic pieces from each side of the radio. Get something under them down low and pull straight out toward the doors. There are no screw, just friction tabs under there. Once remove you reveal 3 screws on each side that now need to be remove to pull away the center plastic.

You can now pull gently on the center plastic from the top and it should come free. Keep in mind the CD slot will stay in the console but the buttons and a/c controls will come away with the plastic. There are two connectors to remove now, use a 90 degree pic or similar to slide under the release latch and free the connectors.

Once the wires are released pull up and away on the center console section to work it free.
Now you can remove all of the screws holding the plastic in that surround the speedometer then the speedometer assembly itself. There is one small plug behind the speedo, press the top of the connector and wiggle to remove it.

There are quite a few t-20 screws in this process as well as some T-27.
In order to remove the center plastics around the stereo and a/c in the 2013 countryman you need to first remove the glove compartment and lower the section of the dash below the steering wheel.
I started on the passenger side, for no particular reason.
First thing i did was remove the small section nearest the door. A firm tug pulled it free.

Remove the three screws across the top of the glove compartment just inside the lid.

Remove the larger two bold that were revealed when pulling the side piece away. one is right were the plastic of the door trim meets the glove box. Kid of hiding in there and fun to get to.

There are 2 more screws that are accessed by laying down on the floor and looking up. The one picture is on the fuse box side.

Pull down gently to pop the tabs out that hold the air bag cover in place. There is another screw under the glove box on the side closest to the console. You have to hold down a bit on the air bag cover to see it hiding in there.

Once all the screws are free you can lean the top of the compartment out toward you the pull up and work the bottom away form the dash. There is a plug for the light. you can give it a firm tug and it will pull away.

Once the compartment is out of the way you see the air bag assembly. The left side of the rubber cover is in the way of a screw you will need to access so push the plastic up and unhook it form the metal tabs on the airbag unit. The plastic is soft so it's not hard to manipulate. Remove the two screws that hold in the center console section that were once covered by the passenger side dash.

Moving on to the driver's side. There are two screws directly above the pedals. Remove these first.

Also remove the part closest to the door on this side.

Pull directly out toward the drivers seat and the piece around the steering wheel will come free. there are a few metal tabs as well as a few plastic ones holing it in place.

once pulled away you will see the cable that runs to the key/start button, there is no need to disconnect this. just let it hang but be careful not to tug to hard and risk damage.
Remove the two screws now reveled that hold the center console in place.

Now we move up top to the mickey mouse plastic gauges/vent face pull off.
You will need good sturdy force but be careful because the vent portions are quite flimsy once free. Once free the only connection point is the wires to the hazard flasher button. A pick of some variety will assist in pulling it off.
The ac grill hides two screws. The light sensor slides right out if you get a finger nail under it to revel a hidden screw below it. Use the same pick as the hazard light connector to remove the sensor plug. Once that is removed stick a finger in that hole and gently pull up. The grill will pop free and come up revealing another screw. Once you undo that screw you can pull the next layer away slowly from the top working your way down.
Once the mickey mouse is out of the way you will need to pull the gray hard plastic pieces from each side of the radio. Get something under them down low and pull straight out toward the doors. There are no screw, just friction tabs under there. Once remove you reveal 3 screws on each side that now need to be remove to pull away the center plastic.

You can now pull gently on the center plastic from the top and it should come free. Keep in mind the CD slot will stay in the console but the buttons and a/c controls will come away with the plastic. There are two connectors to remove now, use a 90 degree pic or similar to slide under the release latch and free the connectors.

Once the wires are released pull up and away on the center console section to work it free.
Now you can remove all of the screws holding the plastic in that surround the speedometer then the speedometer assembly itself. There is one small plug behind the speedo, press the top of the connector and wiggle to remove it.

Last edited by goofballtech; 05-24-2013 at 02:39 PM.
#10
03-02-2013, 08:43 PM
Join Date: Feb 2013
Location: South Louisiana
Posts: 61
Likes: 0
Received 0 Likes
on
0 Posts
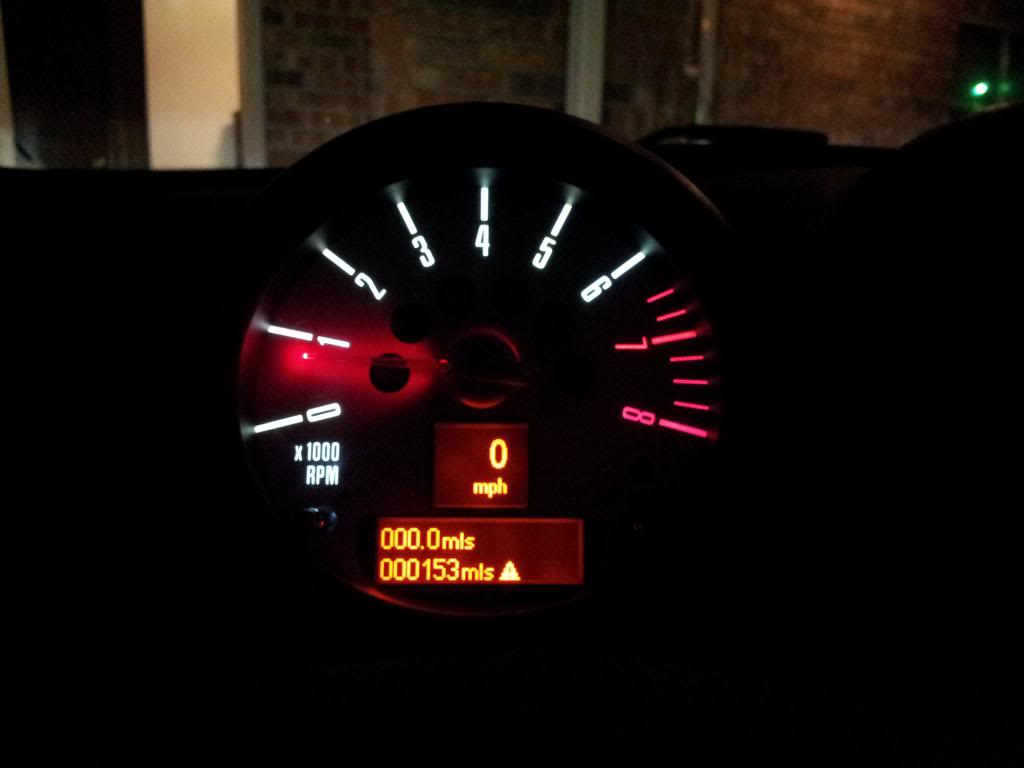
In order to give myself some sense of accomplishment today i had to at least finish the tach. I had just enough whites to finish.
Ended up using:
3 White for the numbers around the outside
1 red for the red line stuff (and i actually loaded the solder a little higher on one side so it angle away and didn't make the 6 pink)
3 Blues under the needle
4 whites for speed display
8 whites for odometer display
Blue Acrylic paint from hobby lobby on the needle, two coats and a clear coat.
Last edited by goofballtech; 03-24-2013 at 02:16 PM.
#11
03-03-2013, 09:06 AM
Join Date: Feb 2013
Location: South Louisiana
Posts: 61
Likes: 0
Received 0 Likes
on
0 Posts
Cant figure out how to get the damn roof switch panel down to see what LEDs are under there and don't want to break anything.
Here it looks there should be screws in the little holes but in my car there are LED's in there for the colored accent lighting.
If anyone has suggestions i am all ears. I thought there would be some screws under the lens for the front seat "reading" lights but pulled those lens and there was nothing bulb a bulb in there.
Edit*
Score! The face just pulls off. Just had to get a 90 degree pick to get enough grab on it and wrap it in a small piece of cloth so i didn't mark the plastic up.
Direct pull down gets the plate off
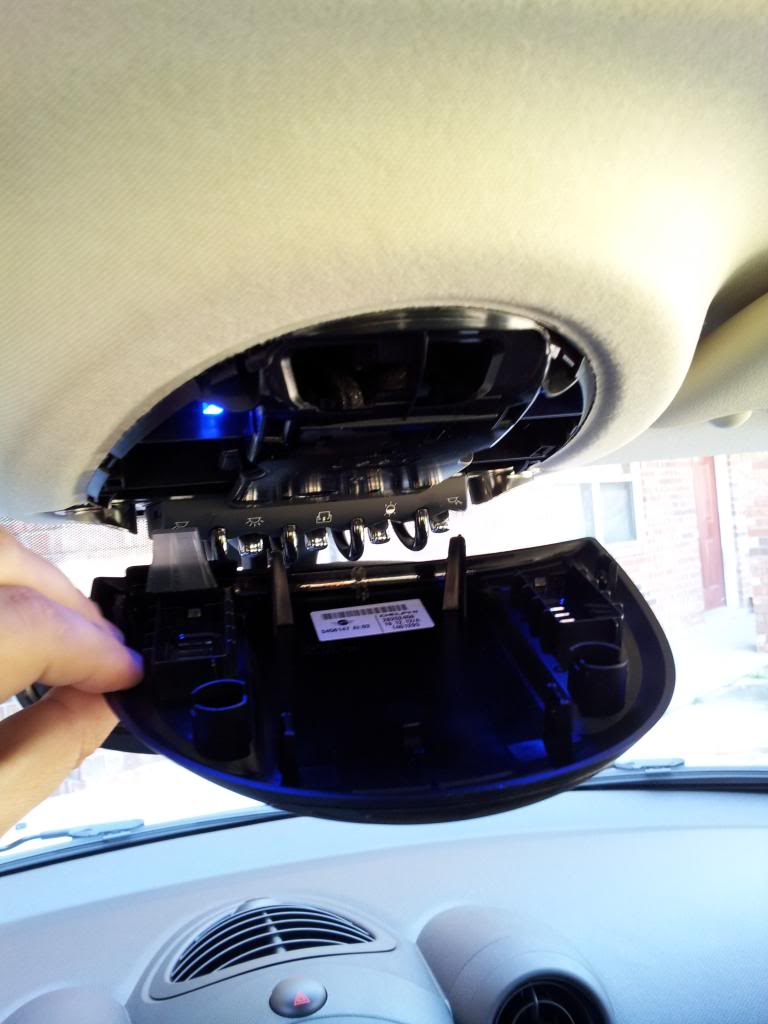
First, there are two T-20 screw that hold this plate in.
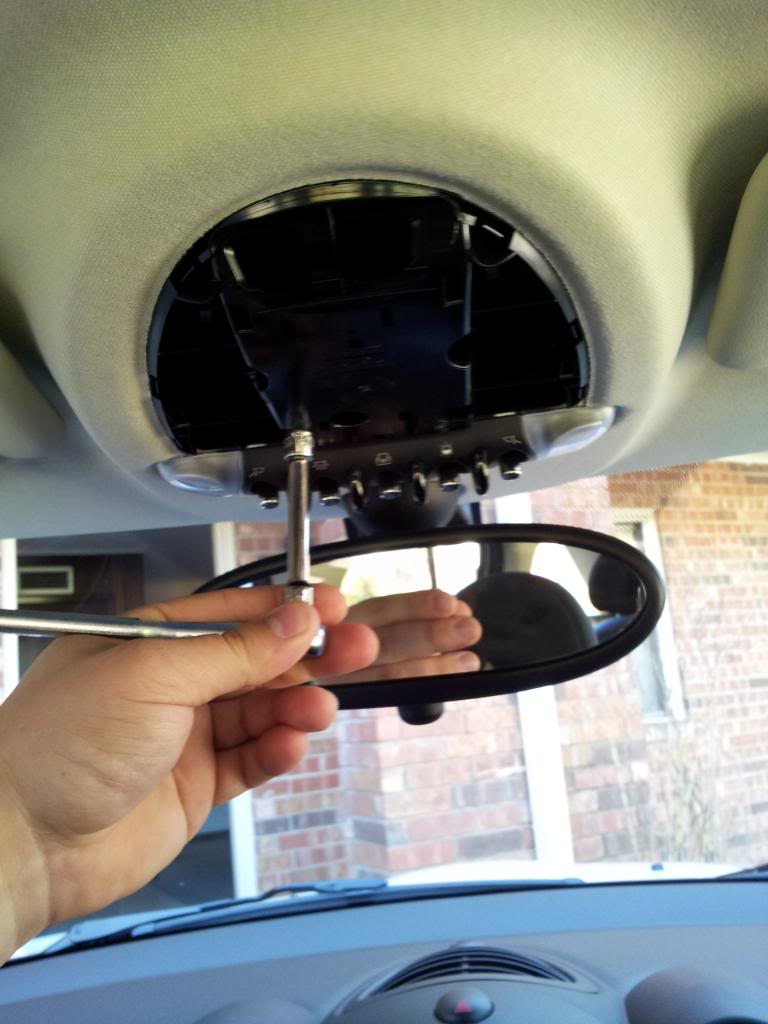
Once the screws are out there are 6 tabs still holding it. Put a finger in the front hole and apply a slight downward pressure and press each of the tabs. Doing one side then the other and go front to back worked best for me. 3 of the tabs are seen in this pic.
LEDs for the switch function icons look to be PLCC-2's. Made my day. dont have to order another type of LED and i have enough blues to do these today. More pics to come.
Here it looks there should be screws in the little holes but in my car there are LED's in there for the colored accent lighting.
If anyone has suggestions i am all ears. I thought there would be some screws under the lens for the front seat "reading" lights but pulled those lens and there was nothing bulb a bulb in there.
Edit*
Score! The face just pulls off. Just had to get a 90 degree pick to get enough grab on it and wrap it in a small piece of cloth so i didn't mark the plastic up.
Direct pull down gets the plate off
First, there are two T-20 screw that hold this plate in.
Once the screws are out there are 6 tabs still holding it. Put a finger in the front hole and apply a slight downward pressure and press each of the tabs. Doing one side then the other and go front to back worked best for me. 3 of the tabs are seen in this pic.
LEDs for the switch function icons look to be PLCC-2's. Made my day. dont have to order another type of LED and i have enough blues to do these today. More pics to come.
Last edited by goofballtech; 03-24-2013 at 02:17 PM.
#12
03-03-2013, 10:20 AM
Join Date: Feb 2013
Location: South Louisiana
Posts: 61
Likes: 0
Received 0 Likes
on
0 Posts
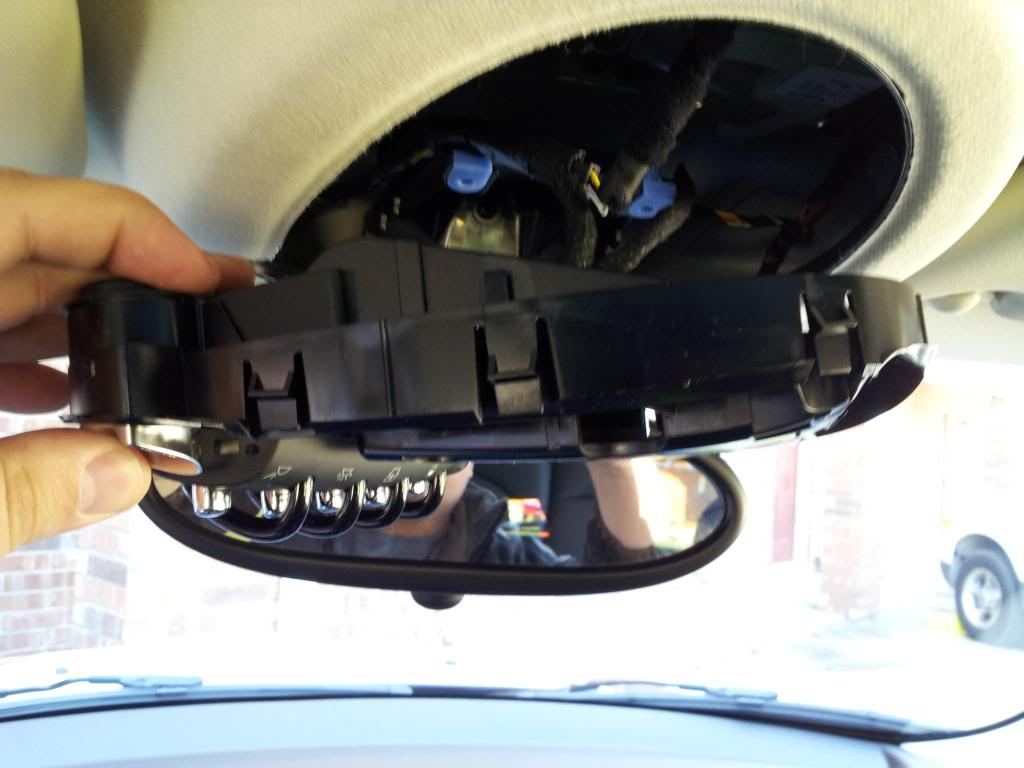
Unplug the connectors (just a firm tug to get them out, i saw no latches to squeeze or press) Once this piece is removed you will see 4 T-15 screw on the back. These screw into the switch guard rails.

Once these 4 are removed the guard rails will come away easily

At this point the only thing holding the back portion on it some plastic spring clips on the arms that go down toward the ambient light locations. Be careful when squeezing these as they are fragile.
*Important Note* When you remove this the top piece will then pull away from the "main" plastic piece. None of the switches are fixed in place. They all float and each one has two plastic pieces (one on each side of the rocker) that are also not secured. The only thing holding them in is the circuit card that is not screwed down. Be careful not to lose anything.

Once the upper portion is away you will see the plastic section that closes contacts to make things work. The indicator LED's i needed to change are arranged along the top in this pic.

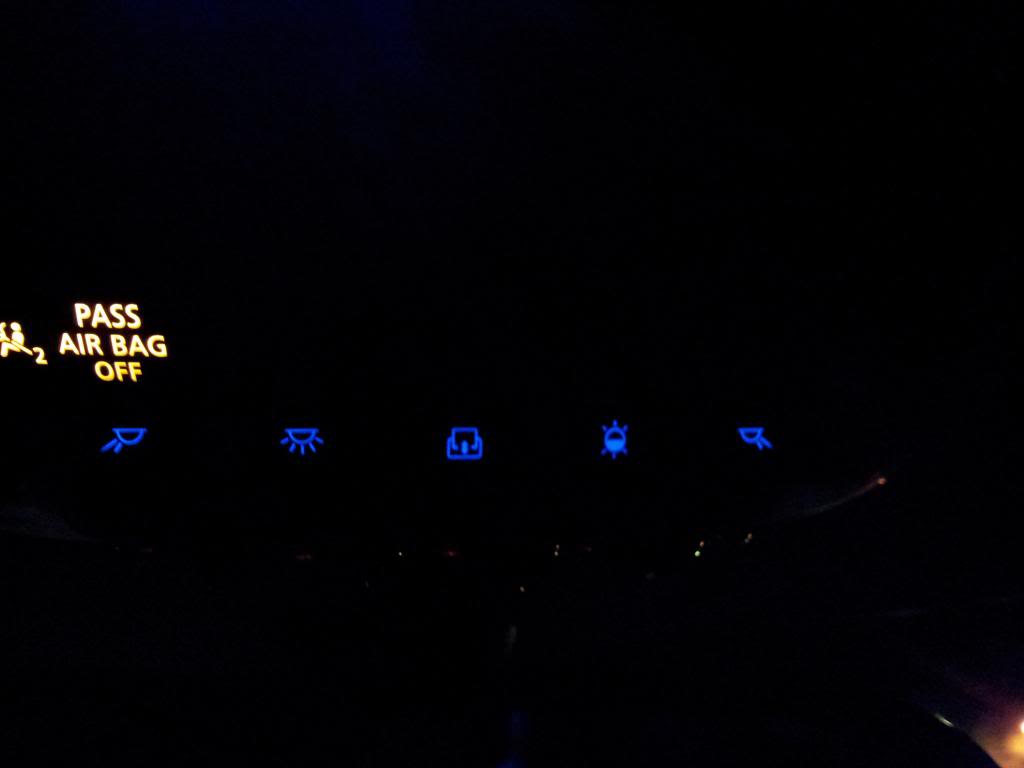
Plastic peels away easily, it's not attached. Just rests there. Now it's soldering time. This pic was after my blues were in place.

Final pic once it got dark.....
Once these 4 are removed the guard rails will come away easily
At this point the only thing holding the back portion on it some plastic spring clips on the arms that go down toward the ambient light locations. Be careful when squeezing these as they are fragile.
*Important Note* When you remove this the top piece will then pull away from the "main" plastic piece. None of the switches are fixed in place. They all float and each one has two plastic pieces (one on each side of the rocker) that are also not secured. The only thing holding them in is the circuit card that is not screwed down. Be careful not to lose anything.
Once the upper portion is away you will see the plastic section that closes contacts to make things work. The indicator LED's i needed to change are arranged along the top in this pic.
Plastic peels away easily, it's not attached. Just rests there. Now it's soldering time. This pic was after my blues were in place.
Final pic once it got dark.....
Last edited by goofballtech; 03-24-2013 at 02:24 PM.
#13
03-04-2013, 12:23 PM

2nd Gear
Join Date: Jul 2011
Location: Austin, TX
Posts: 97
Likes: 0
Received 0 Likes
on
0 Posts


#15
03-11-2013, 05:42 PM
Join Date: Feb 2013
Location: South Louisiana
Posts: 61
Likes: 0
Received 0 Likes
on
0 Posts
Holy Crap.
Does pulling the dash apart to get to the speedo in the older mini's make you want to punch someone in the face? Because i am pretty damn close.
I will have to take some pics (next time) but so far....
Can't pull the bottom of the center out without picking up the plastic around the shifter. Once that piece is out you can pop out the side face pieces (pain in the *** to figure out they just pop out if pulled the right way). Once those are off you see some screws and get happy because it looks like something can happen.... but not really. Pull off the mickey mouse section i did the last time i tried to get those out of the way and still limited by the two base screws. The center console has lips that tucks UNDER the dash on both sides.
So i have to completely disassemble the driver and passenger side dash to pull the center piece, then pull the plastic around gauges, which will reveal the screws to remove the gauges themselves. Holy HELL!
Getting dark. Screw this tonight. Will need to be an all freaking day thing. Maybe Sunday.
#16
03-24-2013, 01:58 PM
Join Date: Feb 2013
Location: South Louisiana
Posts: 61
Likes: 0
Received 0 Likes
on
0 Posts

#17
03-24-2013, 04:55 PM

3rd Gear
#18
03-24-2013, 05:04 PM
Join Date: Feb 2013
Location: South Louisiana
Posts: 61
Likes: 0
Received 0 Likes
on
0 Posts
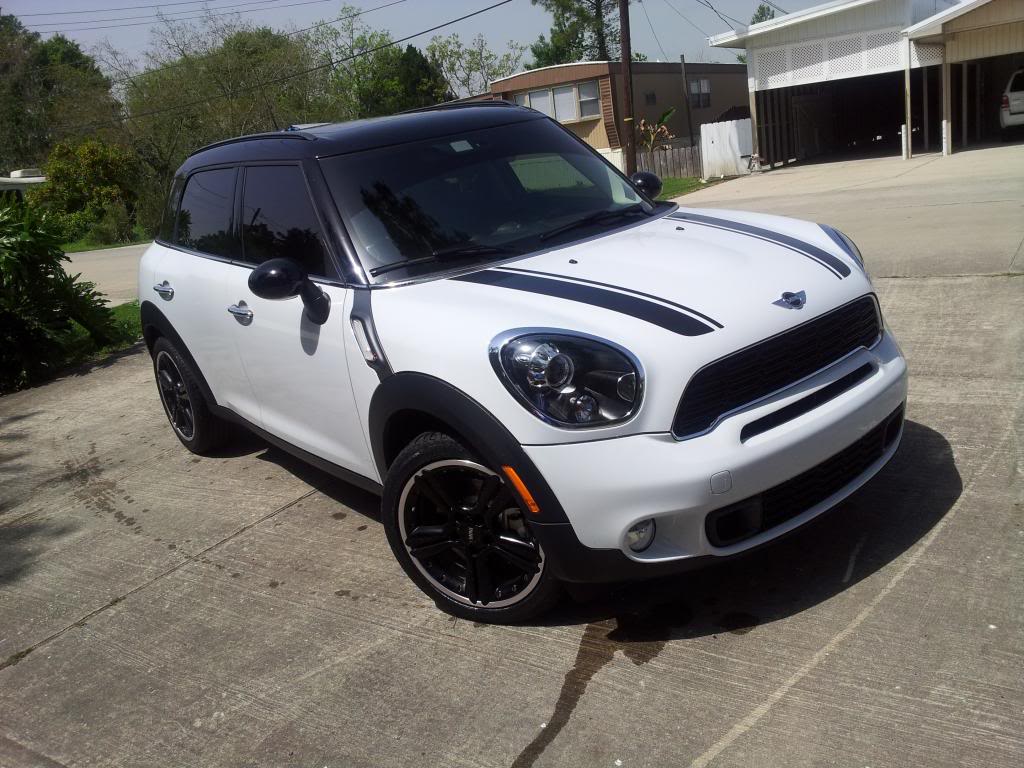
Gosh, I am impressed! You actually know what you're talking about. I like the blue LED accents. Also the tinting. The Mini dealer here in Orange County, CA charges $399 for tinting and think it is only for the rear windows. Illegal to tint forward of the rear door post.
I dunno if i have ever owned a vehicle that was legal (due to tint) as a matter of fact.
Here you can go as dark as you want on the back windows. The driver and passenger doors are supposed to be no darker than 35% (I think) and the visor is supposed to be no deeper than a few inches. Normally there is a mark on the front window that notes where the visor should stop... Mini's don't have this so i took it as an open ticket....
In general as long as the police can see you and know you aren't trying to do something shady they wont give you any crap...... Unless they are in a bad mood.
#19
03-24-2013, 05:26 PM
5th Gear
Storm Trooper Eyes Sunshade
Your storm trooper needs eyes "only when parked" these would be a good addition.

This is a sunshade from: http://www.kristanyadao.com/Eyeshades.html
They have many others aside from the trooper but with the name these just fit.
The LED work looks great.
This is a sunshade from: http://www.kristanyadao.com/Eyeshades.html
They have many others aside from the trooper but with the name these just fit.
The LED work looks great.
#20
03-24-2013, 05:35 PM
Join Date: Feb 2013
Location: South Louisiana
Posts: 61
Likes: 0
Received 0 Likes
on
0 Posts
Your storm trooper needs eyes "only when parked" these would be a good addition.

This is a sunshade from: http://www.kristanyadao.com/Eyeshades.html
They have many others aside from the trooper but with the name these just fit.
The LED work looks great.
This is a sunshade from: http://www.kristanyadao.com/Eyeshades.html
They have many others aside from the trooper but with the name these just fit.
The LED work looks great.
I am getting on a plane to San Diego in the morning but might have to order some eyes when i get back.
I was just thinking i needed a sunshade for when i travel and there is no covered parking.

#22
03-24-2013, 10:31 PM
Join Date: Feb 2013
Location: South Louisiana
Posts: 61
Likes: 0
Received 0 Likes
on
0 Posts
One day when i have the time i will finish pulling it apart. Also need to pull the buttons off the steering wheel to see what LED's are there as well as all the door panels to change the backlighting for the window/lock switches.
#24
03-25-2013, 05:01 PM

#25
03-30-2013, 08:20 PM
Join Date: Feb 2013
Location: South Louisiana
Posts: 61
Likes: 0
Received 0 Likes
on
0 Posts
Got to play with some NCS Expert today. I bought a cheap cable with the white board before doing some good reading in the coding thread. Returned it to Amazon and got a good one from Hong Kong on the way.
Last night i got it running and pulled the original files. Did some editing this morning and pushed some changes like disabling the gong, one touch sunroof functions, door unlock with key remove, comfort close, etc.
Just in case anyone needs it here is a link to the original files for my car.
This is not a replacement for YOUR OWN files since everything is very dependant on the features you have installed but it might help someone out of a jam one day so i might as well put them up.
https://www.dropbox.com/s/qut57ve7bk...CU%20Files.rar