
Australian Mini Rebuild
#1
 01-10-2007, 11:42 PM


Join Date: Jan 2007
Posts: 14
Likes: 0
Received 0 Likes
on
0 Posts
Australian Mini Rebuild
Hi all, i am new to this site and am from Melbourne in australia...
I came accross this site searchuing for mini related things and thought i would share my rebuild with you...
Its been going on for a year now and is hopefully only a few months from being back on the road

This resto started in December 2005 after I was forced to take the car off the road when the front drivers side wheel collapsed!! The bolts holding it on had sheard off unbeknownst to me and in peak hour traffic I was left with one nut and bolt holding the front wheel on!! VERY WOBBLY.
Here's the car before the resto started

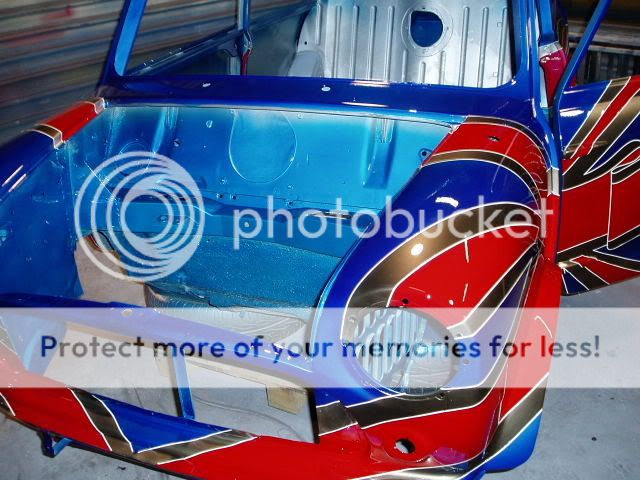
Well first things first...Started stripping the car. Lots of fun!! I pulled all the seats and windows out first then started stripping paint and gennerallly making a mess!!!

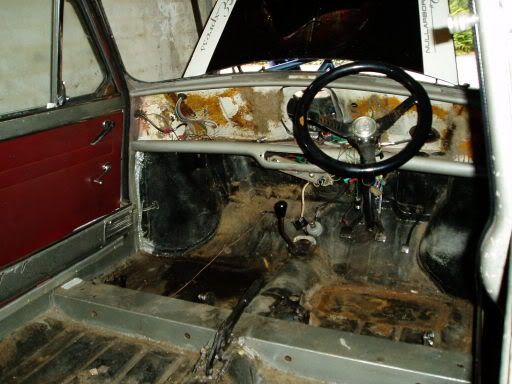
As you can see it was pretty grubby in there but no sign of any rust yet
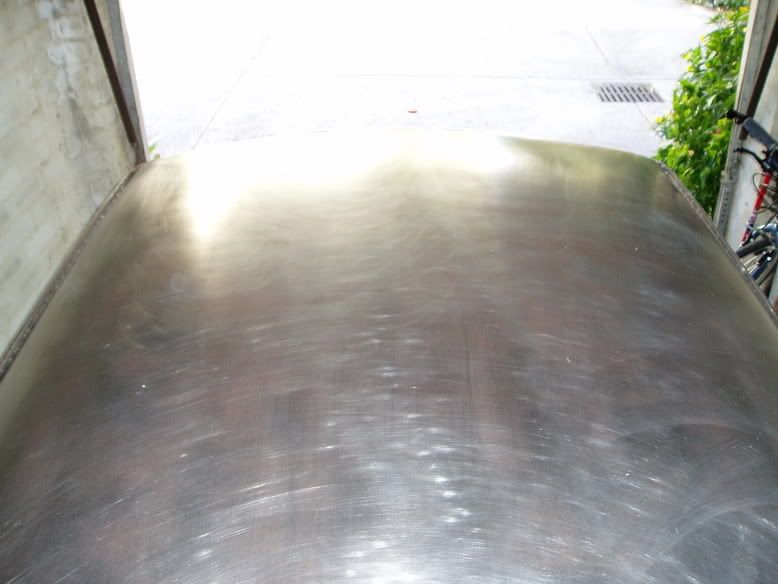
I started from the top down and got the roof all stripped and shiny first then put a temp coat of anti rust primer on (hindsight sux as I should have left it bare... I had to strip it all over again) but at least it kept the rust off.
Then it was on to the rest of the body. There is a heap of pics that I should have taken of this part but didnt (hindsight again!) however I stripped the layers and layers and layers of paint from the body with the exception of the drivers side fender as this had been damaged in an incident before I got the car and I thought I would get it panel beated professionally (didnt happen... i ended up doing it myself and am pretty happy with the result but lets not get ahead of ourselves ...)
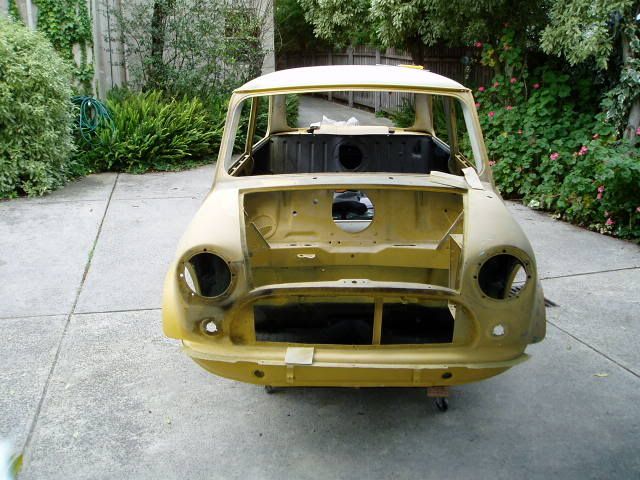
Engine is out and body is stripped of all bolt on items...
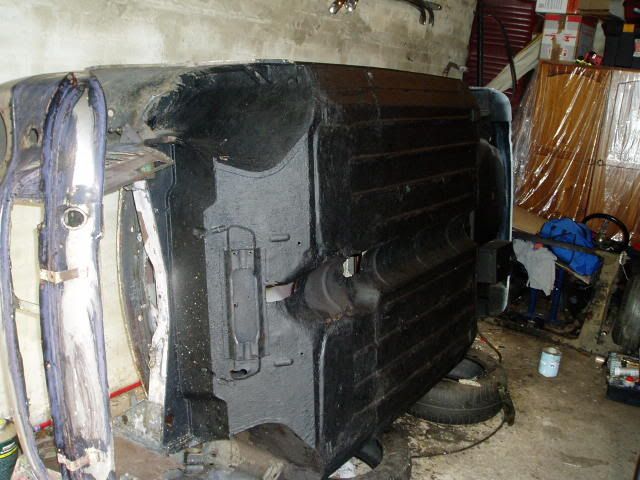
Then I got hold of some old tyres and put the car on its side to clean up the undercarriage... this was indeed the messiest part of the job!
Sorry folks no before pics but these next are after I had stripped the undercarriage back to metal and recoated with some pretty heavy deadner...
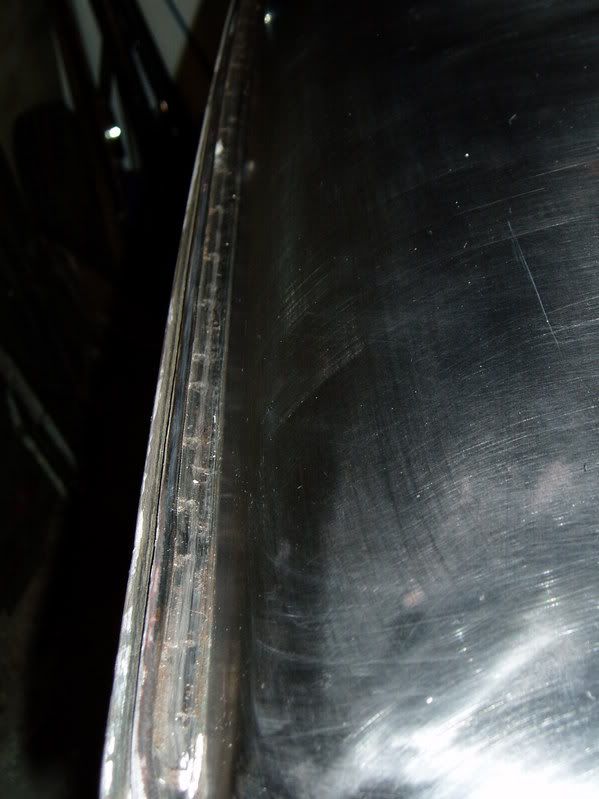
I used a rust converter on all the seams on the car. The covers were removed from the seams running from the roof to the wheel arches and the seams themselves cleaned up, treated and then the covers were palced back on with a high quality paintable sikaflex as well as being brazed at the top and bottom.
After the body was stripped I moved on to the doors... ouch found the only bit of rust in the whole car and when I say bit I mean shiploads!! Luckily it was only in the doors... but still too much for me to want to play with and as the car originally had sliding windows I scouted around for some replacement doors (with sliding windows of course)
I found one in Bendigo (about 100km away and the other was donated to me by a local mini shop.
Both doors were in reasonable nick... NO rust (yay) but need some minor panel work and both will need new chrome.
You can't see from these pics but it also needed some welding where the top hinge mounts on... the hole for the bolts was torn all the way through the front seam of the door.
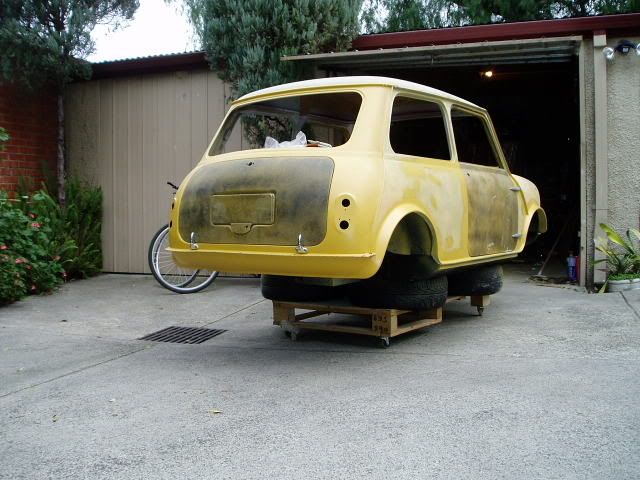
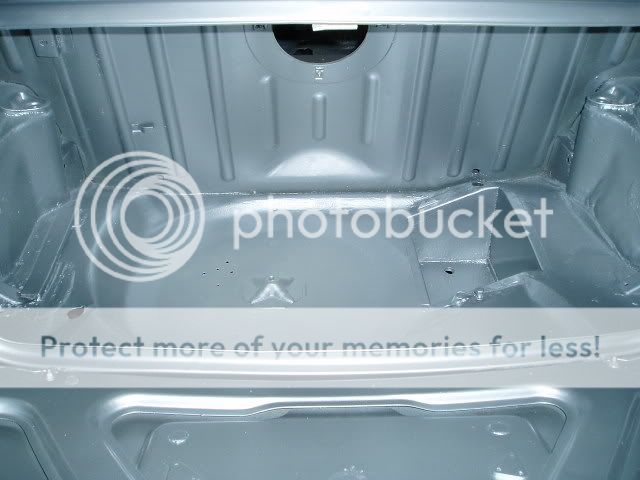
As I stripped panels I also put a primer on them (probably didn't need to but...). The car is basically re-assembled now (doors and boot lid only) and has had a couple of coats of hi-build primer which has been blocked back once . The next series of pics show this... as well as the interior floor rust proofed and coated with body deadner ready for an undercoat.
Note the 2 pallets with castors underneath!!
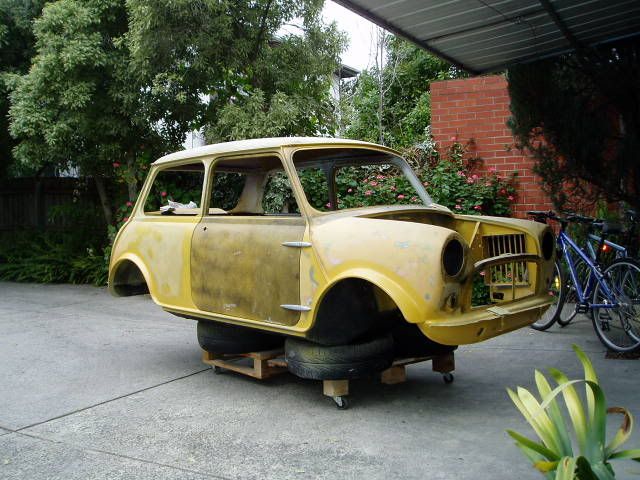
This next pic shows the flares... they are the cheap screw on type but I have fibreglassed them to the body and then sanded and filled and sanded and filled .... ... them to look like this:
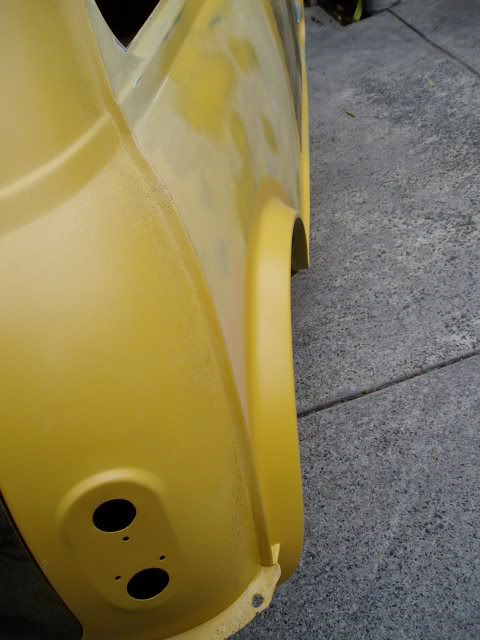
And that is where it was up to as of Thursday August 17, 2006. (Remember this started in December of '05.
Cheers Bryan
I came accross this site searchuing for mini related things and thought i would share my rebuild with you...
Its been going on for a year now and is hopefully only a few months from being back on the road
This resto started in December 2005 after I was forced to take the car off the road when the front drivers side wheel collapsed!! The bolts holding it on had sheard off unbeknownst to me and in peak hour traffic I was left with one nut and bolt holding the front wheel on!! VERY WOBBLY.
Here's the car before the resto started
Well first things first...Started stripping the car. Lots of fun!! I pulled all the seats and windows out first then started stripping paint and gennerallly making a mess!!!
As you can see it was pretty grubby in there but no sign of any rust yet
I started from the top down and got the roof all stripped and shiny first then put a temp coat of anti rust primer on (hindsight sux as I should have left it bare... I had to strip it all over again) but at least it kept the rust off.
Then it was on to the rest of the body. There is a heap of pics that I should have taken of this part but didnt (hindsight again!) however I stripped the layers and layers and layers of paint from the body with the exception of the drivers side fender as this had been damaged in an incident before I got the car and I thought I would get it panel beated professionally (didnt happen... i ended up doing it myself and am pretty happy with the result but lets not get ahead of ourselves ...)
Engine is out and body is stripped of all bolt on items...
Then I got hold of some old tyres and put the car on its side to clean up the undercarriage... this was indeed the messiest part of the job!
Sorry folks no before pics but these next are after I had stripped the undercarriage back to metal and recoated with some pretty heavy deadner...
I used a rust converter on all the seams on the car. The covers were removed from the seams running from the roof to the wheel arches and the seams themselves cleaned up, treated and then the covers were palced back on with a high quality paintable sikaflex as well as being brazed at the top and bottom.
After the body was stripped I moved on to the doors... ouch found the only bit of rust in the whole car and when I say bit I mean shiploads!! Luckily it was only in the doors... but still too much for me to want to play with and as the car originally had sliding windows I scouted around for some replacement doors (with sliding windows of course)
I found one in Bendigo (about 100km away and the other was donated to me by a local mini shop.
Both doors were in reasonable nick... NO rust (yay) but need some minor panel work and both will need new chrome.
You can't see from these pics but it also needed some welding where the top hinge mounts on... the hole for the bolts was torn all the way through the front seam of the door.
As I stripped panels I also put a primer on them (probably didn't need to but...). The car is basically re-assembled now (doors and boot lid only) and has had a couple of coats of hi-build primer which has been blocked back once . The next series of pics show this... as well as the interior floor rust proofed and coated with body deadner ready for an undercoat.
Note the 2 pallets with castors underneath!!
This next pic shows the flares... they are the cheap screw on type but I have fibreglassed them to the body and then sanded and filled and sanded and filled .... ... them to look like this:
And that is where it was up to as of Thursday August 17, 2006. (Remember this started in December of '05.
Cheers Bryan
#2
01-10-2007, 11:46 PM
Join Date: Jan 2007
Posts: 14
Likes: 0
Received 0 Likes
on
0 Posts
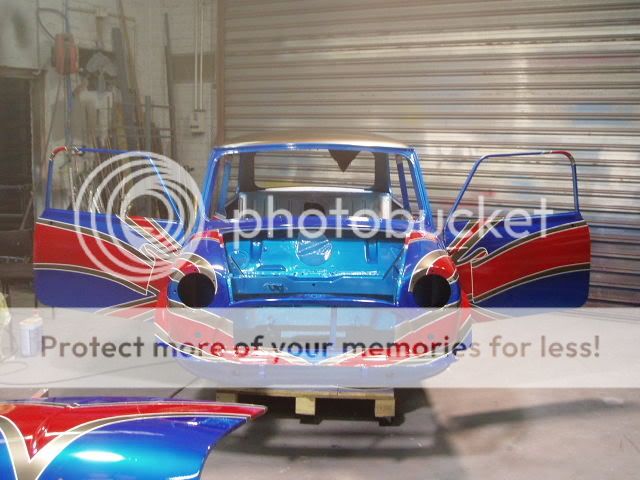
Heres the next series of pics from the rebuild...
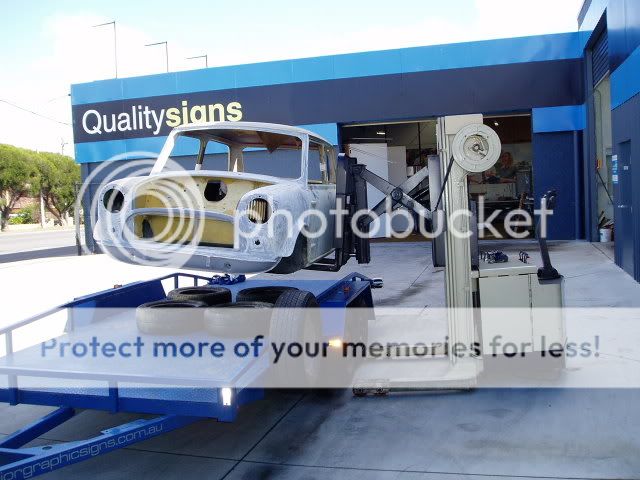
i am a signwriter by trade so used my workshop to do the final coats of paint... the undercoating etc. i did in my garage.
Heres the car leaving home...

And being taken off the trailer!
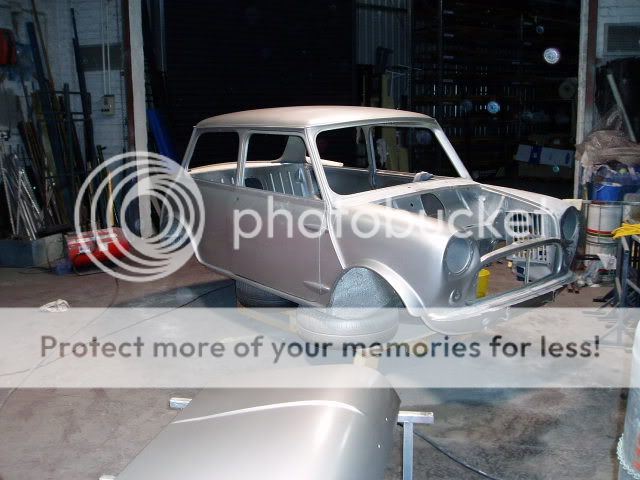
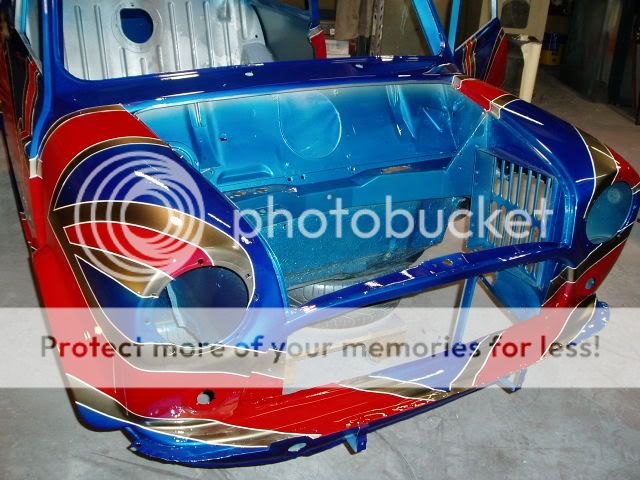
The first coats of colour.... Metalic Silver
Then ther was a bit of masking and blue sprayed over that. The blue is essentiallly 9 parts clear to one part blue to give a pearl metalic effect...
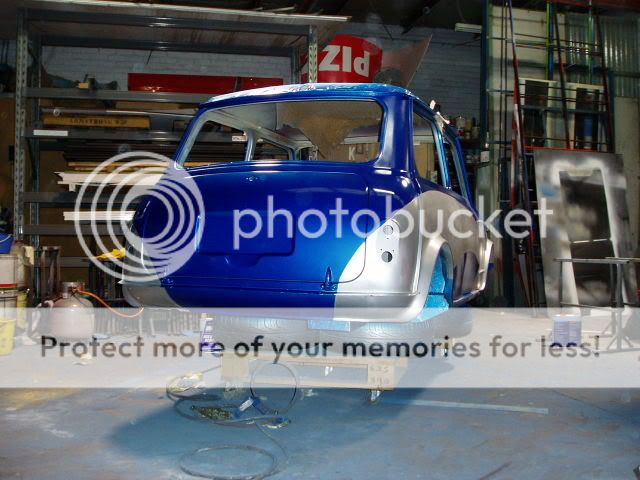

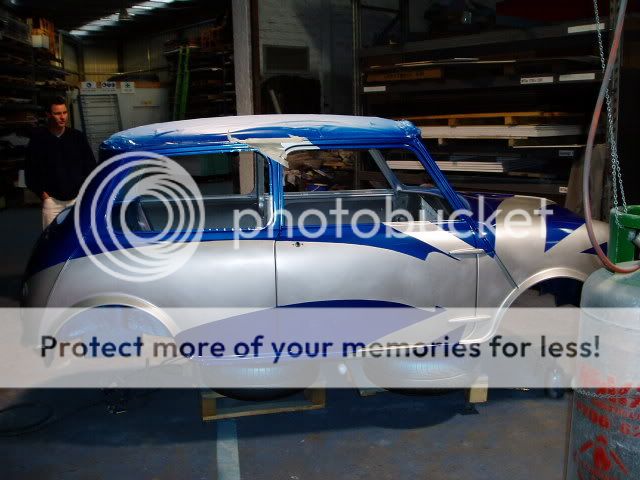
Remember this paint job is to resemble a union jack!! Some red was needed and done in the same fashion as the blue...

Thats not the end yet!! there are heaps more pics to come (i hope your not on dialup!!)
Cheers, Bryan
i am a signwriter by trade so used my workshop to do the final coats of paint... the undercoating etc. i did in my garage.
Heres the car leaving home...
And being taken off the trailer!
The first coats of colour.... Metalic Silver
Then ther was a bit of masking and blue sprayed over that. The blue is essentiallly 9 parts clear to one part blue to give a pearl metalic effect...
Remember this paint job is to resemble a union jack!! Some red was needed and done in the same fashion as the blue...
Thats not the end yet!! there are heaps more pics to come (i hope your not on dialup!!)
Cheers, Bryan
#3
01-10-2007, 11:47 PM
Join Date: Jan 2007
Posts: 14
Likes: 0
Received 0 Likes
on
0 Posts
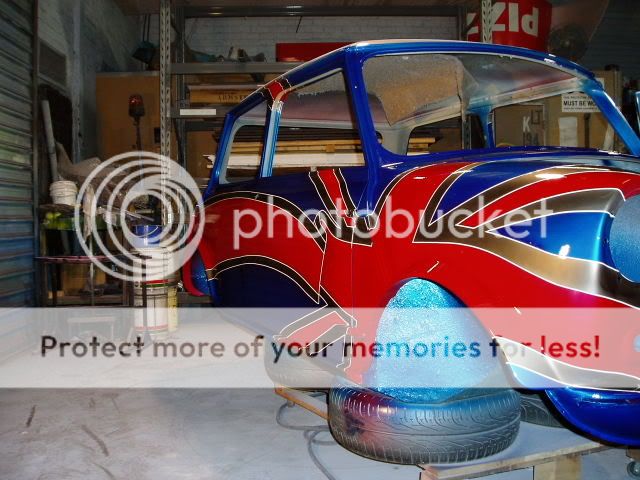
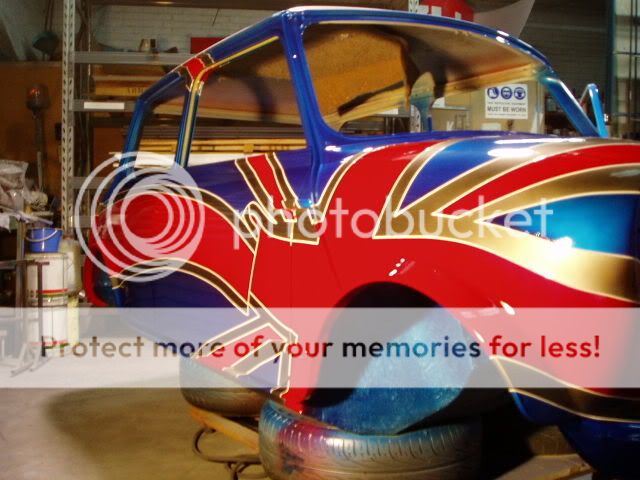
Well here is the finished product :D :D :D
I hope you all like it... you will see some differences from the last pics in that the silver is now darker (both on the flag and the roof). Doing this had a slightly unexpected side effect... The silver section now changes colour depending on the angle you look at it from ... mostly from bright to dark silver but there is also a bronze/gold effect thhat has come through...
Also you will notice hiliting around the red and silver sections...
all colours used were of acrylic lacquer but the top coats (clear) were 2 pack iso-clear...
this is a 2 pack that bonds well with fresh acrylic lacquer.
This is the car ready for the clear to be done..
[img]https://i40.photobucket.com/albums/e207/nullarborexpress/Paintjob29preclear.jpg
[/img]
and after the clear...

silver...
gold!!...same position different light
Left
Right
ME!!!

Well thats the extent of the paintwork... Even now, months down the track im not 100% happy with the result... I didnt like the pinlines so i removed them quick smart and am waiting to basically finish the whole car before re-applying the pinlines and adding another coat or two of 2 pack clear to the job.
BTW. The reason for different posts rather than one huge one is the site wont let me put over a certain amount of pics up at once so...
I hope you all like it... you will see some differences from the last pics in that the silver is now darker (both on the flag and the roof). Doing this had a slightly unexpected side effect... The silver section now changes colour depending on the angle you look at it from ... mostly from bright to dark silver but there is also a bronze/gold effect thhat has come through...
Also you will notice hiliting around the red and silver sections...
all colours used were of acrylic lacquer but the top coats (clear) were 2 pack iso-clear...
this is a 2 pack that bonds well with fresh acrylic lacquer.
This is the car ready for the clear to be done..
[img]https://i40.photobucket.com/albums/e207/nullarborexpress/Paintjob29preclear.jpg
[/img]
and after the clear...
silver...
gold!!...same position different light
Left
Right
ME!!!
Well thats the extent of the paintwork... Even now, months down the track im not 100% happy with the result... I didnt like the pinlines so i removed them quick smart and am waiting to basically finish the whole car before re-applying the pinlines and adding another coat or two of 2 pack clear to the job.
BTW. The reason for different posts rather than one huge one is the site wont let me put over a certain amount of pics up at once so...
#4
01-10-2007, 11:49 PM
Join Date: Jan 2007
Posts: 14
Likes: 0
Received 0 Likes
on
0 Posts
Well these next pics were taken some time later as i had been pretty busy with work and didnt have much time to spend on the car.
The engine was taken to a local mini specialist and is finished (still at the mechanic's though waiting for the gearbox to be rebuilt). I have had the 1100 rebuilt and its been bored out 40 thou, this takes the bore to 1160, and the cam has had a mild grind as well. The head has been fitted out with stainless valves etc for unleaded fuel and should be ready soon. This is all pretty exciting but really for me it feels as though it amounts to very little until its back in the car.
Whilst this has been happening i was busy preping some other parts....
I sandblasted the subframes and have repainted them.
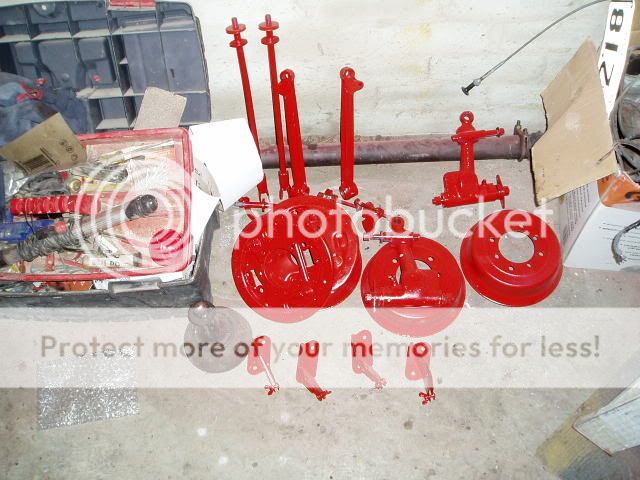
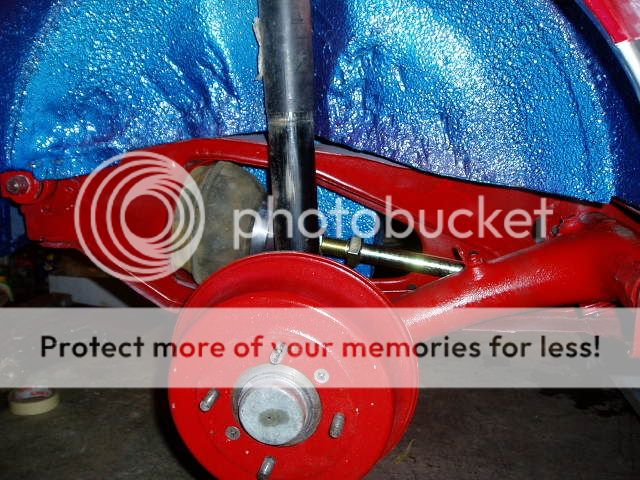
I cleaned up all the brake drums and suspension gear, the subframes and just about any other bolt on bits and pieces. I have got to the stage where the back wheels are BACK ON :D
Here's a few pics....
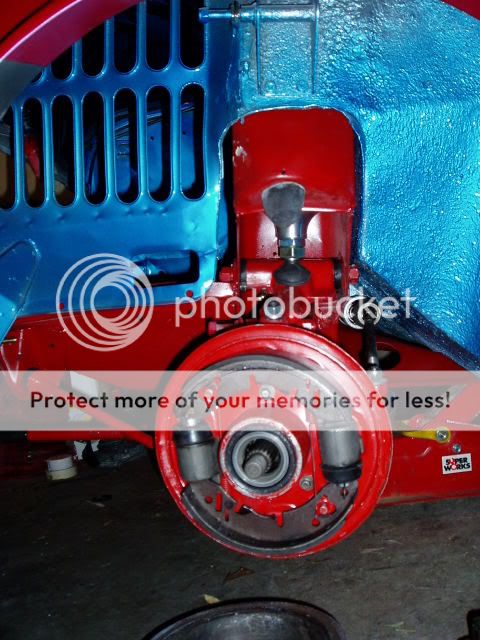
brake drums etc.
and what they look like on the car... ignore the old shock absorbers they are just there to hold things in place for now!!
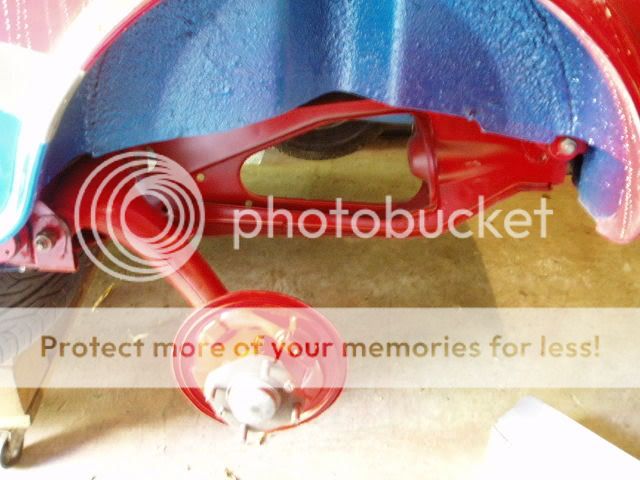
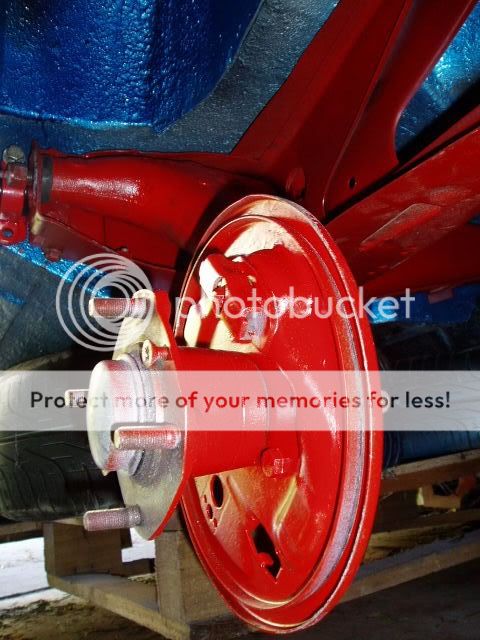
hi-lows and brake drums fitted...
both front and rear subframes have been painted red for a bit of contrast..
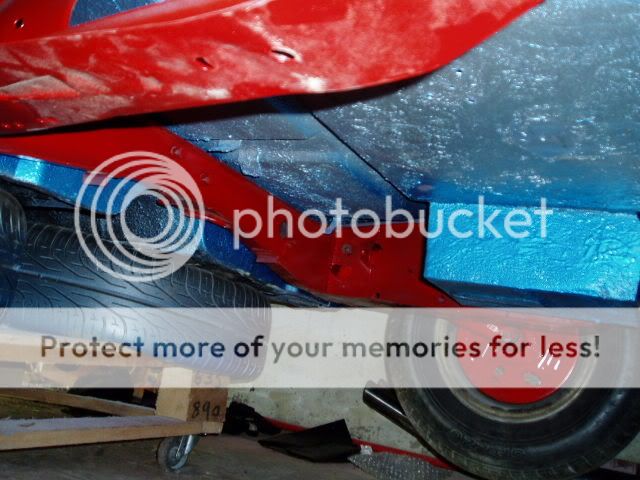
even the pedals have had a bit of a touch up!
and finally... thr car is back on its rear wheels. The old wheels as even now i am trying to find a set of nice 10 x 6's...
Cheers Bryan
The engine was taken to a local mini specialist and is finished (still at the mechanic's though waiting for the gearbox to be rebuilt). I have had the 1100 rebuilt and its been bored out 40 thou, this takes the bore to 1160, and the cam has had a mild grind as well. The head has been fitted out with stainless valves etc for unleaded fuel and should be ready soon. This is all pretty exciting but really for me it feels as though it amounts to very little until its back in the car.
Whilst this has been happening i was busy preping some other parts....
I sandblasted the subframes and have repainted them.
I cleaned up all the brake drums and suspension gear, the subframes and just about any other bolt on bits and pieces. I have got to the stage where the back wheels are BACK ON :D
Here's a few pics....
brake drums etc.
and what they look like on the car... ignore the old shock absorbers they are just there to hold things in place for now!!
hi-lows and brake drums fitted...
both front and rear subframes have been painted red for a bit of contrast..
even the pedals have had a bit of a touch up!
and finally... thr car is back on its rear wheels. The old wheels as even now i am trying to find a set of nice 10 x 6's...
Cheers Bryan
#5
01-10-2007, 11:50 PM
Join Date: Jan 2007
Posts: 14
Likes: 0
Received 0 Likes
on
0 Posts
But wait theres more....
i used a bath of caustic soda in the garage to clean up some parts...
A few hours in the bath and then a lick of paint....
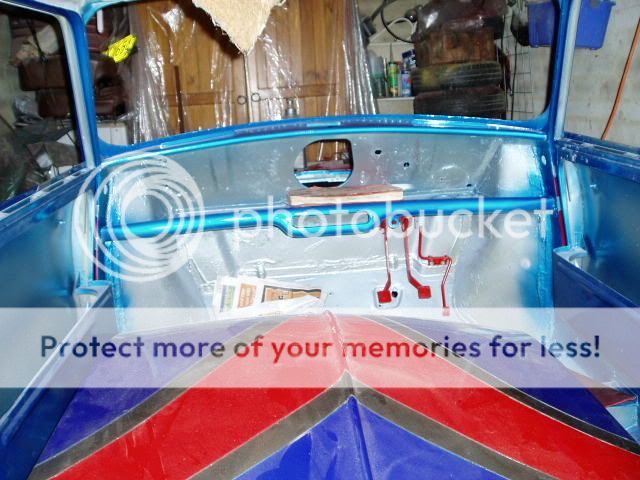
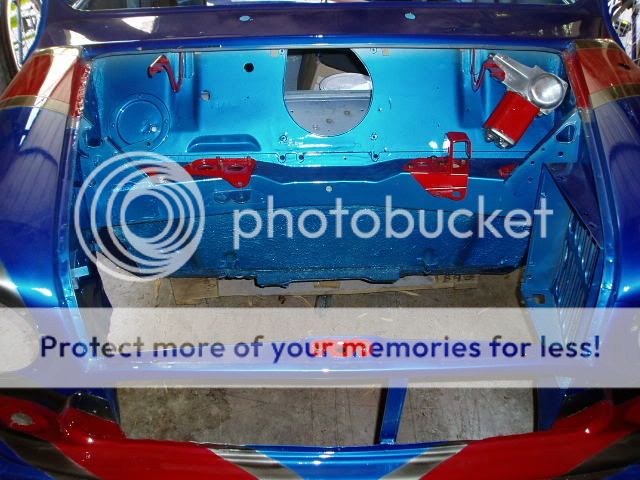
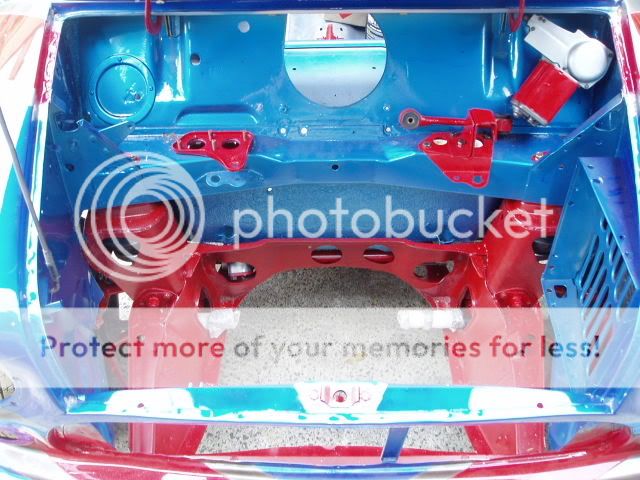
Under the bonnet...
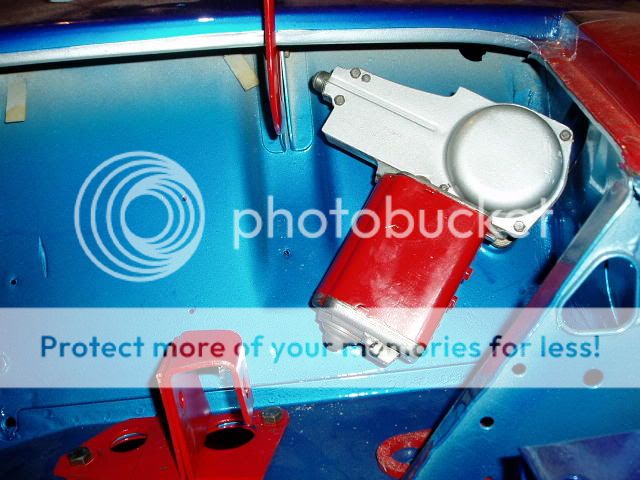
closer look at the wiper control
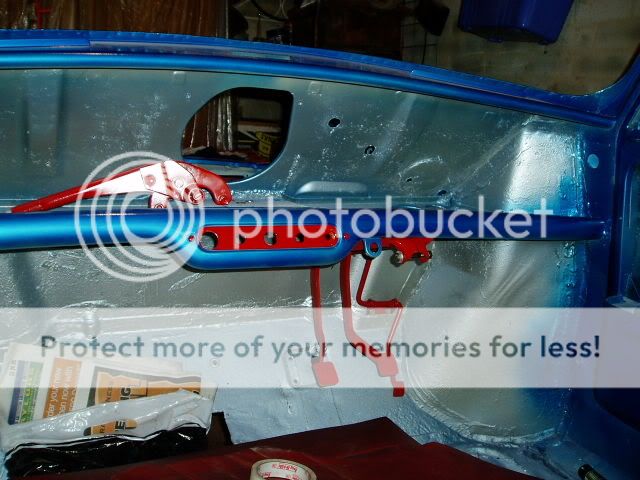
more of the inside.. dash is yet to be built...
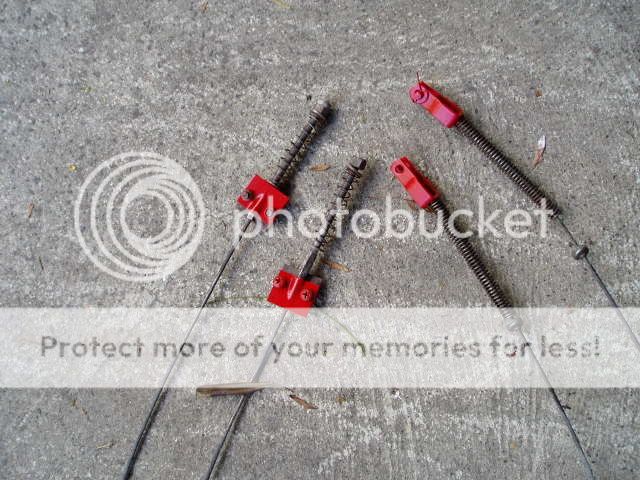
and even the handbrake cables!!
Its amazing how much time and effort you can put in to ajob for what seems like NOT a lot of progress. . below are some pics of the front :D
I cant believe how high it sits with the new rubbers and the Hi-Lows are adjusted as low as they will go!! Hopefully when the engine goes in it will drop ... a LOT! Well the brakes are done..still have to run the lines but i feel somewhat satisfied (Even have a handbrake that works :D )
I dont want to put any of the chrome work or lights or windows etc. on yet as it is going to get another coat of clear before then. On to more of the interoir from here but then again there is the wiring to do and the brake lines to run and the .... and the ... and the... crikey when will it end!!!
i used a bath of caustic soda in the garage to clean up some parts...
A few hours in the bath and then a lick of paint....
Under the bonnet...
closer look at the wiper control
more of the inside.. dash is yet to be built...
and even the handbrake cables!!
Its amazing how much time and effort you can put in to ajob for what seems like NOT a lot of progress. . below are some pics of the front :D
I cant believe how high it sits with the new rubbers and the Hi-Lows are adjusted as low as they will go!! Hopefully when the engine goes in it will drop ... a LOT! Well the brakes are done..still have to run the lines but i feel somewhat satisfied (Even have a handbrake that works :D )
I dont want to put any of the chrome work or lights or windows etc. on yet as it is going to get another coat of clear before then. On to more of the interoir from here but then again there is the wiring to do and the brake lines to run and the .... and the ... and the... crikey when will it end!!!
#6
01-10-2007, 11:51 PM
Join Date: Jan 2007
Posts: 14
Likes: 0
Received 0 Likes
on
0 Posts
These are just about up to date with where i am now...
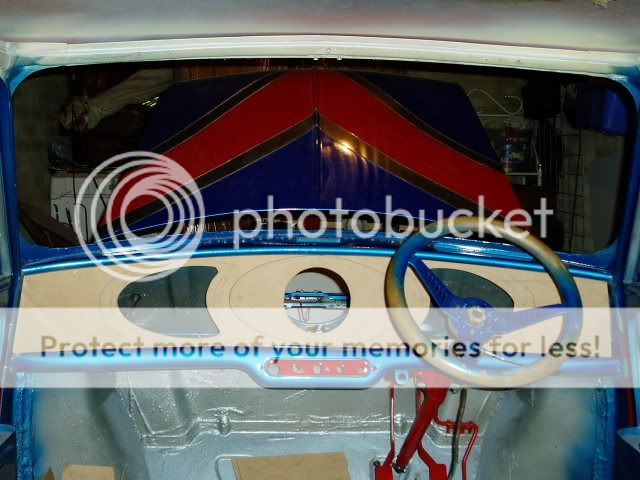
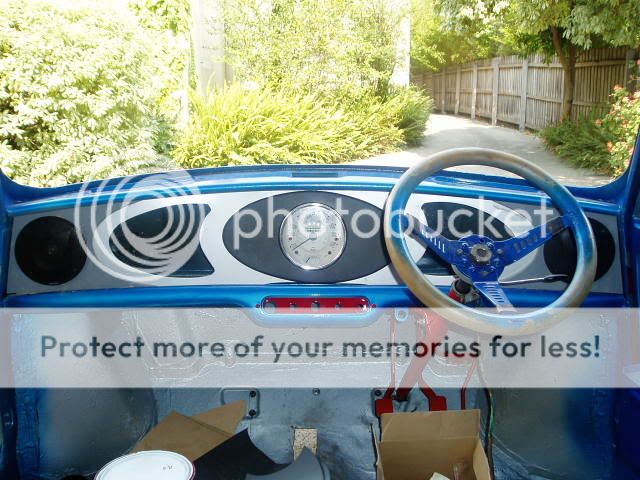
Just before christmas i turned my attention to the dash. I completed bits and pieces here and there on the rest but the dash and the interior has had all my attention to date!!! ...Even today its is not finished yet but the colour scheme will match the outside.
You will notice in the pics below there is a shaped panel on the extremities of the dash and this will bring the blue of the body onto the dash (as well as hold a nice little speaker). The backing will be a light metalic silver with the glove BOXES (those two shaped holes... have made a cover for them but not in pics) will be the darker met silver that is on the stripes outside the car. The centre piece is going to be the same red as the outside. In effect the dash colour scheme will mirror the stripes outside... blue ...light silver ...dark silver ...light sliver ...red ...light silver..dark silver ...light silver and then blue again. Must say the hardest part of all this was getting the glove box covers to conform to the curve of the dash... As i fabricated it all out of MDF (craftwood/pracicle board) this turned out to be quite simple... I screwed a backing panell behind the holes for the gloveboxes and then screwed in insert to these, coverd that with wood glue and then screwed the covers/lids to that. Once this was done and the glue set i removed all the screws and disposed of the backing board... The lids now hold thier curved shape!
I was hoping to have all this painted and finished by now but these next are as far as i have gotten...
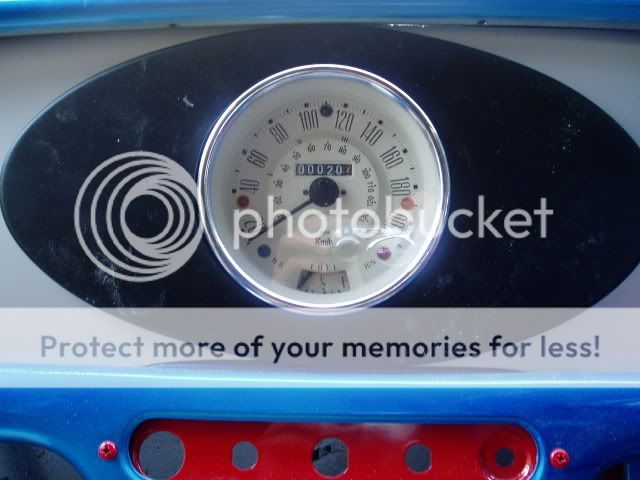
Here's the dash with undercoat on, speakers in and the speedo mounted. The 2 glove boxes have lids that will be fully removeable when finished... all will be magnetised. This saves a lot of headaches with trying to come up with an unseen hinge system!! Background is silver, glove boxes will be the darker silver from the outside paint job and the two end bits with the speakers in them will be the blue. The bit holding the speedo will end up red.
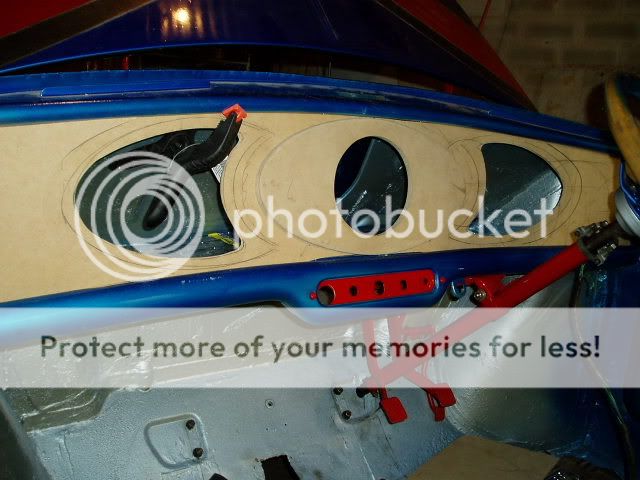
Whilst i was busy with all this woodworking I fabricated some speaker boxes with a diffference (go figure!)... Mrs NExpress gave me a pair of xpold 6x9's for chrissy and i needed somewhere to put them... Unfortunately they were a little too big for my original idea but i compromised and check out the results below....
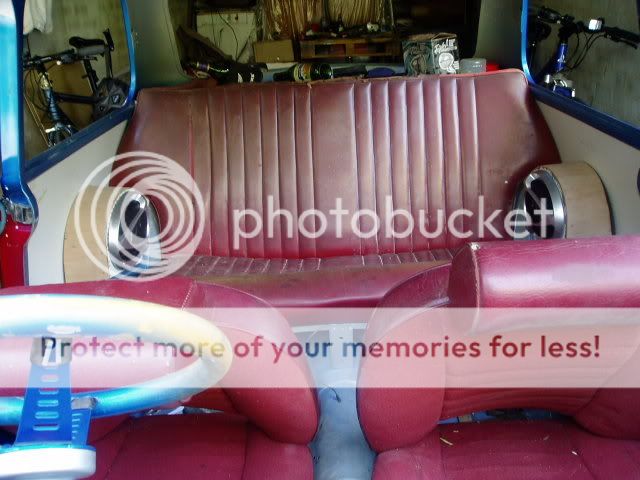
Here is a pic of the speaker boxes as they fit in the storage wells beside the rear seat. I intend to cover these with some padding and the same vinyl as the rear seat.
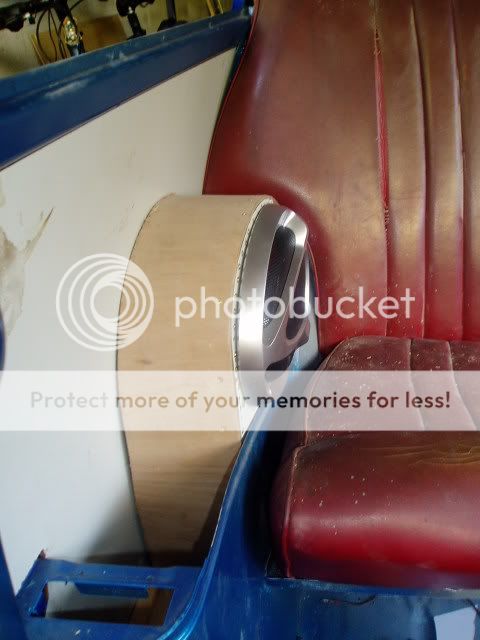
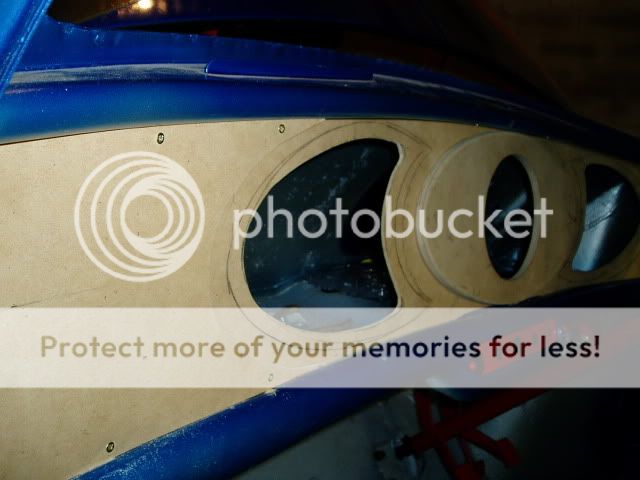
another view...
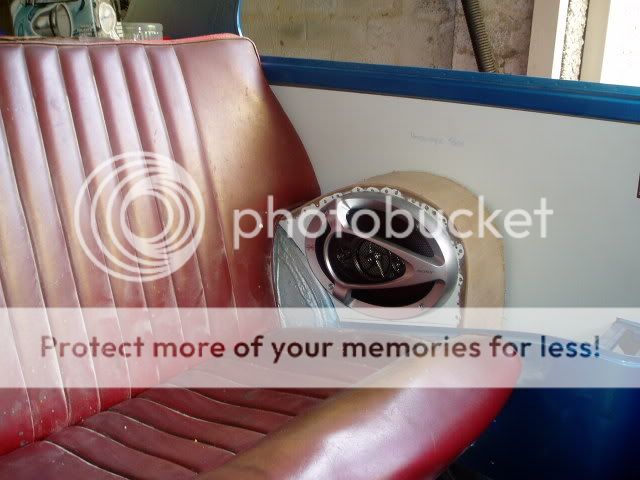
and another!

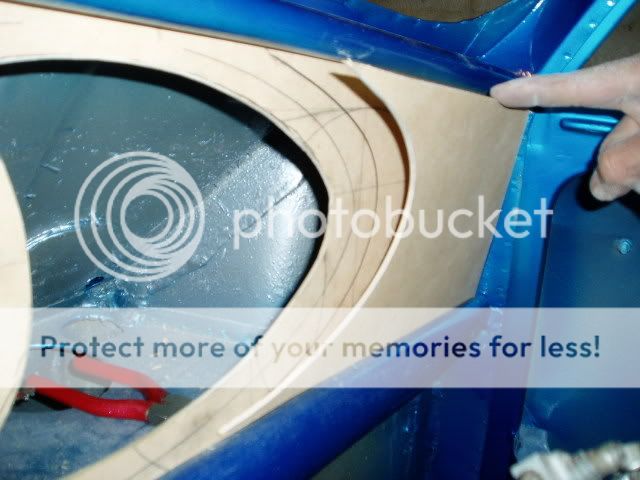
and one from the top!... Should make pretty good armrests when its all finished!!
as for the rest of the interior, not sure what colour carpet to use at this stage, but I want to stay with a reddish trim. With that in mind 9 and the fact that i dont really like the clubman seats that someone had put in the car previously I have RESCUED a brilliant pair of bucket seats from a Fiat 128 sports car that was about to be crushed at a local wrecking yard. They fit beautifully and I have (well still in the process of really) cut parts of the mounting brackets from the clubby seats that were in my car and welded them to the new seats. Pretty simple really. I

Rescued from a doomed Fiat 128 Sports Coupe..

i love em!!
Thats about all i have for you at the moment... Should be getting the engine and gearbox back early Feb...
well i hope you enjoy reading this and i will be sure to check back and answer any questions you might have. Also i will be posting updates from time to time btu not nearly as big as the previuos posts (which have taken me the better part of the last 3 hours!!!)
anyway, enjoy...
Cheers, Bryan
Just before christmas i turned my attention to the dash. I completed bits and pieces here and there on the rest but the dash and the interior has had all my attention to date!!! ...Even today its is not finished yet but the colour scheme will match the outside.
You will notice in the pics below there is a shaped panel on the extremities of the dash and this will bring the blue of the body onto the dash (as well as hold a nice little speaker). The backing will be a light metalic silver with the glove BOXES (those two shaped holes... have made a cover for them but not in pics) will be the darker met silver that is on the stripes outside the car. The centre piece is going to be the same red as the outside. In effect the dash colour scheme will mirror the stripes outside... blue ...light silver ...dark silver ...light sliver ...red ...light silver..dark silver ...light silver and then blue again. Must say the hardest part of all this was getting the glove box covers to conform to the curve of the dash... As i fabricated it all out of MDF (craftwood/pracicle board) this turned out to be quite simple... I screwed a backing panell behind the holes for the gloveboxes and then screwed in insert to these, coverd that with wood glue and then screwed the covers/lids to that. Once this was done and the glue set i removed all the screws and disposed of the backing board... The lids now hold thier curved shape!
I was hoping to have all this painted and finished by now but these next are as far as i have gotten...
Here's the dash with undercoat on, speakers in and the speedo mounted. The 2 glove boxes have lids that will be fully removeable when finished... all will be magnetised. This saves a lot of headaches with trying to come up with an unseen hinge system!! Background is silver, glove boxes will be the darker silver from the outside paint job and the two end bits with the speakers in them will be the blue. The bit holding the speedo will end up red.
Whilst i was busy with all this woodworking I fabricated some speaker boxes with a diffference (go figure!)... Mrs NExpress gave me a pair of xpold 6x9's for chrissy and i needed somewhere to put them... Unfortunately they were a little too big for my original idea but i compromised and check out the results below....
Here is a pic of the speaker boxes as they fit in the storage wells beside the rear seat. I intend to cover these with some padding and the same vinyl as the rear seat.
another view...
and another!
and one from the top!... Should make pretty good armrests when its all finished!!
as for the rest of the interior, not sure what colour carpet to use at this stage, but I want to stay with a reddish trim. With that in mind 9 and the fact that i dont really like the clubman seats that someone had put in the car previously I have RESCUED a brilliant pair of bucket seats from a Fiat 128 sports car that was about to be crushed at a local wrecking yard. They fit beautifully and I have (well still in the process of really) cut parts of the mounting brackets from the clubby seats that were in my car and welded them to the new seats. Pretty simple really. I
Rescued from a doomed Fiat 128 Sports Coupe..
i love em!!
Thats about all i have for you at the moment... Should be getting the engine and gearbox back early Feb...
well i hope you enjoy reading this and i will be sure to check back and answer any questions you might have. Also i will be posting updates from time to time btu not nearly as big as the previuos posts (which have taken me the better part of the last 3 hours!!!)
anyway, enjoy...
Cheers, Bryan
#7
01-11-2007, 07:30 AM

2nd Gear
Join Date: Nov 2006
Location: Worcester, MA
Posts: 90
Likes: 0
Received 0 Likes
on
0 Posts
Trending Topics
#8
01-11-2007, 12:30 PM

Wow! *drool* If only I had that kind of patience and talent.
Wanna make me a dash and ship it to the States?
Don't worry about the ride height. The front will drop a bit when you add the engine, and as the cones compress over time, the body will lower. Or, you could go with bigger wheels, but it looks to me like you want to stay pretty original except for that amazing paint.
I would like to point out that the old paint on the car looks pretty cool too.
#9
01-11-2007, 05:58 PM

Join Date: Aug 2003
Posts: 1,395
Likes: 0
Received 0 Likes
on
0 Posts
Man! that is one heck of a project you got there.
Thanks for all the pictures it really helps me when I get ready to do my Mini Pick up. I love the speaker pods you made. That would be a nice set up to make out of fiberglass.
Can't wait to see the finished work.
Keep it up
BTW do you still have the Aussie doors. I would love to talke them off your hands for you.
#10
01-11-2007, 06:05 PM

6th Gear

#12
01-12-2007, 02:25 PM


#16
01-13-2007, 05:18 AM

#17
01-15-2007, 09:04 AM

Neutral


#20
01-17-2007, 12:17 AM

6th Gear
Join Date: Sep 2006
Location: Rowland Heights, CA
Posts: 1,518
Likes: 0
Received 0 Likes
on
0 Posts
#21
01-21-2007, 04:09 PM
Join Date: Jan 2007
Posts: 14
Likes: 0
Received 0 Likes
on
0 Posts
Thanks to you all for the feedback!! I am trying to get the car finished and on the road by April (ish!!!) this year. Being held up a little by this and that and as "Mrs Aussie Mini" and myself have just bought our first house the cash flow into the mini has slowed to a trickle!!
BTW. JRI the 'bronzing' effect is only noticale when its under a yellow light. But i agree with you.... i prefer the lighter colour on the sliver parts of the flag. I am intending to rub the clear back and give the paint a float coat of clear just before the chrome and glass etc go on so i might yet give that silver a touch up too. (see how keen i feel...at this stage i just wanna get it finished!!)
Thanks again guys, glad you like it!
Bryan
#23
06-25-2007, 01:33 AM
Join Date: Jan 2007
Posts: 14
Likes: 0
Received 0 Likes
on
0 Posts
April!!! hahaha that was the plan!
Hi all, well its obviously a long time after April and a long time since my last update but here it is...
Seriously its been a slow year as far as the mini is concerned. I have been busy though... bought a house, graduated from university, and and and!!!
On to the mini though... not a lot to report since JANUARY!! However I should have the engine back from my mechanic in week or two... that will be exciting! 1098 bored out to 1160 (or something there abouts!) mild grind on the cam, head ported and modified to take unleaded fuel, new set of extractors.. 3 into1 type to suit the BIG bastard exhaust and inch and a half carby i have to put on it. Also the gearbox is being changed... was the original 3 syncro type with "magic wand" type lever, now 4 syncro with remote change... this means changing gears will be slicker and the lever goes into the floor between the front seats as opposed to dissappearing into the base of the firewall!
Also I have got just about all the chromework... bumpers and trim... back on the car as well as all the lights etc and am putting the windows back in. Unfortunately I have not got around to painting the dash or re-upholstering the interior yet but this is to happen once the engine is sorted.
BTW I got a new rof lining on ebay... made here in Melbourne... if any of you guys need one you should check them out... fits great!!
Here are a couple of pics to show where I am at... (as I said though... not much different from before but I am getting there!!)
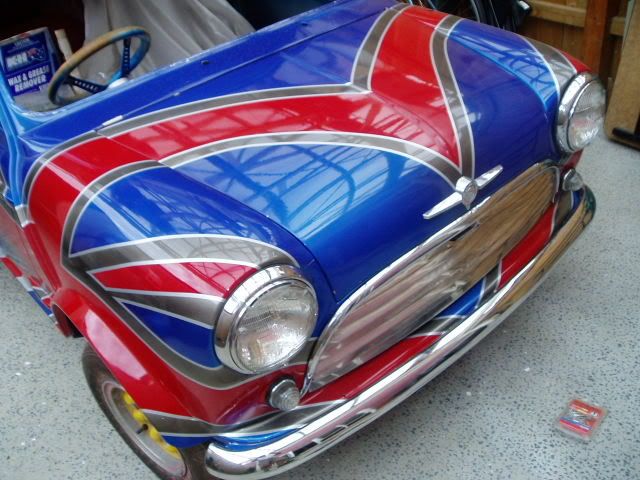
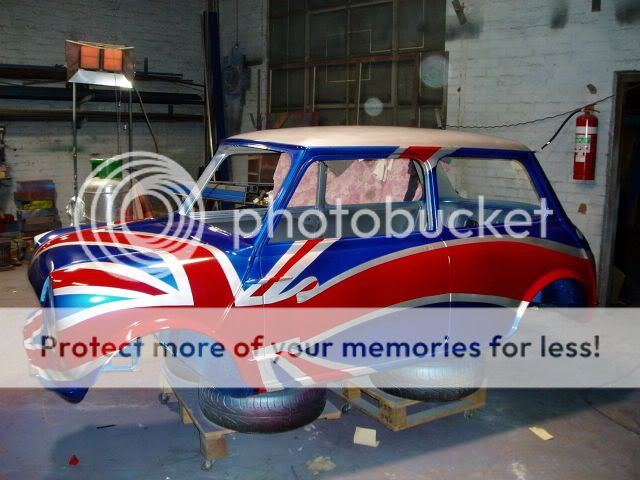
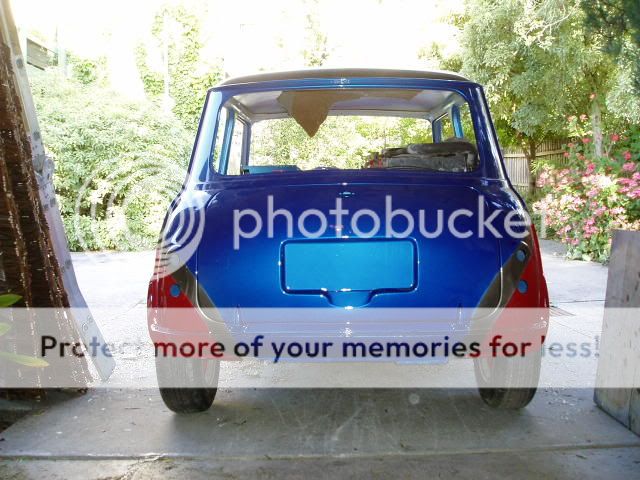
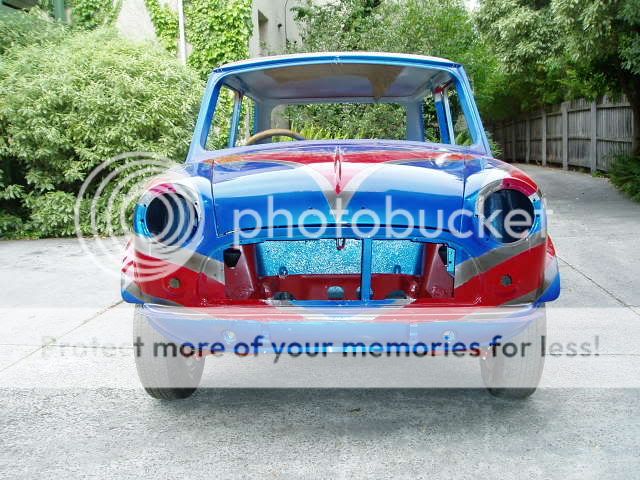
The frontside..I like this pic!!
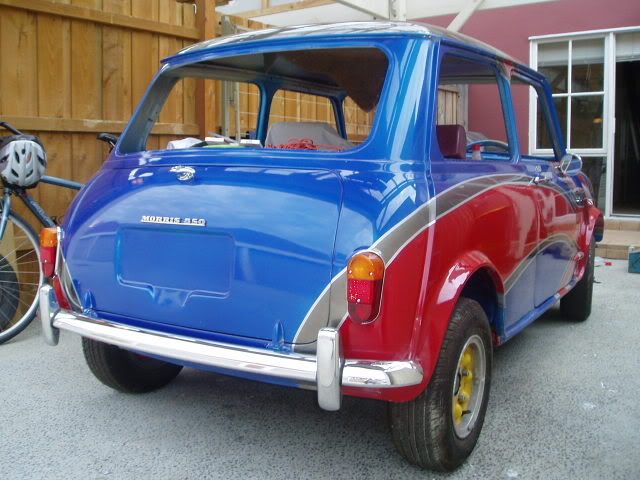
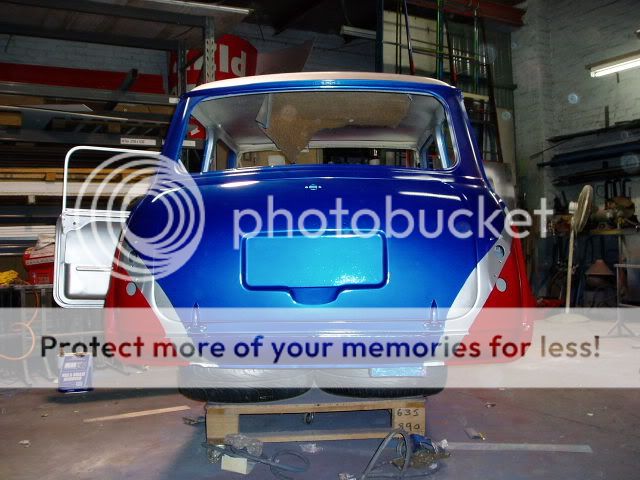
the backside!
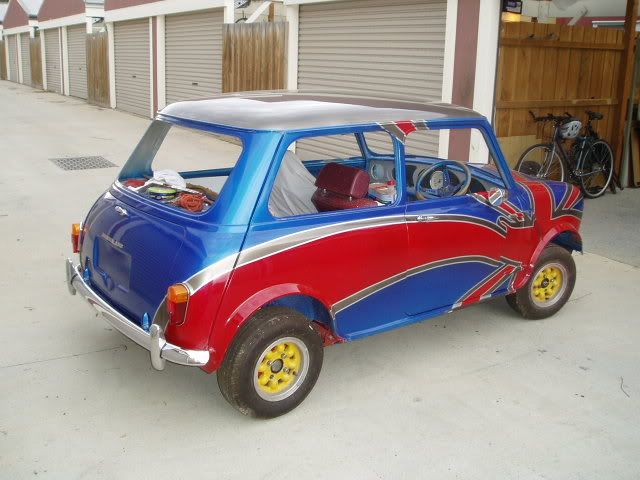
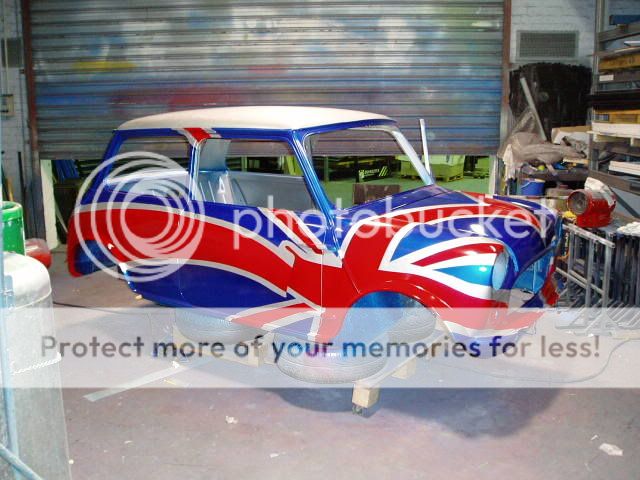
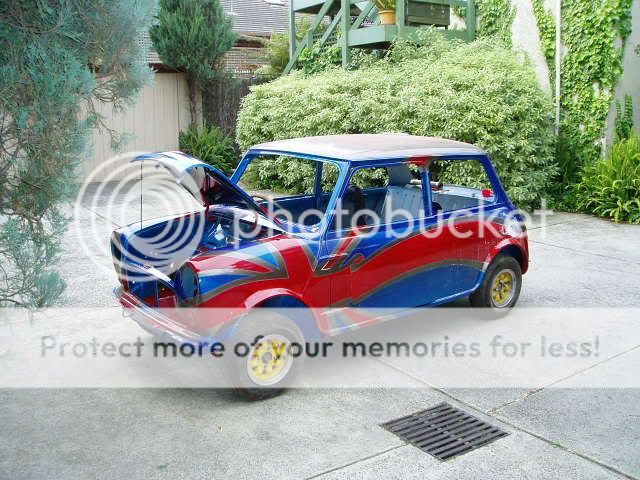
The side side!!
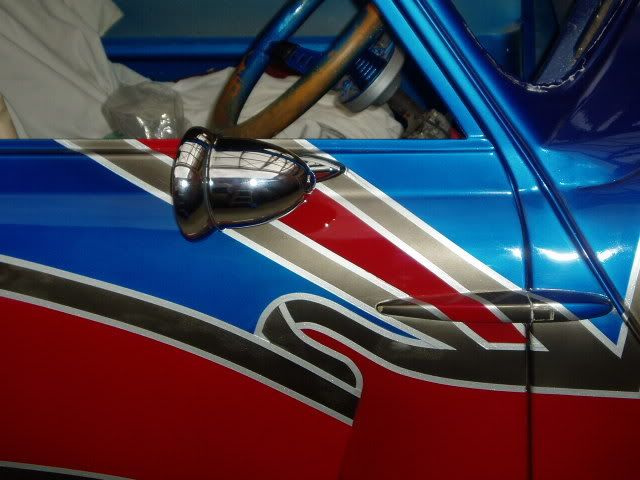
And my new drivers mirror
Well, hopefully the next update wont be so far away... and the finished product as well!!!
Cheers, Bryan
Hi all, well its obviously a long time after April and a long time since my last update but here it is...
Seriously its been a slow year as far as the mini is concerned. I have been busy though... bought a house, graduated from university, and and and!!!
On to the mini though... not a lot to report since JANUARY!! However I should have the engine back from my mechanic in week or two... that will be exciting! 1098 bored out to 1160 (or something there abouts!) mild grind on the cam, head ported and modified to take unleaded fuel, new set of extractors.. 3 into1 type to suit the BIG bastard exhaust and inch and a half carby i have to put on it. Also the gearbox is being changed... was the original 3 syncro type with "magic wand" type lever, now 4 syncro with remote change... this means changing gears will be slicker and the lever goes into the floor between the front seats as opposed to dissappearing into the base of the firewall!
Also I have got just about all the chromework... bumpers and trim... back on the car as well as all the lights etc and am putting the windows back in. Unfortunately I have not got around to painting the dash or re-upholstering the interior yet but this is to happen once the engine is sorted.
BTW I got a new rof lining on ebay... made here in Melbourne... if any of you guys need one you should check them out... fits great!!
Here are a couple of pics to show where I am at... (as I said though... not much different from before but I am getting there!!)
The frontside..I like this pic!!
the backside!
The side side!!
And my new drivers mirror
Well, hopefully the next update wont be so far away... and the finished product as well!!!
Cheers, Bryan
#24
06-26-2007, 07:23 AM
I never liked the look of those mirrors in the product photos, but on your car they look really good - it changed my mind on them.
The silver on the UK looks mungy in many of the photos, but in a few it looks fantastic - it's probably just the photos. Also, LOVE your rear speaker boxes - I'll have to kep that in mind for my car. I assume you'e going to resin-coat them and then wrap them in some sort of material?
The silver on the UK looks mungy in many of the photos, but in a few it looks fantastic - it's probably just the photos. Also, LOVE your rear speaker boxes - I'll have to kep that in mind for my car. I assume you'e going to resin-coat them and then wrap them in some sort of material?
#25
06-26-2007, 09:39 PM
Join Date: Jan 2007
Posts: 14
Likes: 0
Received 0 Likes
on
0 Posts
ImagoX... Thanks... i am happy with the mirror but i guess time will tell! I mean when its on the road it will probably be useless but still look cool! The car originally did not come with any side mirrors... also yes! Am giong to coat the speaker boxes and cover them at the same time as the seats get done so they tie in with the interior... will sort of becobe part of ythe rear seat like armrests!
Cheers, Bryan
Cheers, Bryan