When you click on links to various merchants on this site and make a purchase, this can result in this site earning a commission. Affiliate programs and affiliations include, but are not limited to, the eBay Partner Network.
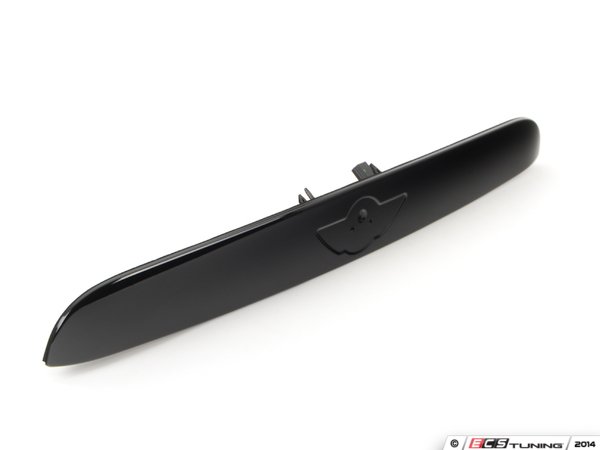
I'm swapping out my chrome one for a black one.
Anyone done this yet?
I wonder if it is like the R56 which removes from the exterior with screws on the bottom...
I plan to do the same thing with our Pepper White w/black roof and wheels. So I'm really interested in your experience. It will look much better with the black hatch trim.
There are two replacement parts, one with the backup cam, one without. When I owned a BMW I noticed that they often installed the wiring for options even if they were not installed in the factory. The back up camera is about $375. I wonder if you will find the harness for the backup cam tucked away in the hatch? It will be wrapped in gray foam. So the question is, is it a matter of installing the camera, or is there another processor that needs to be installed too? Then I'd guess there needs to be some software activation for it to work.
GregoryK, please document the process with pics. I'm planning to remove my black trunk lid cover and add chrome. Going to add the chrome brake ducts and chrome trim in lower rear bumper.
And. . um. . . can I have dibs on your chrome trunk lid piece?? LOL!!
How difficult did this swap turn out to be? Was the original "MINI" badge reusable? Is the badge held in with clips, or trim adhesive? Just trying get prepared, as I too just ordered a black grip
I did this already. Easy. Hair dryer and dental gloss to remove badge. 3m tape to stick it on the new grip. I ran the stripes right through the middle of the handle and stick the badge right on top.
So how do you remove the whole trim piece, not just the badge? I want to paint mine black to match my black plasti-dipped light rings, but keep the mini badge chrome. I prefer to do trim painting with pieces off the car...
Dough76...Been there done that...
There are 2 screws in the back of the liner. Remove these.
The liner pops off in 4 sections but they connect together so be careful. Take the top section off first, get your fingers near the glass and it will pop off (think it has 3 plastic clips) the 2 sides only have one clip each but slide into the big main piece.
The main piece come off by pulling it from the top edge - it has lots of clips but once you start pulling it comes off easily. I pulled the big piece off first but this can damage the connections.
After the liner is off the handle is easily unscrewed from the inside - I think it is 6 screws. It is best to unplug the connectors to the lights and release handle before you remove the handle as the cords are short.
These things are always designed for a quick and simple install and are harder to remove. In this case it is pretty straight forward though.
Good Luck!
Didn't see any pics posted yet, so thought I'd post some to help out. Decided to experiment with a Plasti Dip Metalizer (violet) with the hatch handle, along with the rear Cooper badge. The basic steps for removing the handle are:
Remove the 2 torx screws located near the center of the large interior trim piece (which also covers the rear wiper motor assembly).
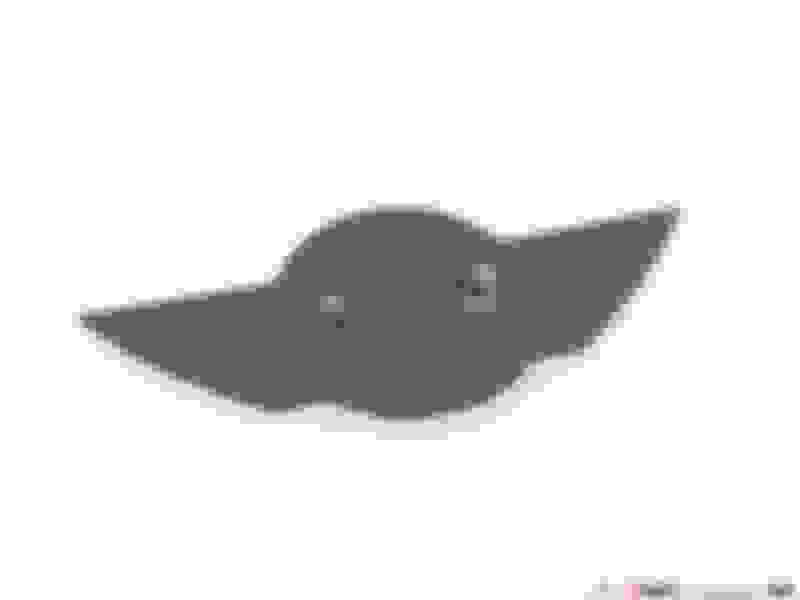
Remove the trim piece by carefully loosening the 8 plastic clip connectors (4 across both the top and bottom - see attached photo). I used a trim removal tool with a flat edge, loosened the center pair of clips, and then used gentle pressure with the rest.
Remove the 6 torx screws that hold in the handle.
Loosen the handle from the hatch slightly to access & remove the single electrical connector, and the handle should come right off.
Ok, I did this one too. Our car was ordered back in Jun and we were part of the EPA delay. The black hatch grip has been sitting in the living room for over 2 months. So I decided to install it today. It was pretty easy and improves the look of our Pepper White car with black roof. I'll post pictures....
1) First I took the rear emblem off the car. It is easier to work with it and pry on it while it is on the car. The replacement doesn't have the emblem so you need to move it over. I used my heat gun on low setting to warm up the adhesive. A hair dryer may work too. I put some painters tape on the hatch grip to protect it from the heat. I thought the emblem was made of metal but it is really plastic so careful with the heat and the force you use to get it off. It is on with 3M double stick foam tape. I used a piece of dental floss to get behind and then I used a nylon trim removal tool and it came off pretty easily. You have to remove the remaining tape from the back. Then get new 3M molding tape to attach the emblem to the new trim. You can get this at Autozone. Trim with a razor so the tape it just inside the edge of the emblem.
2) Now you need to remove the black trim piece on the inside of the hatch. There are two black screws (Torx-25) to remove. Then there are eight trim tabs holding the lower trim piece in. You can see their position in the pic. The trim that runs up around the window is slotted into a groove in the bottom piece. It will slide out when you release the main trim piece. I used some nylon trim tools to get under the trim. The plastic trim tabs are in their pretty snug but they will come out.
3) Once the trim piece it off there is a 3-pin connector that you need to remove. It is a friction fit, just pull on the connector.
4) There are 6 silver screws (Torx-20) holding the hatch grip on. Remove them and the grip comes off pretty easily. The lights and hatch open switch are already installed on the new piece. The black one is on top, the silver is below.
5) Attach the new grip and install the 6 screws.
6) Reconnect the 3-pin connector. Test the hatch open switch to make sure it works before buttoning it up.
7) Reinstall the bottom trim piece. Make sure the white trim tabs are correctly in place, they could have moved when you removed it. Make sure you align the groove in the lower piece with the tab in the piece around the window. Once the tabs are aligned a firm hit with a close fist or palm will insert the trim tabs. Make sure all 8 are inserted.
8) Replace the 2 black screws
9) Remove the backing film from the tape and stick the emblem back on. The alignment pins do a pretty good job of aligning things. I had to run out and buy the tape so it was dark by the time I finished. But it really looks nice on the Pepper White/Black Roof car.
10) Now I have a silver hatch grip if someone wants to buy it. I'm sure it would look nice on a darker color car. I'll post it in the for sale section.
Nice DIY, the black looks good on the white. If you have the camera version the grip handles does not show to have it , so you would have one more step to swap that over to the new one.
Nice DIY, the black looks good on the white. If you have the camera version the grip handles does not show to have it , so you would have one more step to swap that over to the new one.
Thanks. Years ago I had a BMW and I wanted to install a CD changer in the trunk. BMW had pre-wired the car with the cable and it was tucked away and nicely wrapped with foam. All I had to do was unwrap it and plug it in. I was hoping the Mini would come with the rear camera wiring pre-installed. But it is not. I would have been tempted to buy a camera and see if I could install it, but not worth it without the factory harness.
I Opti-coated the car and took a better pic of the rear after the badge was re-installed. I think it makes the Pepper White/Black theme tie together.

 06-22-2014, 02:25 PM