When you click on links to various merchants on this site and make a purchase, this can result in this site earning a commission. Affiliate programs and affiliations include, but are not limited to, the eBay Partner Network.
General MINI TalkShared experiences, motoring minutes, and other general MINI-related discussion that applies to all MINIs, regardless of model, year or trim.
I finished last about 4 pm yesterday. Run like a dream. No more squealing from belt slipping. I found the tensioner pulley bearing was rough. The water pump had a tiny bit of play an it also had a rough feeling . The alternator was putting out low voltage. My fan resistor was crumbling apart. I went ahead an changed all the coolant hoses while I was there. I still need to change valve cover gasket. I will save for another day.
Replaced my:
Alternator
Water pump
Thermostat
All coolant hoses
Resevoir tank
Fan resistor
Tensioner
Belt
Crank sensor seal
Manual transmission fluid
My *** is worn out.
Drove her around today. No issues. No more shuttering when a/c kick on. Smooth an so much quieter. Now I got to fix the rattle on my muffler. Need to order a new mounting bracket.
Last edited by shrevemini; 12-08-2019 at 11:23 AM.
New parts purchased from ECS Tuning. Intercooler and Downpipe for a Stage 2 tune from Bytetronik. Thanked Youtube (again) for user posted videos of the "how-to".
Last edited by Warren2185; 12-08-2019 at 11:44 AM.
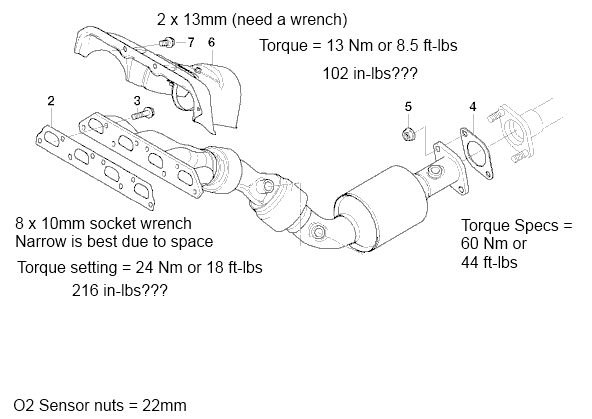
Fixed the massive exhaust leak that developed sometime this bbn past week. Downpipe cracked completely off just below the first cat. No indication of any impact and the wife doesn't recall hitting anything. Got the pipe seated against the cat and just welded it to the heavy duty heat shield. Not my best work, but it doesn't leak and should hold for a bit. May be time to explore header options.
Fixed the massive exhaust leak that developed sometime this bbn past week. Downpipe cracked completely off just below the first cat. No indication of any impact and the wife doesn't recall hitting anything. Got the pipe seated against the cat and just welded it to the heavy duty heat shield. Not my best work, but it doesn't leak and should hold for a bit. May be time to explore header options.
No worries on the impact front. This is a known issue. I encountered the same thing at 89k miles on my Mini back in 2013. Time for an upgrade!
No worries on the impact front. This is a known issue. I encountered the same thing at 89k miles on my Mini back in 2013. Time for an upgrade!
Interesting sound, no?
Well, Grumpy already has an Ebay special exhaust with broken baffles in the mufflers, if you really want to talk about an interesting sound. Lol! Good to know it's common, and it sounds like his did well making it 16 years and 173k-ish. First priority was to make him safe to drive, again.
Well, Grumpy already has an Ebay special exhaust with broken baffles in the mufflers, if you really want to talk about an interesting sound. Lol! Good to know it's common, and it sounds like his did well making it 16 years and 173k-ish. First priority was to make him safe to drive, again.
LOL I can only imagine that sound!
From what I understand with the manifold... imagine a wire that you bend back and forth indefinitely. Eventually, it breaks. Combination of the motor moving and engine/trans mounts allowing things to move under normal driving conditions. Its bound to happen. But you guys got your money's worth with that kind of mileage.
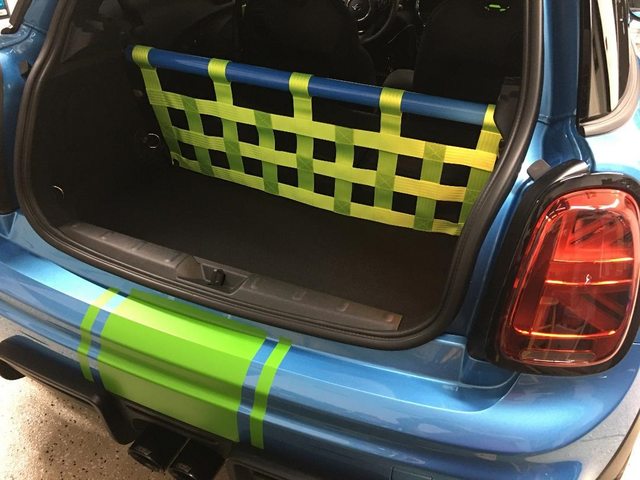
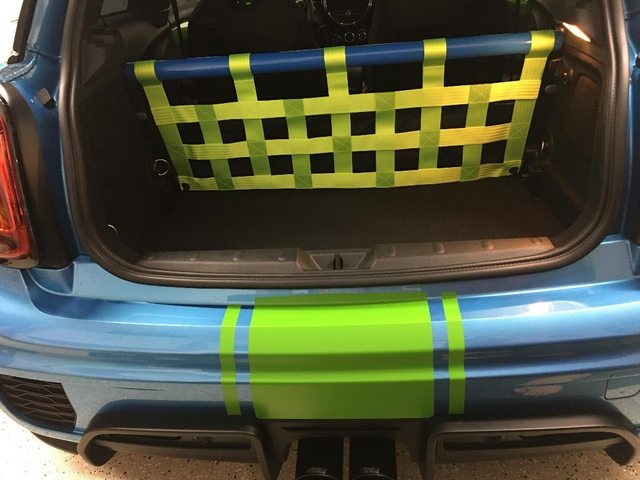
Switched my factory JCW tips to ECS Tuning Black Chrome ones and installed my Stern Performance bar and net. I have to remove the rear seats to properly secure the bottom of the net. It hooks to the hole (socket) that is left from the rear seat removal.
I'm attempting to delete message secure vehicle against rolling on my dash in front of steering wheel cloumn it doesn't seem to go away until I put the car in drive, any ideas of how to delete this message ?
First time changing the spark plugs and coils on my mini. Was cursing to see what kind of spark plugs the previous owner placed on the justa. CHAMPIONS! That is why the car is hesitating and kinda feels sluggish. Looked at the service records and the mini indi shop just replaced it at 90k kilometers and the justa just hit 136k and was limping already. Placed proper Bosch iridium plugs and boy it drives way better than when I picked the car up at 106k kilometers on the motor. Pulls strong, motor runs smoother, no more hesitation and best of all my fuel economy went up.
Not sure if these plugs looked bad but it did the trick to make my justa run like new.
Back in the day, before O2 sensors and all of that, a way to tell how the car was running and how good the A/F was, was to look at the spark plug. There were even picture charts showing what a plug in an engine that was running too lean or rich, etc. Your plugs are off the charts... They show a lot of erosion, and, maybe, running a little too hot. The ECU will �see� what the plugs are doing to the ignition and set the timing and fuel to compensate. In your case, the settings were at the detriment of performance to save the engine. Given the extent of erosion, I would say those plugs should have been replace 20K miles ago. Coil and wires change-out was a good idea given the miles and age of your car.
Glad your car is running as it should... Motor On!
Well the fact that they were replaced at 90k and only run less than 45k are looked like that already is head scratching actually. You think since these old plugs were just cheap Champion plugs it did not perform well? I do hope the Bosch plugs I placed will do better. Maybe I'll check it every year now.
Well the fact that they were replaced at 90k and only run less than 45k are looked like that already is head scratching actually. You think since these old plugs were just cheap Champion plugs it did not perform well? I do hope the Bosch plugs I placed will do better. Maybe I'll check it every year now.
I've lost my faith in Bosch spark plugs. NGK plugs are my go to for everything, these days. Saab was onto something when they were OE in my 1979 900 Turbo. VWs, BMWs, Subarus, etc.
Why? did they performed poorly on your mini? I did not find any NGK on amazon when I was shopping for it.
BMW felt they were good enough for my wife's 2003 Cooper S and my 2003 325i, so Saab was obviously onto something back in 1979 when they used them. We had a 2005 1.8T VW GLI that used NGK plugs, and a 2008 VW 2.0T GTI. Bosch has also discontinued the plugs for my 1982 VW Rabbit ( almost 10 years ago, BTW), but NGK hasn't. They have the quality and the support, and are the most used OE spark plug today.
Replaced the horrible F56 shift ****. I have only had my F56 for a little over a month and I couldn't take the OEM shift **** any more. Even on the first test drive I didn't like that the shift pattern was worn off and just about invisible - the pattern was worn off on both 2015 Minis I tested. The leather wrap on the **** makes it the most uncomfortable **** I have ever experienced. It feels like the **** is square. It's a shame because the shifter is butter smooth and light and feels great otherwise.
Replaced it with the Cravenspeed ****. As soon as I received the package and opened it up to check it out, it was obvious that this piece is made of the highest quality components. The heft of it is impressive. The stainless core is heavy and nicely machined. The plastic **** feels substantial and solid, like a bowling ball. Even the packaging box is nicely done. It's worth the price.
Once installed, it's a night and day difference. It feels correct, comfortable, and like it belongs in your hand, as opposed to the OEM **** that almost hurts. And the weighting makes a noticeable positive difference in ease of shifting. Looks are subjective, but to me it's no contest that the Cravenspeed is a better looking shift ****. This mod was a no-brainer.
Pictures before and after. The shift pattern in the before picture is much more visible here than in real life - you can't really see it at all most of the time. The after picture shows a cool looking **** that feels awesome in your hand. Not quite sure how to attach the boot so I just left it loose until I can check with Cravenspeed after the weekend. The materials are the highest quality, but the instructions could be better.
I really like the looks of that shift ****! How much did that Cravenspeed set you back? How hard was it to replace?
I had to replace the shift **** on my 17 Mustang for the same reason. It lacked the correct weight or solid feel or something. Put a Hurst solid ball shift **** in and it did the trick. I�m looking for something for my JCW now so I�ll check that Craven out.
I really like the looks of that shift ****! How much did that Cravenspeed set you back? How hard was it to replace?
I had to replace the shift **** on my 17 Mustang for the same reason. It lacked the correct weight or solid feel or something. Put a Hurst solid ball shift **** in and it did the trick. I’m looking for something for my JCW now so I’ll check that Craven out.
I was concerned about the difficulty of getting the OEM shift **** off, after reading many accounts where it is super hard to pull off. But it turned out to be much simpler and less effort than I expected. The most important preparation part is to first lift off the base ring around the shift boot (you can use a plastic panel pry tool, but you can also just lift it off without any tools). Once that base ring is free, you need to disconnect the plug for the Sport-Mid-Green driving mode. Then you simply pull the **** upward and it will come right off.
The rest of the installation is straightforward, except for attaching the top of the leather boot. I'm still not sure how that attaches to the shift lever, so I have sent Cravenspeed an email, and hope they will answer when they open for business after the weekend. As it is with it not attached, it still looks stock and is really not a concern at all, though I would like to make it right. Figure less than an hour total, possibly as little as 15 minutes or so.
PS - I also had a Mustang and replaced the stock shifter assembly with the Hurst unit. It had the classic white cue ball ****. The shifter itself was much more precise and firm, and the **** was super comfortable. And the looks of the shift blade and **** was awesome. I kind of wish Cravenspeed offered theirs in white for us old school guys. It would go really well with the white accents in my F56 interior.
Well that's something they got right the first time around. The Cravenspeed **** looks a lot like the R53 shift ****. It always boggles me when manufacturers miss something as obvious as that in the ergonomics department. It shows they way the manual trans is sadly going.


 12-08-2019, 07:02 AM


 They show a lot of erosion, and, maybe, running a little too hot. The ECU will �see� what the plugs are doing to the ignition and set the timing and fuel to compensate. In your case, the settings were at the detriment of performance to save the engine. Given the extent of erosion, I would say those plugs should have been replace 20K miles ago. Coil and wires change-out was a good idea given the miles and age of your car.
 It's a shame because the shifter is butter smooth and light and feels great otherwise.