When you click on links to various merchants on this site and make a purchase, this can result in this site earning a commission. Affiliate programs and affiliations include, but are not limited to, the eBay Partner Network.
General MINI TalkShared experiences, motoring minutes, and other general MINI-related discussion that applies to all MINIs, regardless of model, year or trim.
I believe you are correct. The lenses seem to be compatible/interchangeable between pre and facelift. Basd on my visual comparison. The bulb deisgnation(H7) embossed on the lenses also indicate they are same.
BTW: $30 + $3 "environmental fee" (I thought I was helping save the environment by reusing old car parts...so why are they passing on the fee to us? *sarcasm*).
However if you purchase these used with the ballast the price goes up by $70 = $100 cash & carry
Yep - My apologies in advance for yet another (redundant) headlight refurbishing post...
After scoring a decent facelift passenger side headlight last week, I still needed a driver side. Even though I was in no hurry to find one right away -
As luck would have it; I received a text from a fellow local Mini enthusiast who had alerted me that a couple of 1st gen Facelift's had landed a yard and hadn't been picked over yet.
I headed out to that salvage yard this morning and picked up another sad, almost un-salvageable, nasty looking driver side headlight.
I forgot to take a photo of how bad of condition the driver side headlight looked.
I had brought some baking soda, hydrogen peroxide and scrubbing media with me this time and preformed a quick scrubdown to predetermine it's restoration potential before deciding to make a purchase..
However you can see the comparison between the passenger side (original condition) and what the driver side headlight was like before I scrubbed it while at the lot.
After a hot and sweaty morning enjoying the serene surroundings among the vestige of salvage yard rusted memories, it was time to head back and get to work in an attempt to bring this projector back to it's (hopefully, near) former glory...
While my previous restoration remedy worked fairly well at de-hazing the pitted yellowed lens - Compared to the restored passenger side (from last week), paled in clarity.
I decided to go one step further by wet roto polishing with 800 grit subsequently down to 2000 grit.
Although not perfectly matched in clarity - The little extra effort made all the difference - to me.
Price for the driver side projector headlight w/bulbs & ballast = $34
This particular salvage yard could careless about the ballast and doesn't charge extra.
Today I also scored another pair of Cabrio braces = $2.05 (YES = $2.05 - for the pair).
In addition - I scored an extra glove box lock cylinder = $0 = gifted from the salvage yard
Last edited by Here2Go; 08-05-2023 at 04:31 PM.
Reason: FACELIFT not 1st gen "PF"
I just redid my headlights again too, and showed my wife how to do the headlights on her element at the same time. Wet sand with 600 to get all of the old clear coat off, then refine the scratches with 800 before a good cleaning. Finished it off with 2 goats of clear this time. Nice clean headlights are so worth the effort!
I also scored another pair of Cabrio braces = $2.05 (YES = $2.05 - for the pair).
In addition - I scored an extra glove box lock cylinder = $0 = gifted from the salvage yard
Yes it was definitely worth the drive.
It is pretty far from the central metro and one would be hard pressed to see any Mini's driving around "in them parts".
So you can imagine most of the Mini's that land in that yard have hardly been cannibalized or brutally ripped apart.
And yes @khnitz - You can be sure that I looked in hopes to find a windscreen for you off that '06 R52....
I haven't given up yet
It was (only) 109 today. So I did very little work today, but did run half way across town to get the only cabin air filter in town, amd the ac could simply NOT keep up with the amount of heat pouring in from the sunroof and glass.
we did get the old stripes pulled off and just in time. The black part came off fine but the white pinstripes were just at the edge of cracking and had to be shaved off with my �Lil Chisler� as they wouldn�t pull off with out constantly breaking in pieces.
Pepper white was apparently originally much more buttermilk colored than the ivory color it is now.
ToNIGHT, after temps dropped into the 80s, I got busy with something I noticed to be an issue on drive home couple weeks ago. If windows or sunroof are cracked, I�m getting hot air and some exhaust smell being drawn in from the trunk vents. the foam was completely disintegrated on them and the HK speaker grills As in crumbles when touched or looked at sideways.
So I bought some foam and fabric at Hobby lobby to fix the trunk panel, first I cut some foam strips longer and wider than the openings, and stuffed those in, then with hot glue I put a layer of dark brown cloth over the openings to restore the cosmetic appearance, while still being porous to air movement.
I replaced the oil filter housing gasket while changing the oil (topside), ran it to the grocery store to verify good oil pressure and it reads good so far. I'll get under it before the weekend just to verify the leak has stopped. Toughest part of the job was getting clearance to reach the bolts because that starter motor heat shield is stubborn af!
Yep - My apologies in advance for yet another (redundant) headlight refurbishing post...
Good job! I had to do the same but didn't have time to search for a salvage replacement. To preserve your work, I strongly recommend using the Quick Headlight Clear Coat from 3M. NAPA carries them for about $20-$30 (price may be different in your area). You only need one pack to do both headlights, the clear coat wipes on and it comes with a 3000 grit sanding disc, no masking required or messy spray to deal with. To go the extra mile, I also recommend slapping on some sort of protection film (Laminix makes some beautiful options) because it's the bug guts combined with the sun that will turn that plastic cloudy again.
Last edited by Whisky B; 08-09-2023 at 09:05 AM.
Reason: reference quote
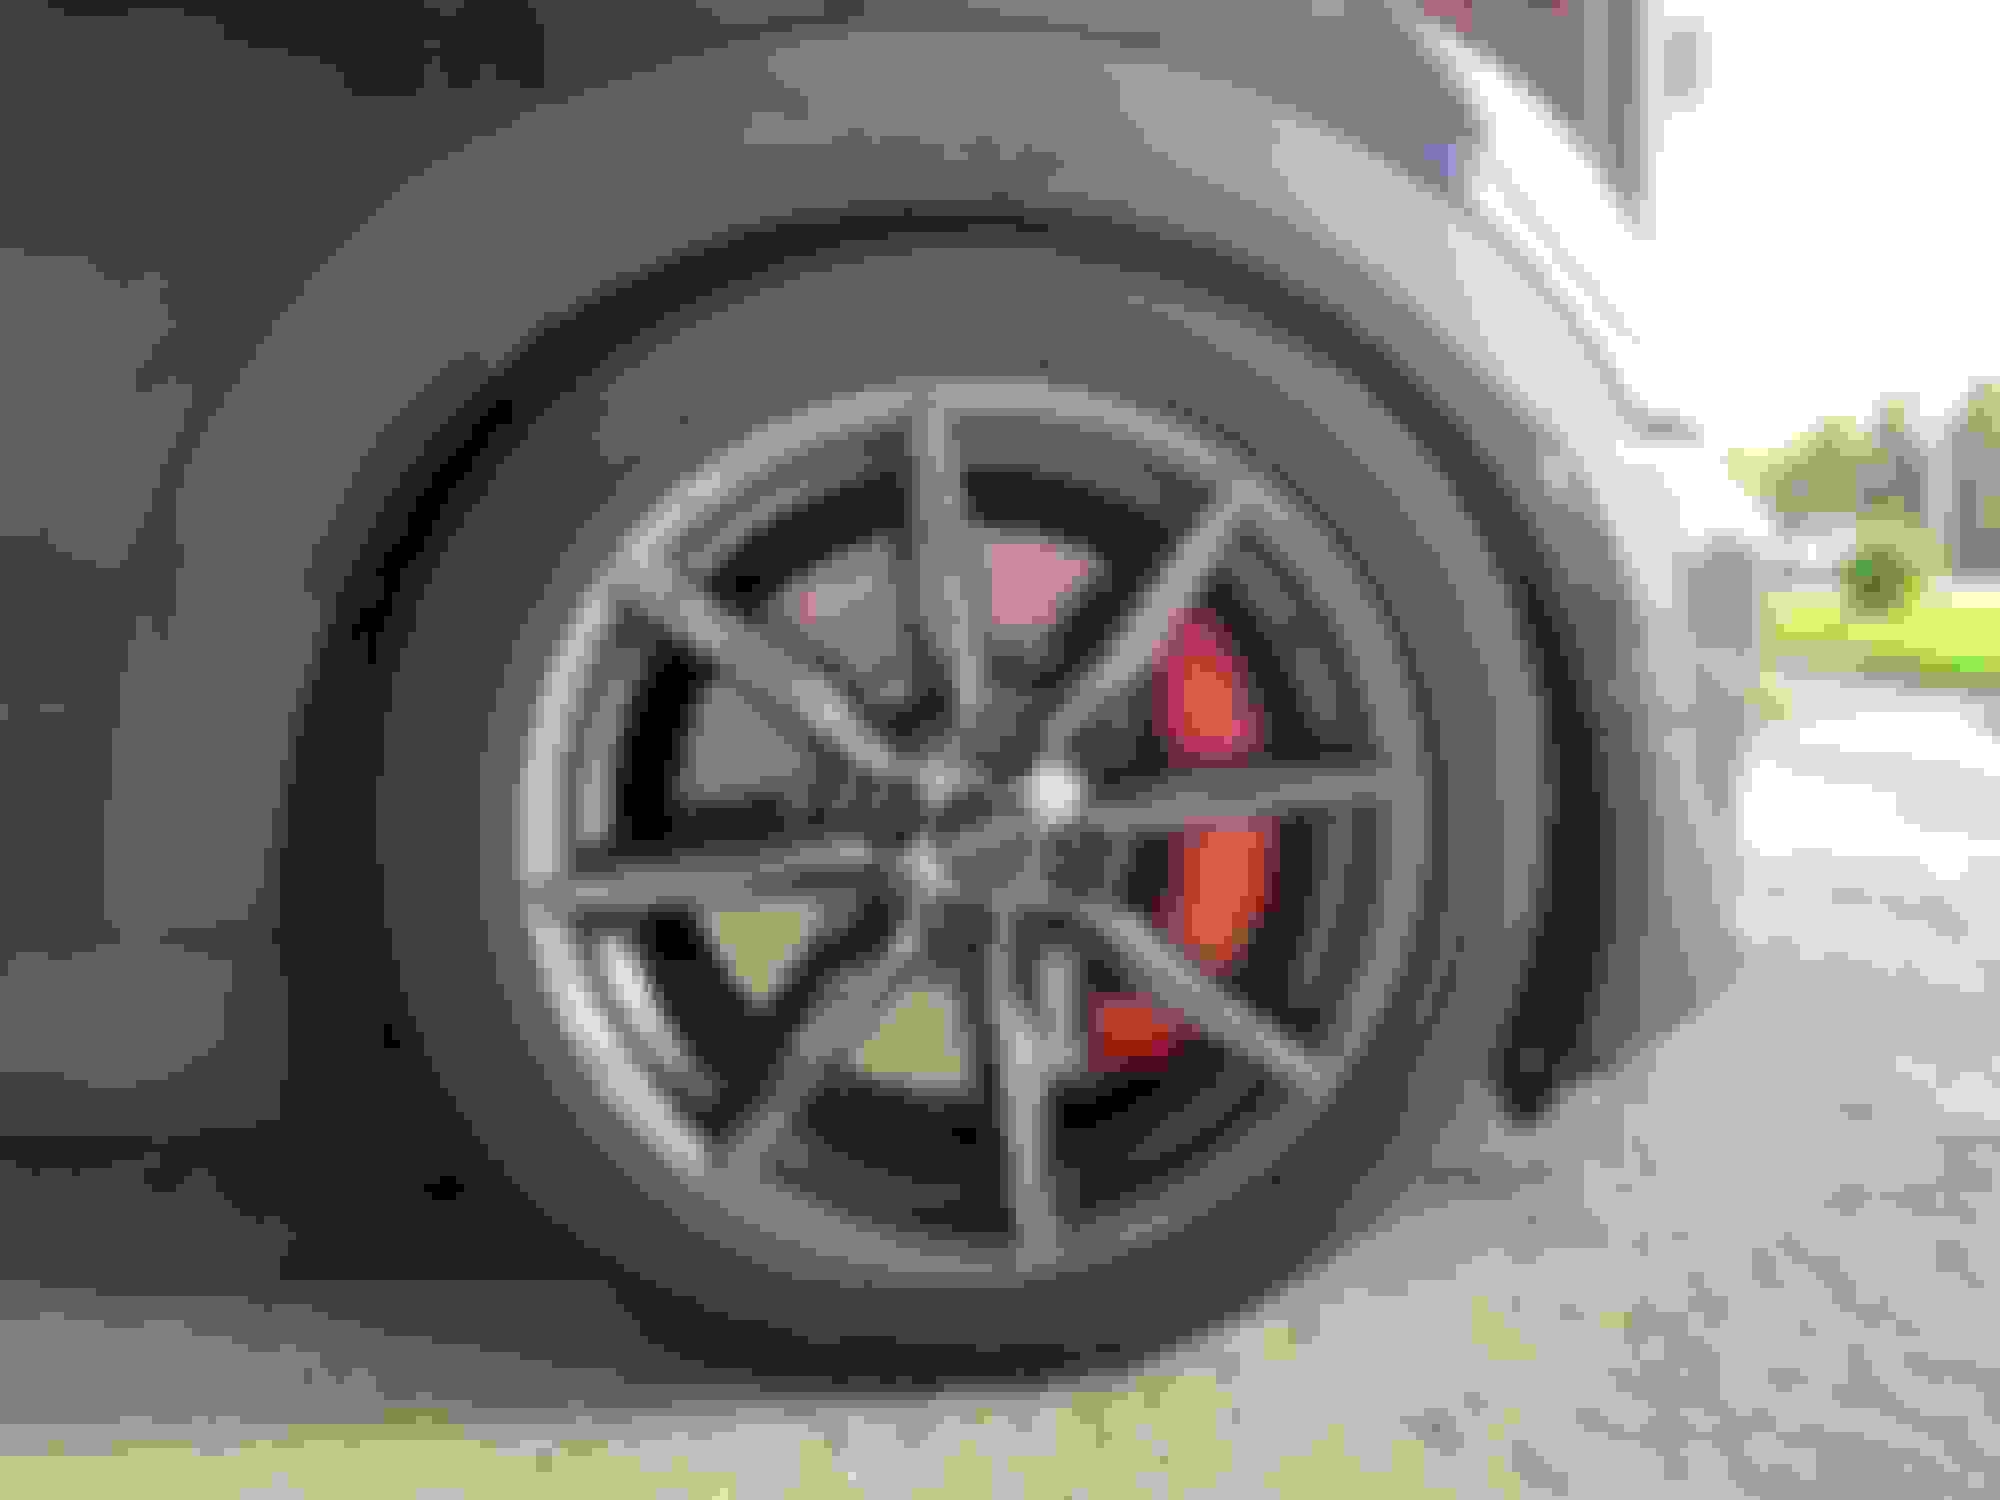
A couple of notes… To fit with my Miata wheels I needed 18mm spacers in the front. Even with that much, I have maybe 3mm clearance. These wheels just weren’t designed for big brakes. My OEM Hampton wheels provide a little bit more clearance. Could probably get away with a smaller spacer with those wheels.
I used ECS GP2 brake lines for hydraulics, and Reboot Engineering caliper brackets. Everything bolted right up no problems.
R52 - 10mm ratcheting wrench with angled head for taillight lens removal
I replaced the taillight/brakelight on my daughter's R52S tonight. Everything was going fine until I went to re-insert the bulb carrier and the reverse light bulb shot out into the lens like it was spring-loaded
I've had this happen the last time I replaced a bulb, and the only solution is to remove the taillight lens, shake the bulb out, and then reassemble everything. And the biggest PITA is removing the 10mm nut that holds the lens in place, because it is inconveniently located behind the trunk trim (really, Mini...the opening for the bulb access couldn't have been made just a little bigger??).
Tonight, I was happy to come across a recently new-to-me 10mm ratcheting wrench in my toolbox with an angled head that is a big help for this job! When the head is bent 90deg, it makes accessing that nut a lot easier, and then loosening it is easier, too. Still not ideal...but easier.
A couple of notes� To fit with my Miata wheels I needed 18mm spacers in the front. Even with that much, I have maybe 3mm clearance. These wheels just weren�t designed for big brakes. My OEM Hampton wheels provide a little bit more clearance. Could probably get away with a smaller spacer with those wheels.
I used ECS GP2 brake lines for hydraulics, and Reboot Engineering caliper brackets. Everything bolted right up no problems.
Heck yeah they are! EASILY twice the physical size of the OEM S calipers, but surprisingly about the same weight. (cast iron vs aluminum)
What really surprised me about the install: The fitting from the hard line to the flex line to the caliper was not rusted, and broke loose very easily. I was nervous the little fitting nut was going to rusted solid, but it wasn't.
Dont let my old clubman scare you, I�m sure you take way better care than the first 2 owners did on mine. Fwiw I�ll never do brakes on a r55 ever again, both where 09�s from the salty rust belt.
Dont let my old clubman scare you, I�m sure you take way better care than the first 2 owners did on mine. Fwiw I�ll never do brakes on a r55 ever again, both where 09�s from the salty rust belt.
I definitely had your horror story in my mind as I went to loosen that fitting. When it went smooth, I quite literally laughed out loud.
The only hiccup was when I was using my pressure bleeder to bleed the calipers, the gasket on the bleed fitting to the master cylinder decided to leak all over the garage floor. Made a huge mess, and I had to wash out my engine bay when all done to get the brake fluid rinsed out.
I glad yours went smooth, how many beers and cans of pb blaster did you hit it with before that first turn? A few hail mary's and jesus take the wheel, here we go? 😁
I glad yours went smooth, how many beers and cans of pb blaster did you hit it with before that first turn? A few hail mary's and jesus take the wheel, here we go? 😁
Believe it or not, no penetrating oil was used, and I was sober!
The short (happy) version:
Tonight I rewired the LH driver side facelift projector headlight.
The longer (not so happy) version:
A couple of days after installing my facelift projector headlights; I was a pretty happy guy. I had waited a long time to finally score a pair of OEM's.
The other morning in the pre dawn hours, was met with disappointment when I turned on my lights to discover the LH driver side low beam was out. I spent 2wo days swapping bulbs, igniters and ballasts to no avail.
It didn't take long before noticing how decomposed the wires had become over the last 18 years as they literally crumbled before my eyes- leaving 1"-2" of exposed copper precariously too close for comfort of shorting out.
For anyone who has had to change a Xenon (low beam) on a 1st gen facelift with projectors has probably seen or aware of the of the deterioration of the igniter wires over the years.
I went right to work on taking a blind chance at rewiring the low beam Xenon it hopes it would be the fix. I was in "get it done" mode so didn't document the process.
In the image: [lower center] was my initial crude attempt at insulating the crumbled sheathing of the wires that connect to the igniter.
The housing above is that of an extra (Right/passenger side),salvage headlight I had, in which I clipped the igniter connector from in an effort to solder/replace with new (18 gauge) wire in hopes to repair the driver side headlight.
You can see (from the salvaged) how badly deteriorated the wiring has become on these facelift headlights.
Amazing - rewiring actually worked!!!
As a side note:
This is the first time I've witnessed the auto leveler (s) actually work.
I never could see them in action when I had my original pre-facelift headlights installed no matter how clear the lenses were.
I got my new trim pieces in from my R52 top. I noticed on ECSTUNING website in the pic. There are the 2 trim pieces an 2 black pieces of rubber. Question is what are the two small rubber pieces for?


 08-02-2023, 03:46 AM

 *sarcasm*).