When you click on links to various merchants on this site and make a purchase, this can result in this site earning a commission. Affiliate programs and affiliations include, but are not limited to, the eBay Partner Network.
I’ve been tracking my GP3 since the day it passed the break in period. One issue I’ve constantly had, though, is almost complete brake fade about 2/3 into a 20 min session. Currently, my style of driving is late braking into a turn and using the brakes hard, although I’m still working on that trail-braking thing. Basically, I hit the brakes and the pedal goes straight to the floor. Pumping the pedal gets me some pressure, but I shouldn’t have to do this. This happens even after a complete flush with new fluid.
Anyway, I’ve already swapped out to SS brake lines, racing brake fluid (SRF) and using dedicated track pads (Porterfield R4). Nothing has helped. I figure I have 3 options left: 1) A better brake cooling system, 2) swapping out expensive brake parts (calipers, disks, etc) and 3) Change my driving style. For me, option 3 doesn’t seem like the right solution. I’m of a mind that the braking system should be able to handle all different styles of braking. I’m not ready to spend thousands on new brake hardware, so that leaves option 1. This isn’t a review of the system yet (I should have that in a week or so after I track it), but a how-to for the install of this brake cooling system:
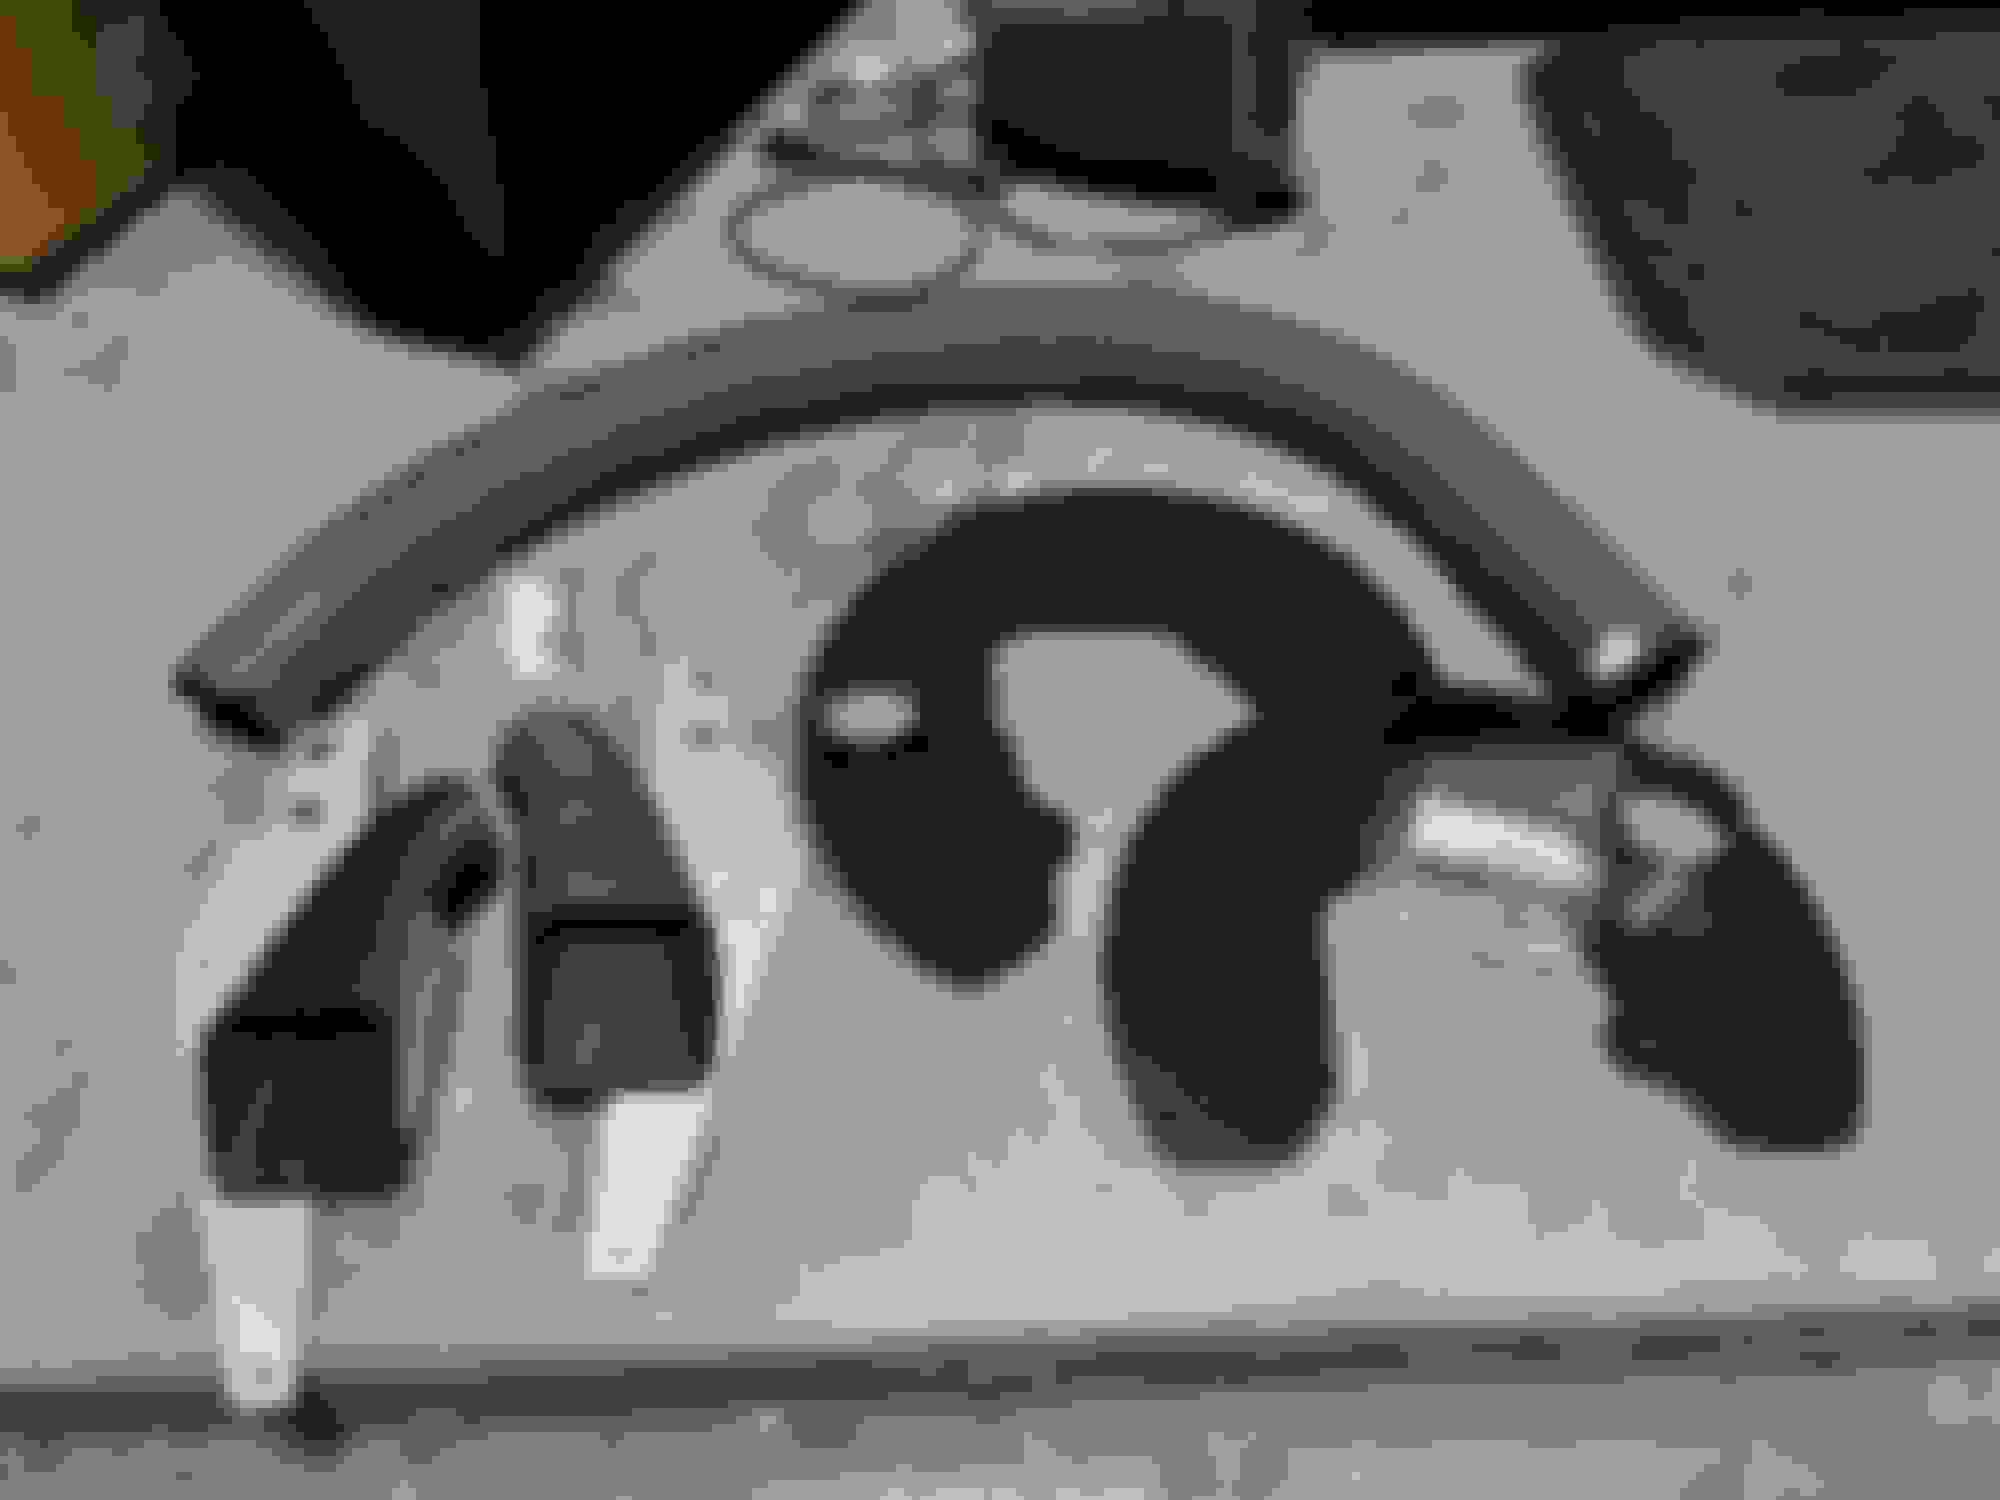
The kit comes with pretty much everything you need, minus the zip ties (which is just bizarre). The intakes/scoops sit under the car rather than connect to the OEM intakes in the front bumper. I was concerned that the contact area for the incoming air isn’t the center of the disk, but the face of the disc on the inside side. However, I showed it to my mechanic and they said it should be fine. Like I said, we’ll find out soon enough. The instructions that come with it are *ok*. They assume a certain amount of knowledge for taking bits and baubles off your car…which I *did not* have. Yay YouTube!
On with the install, my notes, and some tips to make it easier for you. First, obviously remove the caliper, disk and dust shield. I won’t go over this part because Youtube. Install the new shield according to the directions. *CAUTION* I had my torque wrench set to the documented torque (8-9 ft lbs) for these bolts but I still managed to over torque one. I don’t know if it’s because my wrench wasn’t working, or it was a bad bolt, but be aware. I ended up just tightening these to “snug”
As you can see, the new dust cover has spacers on the back side to keep the cover close to the disk, which I though was pretty neat. Anyway, you can re-install the disk now.
The scoops are were a bit of an issue. The instructions said to remove the OEM hardware and had 4 bolts circled. What they *didn’t* say was you either have to 1) remove some of the trim underneath the car, or 2) cut a hole in the trim. The bolt circled in blue is the troublesome one. The red arrow points to the plastic trim that will need to be either completely removed or have a hole cut in it. That’s because the bolt you need to take out is right underfeed the trim. Ugh. I ended up just cutting a hole. Also, for this bolt, the kit comes with a new bolt that’s longer and also has a spacer that goes with it. For the life of me, though, I couldn’t get the bolt to catch with either the spacer *or* with the washer. You might have better luck
It took me about 2-ish hours to completely get the first side completely installed. The second side took about an hour, once I figured some stuff out. Here’s how I did it for the second intake, assuming you decide to not remove the plastic trim.
Remove the 3 bolts circled in yellow.
Install the intake using only those 3 bolts.
Using a drill, start a hole where the 4th bolt will be
Remove the 3 bolts and intake
Cut enough of the trim to remove the bolt that’s under the trim and remove the 4th bolt
CONNECT THE HOSE TO THE INTAKE
Finish installing the intake and the 4 bolts
The 4th bolt (where you had to remove trim) will be very difficult to get threaded. I honestly think the bolt is just too short with the trim still on and I might try to get another one at some point.
The rest should be fairly easy. Connect the hose to the dust shield and zip tie it down. Test your clearance and host lengths then put everything back together.One other thing. The air intake is almost directly behind the flaps in front of them. Off to the side just a bit, but not by much. I have no idea how this will affect the ability of the intake to actually intake air. I’ll find out soon enough
And a few last pics of the setup.
Again, I'll be testing the actual functionality this upcoming week and will have post the results once I have them. Hopefully, this is useful to someone and if there are any questions, feel free to ask.
Are your front calipers and rotor the same as on the JCW? Sorry, I should know this, but don’t remember...
It looks like they did a really good job of making the replacement shield to capture the incoming air and forcing it though the center of the disk.
My only caution is to watch for cracking on the outside of the rotor... This may not be an issue with the way that they designed it. It was an issue I had when I removed the dust shield from the front brakes on my R56. The air blowing through the MINI brake ducts was enough to cool the inside of the rotor, but not the outside. So there was cracking on the outside of the rotor. I say this may not be a problem with yours as it looks like the shield will force are through the internals of the rotor, which may preclude the problem I had. Just something to watch for.
Thanks! And yeah, bare feet. I only wear shoes when I absolutely have to
I *believe* the calipers are the same, or pretty close to it. As for the airflow? I'll be watching it pretty closely. I'm registered for an open track day on Friday and will be checking the disks after every run. I'm *really* hoping this kit works and solves some of the issues I've been having...without causing other issue.
Neither the calipers nor the rotors are the same. The rotors are 360x30 instead of 335x30. The calipers are also different, they are larger and use larger pistons which a different sizes between the two as well.
Neither the calipers nor the rotors are the same. The rotors are 360x30 instead of 335x30. The calipers are also different, they are larger and use larger pistons which a different sizes between the two as well.
Thanks...
I thought they were different, but those pictures made them to look to be the same. I guess they are just similar looking.
I track my JCW at Watkins Glen (WGI), which has to be one of the tracks that is hardest on brakes, and I have had no pedal issues from heat. It may be that the speeds that the GP can get to, and therefore the energy that needs to be dissipated by the brakes, is that much greater than the difference in brake size, and therefore, the cause of the GP’s brake pedal issue. Just guessing here... But I do wonder what MINI did with that pre-production GP to get it to do those laps at the ‘Ring without cooking the brakes. And surely those laps were not done with stock pads. A fellow F56 JCW driver told me he cooked a stock set of MINI pads in a day at WGI
Last edited by Eddie07S; 10-17-2021 at 12:50 PM.
Reason: Clarification

 10-17-2021, 08:20 AM