
How To HOW TO: R56 - Thermostat Housing + Thermostat
#151
 03-19-2015 | 08:22 AM

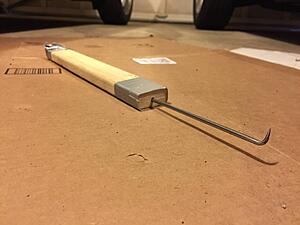
Thanks for the advice. By getting under the car and using a telescoping mirror I confirmed there is still a bit of plastic and the o ring lodged inside the water pump port. I fooled around for a couple hours making various extended picks to try and remove what's leftover but progress is very slow because of the lack of access.
I thought about removing the wheel well cover but from under the car it looks like that wouldn't help much unless I removed the water pump itself. It looks like removing the big air hose at the back left corner of the engine would provide sufficient access but I'm not comfortable straying from diy guides and improvising on my own. Any Advice on how to get the remaining bits out?
I thought about removing the wheel well cover but from under the car it looks like that wouldn't help much unless I removed the water pump itself. It looks like removing the big air hose at the back left corner of the engine would provide sufficient access but I'm not comfortable straying from diy guides and improvising on my own. Any Advice on how to get the remaining bits out?
#152
04-03-2015 | 10:22 AM

1st Gear
Joined: May 2012
Posts: 23
Likes: 0
Thanks for the useful info guys! I'm going to tackle this next weekend. Is the correct tool I need for the clamps? Thanks. If not what is the correct one.
#153
04-03-2015 | 10:50 AM
Thanks for the useful info guys! I'm going to tackle this next weekend. Is the correct tool I need for the clamps? Thanks. If not what is the correct one. Video Link: http://www.amazon.com/gp/product/B000F5JM0O/ref=ox_sc_act_title_2?ie=UTF8&psc=1&smid=ATVPDKIKX 0DER
Sent from my phone using NAMotoring
#155
04-06-2015 | 06:09 AM
We have a schwaben version here if anyone needs it.
Locking Hose Clamp Pliers
http://www.ecstuning.com/Search/SiteSearch/ES2702616/
Locking Hose Clamp Pliers
http://www.ecstuning.com/Search/SiteSearch/ES2702616/
__________________

MINI Guru/ MINI Owner Since 2004 | NEW Lifetime Part Replacement | Local Pickup
Milltek | Genuine MINI | Forge Motorsport | NM Engineering | ECS Performance | M7 Speed
Customer Service Hours: 8am-8pm EST|Sales Team Hours: 8am-11pm | SAT 10am-7pm 800.924.5172
MINI Guru/ MINI Owner Since 2004 | NEW Lifetime Part Replacement | Local Pickup
Milltek | Genuine MINI | Forge Motorsport | NM Engineering | ECS Performance | M7 Speed
Customer Service Hours: 8am-8pm EST|Sales Team Hours: 8am-11pm | SAT 10am-7pm 800.924.5172
#156
04-06-2015 | 01:59 PM

1st Gear
Joined: Feb 2013
Posts: 25
Likes: 0
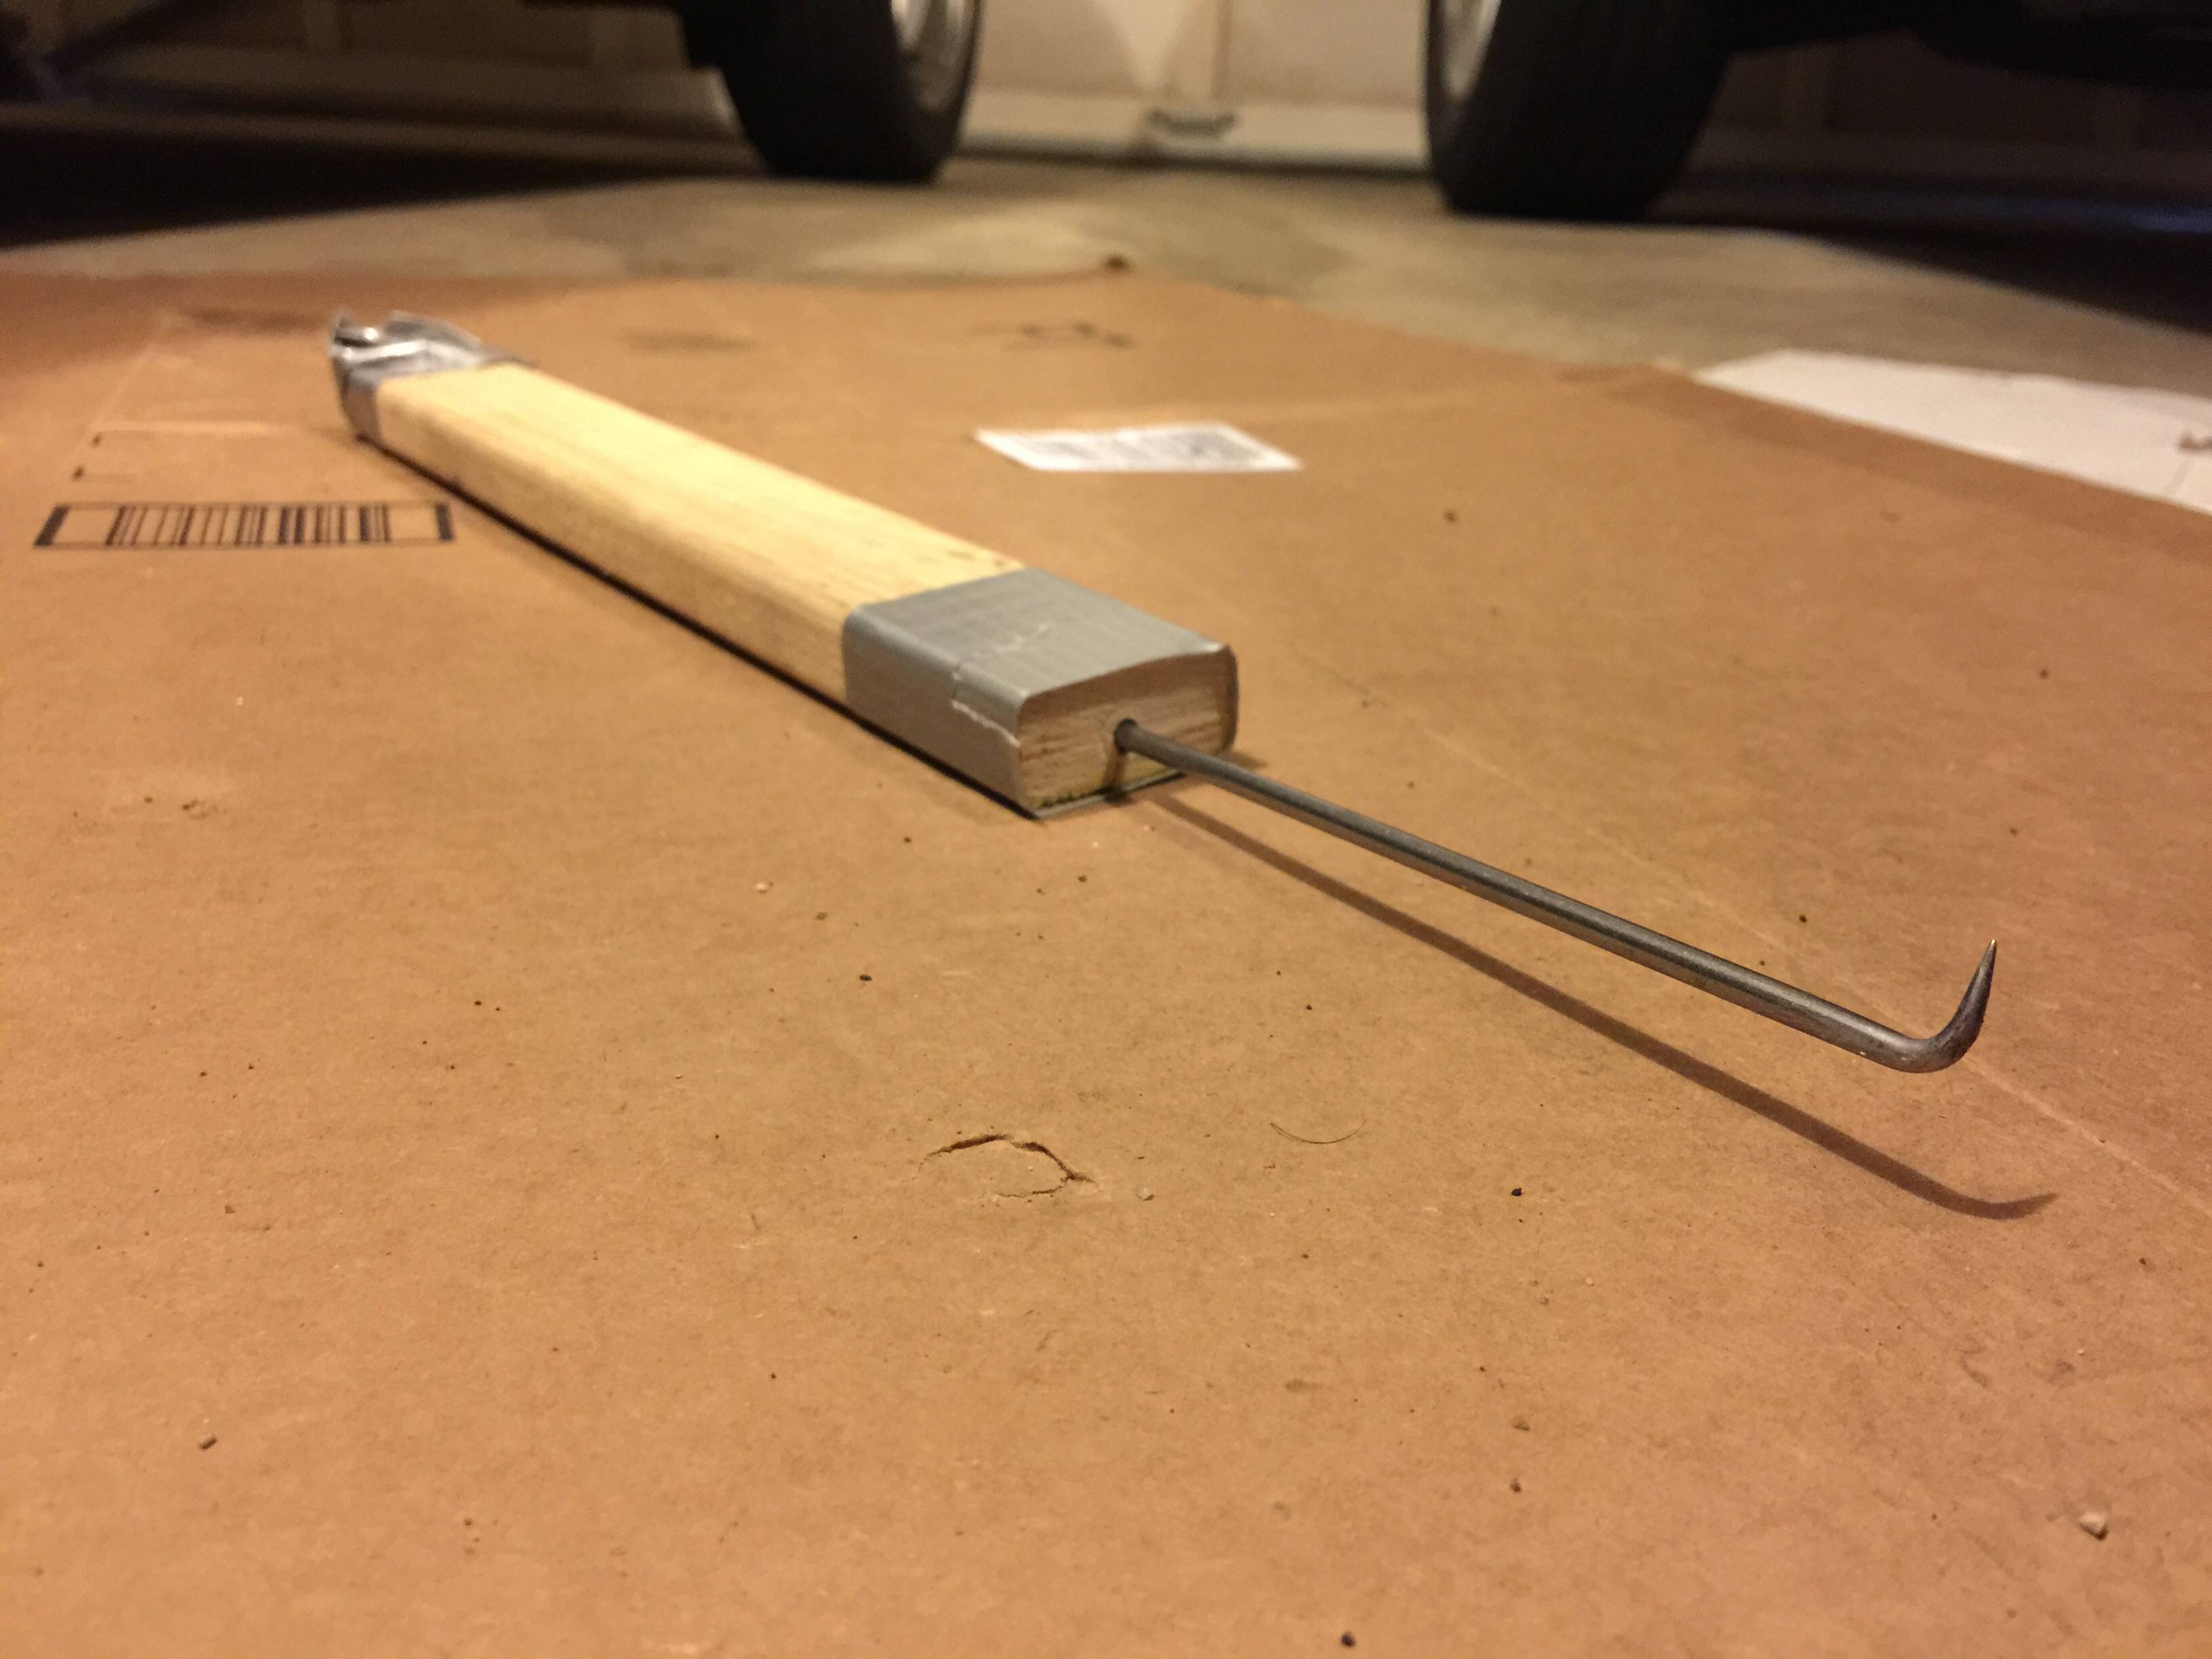
This post is a few weeks late but I ultimately got the broken piece out of the water pump by using an extended pic. I needed a second person to move the pic around from the driver side of the engine while I laid under the car with a telescoping mirror and light. What a PITA! When trying to install the new water pipe it seemed like no matter what I did I couldn't get it all the way inside the water pump - the gasket was still outside the port. After tightening down the thermostat housing I checked again with the mirror under the car and could tell that the water pipe was now fully inside the water pump port. The car has been running great without a leak for the last few weeks. Thanks for the help.
#157
04-06-2015 | 02:01 PM
Nice, glad you got it taken care of.
__________________
MINI Guru/ MINI Owner Since 2004 | NEW Lifetime Part Replacement | Local Pickup
Milltek | Genuine MINI | Forge Motorsport | NM Engineering | ECS Performance | M7 Speed
Customer Service Hours: 8am-8pm EST|Sales Team Hours: 8am-11pm | SAT 10am-7pm 800.924.5172
MINI Guru/ MINI Owner Since 2004 | NEW Lifetime Part Replacement | Local Pickup
Milltek | Genuine MINI | Forge Motorsport | NM Engineering | ECS Performance | M7 Speed
Customer Service Hours: 8am-8pm EST|Sales Team Hours: 8am-11pm | SAT 10am-7pm 800.924.5172
#158
04-19-2015 | 02:02 PM

Neutral
Joined: Apr 2012
Posts: 3
Likes: 0
I just finished replacing the thermostat housing on my wife’s 2008 R56 base with 77K miles. Not an easy or quick job for me unfortunately! For one thing I found replacing the “V” hose clip at the back of the engine a major time suck. Also, once reassembled I found that there was still a leak so I had to do it all over again! Anyway, here are some of my tips and observations for anyone attempting this…
Having removed the housing I discovered a �” long hole in the longest (inlet?) section on the inside of the elbow (see photo). I saw this type of problem once before in a coffee machine boiler which was cast alloy. In general, flowing water containing particles/grit will erode the corners of its container. If the container is plastic rather than metal then it will happen all the sooner. My opinion is that the best way to ensure that plastic parts last as long as possible is to use quality coolant and perform occasional coolant flushes in order to remove any particles.
When disassembling everything, take frequent photos with a camera or cellphone. These can be very useful when you go to put things back together again.
You don't need to remove the front section of cool air duct. Mine has a plastic flange at the front which is very difficult to remove. Just remove the large plastic box that is the back section, and bend the flexible front duct out of the way. Use string to tie it back if necessary.
You don't need to remove the wiring harness. However you do need to remove the rectangular plastic wiring casing above the thermostat housing. With this off and some of the plugs unplugged, the harness can be moved out of the way.
Large vise grips can be used for releasing the hose clips, assuming the orientation of the clips is appropriate, as they all were for me.
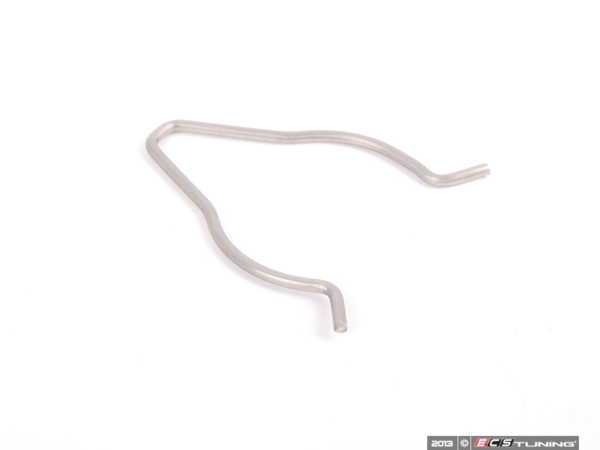
When replacing the “V” hose clip, tie a piece of twine to the center of it. If you drop the clip while trying to position it, chances are it won’t reach the ground and you’ll have to get under the car to look for it. The twine makes life a lot easier in that respect. Also, the twine has the added advantage of providing a better grip for pointy-nose pliers when maneuvering it into place. And contrary to what some people say, I found that this is not a feel-only operation - get lots of light down there. Loosely attaching only the housing top bolt will keep the housing in place while giving enough wiggle room to get the clip in place. Once the clip is in place, remove the bolt and check that the hose is firmly attached. Also check that the blue gasket is seated correctly in its groove before bolting on the housing (I failed to do this on my first pass). Finger tighten all three bold before tightening any of them any further.
Before re-attaching all hoses and wiring, if there is any coolant spillage, take time to dry off the engine with some kitchen roll. If you do have the misfortune of still having a leak when you test your work, it will make it much easier to diagnose. Also remember to monitor the bleed valve carefully when releasing air from the system. Once the air has gone this can spew fluid over the engine making any leak diagnosis more difficult.
I found this video helpful:
Having removed the housing I discovered a �” long hole in the longest (inlet?) section on the inside of the elbow (see photo). I saw this type of problem once before in a coffee machine boiler which was cast alloy. In general, flowing water containing particles/grit will erode the corners of its container. If the container is plastic rather than metal then it will happen all the sooner. My opinion is that the best way to ensure that plastic parts last as long as possible is to use quality coolant and perform occasional coolant flushes in order to remove any particles.
When disassembling everything, take frequent photos with a camera or cellphone. These can be very useful when you go to put things back together again.
You don't need to remove the front section of cool air duct. Mine has a plastic flange at the front which is very difficult to remove. Just remove the large plastic box that is the back section, and bend the flexible front duct out of the way. Use string to tie it back if necessary.
You don't need to remove the wiring harness. However you do need to remove the rectangular plastic wiring casing above the thermostat housing. With this off and some of the plugs unplugged, the harness can be moved out of the way.
Large vise grips can be used for releasing the hose clips, assuming the orientation of the clips is appropriate, as they all were for me.
When replacing the “V” hose clip, tie a piece of twine to the center of it. If you drop the clip while trying to position it, chances are it won’t reach the ground and you’ll have to get under the car to look for it. The twine makes life a lot easier in that respect. Also, the twine has the added advantage of providing a better grip for pointy-nose pliers when maneuvering it into place. And contrary to what some people say, I found that this is not a feel-only operation - get lots of light down there. Loosely attaching only the housing top bolt will keep the housing in place while giving enough wiggle room to get the clip in place. Once the clip is in place, remove the bolt and check that the hose is firmly attached. Also check that the blue gasket is seated correctly in its groove before bolting on the housing (I failed to do this on my first pass). Finger tighten all three bold before tightening any of them any further.
Before re-attaching all hoses and wiring, if there is any coolant spillage, take time to dry off the engine with some kitchen roll. If you do have the misfortune of still having a leak when you test your work, it will make it much easier to diagnose. Also remember to monitor the bleed valve carefully when releasing air from the system. Once the air has gone this can spew fluid over the engine making any leak diagnosis more difficult.
I found this video helpful:
Last edited by zimberto; 04-25-2015 at 11:06 AM.
#159
04-22-2015 | 01:56 PM

Neutral
Joined: Mar 2015
Posts: 9
Likes: 0
connected up my bluetooth obdII adaptor tonight and found code P0597 - which tells me there's a problem with my thermostat. although the error code shows up under a scan, the engine management light (or any other warning light) has come on. it was by chance that i saw the fault. don't know how long it's been like this.
i don't think i have a leak as my levels are staying the same.
1. should i just replace the whole thing, or could it be something else, like a sensor?
2. are all the sensors located inside the thermostat housing? (sorry, i know nothing of mechanics)
3. i read somewhere that someone hadn't connected up the second electrical terminal on the underside and this was causing the error code to persist. could it be that someone has replaced the thermostat on my mini and not done this (i only bought the car, privately, about 6 weeks ago.)
4. (sorry) if it's not leaking, is it still an urgent job?
many thanks indeed
EDIT: 5. what about just clearing the code and seeing if it comes back? or is this really bad practice?
6. if the engine managemnt light hasn't come on, but the fault is registering through obdII port, does that mean it's not as bad as if the EML did come on? (so sorry for the noob questions!!)
Last edited by reg66; 04-22-2015 at 02:05 PM.

#161
04-22-2015 | 07:44 PM

2nd Gear
Joined: May 2009
Posts: 122
Likes: 13
1. should i just replace the whole thing, or could it be something else, like a sensor?
4. (sorry) if it's not leaking, is it still an urgent job?
This P0597 code is for the thermostat stuck open. It is not an urgent job, just that the engine will not get up to proper operating temperature. The whole thing will eventually need replacing as the thermostat is embedded in the housing.
4. (sorry) if it's not leaking, is it still an urgent job?
This P0597 code is for the thermostat stuck open. It is not an urgent job, just that the engine will not get up to proper operating temperature. The whole thing will eventually need replacing as the thermostat is embedded in the housing.
#162
04-23-2015 | 08:48 AM
Neutral
Joined: Mar 2015
Posts: 9
Likes: 0
ok, thanks for the responses guys. sorry to hijack this thread instead of making my own. cheers again
EDIT: sorry, just one more post...
i've cleared the fault and been for a drive. the fault code hasn't come back. so, is it something that may take a week or so to show up again, or, could it be that it was an old fault code and the thermostat could have closed itself and be operating fine again? cheers
Last edited by reg66; 04-23-2015 at 09:31 AM.
#163
04-24-2015 | 09:58 AM
The temp sensor( at the top) on the thermostat for some years had an issue ( recall) for some of the 2012 models. If the thermostat does not have a crack and leaking, low on coolant and you are having a code, might want to check / swap that sensor.
__________________
MINI Guru/ MINI Owner Since 2004 | NEW Lifetime Part Replacement | Local Pickup
Milltek | Genuine MINI | Forge Motorsport | NM Engineering | ECS Performance | M7 Speed
Customer Service Hours: 8am-8pm EST|Sales Team Hours: 8am-11pm | SAT 10am-7pm 800.924.5172
MINI Guru/ MINI Owner Since 2004 | NEW Lifetime Part Replacement | Local Pickup
Milltek | Genuine MINI | Forge Motorsport | NM Engineering | ECS Performance | M7 Speed
Customer Service Hours: 8am-8pm EST|Sales Team Hours: 8am-11pm | SAT 10am-7pm 800.924.5172
#164
07-23-2015 | 08:32 PM
Neutral
Joined: Jul 2014
Posts: 9
Likes: 0
From: CR
Unknow sensor
Yesterday I finally replaced my thermostat (P0597 CEL), it was a little messy but almost everything went OK. My guide was the youtube tutorial:
The only problem I got was that I found a connector unplugged and I have no idea what it is or where its the other connector that it should be together. It looks that its been disconnected for some time (it was a little dirty inside).
So I was wondering maybe somebody that know this engines (N14) can help me to find out what it is and maybe from where it should comes the other cable that connects to it.
Thanks for you help!
Picture of the sensor (red circle):

So I was wondering maybe somebody that know this engines (N14) can help me to find out what it is and maybe from where it should comes the other cable that connects to it.
Thanks for you help!
Picture of the sensor (red circle):
#165
07-25-2015 | 05:10 PM
I don't believe there is a plug on that. I just did my thermostat today and that piece just clips for a secure hold. One thing that I did was I also removed the lower portion of the air box which made it a lot easier to see what I was doing for the hose going to the water pump. I have an intake on my car so it was only a few extra minutes to remove the entire thing.
I did notice some spillage after filling it back up and I'm hoping it was just from bleeding the system. I'll have to keep an eye on it.
Sent from my iPad using NAMotoring
I did notice some spillage after filling it back up and I'm hoping it was just from bleeding the system. I'll have to keep an eye on it.
Sent from my iPad using NAMotoring
#166
07-26-2015 | 03:25 PM
Update: I pulled the intake off again along with the air pipe feeding the lower air box. I cleaned the bit of coolant off the engine and got it nice and dry. I just went for a ride to fill the gas tank. Got the car up to normal operating temps and checked when I got back home. Still nice and dry! The coolant level stayed at the max level too. The spillage must've been from the bleeder. Sent from my iPad using NAMotoring
#167
07-28-2015 | 01:58 PM
Update: I pulled the intake off again along with the air pipe feeding the lower air box. I cleaned the bit of coolant off the engine and got it nice and dry. I just went for a ride to fill the gas tank. Got the car up to normal operating temps and checked when I got back home. Still nice and dry! The coolant level stayed at the max level too. The spillage must've been from the bleeder. Sent from my iPad using NAMotoring

__________________
MINI Guru/ MINI Owner Since 2004 | NEW Lifetime Part Replacement | Local Pickup
Milltek | Genuine MINI | Forge Motorsport | NM Engineering | ECS Performance | M7 Speed
Customer Service Hours: 8am-8pm EST|Sales Team Hours: 8am-11pm | SAT 10am-7pm 800.924.5172
MINI Guru/ MINI Owner Since 2004 | NEW Lifetime Part Replacement | Local Pickup
Milltek | Genuine MINI | Forge Motorsport | NM Engineering | ECS Performance | M7 Speed
Customer Service Hours: 8am-8pm EST|Sales Team Hours: 8am-11pm | SAT 10am-7pm 800.924.5172
#168
11-29-2015 | 09:43 PM

Neutral
Joined: Sep 2013
Posts: 6
Likes: 0
I did this repair this weekend and this tutorial was VERY helpful-- thank you!
A couple notes:
1. The flexible hose clamp pliers saved my bacon-- worth every penny and glad I have them in my tool box now for future projects!
2. My thermostat housing on my 2011 MCS was the original one (dated 4/11), and although I had lots of puddles under the car that appeared to originate from the thermostat housing, after removing it, I could not find any evidence of cracking-- doh!
I did however, find evidence of leaking from the temp switch in the cast aluminum elbow on the radiator hose. I pulled that out and it had a rock-hard green o-ring.
When I got the new thermostat housing the parts guys said that the new housing now had that switch in it and also sold me a new Y-harness to reroute the wiring to the thermostat housing-- making the switch in the aluminum elbow obsolete.
Since the source of the leaking appeared to come from the green o-ring, I needed to find a replacement-- and of course I had no luck from the local parts houses and the Mini dealer is 100 miles away, something had to be done as the car needed to be roadworthy for the week. I pulled the elbow, removed the obsolete switch, and put in a pipe plug to seal it...
So, my question is-- has the radiator hose been superseded with a new part number that elimiates the aluminum elbow?
The rest of the repair went easy, and it is nice that there is no longer puddles under the car-- I want to replace both radiator hoses though-- one to eliminate the now obsolete aluminum elbow, and one that had a nick in the hose where it was rubbing against something that looks like it is a disaster waiting to happen...
I can't find any posts on a new radiator hose part number-- any insight on this?
Michael
#169
12-01-2015 | 11:09 AM
Yes, There is a new Y harness for certain years and models. 17122754221 updated hose , which is used on other model outside the years.
__________________
MINI Guru/ MINI Owner Since 2004 | NEW Lifetime Part Replacement | Local Pickup
Milltek | Genuine MINI | Forge Motorsport | NM Engineering | ECS Performance | M7 Speed
Customer Service Hours: 8am-8pm EST|Sales Team Hours: 8am-11pm | SAT 10am-7pm 800.924.5172
MINI Guru/ MINI Owner Since 2004 | NEW Lifetime Part Replacement | Local Pickup
Milltek | Genuine MINI | Forge Motorsport | NM Engineering | ECS Performance | M7 Speed
Customer Service Hours: 8am-8pm EST|Sales Team Hours: 8am-11pm | SAT 10am-7pm 800.924.5172


#172
12-07-2015 | 06:09 AM
If its lost and gone, get the clip asap, you don't want a leak.
11537548652
__________________
MINI Guru/ MINI Owner Since 2004 | NEW Lifetime Part Replacement | Local Pickup
Milltek | Genuine MINI | Forge Motorsport | NM Engineering | ECS Performance | M7 Speed
Customer Service Hours: 8am-8pm EST|Sales Team Hours: 8am-11pm | SAT 10am-7pm 800.924.5172
MINI Guru/ MINI Owner Since 2004 | NEW Lifetime Part Replacement | Local Pickup
Milltek | Genuine MINI | Forge Motorsport | NM Engineering | ECS Performance | M7 Speed
Customer Service Hours: 8am-8pm EST|Sales Team Hours: 8am-11pm | SAT 10am-7pm 800.924.5172
#174
12-09-2015 | 05:57 AM
You are welcome.
__________________
MINI Guru/ MINI Owner Since 2004 | NEW Lifetime Part Replacement | Local Pickup
Milltek | Genuine MINI | Forge Motorsport | NM Engineering | ECS Performance | M7 Speed
Customer Service Hours: 8am-8pm EST|Sales Team Hours: 8am-11pm | SAT 10am-7pm 800.924.5172
MINI Guru/ MINI Owner Since 2004 | NEW Lifetime Part Replacement | Local Pickup
Milltek | Genuine MINI | Forge Motorsport | NM Engineering | ECS Performance | M7 Speed
Customer Service Hours: 8am-8pm EST|Sales Team Hours: 8am-11pm | SAT 10am-7pm 800.924.5172
#175
02-12-2016 | 12:53 PM

3rd Gear
Joined: Jun 2010
Posts: 212
Likes: 2
Just finished same T-stat replacement on my '08 MCCS with 48k miles on it. Noced a small, maybe Frisbee sized puddle on garage floor. Added small amount of coolant and next day about a half gallon had spread out on the floor. Thanks to this site for the hints and tricks. FWIW, since I couldn't wait around for shipping, a new T-stat at the local dealer was $178, with tax. Would have been well worth doing this in advance. on my own schedule and greatly reduced cost. I am going to go ahead and replace the overflow tank as a preventative.
I've replaced a lot of water pumps on other cars, and have always used a UVIEW 550000 Airlift purge and fill system. No bleeding, always a perfect fill, and MOST importantly, checks for leaks before and after repair effortlessly. Best $99 spent on an autotool, about 8 years ago, ever. Really surprised no one here mentioned one over the years!
I've replaced a lot of water pumps on other cars, and have always used a UVIEW 550000 Airlift purge and fill system. No bleeding, always a perfect fill, and MOST importantly, checks for leaks before and after repair effortlessly. Best $99 spent on an autotool, about 8 years ago, ever. Really surprised no one here mentioned one over the years!