
Interior/Exterior OutMotoring Tach Face - let there be light!
#1
 02-02-2008, 02:49 PM

OutMotoring Tach Face - let there be light!
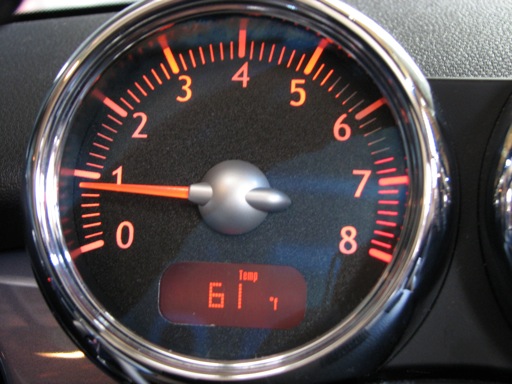
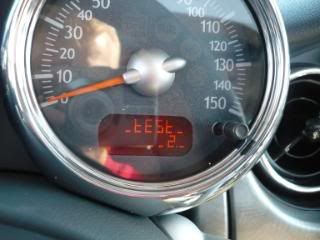
I've been running the OutMotoring gauge faces for a while, and love the look vs. the OEM gauge faces. But there’s one little quirk with them that’s been driving me nuts. There’s a section of the tachometer, between about 5300 and 6700 RPM, where the little hash marks don’t light up completely. Like this:
I never understood (or gave much thought to) the cause of this until I came across a thread on it yesterday. Turns out that the innards of the tach are shared with the diesel MINI - and thus there's some extra red LEDs in there for illuminating the much lower redline for that model. The internal partitions in the gauge to contain that extra red light in the proper area also end up blocking out the orange light from those hash marks on the OutMotoring face.
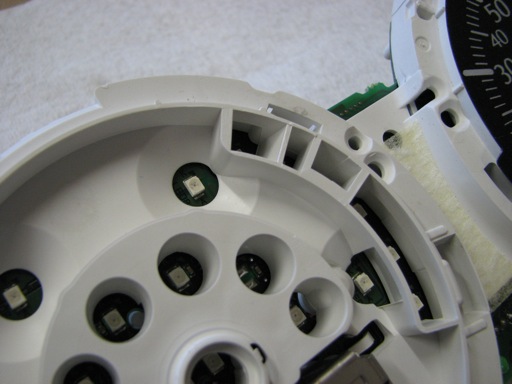
Since I never plan to convert Blimey to a diesel, those extra red LEDs will NEVER come on... so I decided to hack out the extra partitions and let the orange light shine!
Doesn't need to look pretty, because no one else will ever see it.
Oh carp, I guess all of YOU will see it now... Oh well...
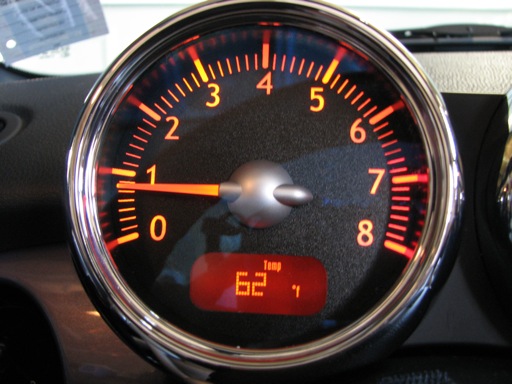
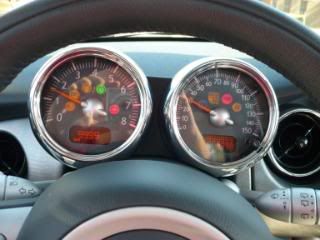
The results? Now it looks the way it should. The colors don't show well in the pix, but the redline area is red like it should be - and the rest is nice and orange!
More details of how I did it are on my blog.
I never understood (or gave much thought to) the cause of this until I came across a thread on it yesterday. Turns out that the innards of the tach are shared with the diesel MINI - and thus there's some extra red LEDs in there for illuminating the much lower redline for that model. The internal partitions in the gauge to contain that extra red light in the proper area also end up blocking out the orange light from those hash marks on the OutMotoring face.
Since I never plan to convert Blimey to a diesel, those extra red LEDs will NEVER come on... so I decided to hack out the extra partitions and let the orange light shine!
Doesn't need to look pretty, because no one else will ever see it.
Oh carp, I guess all of YOU will see it now... Oh well...
The results? Now it looks the way it should. The colors don't show well in the pix, but the redline area is red like it should be - and the rest is nice and orange!
More details of how I did it are on my blog.
Last edited by BlimeyCabrio; 02-28-2008 at 07:26 PM.
#2
02-02-2008, 03:26 PM

4th Gear
Join Date: Jul 2007
Location: Westminster, CO
Posts: 456
Likes: 0
Received 0 Likes
on
0 Posts
#3
02-02-2008, 03:48 PM
The stock faces don't have the "hash" marks between the 1000's like the OM faces do. You actually DO have hash marks in the area of the diesel redline - but they don't all light up (as they shouldn't).
#4
02-02-2008, 03:57 PM

5th Gear
#5
02-02-2008, 04:02 PM
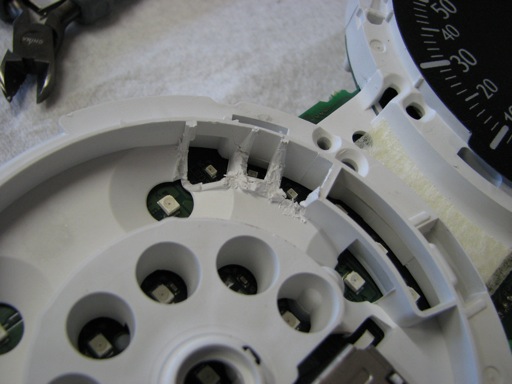
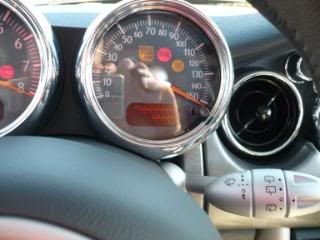
Update! After seeing it in the dark, I decided I could do better - so I trimmed a bit more aggressively and better exposed the area to the light from the "6000 RPM" LED.
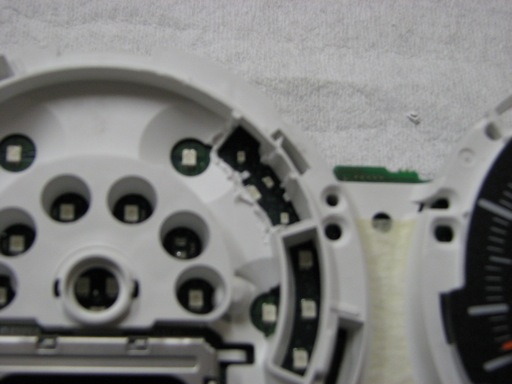
Sorry for the blurry pic, but you get the idea. Note that this involves cutting right up to the circuit board and VERY close to an LED that you care about... so you may want to remove the white bezel completely before attempting this... see the end of my blog post for more details. But now the light distribution under the face is PERFECT.
Sorry for the blurry pic, but you get the idea. Note that this involves cutting right up to the circuit board and VERY close to an LED that you care about... so you may want to remove the white bezel completely before attempting this... see the end of my blog post for more details. But now the light distribution under the face is PERFECT.
Last edited by BlimeyCabrio; 02-28-2008 at 05:51 AM.
#6
02-02-2008, 04:08 PM

The only issue with cutting the partitions is that you should make replacements if you restore the dial back to OEM.
#7
02-02-2008, 04:12 PM

But - if you really didn't want that, a couple of pieces of tape on the back of the OEM face would to the trick - you wouldn't have to rebuild the partitions...
Last edited by BlimeyCabrio; 02-02-2008 at 06:36 PM.
Trending Topics
#9
02-04-2008, 05:43 AM

4th Gear
Join Date: Aug 2006
Location: Cincinnati Ohio area
Posts: 411
Likes: 0
Received 0 Likes
on
0 Posts

#10
02-04-2008, 06:27 AM
4th Gear
Join Date: Jul 2007
Location: Westminster, CO
Posts: 456
Likes: 0
Received 0 Likes
on
0 Posts
#11
02-04-2008, 09:39 AM
Great question... I checked my blog and don't have any pics there - I'll take one tonight and post.
My opinion - the dark OutMotoring faces look great, but they make the Chrono Pack look "less great"... My OM faces almost exactly match the CP fuel gauge - so there's some continuity there... and the fact that the CP mixes black and silver gauge faces already makes it non-obvious to the average observer that something's going on here... the only thing that really bugs me about the CP now is the silver area AROUND the gauges, and the black spots for the indicator lights (which went away on my tach and speedo, thank the Lord).
I'm working with Lyle (lylesvinylstyles) and he's going to attempt to "wrap" the outer area of the CP face with some vinyl to match the fuel gauge, with holes for the indicators. Won't be perfect, but I think it will be better, as long as he can make it work out and get it down in the crevices, etc...
Otherwise I've even considered painting the outer areas of the CP face... but would be tricky. The fuel gauge and the chrome ring are actual plastic-welded through the main molded part of the face - so it's non-trivial to take it apart and put it back together... and since you can't buy it as a separate part, screwing it up is about a $600 mistake...
But, if the choice is stock faces all around, or the black/gray OM faces on the tach and speedo only, I'd take the latter every time... Not for one second have I looked at it and said "Ewww, I liked it better the old way"...

#13
02-08-2008, 09:46 AM
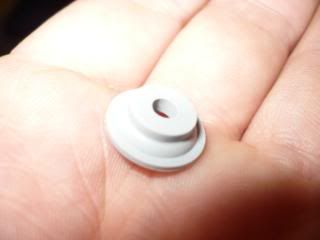
A quick note to anyone who removes the white panel to trim away for better LED illumination (like I just did). Beneath the trip odometer reset button there's a little rubber boot like thing that will fall off the circuit board. Be careful about this as I nearly lost mine. I'll have pics up a little later.
#14
02-08-2008, 09:53 AM

6th Gear
Join Date: Aug 2007
Location: Orange County, NY
Posts: 4,398
Likes: 0
Received 0 Likes
on
0 Posts
#15
02-08-2008, 10:07 AM
#16
02-08-2008, 10:08 AM
A quick note to anyone who removes the white panel to trim away for better LED illumination (like I just did). Beneath the trip odometer reset button there's a little rubber boot like thing that will fall off the circuit board. Be careful about this as I nearly lost mine. I'll have pics up a little later.
#17
02-08-2008, 11:16 AM
The Boot: (it's really hard to photograph):
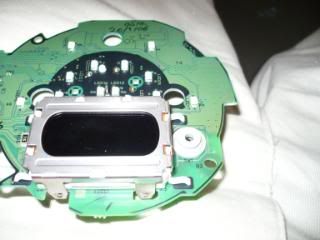
Where it sits on the circuit board to the right of the LCD:
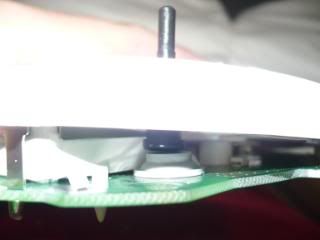
How the button stalk interacts with the boot:
Another thing I found, it's really important to get the needles lined up properly. When you plug the gauges in they adjust a little bit and I kept getting my speedometer 1mph off (picky, I know) and the tack a bit off. I wound up trying a few times to get it just right. I ended the install by doing a gauge test (diagnostic test #2 once you're into that function, search how to reset the oil service indicator and you'll figure out how to do this test) to make sure I hadn't damaged any LEDs, or done something else wrong. All the lights come on (including the unused red LEDs for the diesel redline and the gauges sweep from 0-8000rpm and 0-150mph.
Where it sits on the circuit board to the right of the LCD:
How the button stalk interacts with the boot:
Another thing I found, it's really important to get the needles lined up properly. When you plug the gauges in they adjust a little bit and I kept getting my speedometer 1mph off (picky, I know) and the tack a bit off. I wound up trying a few times to get it just right. I ended the install by doing a gauge test (diagnostic test #2 once you're into that function, search how to reset the oil service indicator and you'll figure out how to do this test) to make sure I hadn't damaged any LEDs, or done something else wrong. All the lights come on (including the unused red LEDs for the diesel redline and the gauges sweep from 0-8000rpm and 0-150mph.
#18
02-08-2008, 01:26 PM

Thread
Thread Starter
Forum
Replies
Last Post
finn
R50/R53 :: Hatch Talk (2002-2006)
1
08-21-2015 07:59 AM