
Interior/Exterior Woodgrain Vinyl Dash
#1
 06-06-2010, 01:54 PM


Woodgrain Vinyl Dash
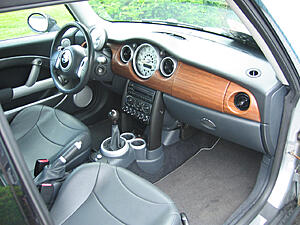
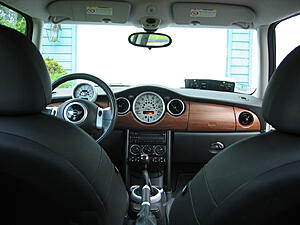
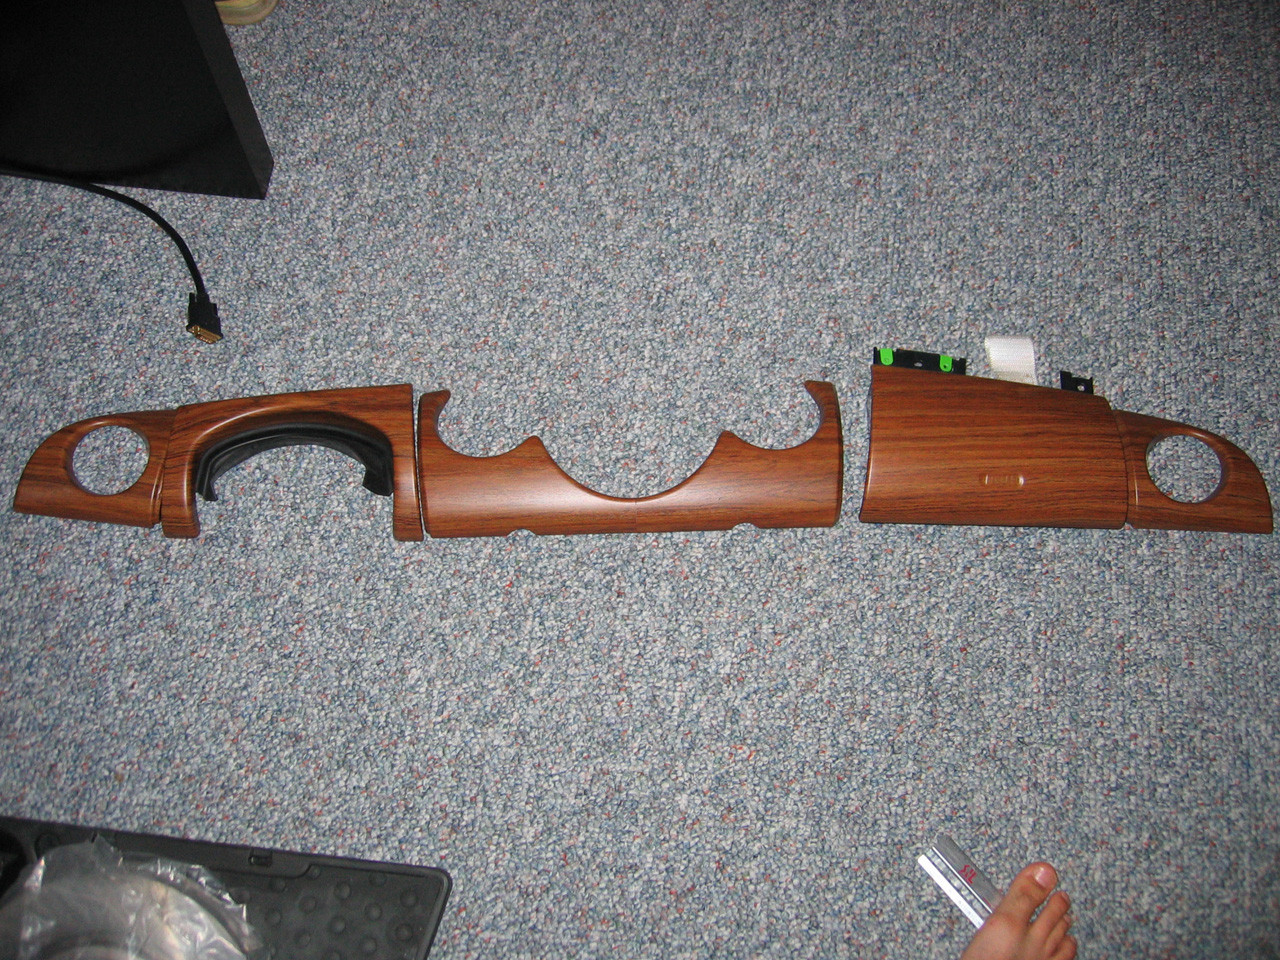
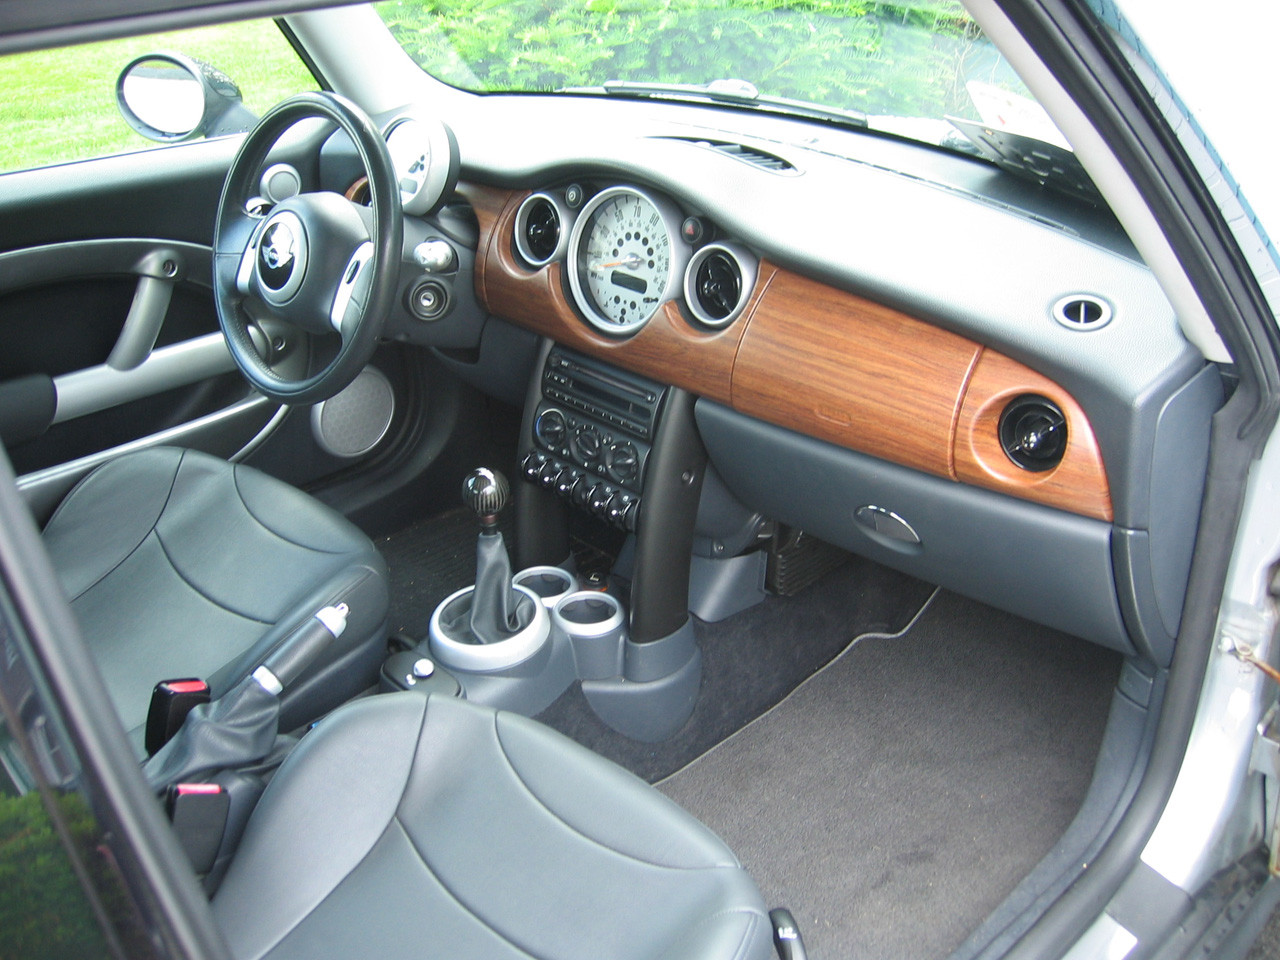
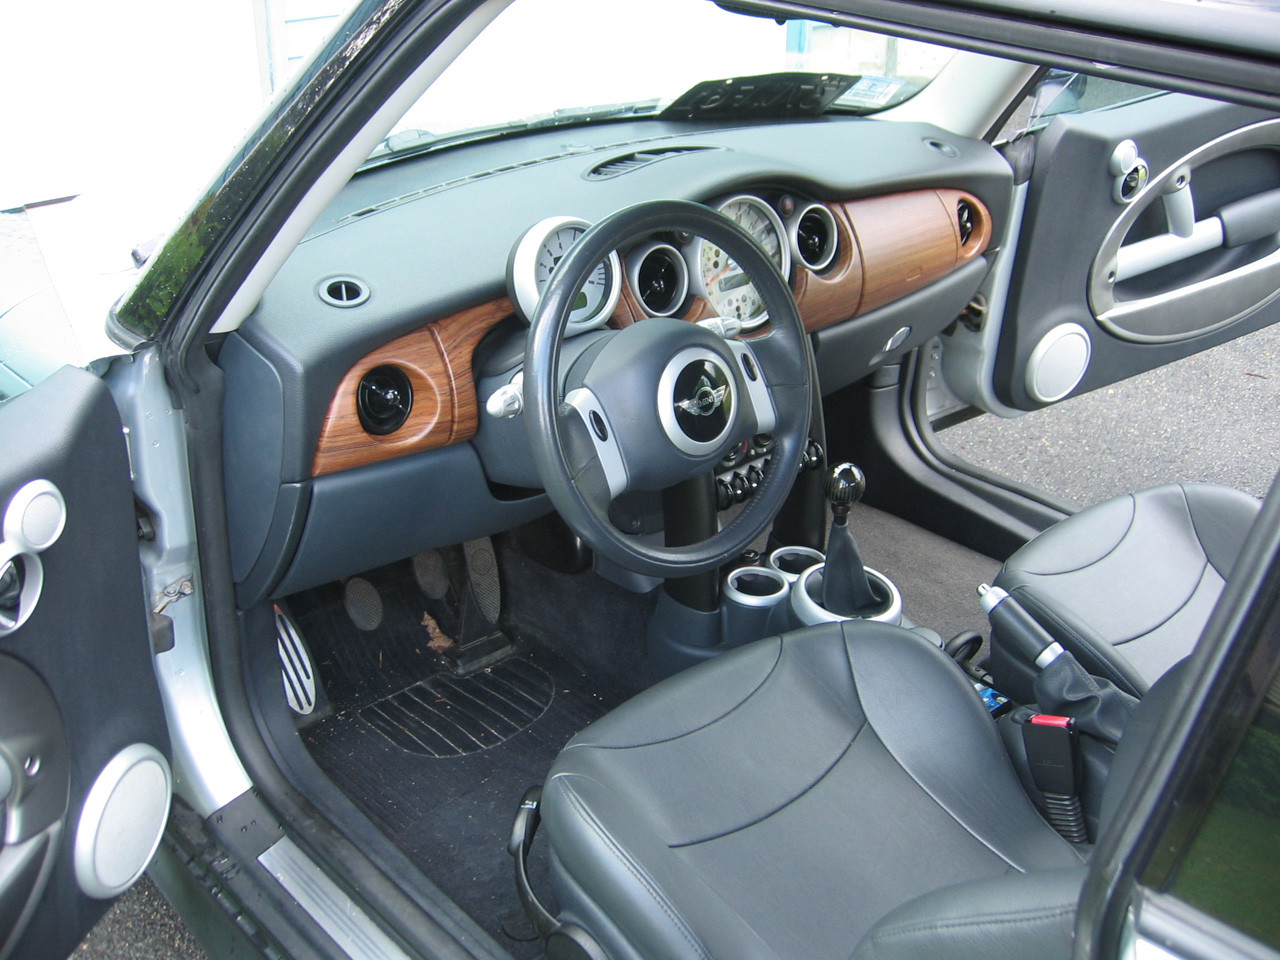
I decided to go a different route from the CF vinyl and wrapped my dash in woodgrain instead. I used a 12x48 strip of 3M Di-Noc Marine Teak Woodgrain Vinyl. This was just enough to do all 5 pieces. I also Plastidip'd my downtubes, but I am undecided on how it looks.
What do you all think?

The airbag cover was crooked in this picture, but I peeled it back up and reapplied it straight.


What do you all think?

The airbag cover was crooked in this picture, but I peeled it back up and reapplied it straight.


#4
06-06-2010, 04:19 PM

5th Gear
i hope you put some extra adhesive in the airvent region.. or super glue (what i did) first good summer heat and it all starts to try and shrink back. and it WILL pull the paint off the dash pieces. so you really need to strip your dash of the painted coating before doing any vinyl wrapping of it... i learned the hard way. next time ill be doing either solver or white cf vinyl :P
#5
06-06-2010, 04:28 PM


#7
06-06-2010, 05:21 PM
i hope you put some extra adhesive in the airvent region.. or super glue (what i did) first good summer heat and it all starts to try and shrink back. and it WILL pull the paint off the dash pieces. so you really need to strip your dash of the painted coating before doing any vinyl wrapping of it... i learned the hard way. next time ill be doing either solver or white cf vinyl :P
Trending Topics
#8
06-06-2010, 05:41 PM
5th Gear
oh good sir.. so did I.. so did I.... it didnt come unwrapped, thats not the problem. it started off with just my driver side air vent doing this, but by mid-may both were doing it, so i ended up taking off the dash and getting to the areas that were coming up, putting a dab of super glue there, mushed it around to even it out, opened it up to let the chemical reaction start then sealed it (wear gloves if you do do this eventually.. i didn't and had super glue fingers for like a week...) wow ADHD kicked in sorry... anyways what happened to me is the vinly tried to go back to its orriginal shape, and since the air vent hole has differing depths to it im sure you had to do what i did and the vinly is not evenly stretched down the hole, btu rather stretched so you could get it through, then cut in several places and pulled over the back. well on mine the vinyl peeled the paint off on the walls of the vent hold and while remaining attached to the backside of the dash created air pockets so instead of the hole begin a O at the opening and an O halfway through and then an O at the back it went to begin an O front , D middle O back. (imagine it in your head... i know its a crude explanation, but its the first thing that came to me as how to describe it..)


#11
06-01-2015, 08:46 AM

Fantastic Work
This looks amazing, you did a very nice job! I have fumbled around with covering the panels in leather, vinyl, and subsequently went back to just spray painting them.
I have read a lot about Di-Noc and I think it's the perfect solution for my R52..I will be trying this!
Any tips for working around the circular air vents, those seem to give me the most trouble?
Love the wood look, but not worth the $350 for OEM replacement panels.
I have read a lot about Di-Noc and I think it's the perfect solution for my R52..I will be trying this!
Any tips for working around the circular air vents, those seem to give me the most trouble?
Love the wood look, but not worth the $350 for OEM replacement panels.

Thread
Thread Starter
Forum
Replies
Last Post
ECSTuning
Interior/Exterior Products
0
10-01-2015 12:34 PM
ECSTuning
Vendor Classifieds
0
10-01-2015 12:34 PM
ECSTuning
Interior/Exterior Products
0
10-01-2015 12:28 PM
ECSTuning
Vendor Classifieds
0
10-01-2015 12:28 PM
ECSTuning
Vendor Announcements
0
10-01-2015 12:13 PM