
Interior/Exterior Tips on De-Chroming
#1
 07-25-2010 | 01:43 PM

Thread Starter
|
2nd Gear
Joined: May 2010
Posts: 134
Likes: 4
From: St Augustine FL
Tips on De-Chroming
Hello All,
I have an 06 MCS and I've been looking into products to de-chrome it. I had found some products on Outmotoring, but wasn't too sure on how they are (I've been told as long as you prep you'll be fine). EX - http://www.outmotoring.com/mini-coop...tline-kit.html -- one of the products I was looking at.
I just found another thread about someone "plastic - dipping" all their chrome. I was wondering opinions on the matter.... tint or plastic dip? I am a "noob" to all of this and want as much advice as I can get before wasting time and money on products that may not work, or I may not be happy with.
Also, would plastic dip work on trim pieces..?
Here is my baby that I picked up 3 weeks ago...


Thanks in advance
I have an 06 MCS and I've been looking into products to de-chrome it. I had found some products on Outmotoring, but wasn't too sure on how they are (I've been told as long as you prep you'll be fine). EX - http://www.outmotoring.com/mini-coop...tline-kit.html -- one of the products I was looking at.
I just found another thread about someone "plastic - dipping" all their chrome. I was wondering opinions on the matter.... tint or plastic dip?
I am a "noob" to all of this and want as much advice as I can get before wasting time and money on products that may not work, or I may not be happy with.Also, would plastic dip work on trim pieces..?
Here is my baby that I picked up 3 weeks ago...
Thanks in advance
#2
07-25-2010 | 02:57 PM

5th Gear
Joined: Mar 2007
Posts: 880
Likes: 56
From: Qu�bec, Canada
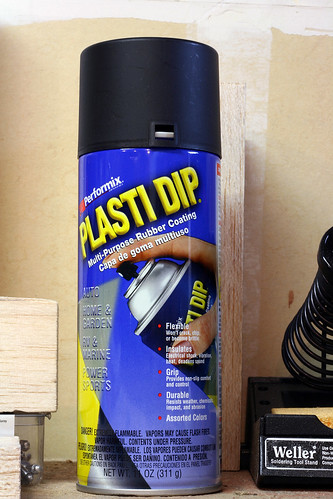
Plastidip is a ''rubber'' stuff that comes in spray cans! It's like paint, but you can remove it quite easily (if you ever want to go back to stock!) I did my gas cap, my side scuttles, mirrors and my lower grill on my car! It looks like it's plastic, so it match the archs pretty good!
To give an idea:

To give an idea:
#3
07-25-2010 | 03:01 PM
I just blacked out most of my chrome. I took off my grills and plasti-diped them. Its just like spray paint but with a matte finish. looks very similar to the black trim around your car. Just clean it before spraying and give it some time to dry before you mess with it.
The black out beltline kit is one of the best mods i think you can do. Its so subtle but it really lowers the look of a mini. I just used 3m black electrical tape. Some is coming off and it left some residue behind. I think the Outmotoring kit would be worth it because I have heard it doesnt leave crap behind.
I hope you have as much fun as I did this weekend!
(be careful because when you have a can of plastidip, you can get carried away. Soon you will have a black car. lol)
#4
07-25-2010 | 03:17 PM
5th Gear
Joined: Mar 2007
Posts: 880
Likes: 56
From: Qu�bec, Canada
Like AggieMini11 said you must clean the parts you're painting, like anything you paint in fact :p! Alcohol can do the trick!


#6
07-25-2010 | 03:54 PM
LOL ~ I told ya you'd be headed down that road 
Before buying Aesthetic Creations molder overlays, I had PD'd door handles and gas cap. The PD lasted a long time and had a very nice finish. When painting, you have to remember that the PD will attach itself to the tape used to mask off not to be painted. Using a razor blade can help with tape removal. With doorhandles painted while still on car, it is important to get around the back side of the handle is so peeling is not an issue. And unlike paint, cannot apply in the sun. 3-4 light coats works best, and following the cans directions for the proper wait time between coats.
If nothing else, PD gives you time to decide if you like the look or not before either using real trim paint or going A/C route.
Found at any Home Depot store in the tool section.
#7
07-25-2010 | 04:44 PM
Thread Starter
|
2nd Gear
Joined: May 2010
Posts: 134
Likes: 4
From: St Augustine FL

This looks great! You already doing the trim helps me out too b/c mine is somewhat faded and needs to be freshened up a bit. Also the gas cap looks nice too, I was curious to see how that would look. Thank you!
LOL it definitely has! The grill would look great like this - I was thinking about the headlight surrounds as well and not the scoop (not sure the term) in the middle though... but basically everything else. The beltline, handles, headlight surround, the S emblem on the side w/the turns as well as the gascap.
yeah... it's honestly the first thing I said when I brought her home... that she was getting de-chromed THANK YOU SSOOOO much for all these tips, they will really help me out. Any idea how much a can is? I won't be able to do it right away (at least I don't think) but I will sure as hell try
 I will definitely post pics up of before and after this. I'm glad I asked about this b/c I really didn't know how well this stuff was. I read in some places people really liked it, but I honestly had to ask for myself
Trending Topics
#9
07-25-2010 | 04:55 PM

1st Gear
Joined: Apr 2010
Posts: 47
Likes: 0
From: Western New York
Hi, I have completed my blackout project, but don't have any photos yet. I used 3M electrical tape on the belt-line and PlastiDip on the headlight and taillight rings, the upper and lower grill surrounds, side scuttles and gas cap. I bought the plastic covers from Aesthetic Creations for the door handles and front/rear MINI logos. I'd like to paint the scoop black too (I think) but would prefer a glossier finish to match bonnet stripes. PlastiDip black is matte (non-shiny) finish.
The only remaining chrome left on my car is the Cooper "badge" (which I'll probably remove/"debadge" one of these days) and small chrome hub caps on my black wheels.
As others have said, start with the PlastiDip. It's the easiest way to decide how permanent you want to make your mods. BTW, 3 coats minimum on the PlastiDip, and make sure you're in a well ventilated area when you spray ... it's pretty nasty smelling until it dries.
Good luck!!
#10
07-25-2010 | 05:06 PM
1st Gear
Joined: Apr 2010
Posts: 47
Likes: 0
From: Western New York
Sorry to jump in, but my blacked out scuttles also have the red S showing. It took about 2 minutes per side to mask off the S with tape before I sprayed on the PlastiDip (I removed the scuttles from the car first). I think it looks cool, and well worth the small effort.
#11
07-25-2010 | 05:15 PM

#14
07-25-2010 | 06:07 PM
5th Gear
Joined: Mar 2007
Posts: 880
Likes: 56
From: Qu�bec, Canada

#15
07-26-2010 | 10:05 PM
Thread Starter
|
2nd Gear
Joined: May 2010
Posts: 134
Likes: 4
From: St Augustine FL
Thank you for the tip as well. Talking about all this with my b/f he told me it doesn't smell nice. He's worked with it before but has been some time... so this should be fun for both of us. Luckily we have a garage full of VW scrap parts that I should be able to practice on As far as taking off the scuttles, I was looking at them earlier and I imagine you have to get in there somehow... but I really don't know how. I'm honestly used to VW and how easy they are to take apart and put back together... I've had 2 and my b/f has had 3... he currently has an '82 rabbit that is totally customed (it's great for anyone to look at honestly -- a LOT of hours into that puppy). But going from early VW's to this... is another world and honestly I don't want to mess anything up I would be pretty mad if I did. So any advice on taking things apart and putting them back together without breaking clips is welcome!! 
Thank you for the pic as well -- it looks good (i think)
It's been thrown around the VW scene a lot...I also had some questions about the Plastidip... Firstly - does it leave a somewhat tacky residue afterwards? My b/f is concerned about this b/c when he used it before the item he painted was a little tacky. Also for on the chrome, how would I go about removing it if I don't like it? Would it damage the chrome at all? ... I had some other questions as well - but I can't recall them now.
Again TY all for all the advice
#17
07-27-2010 | 08:07 AM

5th Gear
Joined: Aug 2008
Posts: 1,100
Likes: 12
From: Inman, SC
big diy'er here. i suggest a joey mod, its one of my favorite things, especially on a car your color.
i want it so bad im debating doing it on my 03 xenons (its a much different task, where for your headlights you take them off the car, pop them in an oven and use a screwdriver to pry the lenses off, im looking at taking a dremmel tool, actually cutting the headlights open, painting th parts, then sealing it back together with silicone, fiberglass tape, and resin/epoxy.
once you do a few things diy, confidence builds a ton.
#18
07-27-2010 | 08:16 AM
Thread Starter
|
2nd Gear
Joined: May 2010
Posts: 134
Likes: 4
From: St Augustine FL
Thank you though - I have checked out both places and if I turn out to suck at it - I know where to get parts
#19
07-27-2010 | 08:18 AM
Thread Starter
|
2nd Gear
Joined: May 2010
Posts: 134
Likes: 4
From: St Augustine FL
big diy'er here. i suggest a joey mod, its one of my favorite things, especially on a car your color.
i want it so bad im debating doing it on my 03 xenons (its a much different task, where for your headlights you take them off the car, pop them in an oven and use a screwdriver to pry the lenses off, im looking at taking a dremmel tool, actually cutting the headlights open, painting th parts, then sealing it back together with silicone, fiberglass tape, and resin/epoxy.
once you do a few things diy, confidence builds a ton.
i want it so bad im debating doing it on my 03 xenons (its a much different task, where for your headlights you take them off the car, pop them in an oven and use a screwdriver to pry the lenses off, im looking at taking a dremmel tool, actually cutting the headlights open, painting th parts, then sealing it back together with silicone, fiberglass tape, and resin/epoxy.
once you do a few things diy, confidence builds a ton.
LMK how it works for you -- definitely post pics before and after

#22
07-28-2010 | 12:53 AM

2nd Gear
Joined: Feb 2010
Posts: 85
Likes: 0
From: Ashburn, Virginia
#23
07-29-2010 | 04:05 PM
Thread Starter
|
2nd Gear
Joined: May 2010
Posts: 134
Likes: 4
From: St Augustine FL
#24
08-03-2010 | 04:55 PM
Thread Starter
|
2nd Gear
Joined: May 2010
Posts: 134
Likes: 4
From: St Augustine FL
So I'd like to thank everyone for all your great advice. Thankfully I didn't do the project yet, I am going to take the car back to the dealer. It is a good thing. I will have another mini in the future and I will keep all my project stuff for that one
It's a long story as to why I'm taking it back. But fortunetly I will benefit from miss Seven being returned. There were complications with the loan that I thought I was approved for, only to find out b/c the dealer was that shady I actually wasn't. So it's sad I won't have a mini for a little, but I will find another one - and when I do I'll post it up
It's a long story as to why I'm taking it back. But fortunetly I will benefit from miss Seven being returned. There were complications with the loan that I thought I was approved for, only to find out b/c the dealer was that shady I actually wasn't. So it's sad I won't have a mini for a little, but I will find another one - and when I do I'll post it up