
Interior/Exterior 2005 Headlight Retro Fit: Morimoto Mini H1's
#1
 08-10-2011, 10:01 AM


2005 Headlight Retro Fit: Morimoto Mini H1's
So I thought I would go ahead and start this thread here as well. I have also posted it on HIDplanet. I was sick of the poor lighting that our cars produced so I decided to do something about it. The OEM xenon's are not acceptable either. The beam pattern is horrible and they are outrageously expensive. I decided to go with the regular headlight housing from a 2006 and modify it to fit the projectors. I didn�t want to cut the back of the reflector but there was no choice.
Protip: To open the headlights, use a heat gun to heat the BLACK housing. DO NOT HEAT THE LENS. From there, you can hold the black housing and push down with a flat head screwdriver on the lens. It will separate and it will not mare and cut up your housing. The key here is not heating the lens or it will warp and with the force from the screwdriver deform your lens.
Protip II: 2002-2004 are horrible to open, skip them and go with a 2005-2006 headlight.
Projector kit purchased from:
http://www.theretrofitsource.com/pro...v4sdu35bb570ob
Background:
2002 R53 Mini Cooper S
2006 Facelifted headlights
Morimoto Mini H1 projectors
Morimoto 3Five 4.3k H1 bulbs
Morimoto 3Five 35W ballast
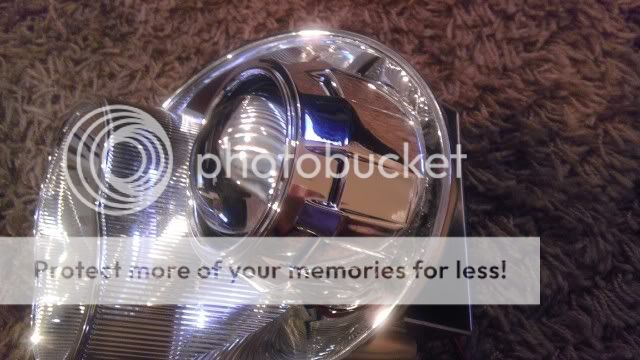
I first mounted the projector and found problems:
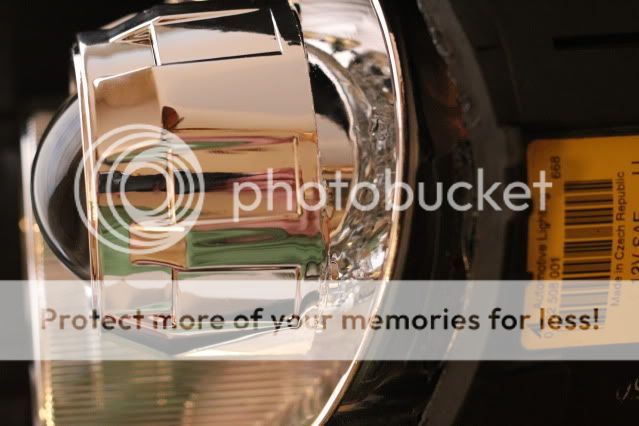

You can see how far it sits and there is interference with the lens. Here is a reference of the stock xenon and how far it sits back:
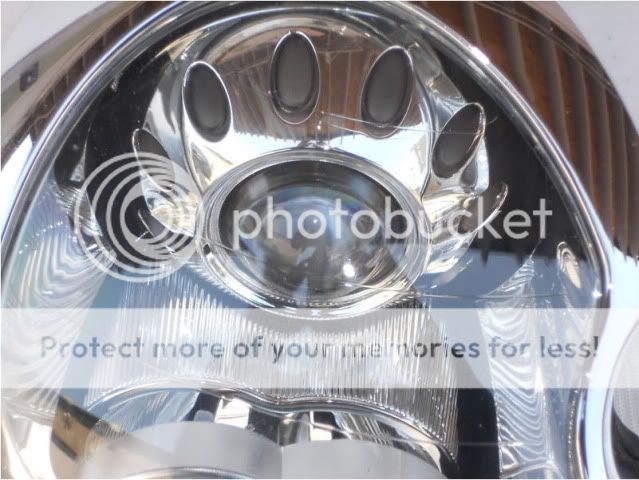
Where mine sits:
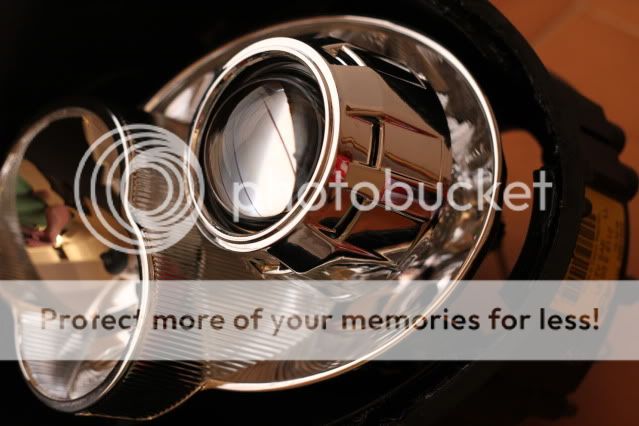
So as you can see, a cut to the reflector had to happen.
Here is the cut to the reflector:
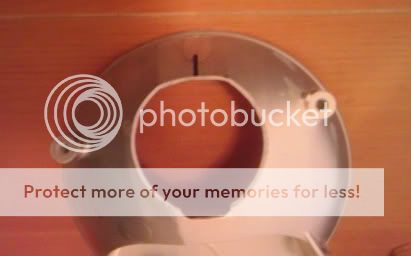
After pitching around a couple of ideas I decided to go with this:
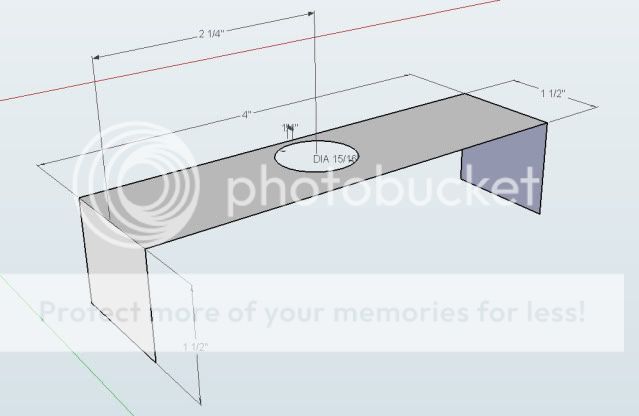
I wanted to be flexible and be able to remove it and still provide a good mounting point. Pitched around the idea on doing a 2'' PVC threaded cap but it was going to have to be jb welded and would rather not do that.
Here are the brackets. They still need to be modified a little:
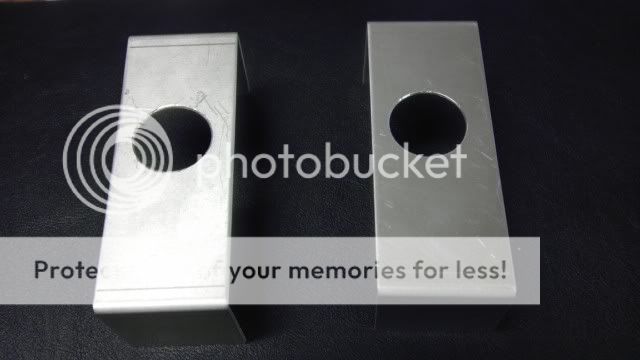
Here is the new locations. You can notice how much further they sit back:
Back of bracket:
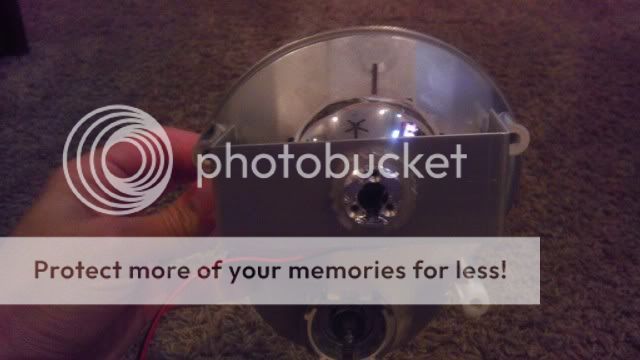
You can still see I need to modify the bracket to make it level and also trim the reflector to pull the projector back a little further:

Front shot:
I have the mini Gatling gun shrouds but I am thinking of using the MC-R shrouds. The only problem is that there is going to be A LOT of trimming on these. If anyone has a trashed xenon headlight and could let me borrow a shroud so I could use it as template and make the cutting much easier. I would pay shipping back and forth and your shroud would not be damaged.
I will continue to update this thread as things progress. Any comments are welcome.
Also, I would like to give a big thank you to Matt at www.theretrofitsource.com for providing information and going above and beyond. If you guys want to do a group buy, I could probably talk to Matt about it.
Protip: To open the headlights, use a heat gun to heat the BLACK housing. DO NOT HEAT THE LENS. From there, you can hold the black housing and push down with a flat head screwdriver on the lens. It will separate and it will not mare and cut up your housing. The key here is not heating the lens or it will warp and with the force from the screwdriver deform your lens.
Protip II: 2002-2004 are horrible to open, skip them and go with a 2005-2006 headlight.
Projector kit purchased from:
http://www.theretrofitsource.com/pro...v4sdu35bb570ob
Background:
2002 R53 Mini Cooper S
2006 Facelifted headlights
Morimoto Mini H1 projectors
Morimoto 3Five 4.3k H1 bulbs
Morimoto 3Five 35W ballast
I first mounted the projector and found problems:
You can see how far it sits and there is interference with the lens. Here is a reference of the stock xenon and how far it sits back:
Where mine sits:
So as you can see, a cut to the reflector had to happen.
Here is the cut to the reflector:
After pitching around a couple of ideas I decided to go with this:
I wanted to be flexible and be able to remove it and still provide a good mounting point. Pitched around the idea on doing a 2'' PVC threaded cap but it was going to have to be jb welded and would rather not do that.
Here are the brackets. They still need to be modified a little:
Here is the new locations. You can notice how much further they sit back:
Back of bracket:
You can still see I need to modify the bracket to make it level and also trim the reflector to pull the projector back a little further:
Front shot:
I have the mini Gatling gun shrouds but I am thinking of using the MC-R shrouds. The only problem is that there is going to be A LOT of trimming on these. If anyone has a trashed xenon headlight and could let me borrow a shroud so I could use it as template and make the cutting much easier. I would pay shipping back and forth and your shroud would not be damaged.
I will continue to update this thread as things progress. Any comments are welcome.
Also, I would like to give a big thank you to Matt at www.theretrofitsource.com for providing information and going above and beyond. If you guys want to do a group buy, I could probably talk to Matt about it.
#5
09-15-2011, 08:56 PM
Hey thanks. I should have one side done tomorrow'ish. I'm going to open up the other light tomorrow and record it so others can see how easy it actually is. I fitted the headlight in the car tonight and it looks amazing. Can't wait.
#6
09-16-2011, 03:59 PM

#7
09-16-2011, 08:49 PM
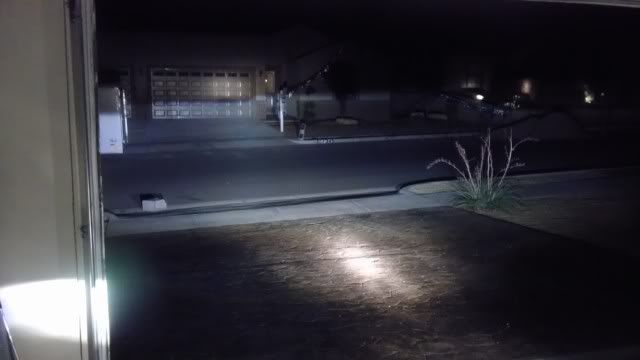
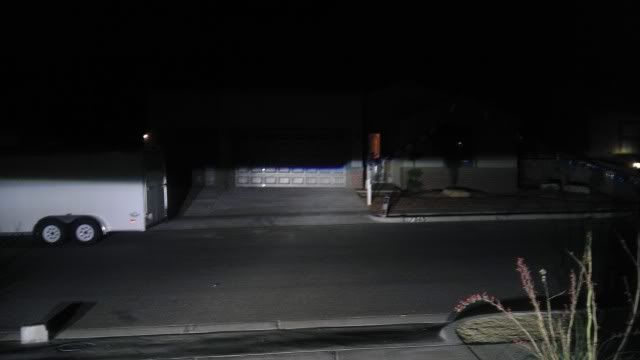
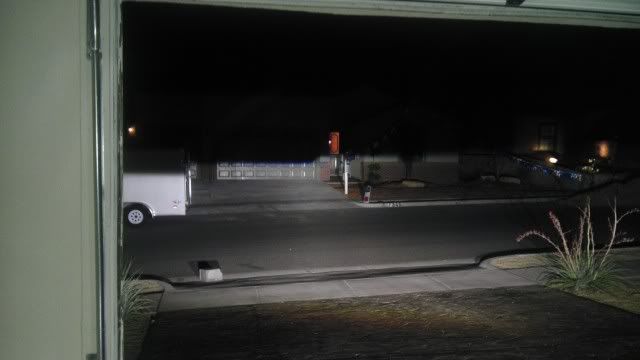
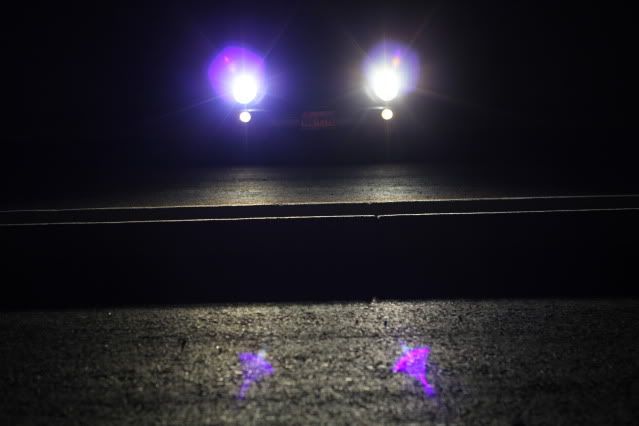
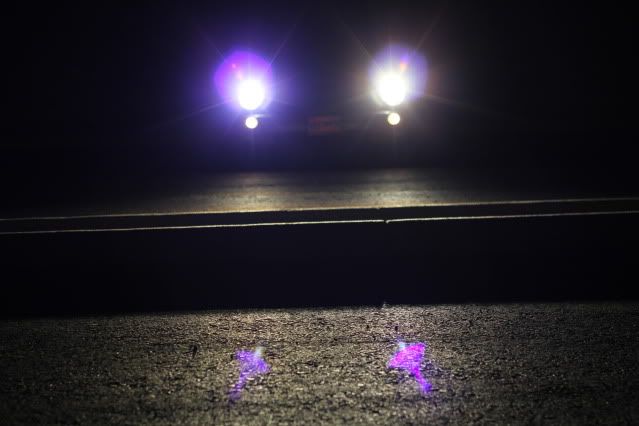
This about 35-40+ feet on neighbors house (no one lives there). I think it is a little high but i am maxed out on lowering it.
http://www.youtube.com/watch?v=RdVbsDerSkM
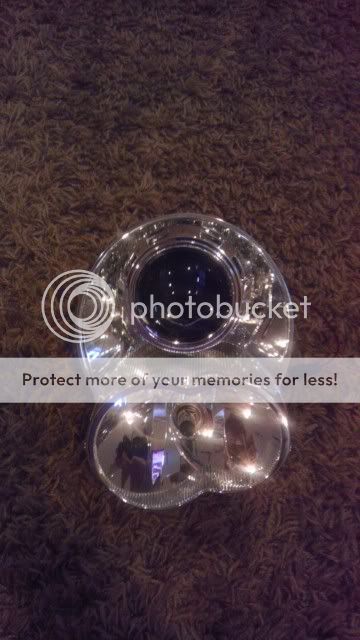
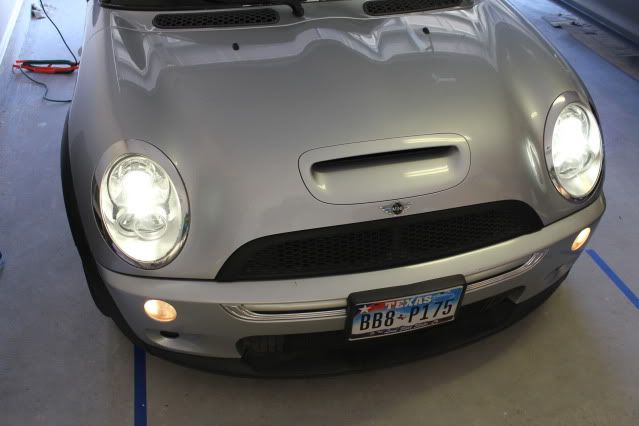
Here is the embarrassing photo:
The rest:
I don't think there is any way you will fit the TSX in there. I had a set of TSX and they looked HUGE to fit in your headlights. Honestly, I would pay someone $300 to do the install for just labor. In the end, it's worth every penny. I learned from my mistake for sure on the high beams. I'm just going to hook up the bi xenon and rely on them for my high beams.
http://www.youtube.com/watch?v=RdVbsDerSkM
Here is the embarrassing photo:
The rest:
I don't think there is any way you will fit the TSX in there. I had a set of TSX and they looked HUGE to fit in your headlights. Honestly, I would pay someone $300 to do the install for just labor. In the end, it's worth every penny. I learned from my mistake for sure on the high beams. I'm just going to hook up the bi xenon and rely on them for my high beams.
Trending Topics


#10
09-20-2011, 07:08 AM
http://www.hidplanet.com/forums/show...roup-Buy/page7
Lessons Learned:
Make sure to adjust and tape out your current beam pattern on your high beams. I put the headlight in without the lens and "tacked" on the projector with JB Weld and made sure it was level. The part I forgot was not leveling and aligning the high beam on the passenger side.
#12
09-21-2011, 11:53 AM
the only problem i see electrically with the harness is that I am going to have to extend a wire or two. Shouldn't be a big deal.
#13
09-21-2011, 09:29 PM

4th Gear
 Glad you were able to make it work.
#14
09-22-2011, 06:45 AM
About the wiring, the TRS seems to have everything needed. I plugged everything in and worked flawless. No errors, no anything. It has the correct connections. Like mentioned before, it is going to be a pain extending and running the harness though but I think I'm going to do it under the fire mat. I just hope I can find a place for the relays. Should have everything completely buttoned up as soon as I get the other projector.
#15
09-22-2011, 04:43 PM
4th Gear
I forgot you used a complete TRS kit ... I'm trying to use the OEM ballasts/ignitors. :( I didn't see a need to reinvent the wheel ... But I'm thinking I'm going to go with 55W ballasts just to make everything easier.
Could you do us a favor and show us how you did the wiring? Wires and I don't get along very well, lol.
Could you do us a favor and show us how you did the wiring? Wires and I don't get along very well, lol.
#16
09-22-2011, 10:21 PM
I forgot you used a complete TRS kit ... I'm trying to use the OEM ballasts/ignitors. :( I didn't see a need to reinvent the wheel ... But I'm thinking I'm going to go with 55W ballasts just to make everything easier.
Could you do us a favor and show us how you did the wiring? Wires and I don't get along very well, lol.
Could you do us a favor and show us how you did the wiring? Wires and I don't get along very well, lol.
#17
09-23-2011, 08:34 PM
So i went out to look to see what I am going to do with this harness and found some good news. Looks like I will only have to lengthen the positive cable. The rest will be able to be routed. What I will have to do is remove the engine fire retardant blanket and run and mount the relays to the supports. Not that big of a deal. Actually relieved I wasn't going to have to lengthen all wires. I guess my biggest problem is the bolt that has the positive feed is seized. I have put PB blaster on it and let it so and the thing isn't moving. Any suggestions?
#18
09-24-2011, 04:13 PM
alright, so here it is, all buttoned up. I took pictures of the wiring as requested:
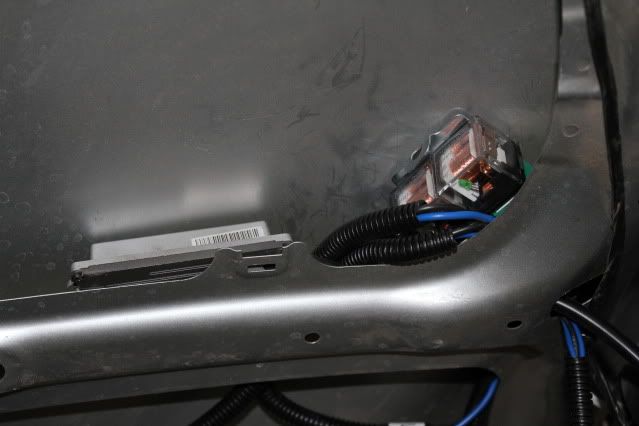
Ballast and relayes "mounted" (with double sided tape) on driver side:
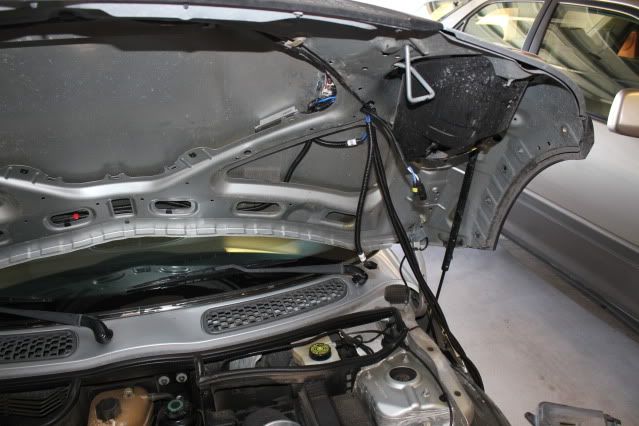
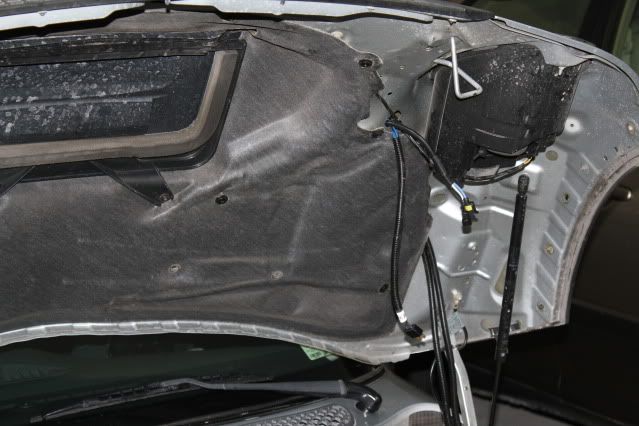
Passenger side wiring ran:
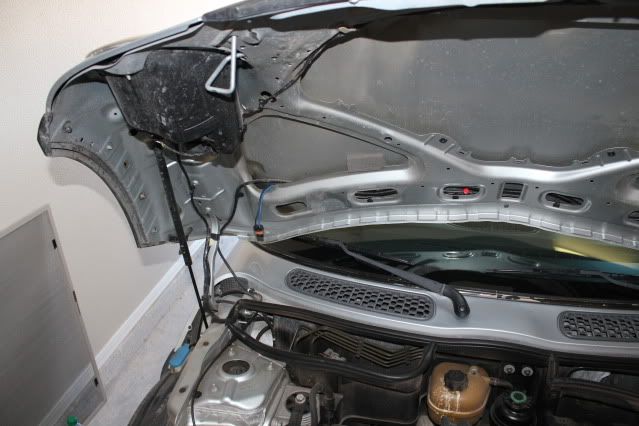
Overall shot of wiring ran:
close up of driver side ballast and relays:
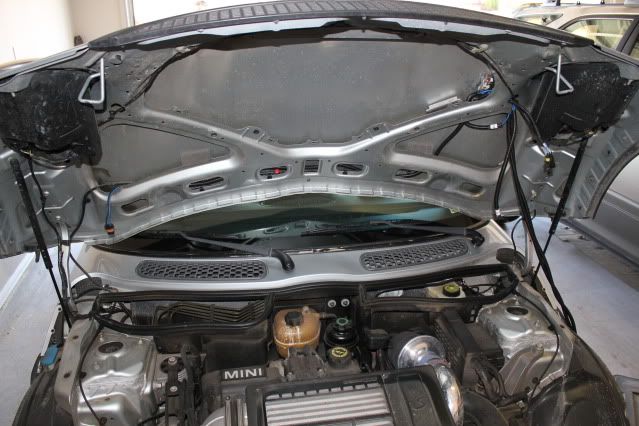
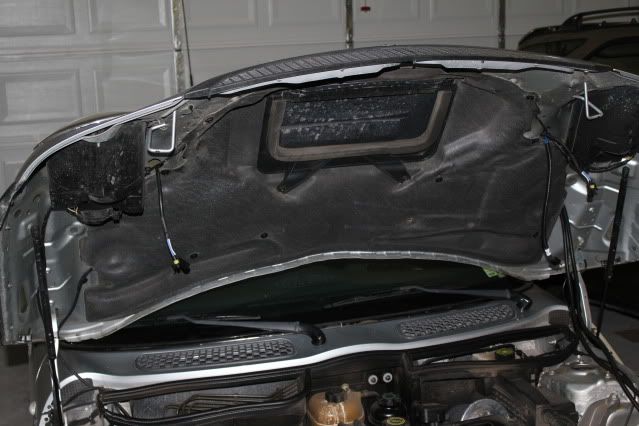
Fire insulation installed:
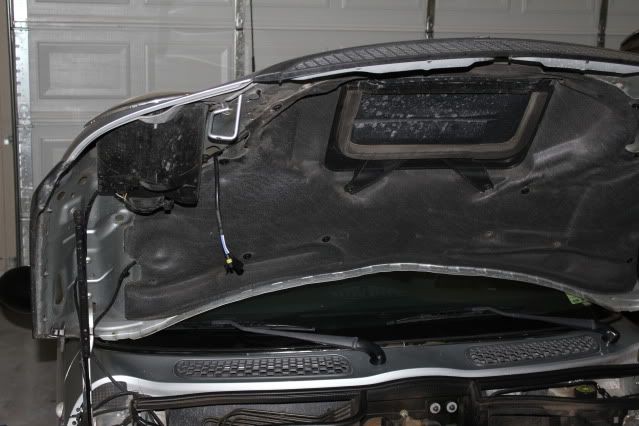
Driver side:
Overall:
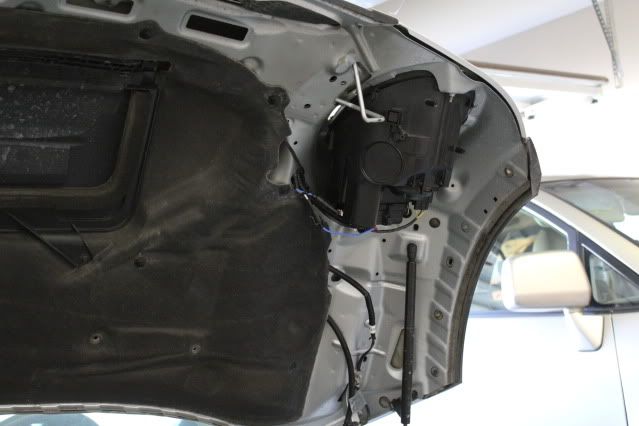
Back of headlight (plenty of room left)
Driver side completely installed:
Passenger side completely installed:

All done:
Note: On the wiring harness I removed about 28 inches of the ground wire to make sure it didn't have any slack. If you look closely you can see it in the pics. I also routed the wires through the side grommet and had to cut and solder twice.
If you have any questions let me know. comments are welcomed as well.
Ballast and relayes "mounted" (with double sided tape) on driver side:
Passenger side wiring ran:
Overall shot of wiring ran:
close up of driver side ballast and relays:
Fire insulation installed:
Driver side:
Overall:
Back of headlight (plenty of room left)
Driver side completely installed:
Passenger side completely installed:
All done:
Note: On the wiring harness I removed about 28 inches of the ground wire to make sure it didn't have any slack. If you look closely you can see it in the pics. I also routed the wires through the side grommet and had to cut and solder twice.
If you have any questions let me know. comments are welcomed as well.
#19
09-24-2011, 07:12 PM
#20
09-25-2011, 01:59 AM
4th Gear
Nice. The setup looks pretty neat and clean.
Curious, why didn't you use the OE mounts for the ballasts underneath the headlight "buckets"? Was there not enough room for the Morimoto ballasts? Also, did you use a CAN bus harness or did you use the normal H7 harness?
I'm going a different route with my setup: I recently ordered a 55W "elite" kit (55W ballasts, 55W 5000k bulbs, H7 CAN bus harness) from TRS, some resealing glue and TSX-R lenses.
I'm basically going to put the xenon hardware into a halogen bucket with 55W ballasts and bulbs, and swap the lenses out for clear ones.
#21
09-25-2011, 10:17 AM
Carmichael:
I wanted to tuck all the wires I could. If I would have used the stock mounting I would have had some hanging out or stuffed inside the housing. Didn't really want to do that. I'm not sure if it would have mounted to stock location regardless. Something I could have checked out.
Harness: I used the TRS kit. There was no CAN bus boxes included. The harness has two relays and connects directly to a positive terminal and uses the stock signal from the driver side.
Let me know how your retro goes. If I can help in anyway let me know. I didn't go with OEM for a couple of reasons:
1. Cost. It's nuts what people are wanting $700+. I did my retro including headlights for $350.
2. Cut off, color and width of pattern. I think your lenses could help the cut off but I don't know by how much. The lenses won't be able to help the width of pattern though. After looking at the OEM projectors I just wasn't happy. I hope yours turns out great though. I want to see pictures
For everyone else, I'll be getting some of these projectors and going to sell them cheap. I'm getting 5 sets first. I'm thinking $90 for a set SHIPPED. They will included the mini gatling shrouds too.
#22
09-25-2011, 05:22 PM
4th Gear
I see. I ordered the CAN bus harness anyway. I hope it doesn't cause any issues ... I'm going to try and use the factory mounting points.
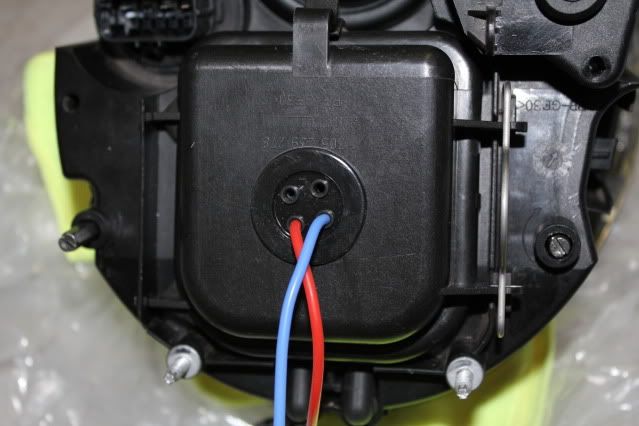
Did you get that grommet that the wires pass through on the low beam cover in your retrofit? That looks real nifty. I think I could use those where the line from the ballast to the projector should be on a halogen housing. The circular part that's blocked off on the bottom of the bucket.
I got both my facelift xenons for $185 shipped ($100 shipped for passenger side [cracked lens], $85 shipped for driver side [perfect shape]. Both included ballasts/igniters) on eBay. With the $235 I spent on TRS stuff, I'm about $100 more into a retrofit than you are, but I wanted to keep the look as factory as possible. I'm going to put the OE ballasts and igniters on the classifieds, so hopefully that will allow me to recoup some cash.
I actually took the "beam limiter" ring inside the factory projectors off and it improved beam width dramatically. The problem is since they're Fresnel lenses, the cutoff wasn't as sharp as I wanted. The output was still pretty low as well. Hopefully the TSX-R lenses and 55W setup will fix that. I just hope the bowls can take the extra heat, I'm seeing some heat marks in the bowls from the OE bulbs/ballasts.
And hell, if I can't get them to work right, I might take you up on one of your Mini D2S kits. :laugh: I appreciate the help, though. I'm sure I'll be asking you plenty of questions. My only problem is finding the time to tinker with my lights between work and school.
#23
09-25-2011, 05:43 PM
#24
09-26-2011, 11:39 AM
4th Gear
I also see the factory headlamp harness is plugged in to the headlamp ... Where are your xenons getting switched power from? Did you just splice into the OE headlamp harness upstream of the headlamp?
I was thinking the relay harnesses plugged into the end of the stock headlamp harness that mates with the plug on the headlamp.
I was thinking the relay harnesses plugged into the end of the stock headlamp harness that mates with the plug on the headlamp.
#25
09-26-2011, 01:39 PM
I also see the factory headlamp harness is plugged in to the headlamp ... Where are your xenons getting switched power from? Did you just splice into the OE headlamp harness upstream of the headlamp?
I was thinking the relay harnesses plugged into the end of the stock headlamp harness that mates with the plug on the headlamp.
I was thinking the relay harnesses plugged into the end of the stock headlamp harness that mates with the plug on the headlamp.

So from the harness you have:
*edit my numbers do not correspond with the above photo.
1. H7 plug in (switched signal)
2. Positive lead with fuse (connect to positive post in engine bay)
3. Ground
4. Driver side ballast plug in
5. Passenger side ballast plug in.
The current is really drawn through the positive post and ran through the relays I believe. The signal is coming from the factory plug in.