
Interior/Exterior You-ification: show 'em
#126
 11-10-2006 | 10:26 AM

2nd Gear
Joined: Apr 2006
Posts: 142
Likes: 0
From my perspective tho.......there is still ALOT of "little things" in that engine bay that still need to be covered/coated/painted/hidden.
Unlike some other "sports" vehicles, MINI did nothing to cover the engine or ancillaries.....and there are ALOT of little hoses/wires/connectors/bolts/clips etc.....showing.....
But I guess that's what the Winter is for......I got a heated garage so....you know I'll be busy...
-B


#128
11-10-2006 | 01:54 PM
2nd Gear
Joined: Apr 2006
Posts: 142
Likes: 0
Metal Window Screening from Home Depot.
It comes rolled in a 2' x 8' sheet(for about $12.00). Scissors/metal sheers to cut.
IF you want it black, I would recommend cutting to size and molding to fit FIRST - once you have the size/shape piece you want, then spray paint with black, or matt black engine paint.
-B
#129
11-10-2006 | 05:53 PM
Got my MiniMania e-brake **** today and installed.  it looks
great, feels great, and super glad i got rid of that pos factory e-brake
****. super easy to install. it's a friction mount intead of the
clip-lock like the factory **** but it ain't going anywhere!
matches my MOMO shift ****, no?

it looksgreat, feels great, and super glad i got rid of that pos factory e-brake
****.
super easy to install. it's a friction mount intead of theclip-lock like the factory **** but it ain't going anywhere!
matches my MOMO shift ****, no?

#131
11-10-2006 | 06:05 PM

#132
11-10-2006 | 06:07 PM
#133
11-10-2006 | 06:20 PM
6th Gear
Joined: Sep 2002
Posts: 4,099
Likes: 0
From: Just around the corner from the Dragon :~)


#134
11-10-2006 | 06:57 PM
 well done!
#135
11-11-2006 | 01:36 AM
3rd Gear
Joined: Jun 2002
Posts: 291
Likes: 0
From: Orlando, Fl. USA
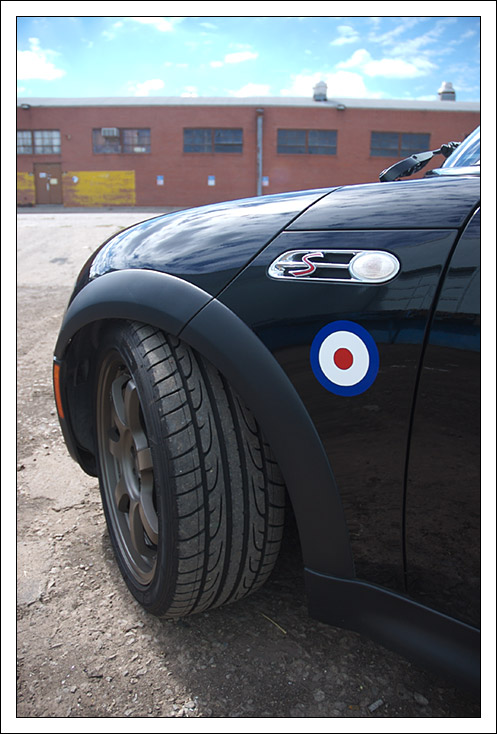
Side stripe pic
Thanks Smokey,
I really appreciate you posting my pics. The side stripe was made by Pro Image Graphics in Longwood Fl. I told him to take a photo of the script on the boot to use for a guide. After going to a few MINI meets, I had to do some kind of cosmetic mod. Once again, thanks.
MB aka Minzila
I really appreciate you posting my pics. The side stripe was made by Pro Image Graphics in Longwood Fl. I told him to take a photo of the script on the boot to use for a guide. After going to a few MINI meets, I had to do some kind of cosmetic mod. Once again, thanks.
MB aka Minzila
#136
11-11-2006 | 04:59 AM
OVERDRIVE
Joined: Aug 2006
Posts: 12,326
Likes: 6
From: PA
By the way, I'm surprised you haven't ordered their chrome ring that goes around the heated seat and side mirror controls. That would look nice with your chrome e-brake and shift ****.
 Of course, then it's hard to stop... I just ordered over $120 worth of chrome accessories from them. And I already have the chrome lined interior package !


#138
11-11-2006 | 06:54 AM
Thanks for that tip, Kenchan. I'm going to have to visit the MiniMania site and get that chrome and leather e-brake assembly !
By the way, I'm surprised you haven't ordered their chrome ring that goes around the heated seat and side mirror controls. That would look nice with your chrome e-brake and shift ****. Of course, then it's hard to stop... I just ordered over $120 worth of chrome accessories from them. And I already have the chrome lined interior package !
By the way, I'm surprised you haven't ordered their chrome ring that goes around the heated seat and side mirror controls. That would look nice with your chrome e-brake and shift ****.
Of course, then it's hard to stop... I just ordered over $120 worth of chrome accessories from them. And I already have the chrome lined interior package ! yah, ive been debating whether to leave that mirror/
heated seat control trim as is, paint it metallic black, or
get a cf one (available in Japan, it looks like)... or just wrap it with
faux CF sheet. since the ceiling has matte black bits im thinking
about leaving it as is for now.
yah, those chrome accessories add up VERY QUICKLY.
#139
11-11-2006 | 06:59 AM
3rd Gear
Joined: Jun 2002
Posts: 291
Likes: 0
From: Orlando, Fl. USA
#140
11-11-2006 | 07:24 AM
OVERDRIVE
Joined: Aug 2006
Posts: 12,326
Likes: 6
From: PA
np! yah, ive been debating whether to leave that mirror/
heated seat control trim as is, paint it metallic black, or
get a cf one (available in Japan, it looks like)... or just wrap it with
faux CF sheet. since the ceiling has matte black bits im thinking
about leaving it as is for now.
yah, those chrome accessories add up VERY QUICKLY.
yah, ive been debating whether to leave that mirror/heated seat control trim as is, paint it metallic black, or
get a cf one (available in Japan, it looks like)... or just wrap it with
faux CF sheet. since the ceiling has matte black bits im thinking
about leaving it as is for now.
yah, those chrome accessories add up VERY QUICKLY.
http://new.minimania.com/web/Item/NM.../InvDetail.cfm


#147
11-13-2006 | 08:03 AM

5th Gear
Joined: Jul 2005
Posts: 746
Likes: 0
From: Miami, FL
.....7. Reverse removal for install - Fill tank ONLY ABOUT 1/4 - 1/3 of the way up, with new antifreeze.
Note: I bought a NEW tank (my old one was really greasy/ratty) and painted that, and kept my old tank just in case. My MINI dealership sold me the new one for ONLY $22.50 - so it might be worth it to do it that way.
Good Luck - ask me if you need any more help.
-B[/quote]
Thanks for this how-to! I'll be doing this soon.
Ken
Note: I bought a NEW tank (my old one was really greasy/ratty) and painted that, and kept my old tank just in case. My MINI dealership sold me the new one for ONLY $22.50 - so it might be worth it to do it that way.
Good Luck - ask me if you need any more help.
-B[/quote]
Thanks for this how-to!
I'll be doing this soon.Ken
#148
11-13-2006 | 09:21 AM
2nd Gear
Joined: Apr 2006
Posts: 142
Likes: 0
.....7. Reverse removal for install - Fill tank ONLY ABOUT 1/4 - 1/3 of the way up, with new antifreeze.
Note: I bought a NEW tank (my old one was really greasy/ratty) and painted that, and kept my old tank just in case. My MINI dealership sold me the new one for ONLY $22.50 - so it might be worth it to do it that way.
Good Luck - ask me if you need any more help.
-B
Note: I bought a NEW tank (my old one was really greasy/ratty) and painted that, and kept my old tank just in case. My MINI dealership sold me the new one for ONLY $22.50 - so it might be worth it to do it that way.
Good Luck - ask me if you need any more help.
-B
Thanks for this how-to!
I'll be doing this soon.Ken[/quote]
YIKES!!!
I almost forgot -
Depending on the celarance of your Spark Plug wires, you might have to remove them (and possibly even your distributor cap) in order to get the tank out/in.
-B


