
Interior/Exterior How to: Cooper Flags rear aero valence trim (with pics!)
#1
 01-11-2007 | 05:07 PM

Thread Starter
|
2nd Gear
Joined: Oct 2006
Posts: 69
Likes: 0
How to: Cooper Flags rear aero valence trim (with pics!)
I ordered the black w/silver "dots" rear aero valence trim from Cooper Flags and it arrived today. With virtually NO instructions other than "consult a professional installer", I took it on myself. Seeing as how I've been installing graphics on vehicles for the past 17 years, I felt qualified.
Anyway step by step;
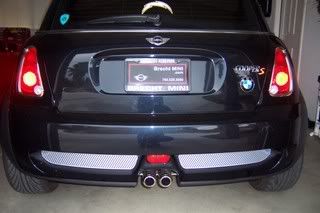
This is the standard stuff on the rear of our 06 Astro Black MCS:
Using a heat gun, apply some heat to one of the corners. Be careful though, too much could be a problem. Just heat it enough to release it's bond on the body of the car:

After removing the stock decal, glue will be left behind:
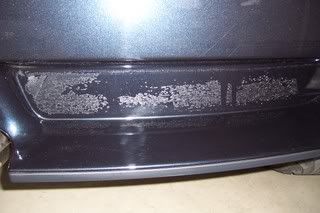
Using a "cool" adhesive remover, soak a rag and apply liberally to the glue. I use 3M 08984 available from auto body supply stores.

It may take a few applications to get all the glue off, but it should turn out clean:

Next, using a spray bottle, spray on a mixture of mild soap and water. (Trust me, this makes it SO much easier). Once it's soaked, peel the backing from the new decal and apply it to the car. The soap and water will allow you to move the decal around to get it centered right. It should look like this:
Now, using the plastic squeegy (sp) that is supplied with the decal, squeegy the water from the center out:

Let it "set up" for several minutes, using the time to push the water out of the decal. I used the heat gun to help dry it out some, but if you do this, keep the heat gun back away from the decal. Once it sets up (depending on outside temp, this could take 20 minutes or more), lightly spray the outside of the decal "masking". Squeegy once more and carefully (and slowly) start pulling the masking off:

Once all the masking is off, check for any air bubbles and squeegy as needed.
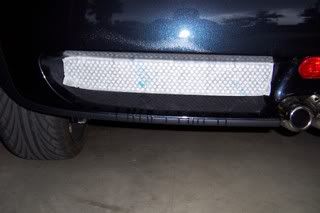
Here's the finished product!

Another angle:

Sit back and enjoy!!!
Anyway step by step;
This is the standard stuff on the rear of our 06 Astro Black MCS:
Using a heat gun, apply some heat to one of the corners. Be careful though, too much could be a problem. Just heat it enough to release it's bond on the body of the car:
After removing the stock decal, glue will be left behind:
Using a "cool" adhesive remover, soak a rag and apply liberally to the glue. I use 3M 08984 available from auto body supply stores.
It may take a few applications to get all the glue off, but it should turn out clean:
Next, using a spray bottle, spray on a mixture of mild soap and water. (Trust me, this makes it SO much easier). Once it's soaked, peel the backing from the new decal and apply it to the car. The soap and water will allow you to move the decal around to get it centered right. It should look like this:
Now, using the plastic squeegy (sp) that is supplied with the decal, squeegy the water from the center out:
Let it "set up" for several minutes, using the time to push the water out of the decal. I used the heat gun to help dry it out some, but if you do this, keep the heat gun back away from the decal. Once it sets up (depending on outside temp, this could take 20 minutes or more), lightly spray the outside of the decal "masking". Squeegy once more and carefully (and slowly) start pulling the masking off:
Once all the masking is off, check for any air bubbles and squeegy as needed.
Here's the finished product!
Another angle:
Sit back and enjoy!!!


Thread
Thread Starter
Forum
Replies
Last Post
igzekyativ
MINIs & Minis for Sale
34
07-16-2020 12:54 PM
dyeLucky
MINI Parts for Sale
3
08-07-2015 07:10 AM