When you click on links to various merchants on this site and make a purchase, this can result in this site earning a commission. Affiliate programs and affiliations include, but are not limited to, the eBay Partner Network.
My s.o. drove behind me today and confirmed my third brake light does still work. No flashing from the red LED portions. Reverse still flash on startup. Weird note: using my scan tool i activated my rear fog light even though i dont have the switch installed, nifty! I got no errors from the new tail lights. Received some bad news as the Spyder R56 (Xenon version) head lights are back ordered on all the popular MINI aftermarket sites (WMW, Outmotoring, ECS...) *sigh*. I'm in love with the glow. Makes the car feel a bit more modern. I think i'll be selling my original LCI Clubman Tail Lights soon...
Alternate plan, get a quad light bar and order all my LED pods and hook them up. Two 40w LED Pods and two 12w Amber LED Pods. I'll hook up each pair to their own rocker switch. From passenger side to driver side (facing the front): Amber - White - White - Amber. Haven't quite decided on location of switches yet.
So, sort of a big update. I was desperate right before Christmas to get the Spyder headlights so I found a Canadian company that sells parts and they had the Xenon version on a "boxing day" sale for $390 USD (after conversion). Hell yeah that's the best price anywhere so fire away on Dec. 22nd. Well f*** me silly because I have yet to receive a shipping notice on them. I have received no email back from them in over a week. Avoid "Tdotperformance" if you can. I'm going to have to report fraud with my bank and buy it now that some of our popular vendors have them hopefully in stock.
Next bit, ordered the VIP Quad Light Bar Bracket 2011+, Black Oak LED Amber Fog Lights, and I had ordered 5inch LED rally lights from Rigid Industries but I also called today and they informed me they could not fullfill my request as they no longer had them in stock. Ugghh, 6100 lumens per light for only 90 USD a pop when i sent the order, dammit that would have been a steal. So I can either go Rigid Industries or Black Oak LED for some regular driving/flood pattern Pod Lights. 95-110 ea Pod Light rated at 3100 lumens (feel my dissapointment now?). Light bar arrives Monday, Amber fog lights came today!
Here are some shots of the Black Oak LED Amber Pod Lights. 1200 lumens each, amber light which wont reflect as much light as white light would from water causing less glare in hazardous conditions, IP69K rating which is one of the highest achievable ingress ratings in terms of being waterproof, dustproof, crushproof along with achieving military standard ratings, and lastly waterproof connectors and powder coated surface. Packaged very well and delivered via Fed-Ex. They delivered it within 2 days of my order being placed, FAST!
2 Amber Pod Lights, bottom is the seperate/optional 2 piece connector. Lastly a wire harness. My packaging came with a wire harness for each pod containing 5amp fuses. Since both pods combined run less than 3 amps, the 5amp fuse on one harness should suffice for 2 pods linked together on the same switch.
Waterproof "deutsch" style connectors. Heat shrink and black rubber cover over the wire felt a bit cheap.
Ignore the blue it is just a protective film. Thing feels really solid and the lifetime warranty is a nice feeling as well. Well designed amber pods are hard to find people!
Special valve that releases any vapor build up
Ground, power, power for the lights. Basic on/off rocker switch.
Spent half the day juggling a weird Amazon cart and other "carts" written on paper trying to figure out the best way to stretch my dollar for these lights. Best I got was getting a set of Rigid Pod Lights, part number 202113, for $160 (normally $210 from Rigid) from Amazon and getting some rocker switches, switch holder, rocker switch-style usb charging port. But no prime shipping for the lights and i want all the lights installed with the bracket arriving monday at once so it is a one and done. When ordered as a pair they do come with a y splittler and harness.
*Sigh* I was more impressed by Black Oak's small business but huge results attitude and service so I decided to pay a little more to support them, got a pair of their 40watt Cree Pod Lights and 2 piece connect cable (y splitter) for a total of $220. Should be here around Wednesday/Thursday next week. Im super excited, hopefully I can get a vendor sticker from them to add to my collection. Still getting the cheap 8 buck rocker switchers and other odds and bits from Amazon.
As to location of where I'm putting the rocker switches, im thinking left side of the center console in line with the switches below the shifter on the side facing your right leg OR the black plastic trim sloped downward behind and to the left of the steering wheel.
As requested by some people in my inbox, I will start indicating the cost I endure to help those trying to figure out costs for these mods while reading my chronicles. I hope it inspires some cool DIY and alternatives as we all exchange info on this amazing forum.
Past couple days have been frustrating but rewarding. I have now had successful tests for both pairs of pod lights. Yet to test the light bar i bought too (oops).
One thing I hate is the protective tubing around the wiring, very cheap...
Here is the light bar I got for cheap ($42). Combination Flood and Spot. Key things here that distinguish a good LED bar from a bad one especially when you go down with cost. These arent some chinese made re-brand, they feature genuine Phillips bulbs (top 3 are Osram, Cree, and Phillips). They use proper reflective housings and have a military grade breather so fight condensation build up. They also have a patent on their spot lenses. OZ-USA is the brand.
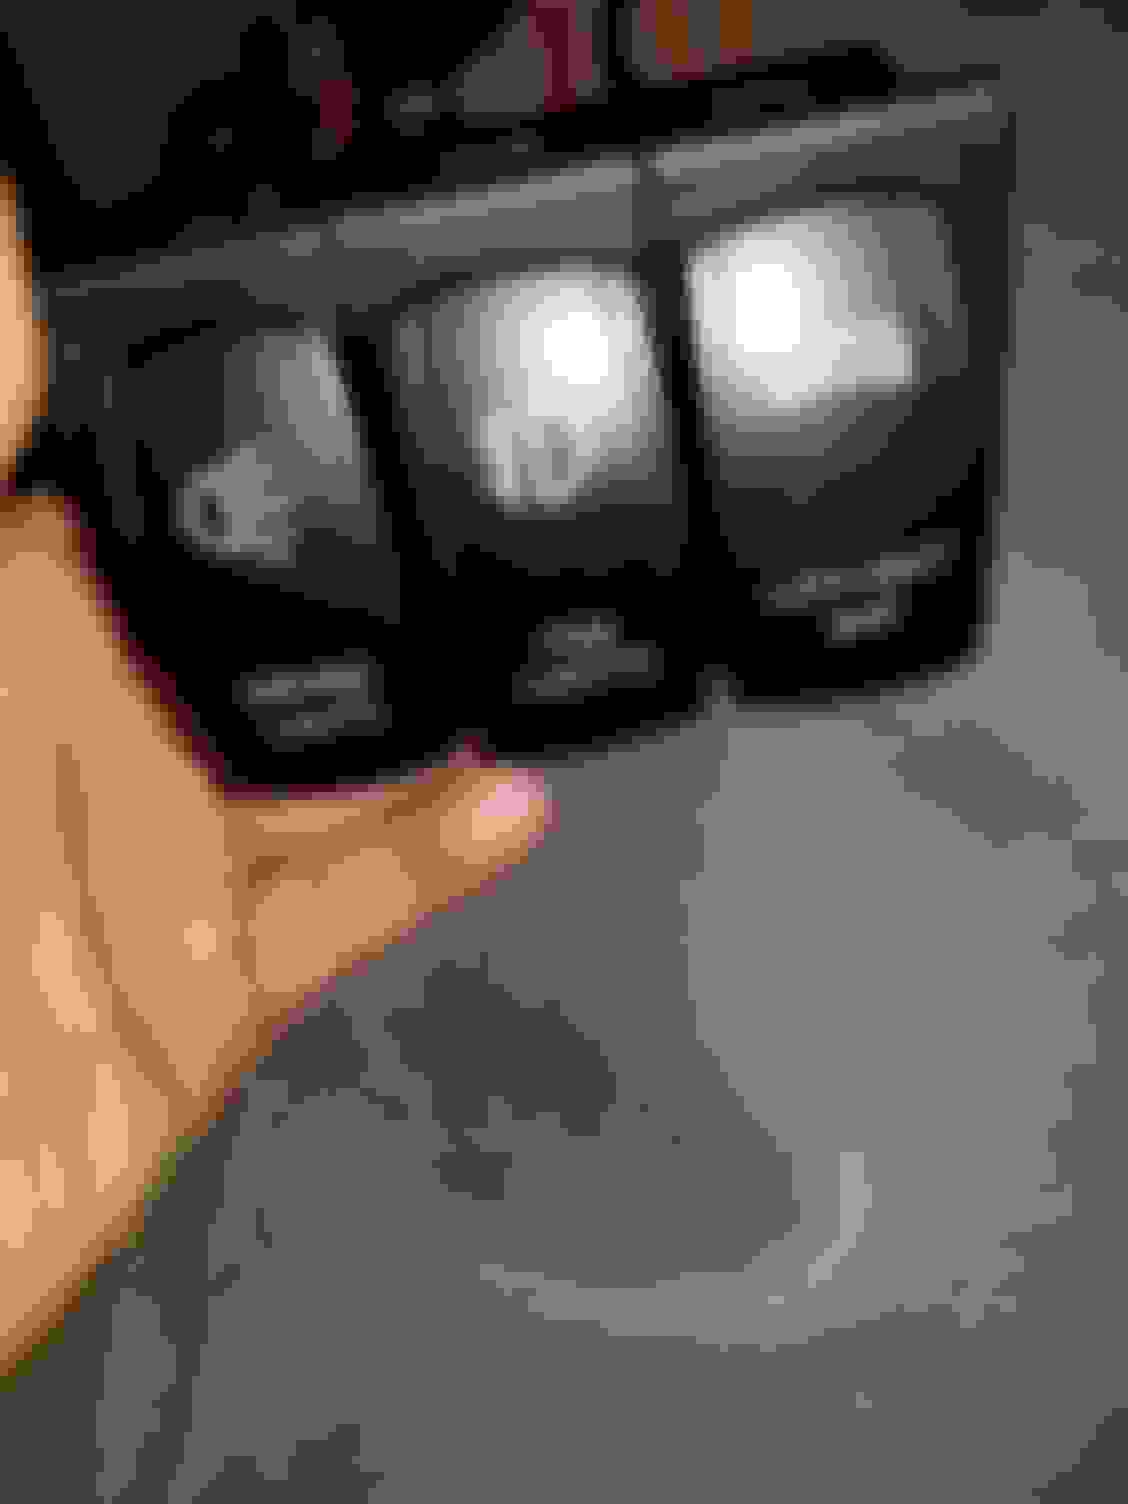
Next up i got some rocker switches from Amazon, 7.99ea, I got 3. A "Driving Light" to go with my Black Oak 40w Cree Pods, "Fog Light" to go with my Black Oak 12w Amber Pods and "Light Bar" for the light bar. The female disconnects/spades are bigger on the rocker than the default switch you get with any Pod Light harness kit. Had to chop off factory ends and crimp bigger female disconnects on the cable. I found everything to do it at Harbor Freight and cost me $25 for the wire crimper, connectors, heat shrink, heat gun, and a dinky light.
The switch is a 5 pin for whatever reason.. The wiring here is just to see if it works, i'll heatshrink it later
"Mictuning" is the brand on Amazon. Got 3 rocker switches and a 3 switch panel
Sorry for potato quality here. This is how illuminated the switch is when not engaged. This is standby. The reviews say it is negligible towards power consumption.
Initially when I hooked up everything I will admit I was a bit intoxicated and reversed the ringlets on the battery..yikes. Attempt two the 40w Cree Pods came on on then shut off. Found my 5amp in line fuse in the harness had blown. Double checked my numbers, 2.8a each Pod...f***.. ok off to local Autozone. Got some 25amp fuses since it was the same cost between 10/15/20/25amp fuses.
I had already installed a few before this photo, i think 5 come in a pack and it was 3.99.
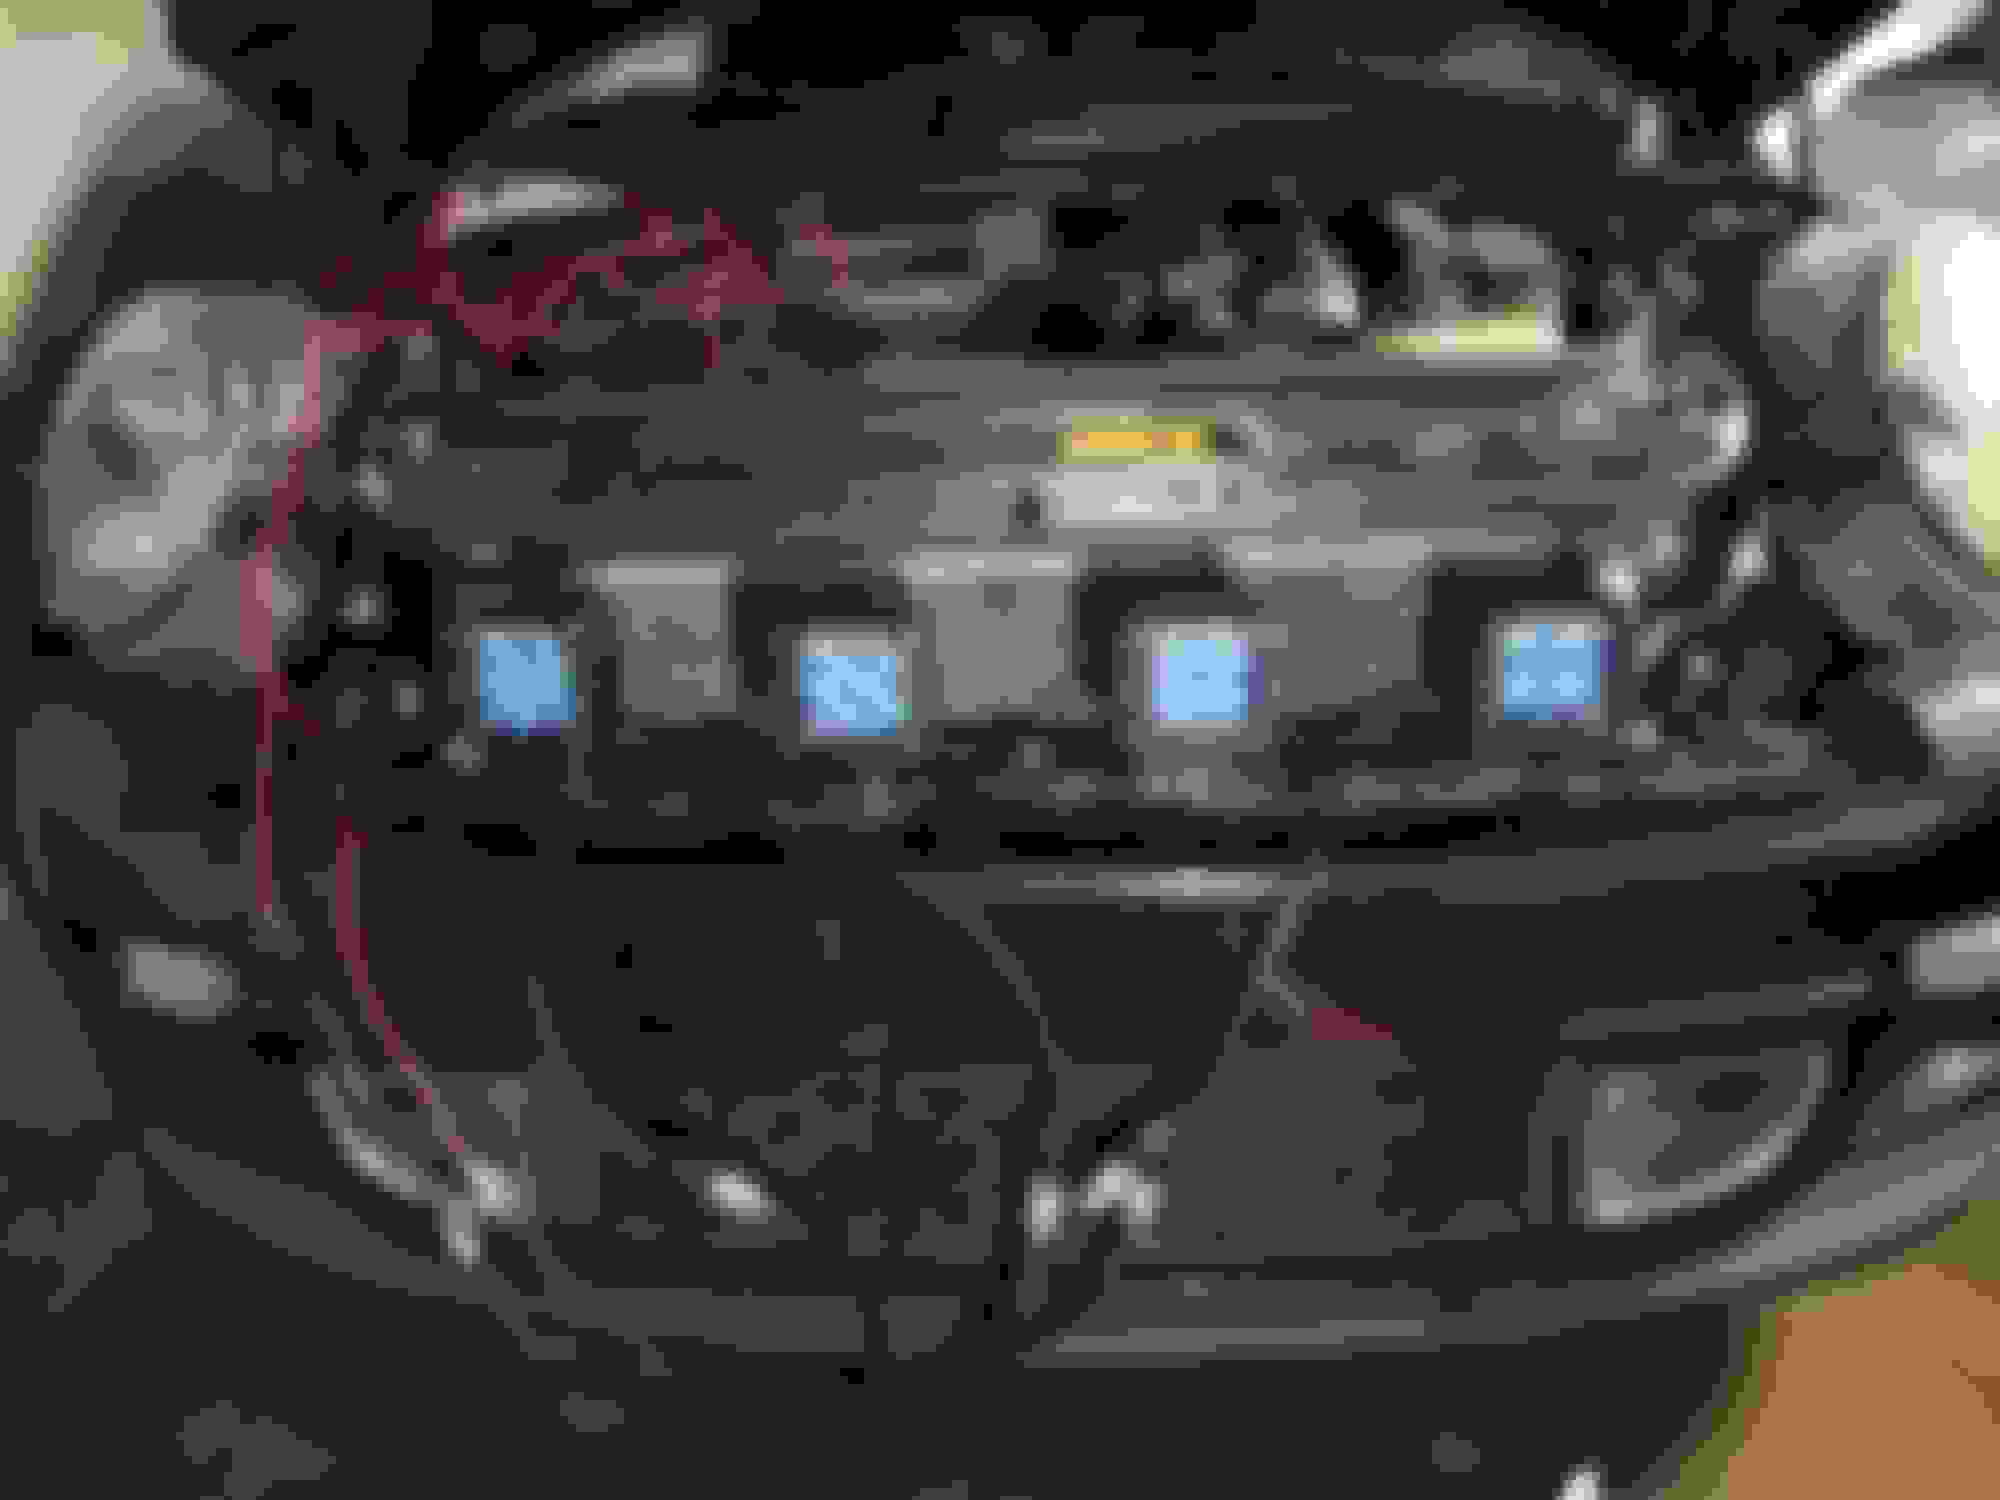
Ok attempt number three but tested with my 12w Amber Pods. Yes yes the engine bay is dirty..I'll get to it ugh. Anyway here is the lights attached to the VIP Quad Light Bar
Wow do these stand out! Look at that glow
Intially picture seconds after being turned on.
Some adjusting is necessary. Maybe I should move them further apart? These babies are bright!
It is currently 1:45am as I post this and I am currently attaching new disconnects to the harness for the 40w Pod lights. I have an extra harness from Black Oak, i probably will use that with the light bar since Black Oak's is way better quality. They use the same DT connector so . Enjoy the **** guys, keep you posted.
Finished getting the second harness and third harnesses ready. Had to go to Home Depot since I lost some nuts fiddling with the battery. M6 1.0 nuts are what goes on battery connectors and other spots I'm using.
All the switches attached, clean and tidy!
Was thinking around this spot to attach, thoughts? Maybe elsewhere..
At work currently but I will be off in a few hours. I'm going to try to attach everything and get it wired up tonight! The grille is a wild card as I need to find a better solution to cut up the grille. My cheap $12 rotary tool aint cutting through like I would want. Perhaps buying a pre-cut grille would be better long run?
Marked my area with the q-tips. In the picture is the template you get when you order the light bracket
Success! Lights installed minus the light bar while i figure out a proper spot for it. Some slight snags, had to re-think my switch spot. Decided on eventually attaching the switch to the glove box right below the silver press button. Lights are bright suckers! 40w pods flood the street with light, illuminates houses on both sides of the street. Amber lights are piercing with their colored light and really cool.
Routing wires through in cabin filter, was the least obstructive path Brackets attached including a very forced middle bracket hooked on to the bumper support/crash bar Close up attachment of each of the arms of the light bracket kit. They use the already existing factory nuts and bolts Coming together, initial fitting and adjustments They're AAALLLIIIIIIVVEEEE! Both sets turned on, keep in mind they are only 4 feet away from the wall Just the amber pods, again just 4 feet away from the wall. Pre-adjustment picture, suckers are bright in real life. Again, just 4 feet away.
Electric tape wrapped the connectors to prevent another accidental short i caused this morning. Atleast i had spare fuses. Love the look, now just have to get the grille coming along
Cant say the light bar is my taste but they sure do put out alot of light if you need it!
Looking at the TSW under car brace for my R55 JCW and didnt realize other companies made braces as well. Wasnt too crazy about the M7 brace as it was multi piece.
The TSW brace is probably the best.
i got the Ultra Racing one which is also very good.
The TSW X Brace was on a prolonged
back-order at the time, or I would have bought it.
I bought the Wiechers one before that but
returned it uninstalled because the design
and mounting looked poorly thought out.
The M7 doesn’t look very good in terms of
design, either.
Ordered new side fender LEDs from Outmotoring, the smoke tinted variants. Also put my Tail Lights up for sale with all the goodies attached to them. Hoping with that money I can get my black headlight rings and new jcw grill with jcw grill trim.
So how much drone does the Miltek have? Are you running resonated or non resonated?
im running Mario�s catless downpipe and worry about going non resonated because i dont want any drone. It currently sounds great with Marios pipe and the factory JCW catback but id love more sound but no more drone.
So how much drone does the Miltek have? Are you running resonated or non resonated?
im running Mario�s catless downpipe and worry about going non resonated because i dont want any drone. It currently sounds great with Marios pipe and the factory JCW catback but id love more sound but no more drone.
Sorry for massively late reply, pretty sure you got a system by now. I have the non resonated version of the Milltek exhaust. There is low end sub like sound during the low rpms and cruising on the highway. It sounds more like growly engine noise to me, I dont mind, some might. It really isnt too bad. The radio with nominal volume would easily drown it out.
Also have lots of updates for you guys...stay tuned.
Firstly, I grew impatient and was inspired to just go out and make my own black trim. So in May, I think, I popped off my headlight rings (front) and bottom grille trim (top one is broken right now) and started painting them.
Here were my steps:
1. 200 grit sandpaper
2. Self etching primer
3. Rustoleum Professional Black High Performance Enamel (spray paint)
3. Another coat within 10 mins
4. Polyurethane spray
5. Cure it with heat gun
Came out decently, not too bad and doesn't wash off. Total cost was around 20 bucks.
In preperation for meeting some fellow MINIacs in Cali, I got some goodies. Also installed my LED side markers as well. Cravenspeed Stubby was $27, DEI wrap was $25, trashcan was $12, arch LEDs were $80.
Thanks Outmotoring! Very nice fit. LED look is coming together nicely... Some engine and cosmetic dressings. Cravenspeed Stubby, DEI Reflect a Gold, and a compact EP Auto Trash Can. Quality of life upgrades! Blinded by the gold... After having this on for over 2 months, intake tube is definitely just warm instead of hot (before the mod) after a nice drive. Also yes my engine bay is a tad dirty. And yes I have a new filter on the way.
So some issues that have arisen since my last big update:
1. Needs first oil change after being tuned
2. Supposedly exhaust was installed by yours truly incorrectly (y pipe)
3. Exhaust hangers are loose/worn
4. Clunk in the front during moments where one wheel dips or goes high than the other (aka speed bumps and pot holes and ****). Been chasing this one forever. More details to come...
5. Exhaust leak in the front
To address #1, just bought an ECS oil kit. Tuner put in Liquid Moly but i'm going back to OEM 5w-30. Also got the optional magnetic drain plug.
To address #2, will meet with a fellow enthusiast to straighten it out. It hangs too low once you go past the back 2 jack points, it is hanging funky.
To address #3, ordered new hangers from Amazon. Basic two hole exhaust hangers, cost me about $15. Will report back how that goes.
To address #4, this has been the bane of my enjoyment for months now. Very noticeable when one wheel goes over a speed bump. Uneven payment it almost sounds like something clunking/hitting running along a line infront of the pedals. Very noticeable on the right side. Here are my options to treat this after consulting RealOEM: front wishbone (control arm) total replacement along with the outer ball joint, front sway bar bushings (i checked and they are 23.5mm [non sport suspension]), broken upper strut mount, or all of the above most likely. Regardless, I need to lower the front subframe. I had to special order a Powerflex 23.5mm front sway bar bushing since I have read these are common sources of clunking in our suspension system. Once my friend and I inspect we can see if the ball joints on the wishbones are good as well followed by the top strut mounts.
To address #5, I cant even see a gasket to be honest, I will order a new one most likely
For #4, you left out the end links. Swapping out sway bar end links is relatively simple, and if it fixes the clunk you won't have to spend money and time dropping the subframe.
For #4, you left out the end links. Swapping out sway bar end links is relatively simple, and if it fixes the clunk you won't have to spend money and time dropping the subframe.
Quoted for truth.
Bad or loose end links will make all variety of clunking noises. My R53 suddenly started making an odd wobbly noise that was only present when off throttle and clunking on the right hand side under braking. One of the end links had worked itself loose. Definitely check that first.
For #4, you left out the end links. Swapping out sway bar end links is relatively simple, and if it fixes the clunk you won't have to spend money and time dropping the subframe.
I did a quick tug on them when parked and they didnt seem loose. But that isnt a real test. Ok well now between Sneed, WMW, and Detroits endlinks.
I did a quick tug on them when parked and they didnt seem loose. But that isnt a real test. Ok well now between Sneed, WMW, and Detroits endlinks.
All three of those are the same product and way over priced. If you're not lowered, OEM is fine.
Tugging on the end link won't show you anything, especially if one or both wheels are on the ground. Lift the front end so that both front wheels are off of the ground, get wrench and tighten the nuts. Be sure to hold the threaded part of the end link in place with either a wrench, a hex socket or and allen key. This is also a good time to inspect the rubber boots on both ends of the end link. Make sure they are not torn or leaking grease. After you have done that, take it for a drive to see if symptoms are still there.
Small update. Got the first package of many goodies coming. Installed the puddle lights and began reading my manual..Sunday will be jacking the car and seeing what is going on with suspension. 4 pack exhaust hangers, Hella TC16 horn (BMW) model so it will fit with the stock horn connectors, Bentley Manual, and MINI puddle lights.
Obtained via amazon. Nice looking LED board and solid feel. The lens are not adjustable though..minor grievance.
Slightly off as you can see but again not adjustable. Also you definitely can't see them when sun is out, at all.
Billet CAPs and MINIS go together like OIL and vinegar. Still trying to GAUGE the possibilities... New project stay tuned (pardon the terrible word play and hints)... Oooh shiny 2x threaded ports (1/8 -27 NPT)
Fun update: walnut blasted the intake valves, installed Vinstar V3 Fog Lights, and Hella horns.
Regarding the horns, the Hella connectors were BMW version which I assumed would work with the MINI connectors on our stock horns. They were nearly identical except the Hella horns connector was a fraction too thick. I used a metal file to take off a bit and it snapped in with the MINI horn pigtail/connector snuggly. No relay needed!
The Vinstar fog housings were very solid feeling. Pro-tip, take the plastic ring around the OEM fog housing off and attach it to the Vinstar fog housing then attach it to the bumper. My phone decided to break for good after the install so i don't have pictures at the moment.
Lastly, the walnut blast was a success. A local buddy worked on with me, he used harbor freight equipment to keep costs down. At around 76k miles I'd say I needed it. Night and day difference driving.
Is this coolant? Strange (cylinder 2)
Cylinder 3
Mmm walnuts
Night and day difference on startup and driving around. Especially "normal" driving feels a bit quicker from butt dyno
Lastly, when inspecting the intake tubing I noticed a decent pool of oil in the elbow leading into the turbo. Blades look lightly coated in suit-like consistency oil. There was some oil in the elbow leading into the intercooler but no pool inside the intercooler nor any trace of oil in the discharge pipe or throttle body. So I definitely don't think turbo oil housing leaks. Most likely valve cover but my PCV does not whistle like it would if damaged so I'm leading more towards excessive blowby/ get an oil catch can.
Also, considering going fully forged and meth injected now. I was shopping around building some part lists. I just have so many different areas i want to modify it is getting hard to prioritize. Oh and my Racing Dynamics strut bar is on its way, part of the newest batch made.
I'm a little surprised your valves look that mucked up. I've been contemplating putting together a walnut kit for my car. I think you just convinced me to make it a priority. My Hampton has 116k miles...

 12-18-2019, 11:23 PM


 . Enjoy the **** guys, keep you posted.