scoubt's Chili Red 2009 Mini Cooper S build


#2
 11-10-2020, 07:58 AM
Backstory:
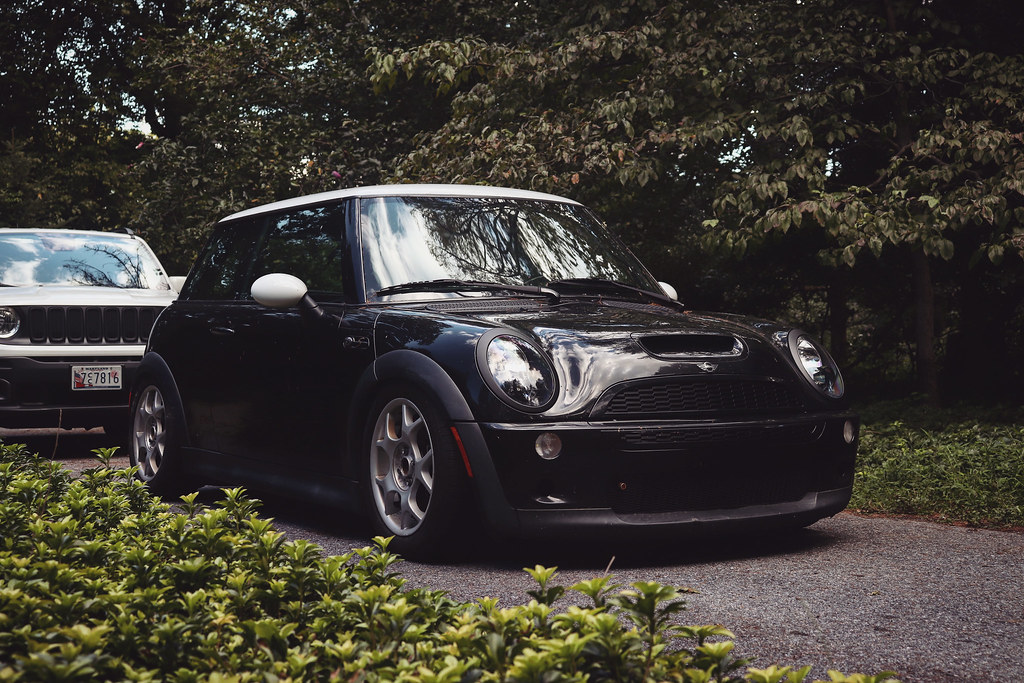
I had originally picked up a black R53 with the intention of making it a daily driver, and eventually an occasional track car. Before I even passed inspection, I had a Chili Red R56 Cooper S fall in my lap for practically nothing, which significantly lower mileage and absolutely zero rust. While I love certain aspects of the R53, the condition and cost of the R56 ended up being a better choice for me and I will be selling the R53 instead.
The R53:
And my 2019 Dodge Challenger Scat Pack that this Mini is going to be helping keep in the garage:

What has happened so far:
The R56 wasn't running when I got it, but I was able to quickly get her fired up and on the road. I did get a code for the thermostat, which I am just going to replace, and I am fairly certain I can hear the timing chain rattling a bit so that will be going also (might as well). I have already replaced the hatch struts, sunroof motor, A pillar trim, and a few other small odds and ends. There are obviously a few rough spots on the exterior that will need to be cleaned up, which I will get to. I'll be sure to update things as I go, but for now here are some photos of the stock car before she starts getting molested a bit:


 I figured I would also post a few shots of the interior, since I will be changing that up fairly quickly. I know a lot of people love the Rooster Red color line stuff, but I really am just not a fan of anything besides black in an interior. In a black car, I might have kept the color line (not the seats), but red on red for me is just way too much. I found a nice set of the Carbon Black knee protectors, and then will be recovering a spare set of door arm pads in black suede. I have also replaced the driver and rear seats with the Carbon Black leatherette ones, but need to find a passenger side one in decent shape to complete that.
The black suede shift and e-brake boots I had for the R53 have moved over to this car, along with the Raceseng shift ****. I'll get pictures of the updated interior soon.


I had originally picked up a black R53 with the intention of making it a daily driver, and eventually an occasional track car. Before I even passed inspection, I had a Chili Red R56 Cooper S fall in my lap for practically nothing, which significantly lower mileage and absolutely zero rust. While I love certain aspects of the R53, the condition and cost of the R56 ended up being a better choice for me and I will be selling the R53 instead.
The R53:
And my 2019 Dodge Challenger Scat Pack that this Mini is going to be helping keep in the garage:
What has happened so far:
The R56 wasn't running when I got it, but I was able to quickly get her fired up and on the road. I did get a code for the thermostat, which I am just going to replace, and I am fairly certain I can hear the timing chain rattling a bit so that will be going also (might as well). I have already replaced the hatch struts, sunroof motor, A pillar trim, and a few other small odds and ends. There are obviously a few rough spots on the exterior that will need to be cleaned up, which I will get to. I'll be sure to update things as I go, but for now here are some photos of the stock car before she starts getting molested a bit:
I figured I would also post a few shots of the interior, since I will be changing that up fairly quickly. I know a lot of people love the Rooster Red color line stuff, but I really am just not a fan of anything besides black in an interior. In a black car, I might have kept the color line (not the seats), but red on red for me is just way too much. I found a nice set of the Carbon Black knee protectors, and then will be recovering a spare set of door arm pads in black suede. I have also replaced the driver and rear seats with the Carbon Black leatherette ones, but need to find a passenger side one in decent shape to complete that.The black suede shift and e-brake boots I had for the R53 have moved over to this car, along with the Raceseng shift ****. I'll get pictures of the updated interior soon.
#3
11-10-2020, 08:13 AM
A few small updates:
Things were a bit slow to start, but I am glad I went the route that I had so far. The previous owner had said there was a horrible noise when driving the car, and it felt like the car was running very poorly. Having read so many issues about the timing chains on these cars, that is the first place my mind went, so I pulled the valve cover. The old guides looked perfect to me, and even after pulling the chain out it seems like it hadn't really stretched at all. I still ended up replacing everything, just for future piece of mind.

I had to do a few other things anyway, so I yanked most of the front end off the car and set about checking / cleaning whatever I could. Having never actually driven the car beyond just moving it around my driveway, I wasn't sure what to look for considering his description of the issues. When I was working on the timing chain, I had noticed some engine movement, and suspected the lower motor mount was just on its way out. With plans on replacing it or getting some nicer bushings, I didn't really think anything of it initially. I finally decided to give it a look yesterday, and noticed the bolt that connects the mount to the subframe was just GONE. This would certainly explain the car seeming like it wasn't running well if you aren't familiar with things. I am crossing my fingers that is the problem he was having, so I sourced a new bolt, and purchased the PowerFlex bushings to add in while I was down there.

I also picked up a Cravenspeed dipstick since I REALLY dislike how bad the stock one is, and a Forge silicone intake tube to replace the stock one that had rotted apart. I am sure I'll have to replace more tubing in the near future due to rot, but I am going to try to hold off on that until after inspection if possible.
The existing S spoiler was REALLY faded, and I am honestly just not a huge fan of the styling. While a GP wing is in my eventual plans, I figured I would just throw a base cooper spoiler on for some simplicity and to prepare for that eventuality. I know most people probably wouldn't agree with me on that, I just really don't like the shape of the S spoiler. While at the local junkyard, I was also able to grab a new hatch release since mine was broken, and a few interior goodies to re-wrap in black suede so I don't ruin the stock ones. The interior stuff is obviously not needed before I get the car inspected, but it makes me happy to do anyway.
I had everything buttoned back together on Friday, and tried starting the car to no avail. I knew the battery was on its way out already, and I wasn't even getting lights on the dash, so I started with a new battery. No dice. I now got lights on the dash, the usual chimes, radio and AC came on, but it wouldn't even try to crank. After fiddling with things for a few days, checking for voltage drops, checking the relays, clutch sensor, etc, I finally settled on it being the starter. It had to be!
For some reason before I jacked the car back up to try to get access to the starter, I decided to check the ground strap on the motor mount.....oops. I forgot to tighten it down. Made sure it was nice and snug, and BOOM, she started right up! I am still getting a CEL for the thermostat, even after replacing the thermostat housing with a brand new one, so I will have to investigate that further tonight.
In other news, I decided to take some time to work on some of the other issues the car has. Starting with the hazy passenger side headlight. I had already removed the light, but brought it inside to start sanding and polishing the lens. I quickly discovered that one of the arms holding the housing inside had broken, so it was just flopping around inside. Automatic fail, so I figured I would open it up and glue the arm back together:

well the damage went through to the reflector itself, so I don't think this light is salvageable. I really didn't want to spend money on another light right now, as I planned on eventually upgrading to Xenons. It seems that every R56 that shows up at our junkyards has the lights taken first, so I will have to think of another solution...hmm.

And that is where I am at so far! Thanks for playing catch up.
Things were a bit slow to start, but I am glad I went the route that I had so far. The previous owner had said there was a horrible noise when driving the car, and it felt like the car was running very poorly. Having read so many issues about the timing chains on these cars, that is the first place my mind went, so I pulled the valve cover. The old guides looked perfect to me, and even after pulling the chain out it seems like it hadn't really stretched at all. I still ended up replacing everything, just for future piece of mind.
I had to do a few other things anyway, so I yanked most of the front end off the car and set about checking / cleaning whatever I could. Having never actually driven the car beyond just moving it around my driveway, I wasn't sure what to look for considering his description of the issues. When I was working on the timing chain, I had noticed some engine movement, and suspected the lower motor mount was just on its way out. With plans on replacing it or getting some nicer bushings, I didn't really think anything of it initially. I finally decided to give it a look yesterday, and noticed the bolt that connects the mount to the subframe was just GONE. This would certainly explain the car seeming like it wasn't running well if you aren't familiar with things. I am crossing my fingers that is the problem he was having, so I sourced a new bolt, and purchased the PowerFlex bushings to add in while I was down there.
I also picked up a Cravenspeed dipstick since I REALLY dislike how bad the stock one is, and a Forge silicone intake tube to replace the stock one that had rotted apart. I am sure I'll have to replace more tubing in the near future due to rot, but I am going to try to hold off on that until after inspection if possible.
The existing S spoiler was REALLY faded, and I am honestly just not a huge fan of the styling. While a GP wing is in my eventual plans, I figured I would just throw a base cooper spoiler on for some simplicity and to prepare for that eventuality. I know most people probably wouldn't agree with me on that, I just really don't like the shape of the S spoiler. While at the local junkyard, I was also able to grab a new hatch release since mine was broken, and a few interior goodies to re-wrap in black suede so I don't ruin the stock ones. The interior stuff is obviously not needed before I get the car inspected, but it makes me happy to do anyway.
I had everything buttoned back together on Friday, and tried starting the car to no avail. I knew the battery was on its way out already, and I wasn't even getting lights on the dash, so I started with a new battery. No dice. I now got lights on the dash, the usual chimes, radio and AC came on, but it wouldn't even try to crank. After fiddling with things for a few days, checking for voltage drops, checking the relays, clutch sensor, etc, I finally settled on it being the starter. It had to be!
For some reason before I jacked the car back up to try to get access to the starter, I decided to check the ground strap on the motor mount.....oops. I forgot to tighten it down. Made sure it was nice and snug, and BOOM, she started right up! I am still getting a CEL for the thermostat, even after replacing the thermostat housing with a brand new one, so I will have to investigate that further tonight.
In other news, I decided to take some time to work on some of the other issues the car has. Starting with the hazy passenger side headlight. I had already removed the light, but brought it inside to start sanding and polishing the lens. I quickly discovered that one of the arms holding the housing inside had broken, so it was just flopping around inside. Automatic fail, so I figured I would open it up and glue the arm back together:
well the damage went through to the reflector itself, so I don't think this light is salvageable. I really didn't want to spend money on another light right now, as I planned on eventually upgrading to Xenons. It seems that every R56 that shows up at our junkyards has the lights taken first, so I will have to think of another solution...hmm.
And that is where I am at so far! Thanks for playing catch up.
#5
11-10-2020, 08:48 AM


Last edited by scoubt; 11-10-2020 at 08:53 AM.
The following users liked this post:
nd-photo.nl (11-11-2020)
#6
11-10-2020, 08:54 AM
 Okay I don't know why this forum doesn't like Flickr videos... lets try it this way:
#7
11-11-2020, 05:59 AM
6th Gear
Trending Topics
#8
11-11-2020, 08:51 AM
Thank you!!
Started the car up today, and the timing sounds off....rattling is worse than it was before. Not sure what is going on, but I feel like it is off enough that it couldn't just need the Vanos reset in the ECU. What are the chances this is actually a bad Vanos unit, or am I better off just redoing the timing and hoping for the best... I'd hate to waste money on more bolts, but it is definitely the cheapest out of all the options....
Started the car up today, and the timing sounds off....rattling is worse than it was before. Not sure what is going on, but I feel like it is off enough that it couldn't just need the Vanos reset in the ECU. What are the chances this is actually a bad Vanos unit, or am I better off just redoing the timing and hoping for the best... I'd hate to waste money on more bolts, but it is definitely the cheapest out of all the options....
#9
11-11-2020, 09:12 AM

Alliance Member
Thank you!!
Started the car up today, and the timing sounds off....rattling is worse than it was before. Not sure what is going on, but I feel like it is off enough that it couldn't just need the Vanos reset in the ECU. What are the chances this is actually a bad Vanos unit, or am I better off just redoing the timing and hoping for the best... I'd hate to waste money on more bolts, but it is definitely the cheapest out of all the options....
Started the car up today, and the timing sounds off....rattling is worse than it was before. Not sure what is going on, but I feel like it is off enough that it couldn't just need the Vanos reset in the ECU. What are the chances this is actually a bad Vanos unit, or am I better off just redoing the timing and hoping for the best... I'd hate to waste money on more bolts, but it is definitely the cheapest out of all the options....
Can you tell if the rattling is coming from the chain, or perhaps the vacuum pump? Possible that it is coming from somewhere else, too...
#10
11-11-2020, 10:04 AM
You said you pulled the chain out and replaced everything... Did you replace the timing chain and tensioner with new pieces, or just put the old parts back in? Did you follow the timing chain replacement instruction? Did you replace the crank bolt and cam bolts? (sounds like you did, but VERY critical that you replace, rather than reuse)
Can you tell if the rattling is coming from the chain, or perhaps the vacuum pump? Possible that it is coming from somewhere else, too...
Can you tell if the rattling is coming from the chain, or perhaps the vacuum pump? Possible that it is coming from somewhere else, too...
Chain, tensioner, guides, bolts, gaskets, etc all replaced with a Detroid Tuned cryo treated kit. Followed instructions, but did NOT use a tool beyond the flywheel pin when doing the crank bolt... I only saw that after I had completed the job. Everything was still lined up before I removed the pin and the cam locks, and seemed in time when I hand turned it a few times. I may just redo the bolts and use that tool this time for good measure, I really don't want to damage the motor....
#11
11-12-2020, 09:53 AM

I'm with you, I really dislike the "S" spoiler on these cars. the base one, to me, looks so much better and it allows you to run the gp style wing in the future if you choose to do so. Initially, I bought the base one with this intention but I have liked the look so much, I've stayed with it for a couple of years now.
#13
11-13-2020, 07:32 AM
I'm with you, I really dislike the "S" spoiler on these cars. the base one, to me, looks so much better and it allows you to run the gp style wing in the future if you choose to do so. Initially, I bought the base one with this intention but I have liked the look so much, I've stayed with it for a couple of years now.
And yeah, I totally agree. I think I will be fine running the standard spoiler for a while, but I absolutely LOVE the GP wing and it definitely fits into my overall plans for this car. I have a LOT planned for this build eventually.....

#15
11-16-2020, 06:02 AM

#17
11-16-2020, 09:50 AM
#18
11-18-2020, 08:56 AM
I finished suede wrapping both arm rests and the passenger side dash panel, going to work on the drivers side tonight. I have one little thing I want to do on the passenger side before installation, I just need to test and see how it looks...

Trying to find the motivation to go outside and sort out the timing issue, but the weather has been a little colder and wetter than I prefer lately. I'll probably take care of it this weekend.
Trying to find the motivation to go outside and sort out the timing issue, but the weather has been a little colder and wetter than I prefer lately. I'll probably take care of it this weekend.
The following users liked this post:
Husky44 (11-19-2020)
#19
11-20-2020, 11:38 AM
Not super thrilled with these photos, but whatever. I figured I would show off some of the new interior. Getting closer in the blackout process, most notably the red is all gone, and the dash panels / arm pads have been wrapped in suede. I also laser etched a 'S' logo on the passenger side dash panel, just as a subtle detail. Working on blacking out the silver rings next, and will eventually replace the gauge faces and center console pieces.


The following users liked this post:
Husky44 (11-20-2020)
#22
11-23-2020, 07:26 AM
I do not have pictures of the process, but I am debating making more of these to sell since I do have access to the laser to be able to do it.... I bought the suede online, it is just the standard Synergy Suede available from many retailers. I used headliner adhesive and Barge glue, and just a lot of trial and error to get the best edging lol.
Thank you, I think so too! I still have a bit planned, but will get there eventually.
#24
11-23-2020, 08:09 AM
Hmm, I will keep that in mind....yes, it works great! I removed the plastic welds that hold the front piece onto the actual hinged portion, and then plastic welded it back together when I was done so it seems pretty much factory.
#25
11-28-2020, 07:57 PM
Not the best pictures, and I still have a bit to finish up, but my new gauges are pretty much done. I wanted to emulate the MK4 Volkswagen gauge colors, and I think it looks pretty good considering there wasn't anything that actually matched the Volkswagen Indigo color. I of course didn't just stop with the gauges, and switched every single orange LED in the car to red, completing the whole theme.


I still need to paint the silver trim rings, and I do want to get black gauge faces, but I still am considering CarPlay in the near future... I'd hate to spend the money on the gauge faces just to replace the stereo and want to change that speedometer gauge up again.
I still need to paint the silver trim rings, and I do want to get black gauge faces, but I still am considering CarPlay in the near future... I'd hate to spend the money on the gauge faces just to replace the stereo and want to change that speedometer gauge up again.