
R50/53 MY BUILD UP, continued...
#601
 03-26-2012, 09:00 PM


Join Date: Feb 2010
Location: North Denver Colorado
Posts: 2,836
Likes: 0
Received 6 Likes
on
6 Posts
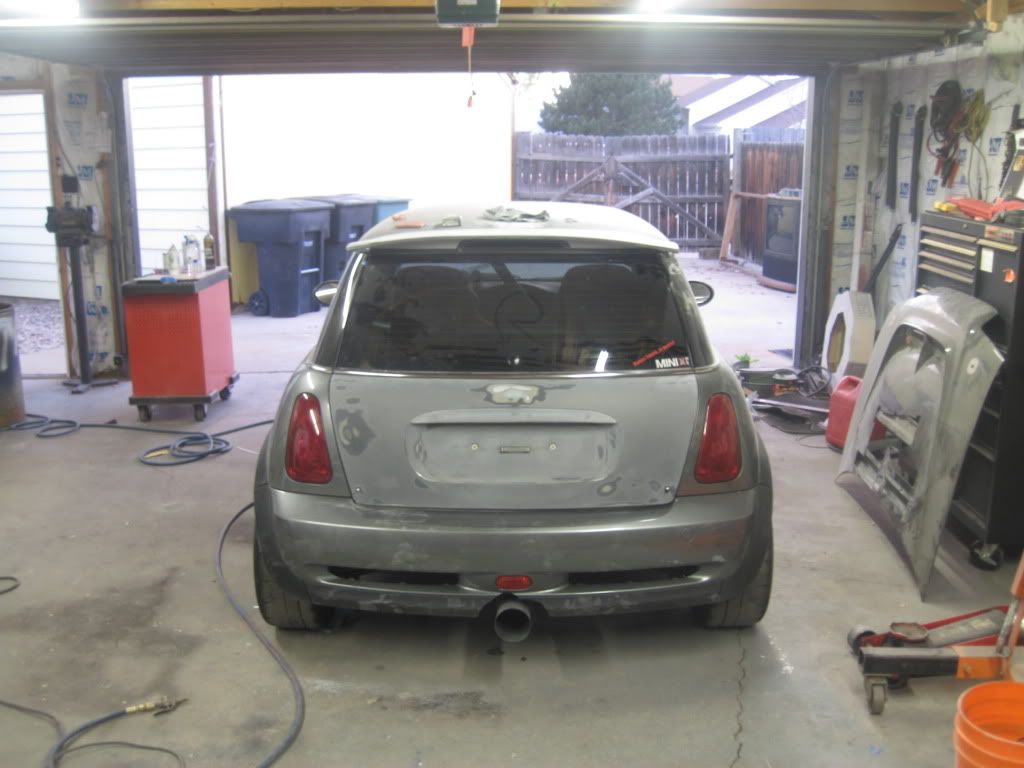
Did some more, there's no turning back now.
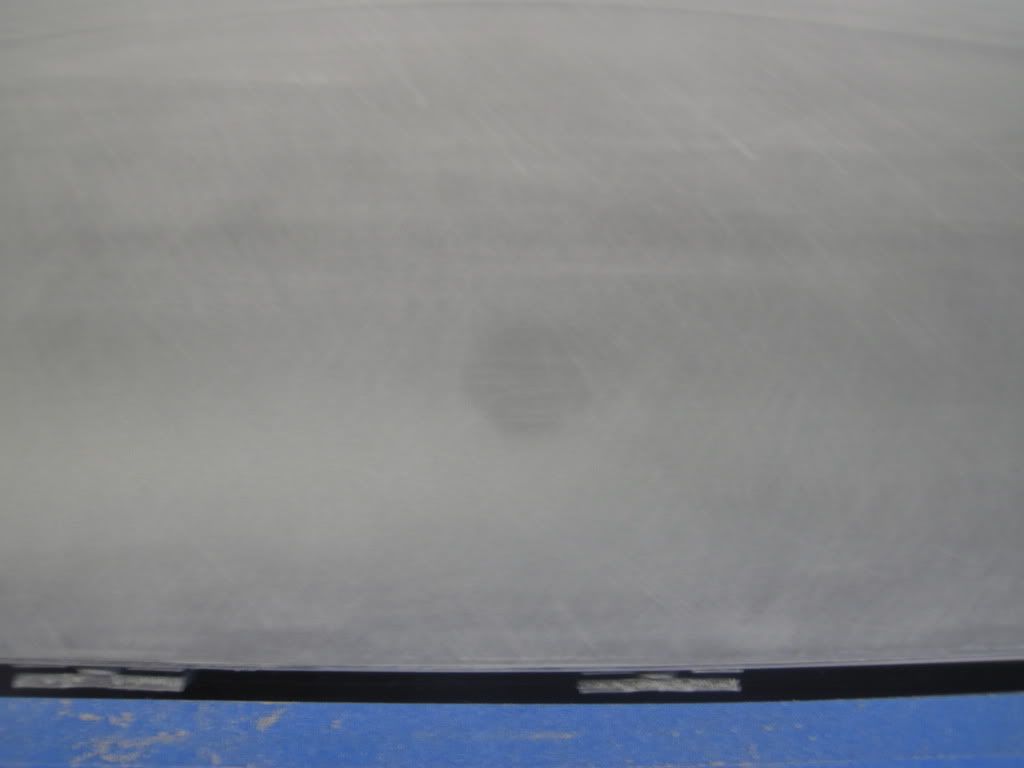
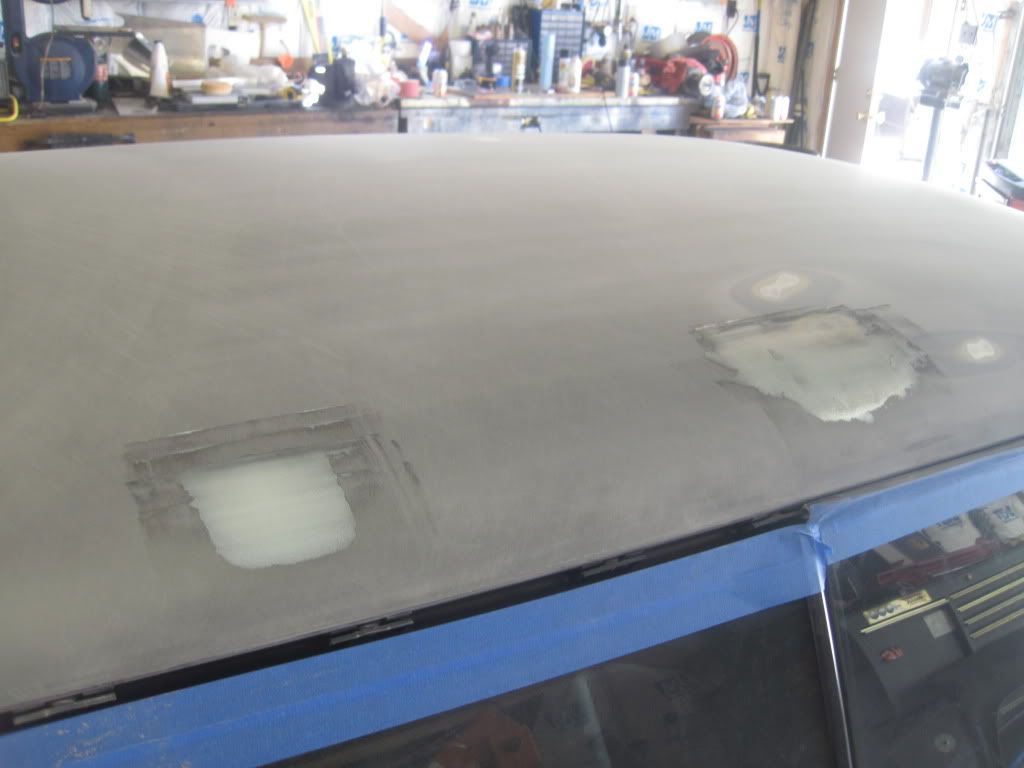
Say goodbye to the body color roof.
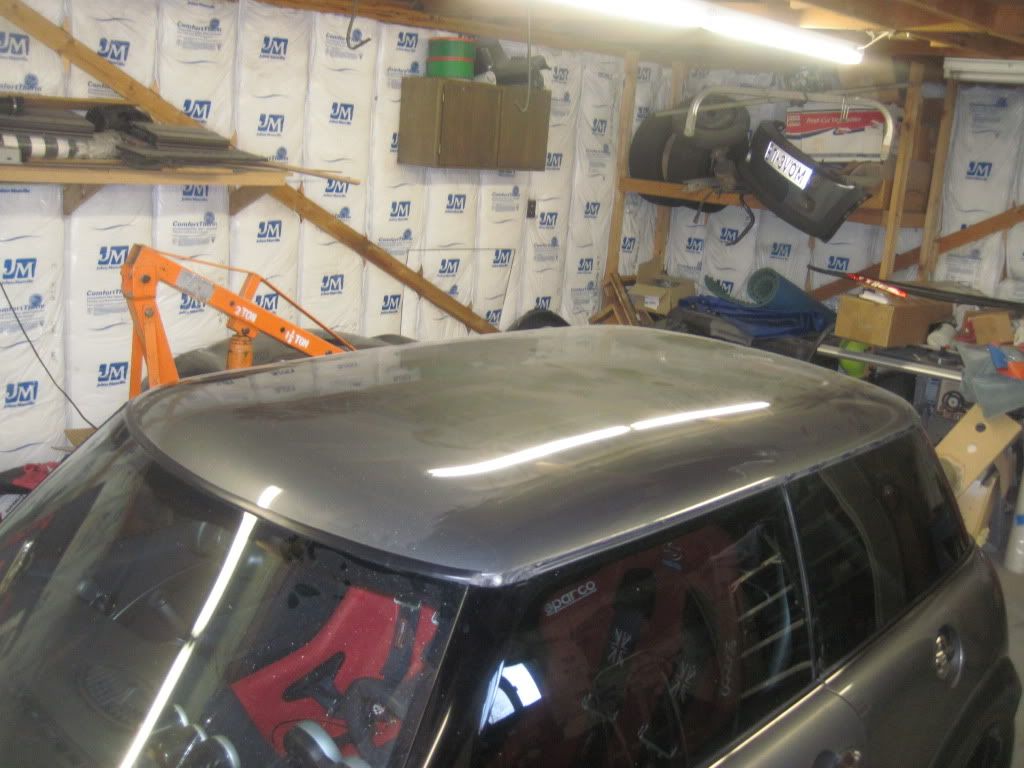
I started the prep work to get it turned black.

Peeled off the clear bra, there is quite a bit of glue left behind that needs to be removed before sanding. (I know it's hard to see the differance, it was a CLEAR bra.)
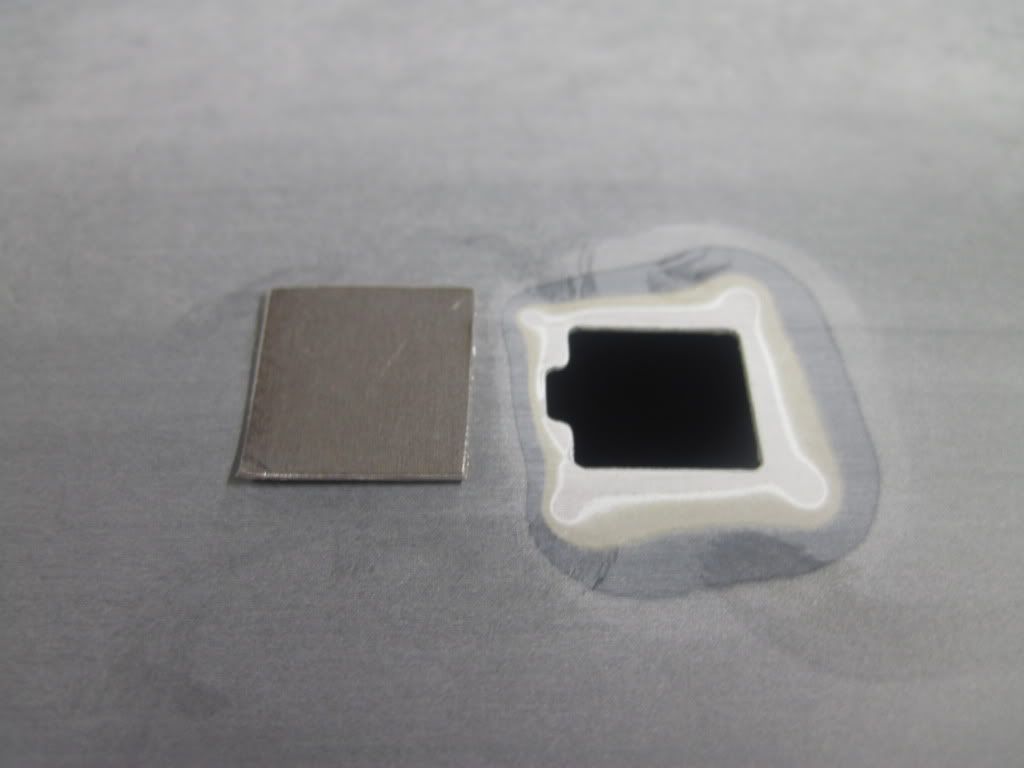
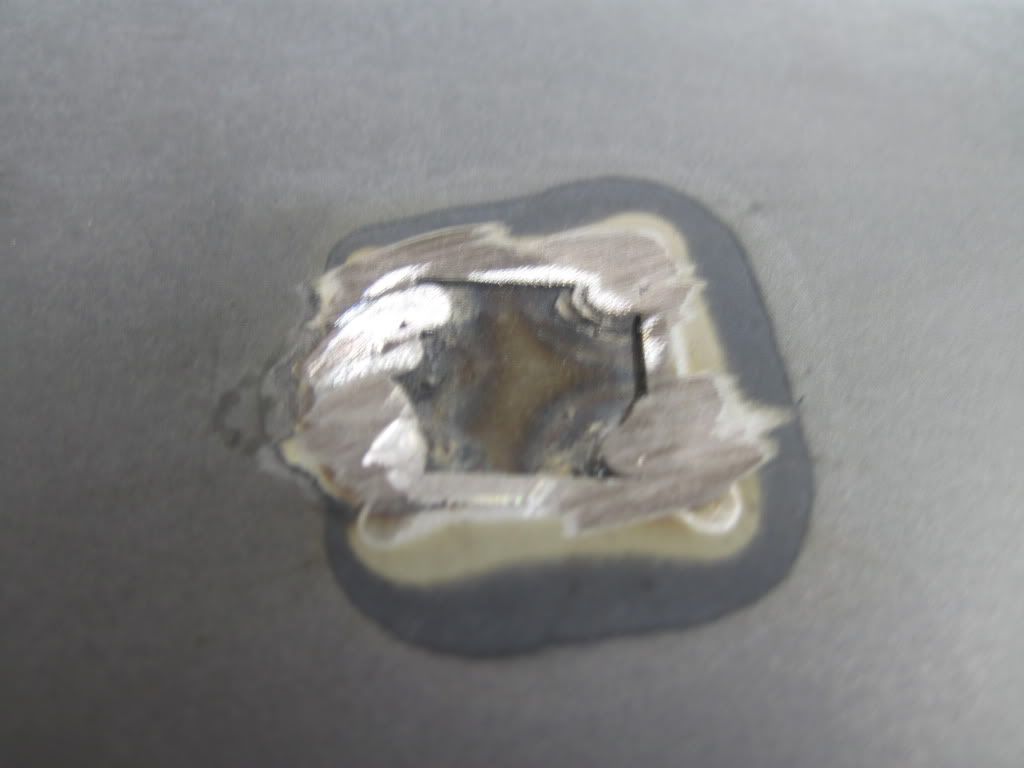
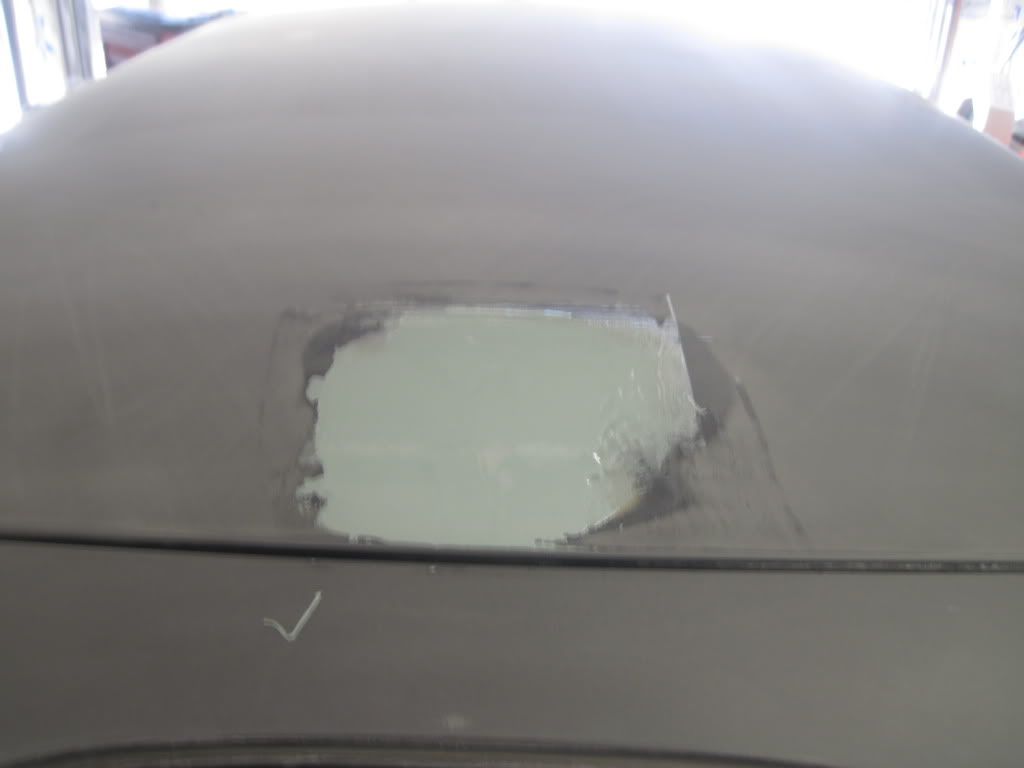
No more chance of snagging a carp with that fishing rod they call an antena (Yes it's been removed for a long time but the hole was still there) Hole meet Plug.
A little welding, a little filler you'll never even know it was there.
That was all for today, tomorrow I need to scuff out some rock chips and make some body mud.
Say goodbye to the body color roof.
I started the prep work to get it turned black.
Peeled off the clear bra, there is quite a bit of glue left behind that needs to be removed before sanding. (I know it's hard to see the differance, it was a CLEAR bra.)
No more chance of snagging a carp with that fishing rod they call an antena (Yes it's been removed for a long time but the hole was still there) Hole meet Plug.
A little welding, a little filler you'll never even know it was there.
That was all for today, tomorrow I need to scuff out some rock chips and make some body mud.

#604
03-27-2012, 04:37 PM
Join Date: Feb 2010
Location: North Denver Colorado
Posts: 2,836
Likes: 0
Received 6 Likes
on
6 Posts
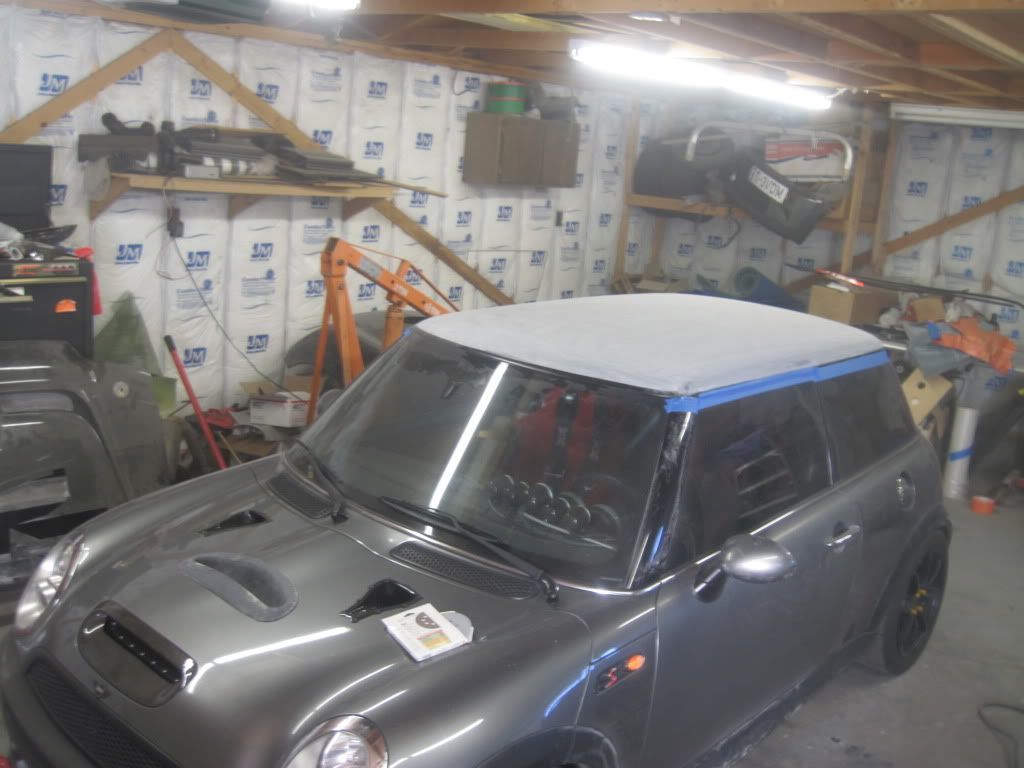
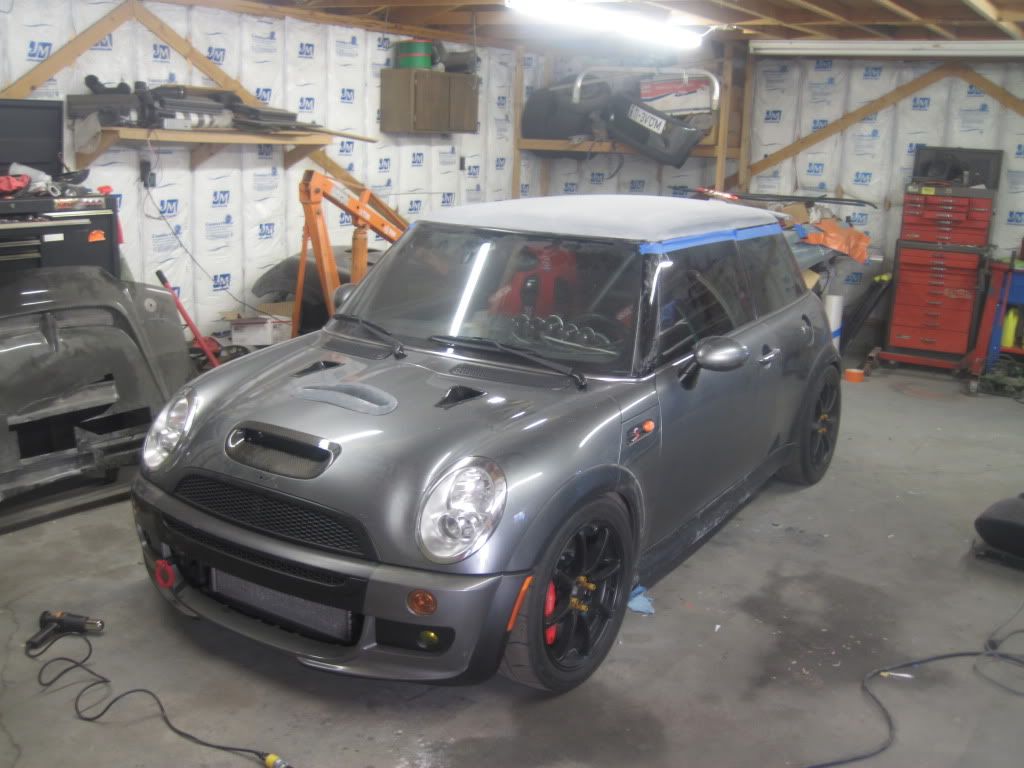
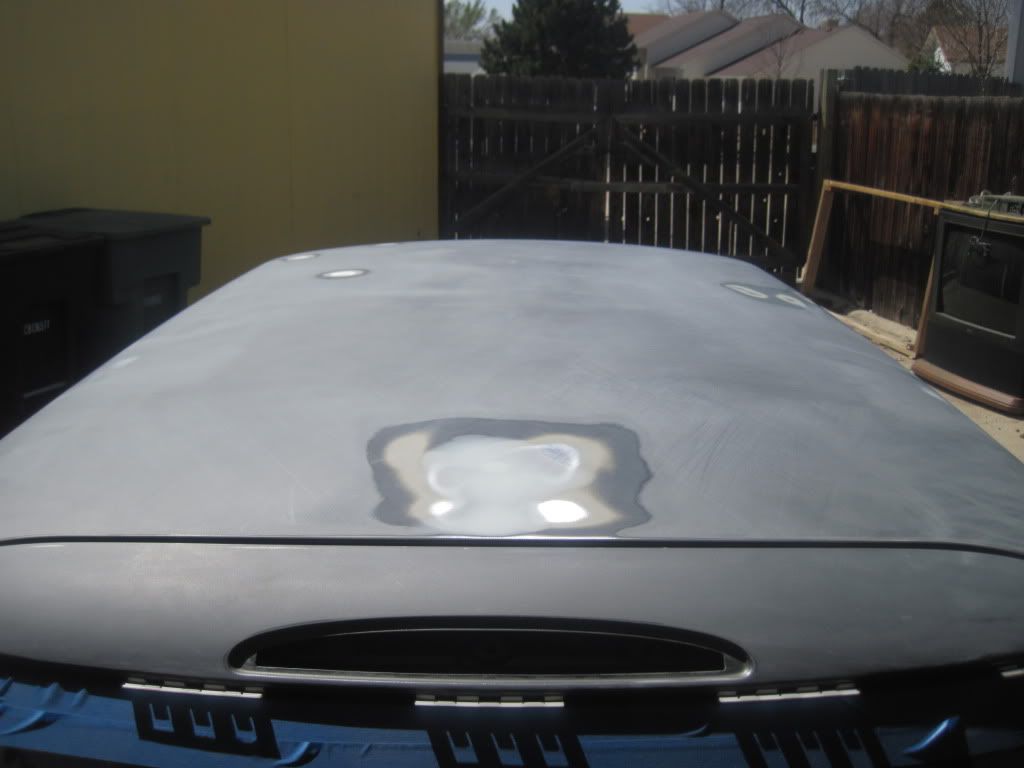
The roof is ready for primer. It's perfectly smooth, the antena hole is gone, now I just need to shoot it. (When I get the materials ofcourse)
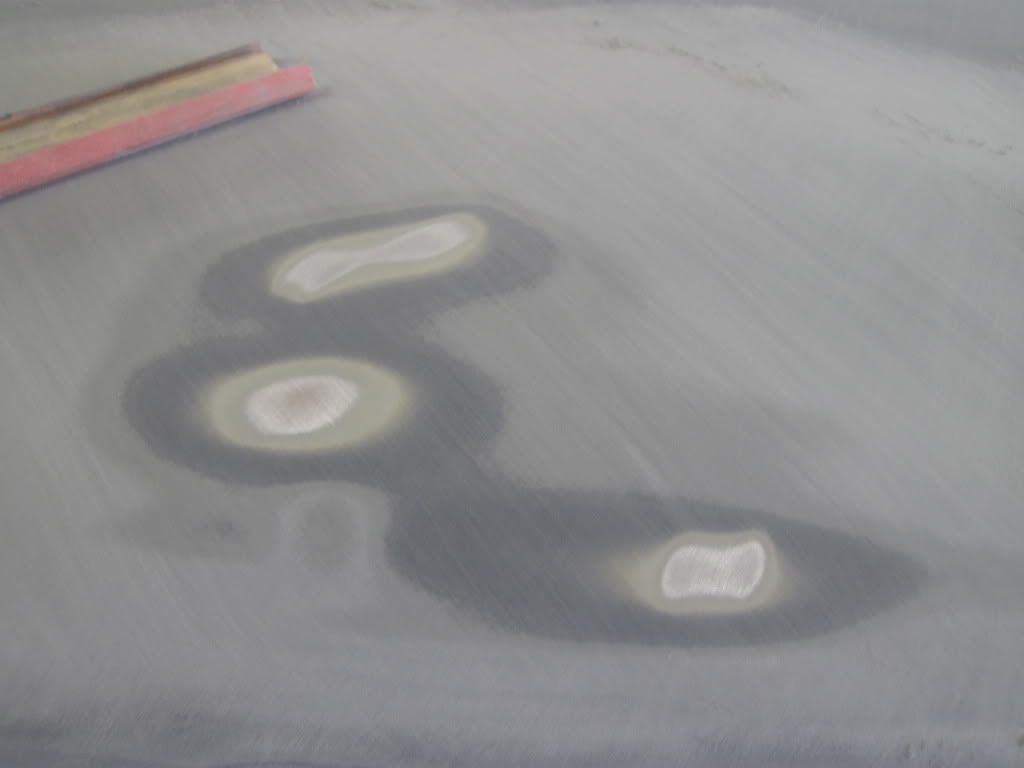
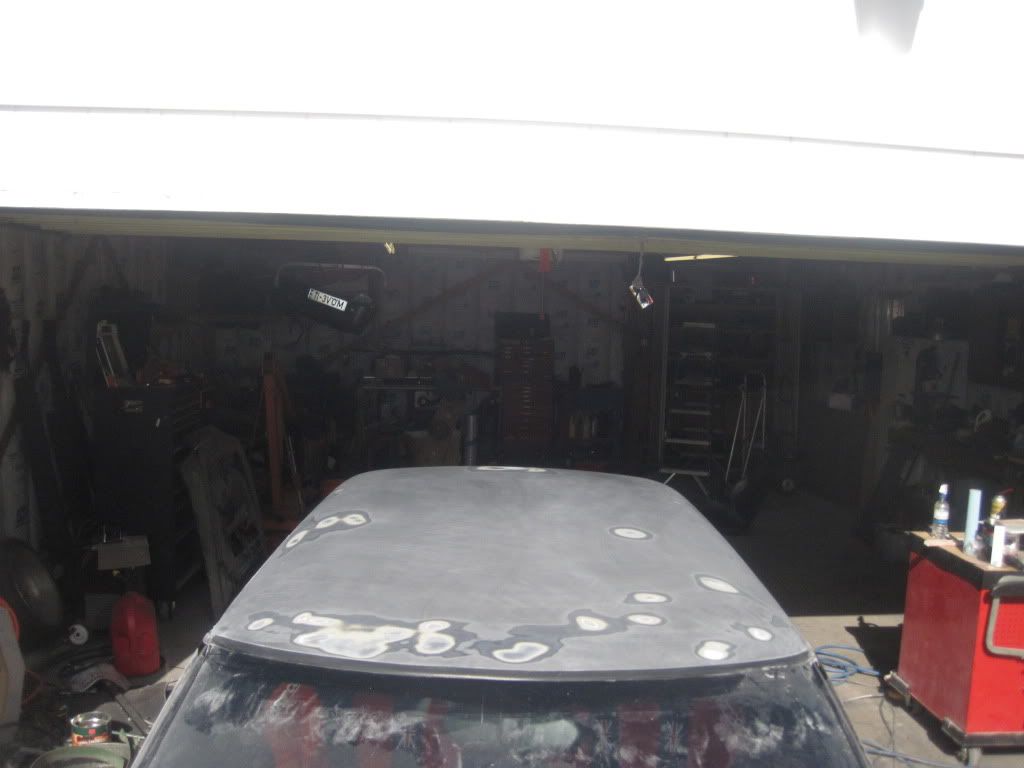
Buzzing down the rock chips with 120 grit, there was a bunch of them.
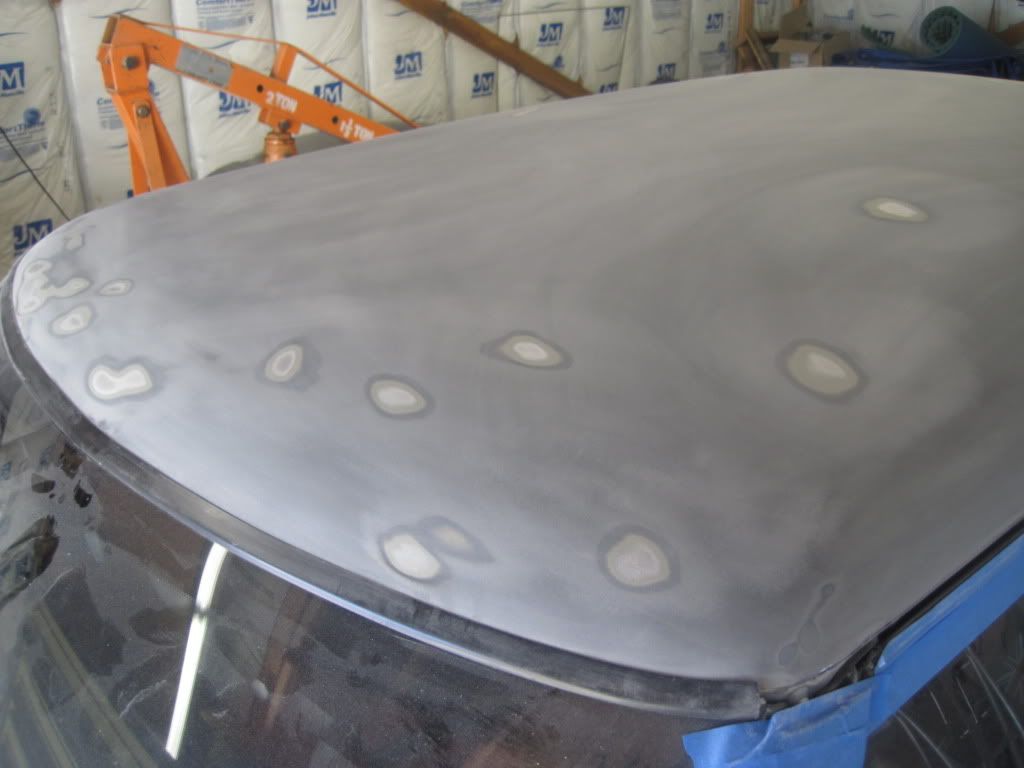
A tiny chip out of the paint should look like this to make sure the new paint comes out smooth.
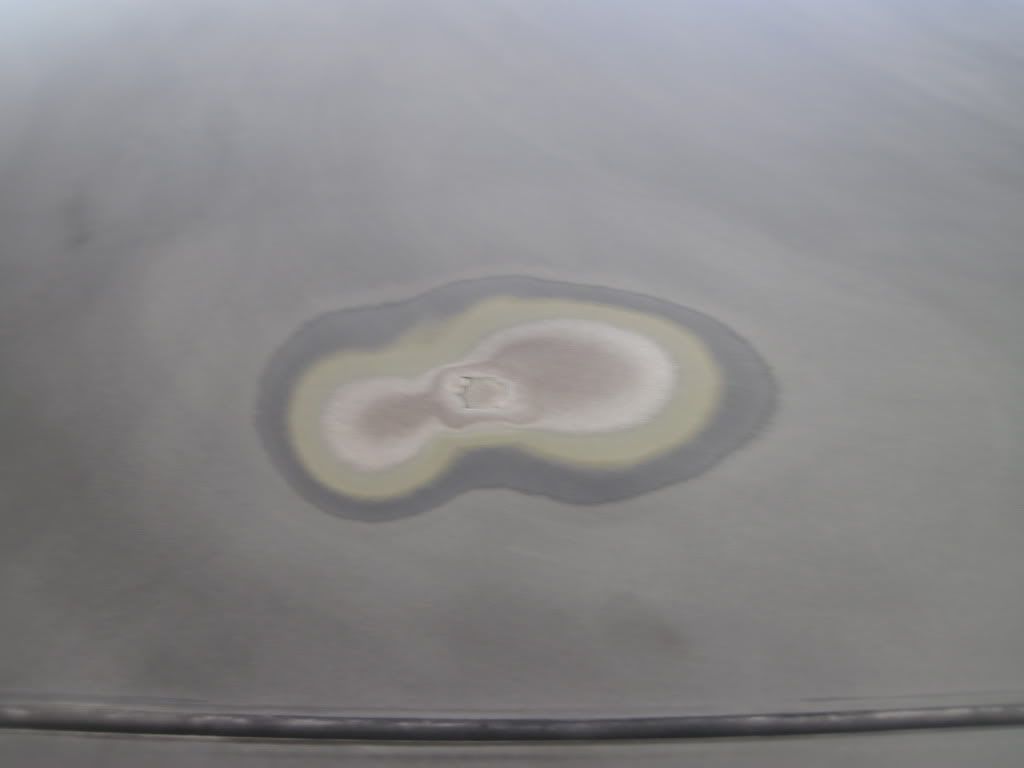
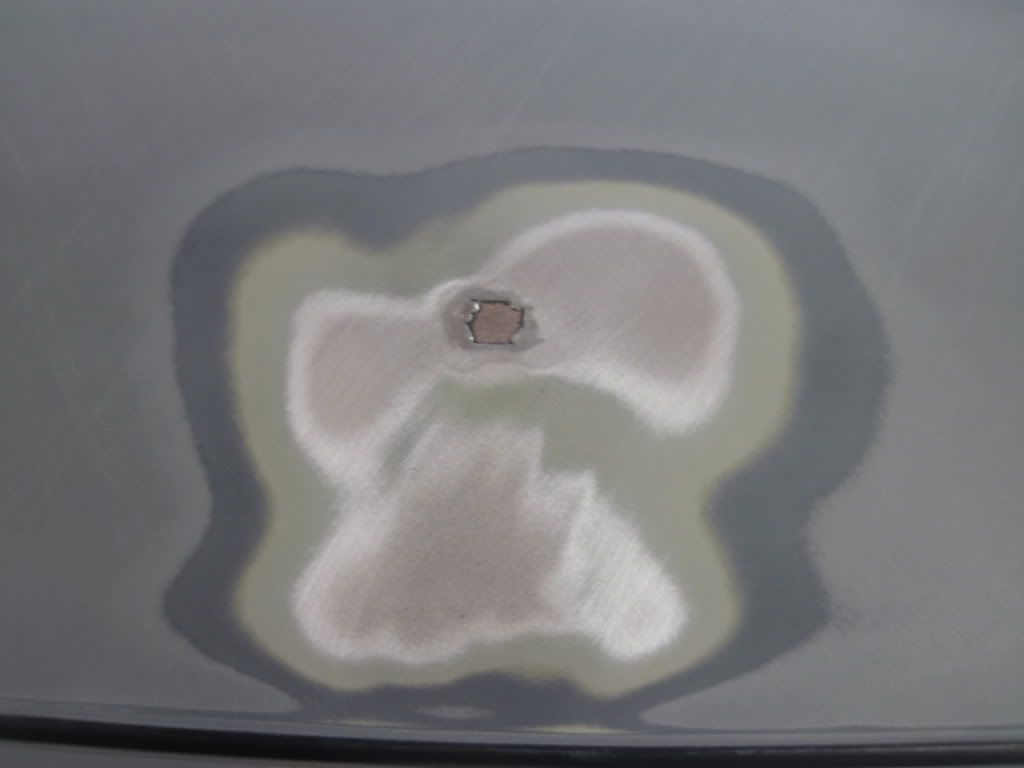
Feathering out the paint around where the antena was, if you look close you can see a darker shadow behind where the hole was, that was a dent that I needed to take care of.
A stress dent on the sides of the roof, nobody believed me that they where there. Here's the proof. Hopefully they wont ever come back.
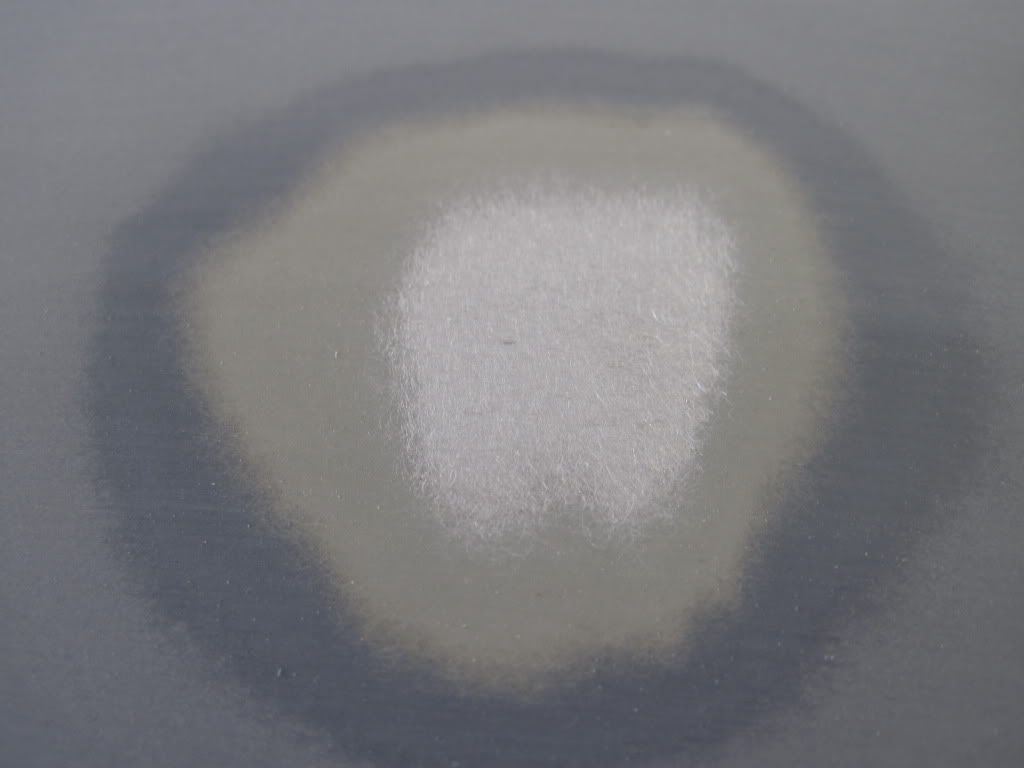
Blocking out multiple rock chips. You want to peel the layers of paint as far back as possible.
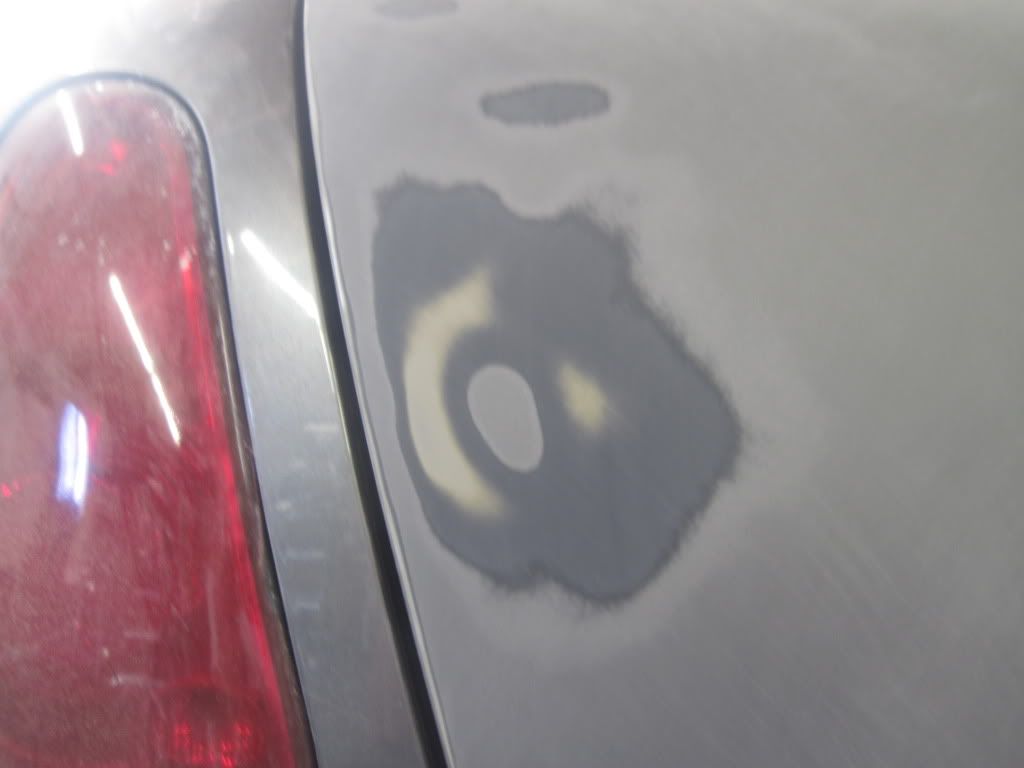
The antena hole all preped and ready for filler. (It kinda looks like a face)
Ah mud.
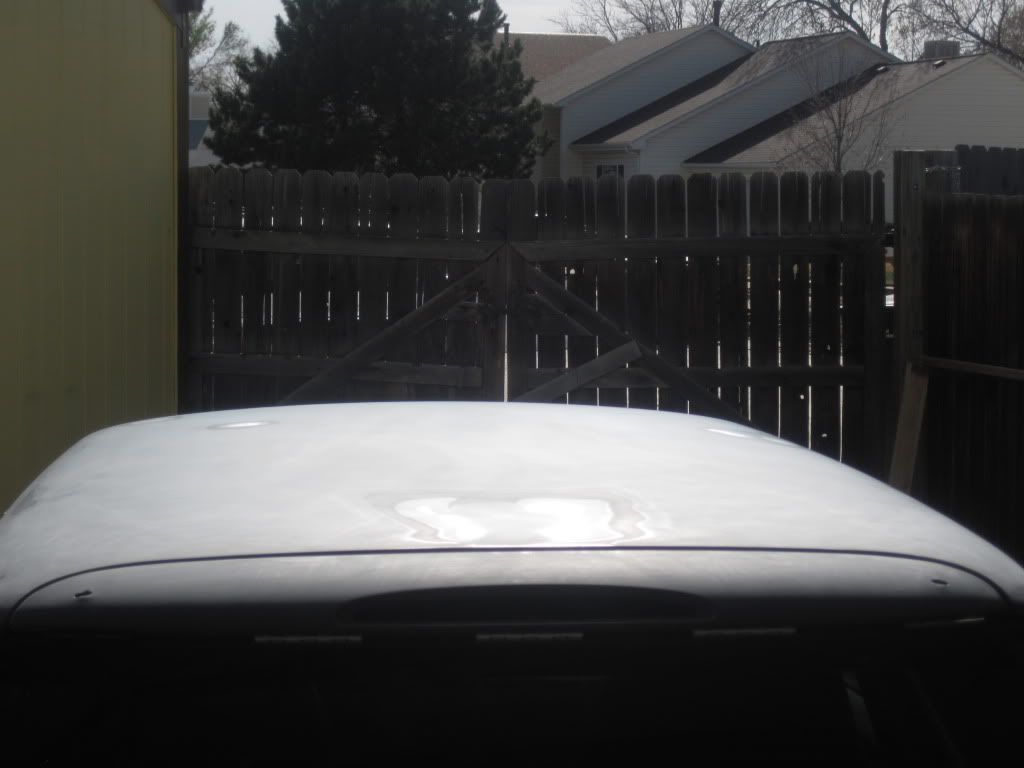
And the finished product after everything was smoothed, then blocked with the 320 grit for final prep before primer.

No sign of a hole ever being in the roof. Pay no attention to how the holes for the wing look like they are pulling up and peeling back. They will be delt with, and I am adding a couple mounting points to the wing to make sure it dosent happen again. (There is NO reason to hold a wing that big with 2 studs and some double stick tape! What where they thinking?)
Buzzing down the rock chips with 120 grit, there was a bunch of them.
A tiny chip out of the paint should look like this to make sure the new paint comes out smooth.
Feathering out the paint around where the antena was, if you look close you can see a darker shadow behind where the hole was, that was a dent that I needed to take care of.
A stress dent on the sides of the roof, nobody believed me that they where there.
Here's the proof. Hopefully they wont ever come back.Blocking out multiple rock chips. You want to peel the layers of paint as far back as possible.
The antena hole all preped and ready for filler. (It kinda looks like a face
)Ah mud.
And the finished product after everything was smoothed, then blocked with the 320 grit for final prep before primer.
No sign of a hole ever being in the roof. Pay no attention to how the holes for the wing look like they are pulling up and peeling back. They will be delt with, and I am adding a couple mounting points to the wing to make sure it dosent happen again. (There is NO reason to hold a wing that big with 2 studs and some double stick tape! What where they thinking?
)
#608
03-27-2012, 11:40 PM
#609
03-27-2012, 11:52 PM
Join Date: Feb 2010
Location: North Denver Colorado
Posts: 2,836
Likes: 0
Received 6 Likes
on
6 Posts
Thanks Mark, Ive gotta do something with my car, and its not going anywhere for a while.
Belt tool? You mean that pice of steel with the hex bolts sticking through one end?
Yeah that thing is a POS! I cut about 6 inches off of one end and got rid of those useless bolts. Ive got just enough grip to squeese the tensioner down, but it works and dosent hit the P/S lines, swaybar, framerail, or anything else like the full length stick did. Remember to squeese the tensioner about as fast as a snail swiming in molasses on a cold day, or you could pop the one tiny C-clip that holds the thing togeather again.
#611
03-28-2012, 08:14 AM

5th Gear
That washer tank *would* be a handy place to put water/meth mix or isopropyl for an intercooler external misting system, so you can hit the washer switch and cool off your intercooler when you need to. I'm sure you could get some misting nozzles at Lowes or Home Despot and fab up something useful....
C ya,
Dutch
Last edited by joe_bfstplk; 03-28-2012 at 08:16 AM. Reason: to fix a bit....
#612
03-28-2012, 08:47 AM
Join Date: Feb 2010
Location: North Denver Colorado
Posts: 2,836
Likes: 0
Received 6 Likes
on
6 Posts
Ive had it rigged up as a I/C sprayer before, but the last time I was at the drag strip they told me I couldnt use it because it was dripping water doun the track. My W/M tank is the 3 gallon tank in the back so I am good on that. It's just kinda useless right now.
I'm thinking about welding the holes for the rear MINI emblem up and not putting that badge back on, but I dont know I kinda like having it there. Any thoughts?
I'm thinking about welding the holes for the rear MINI emblem up and not putting that badge back on, but I dont know I kinda like having it there. Any thoughts?
#613
03-28-2012, 08:49 AM

My roof needs major work as well. The old owner used the OEM roof rack, so it has the 8 mounting point holes (that I am OK with leaving there) and a ton of dents, dings and scratches.
Currently it is white, but I think when I tackle it I am going to change it to black. This is a nice reference. Thanks DGR
Currently it is white, but I think when I tackle it I am going to change it to black. This is a nice reference. Thanks DGR

Thread
Thread Starter
Forum
Replies
Last Post
gar56
MINIs & Minis for Sale
1
11-15-2016 06:41 AM
Emnotek
Vendor Announcements
0
09-29-2015 07:37 AM
EVMini
R56 :: Hatch Talk (2007+)
4
09-28-2015 10:20 AM