
R50/53 Racing Turtel
#126
 07-28-2016, 05:32 PM


#127
08-02-2016, 07:55 PM


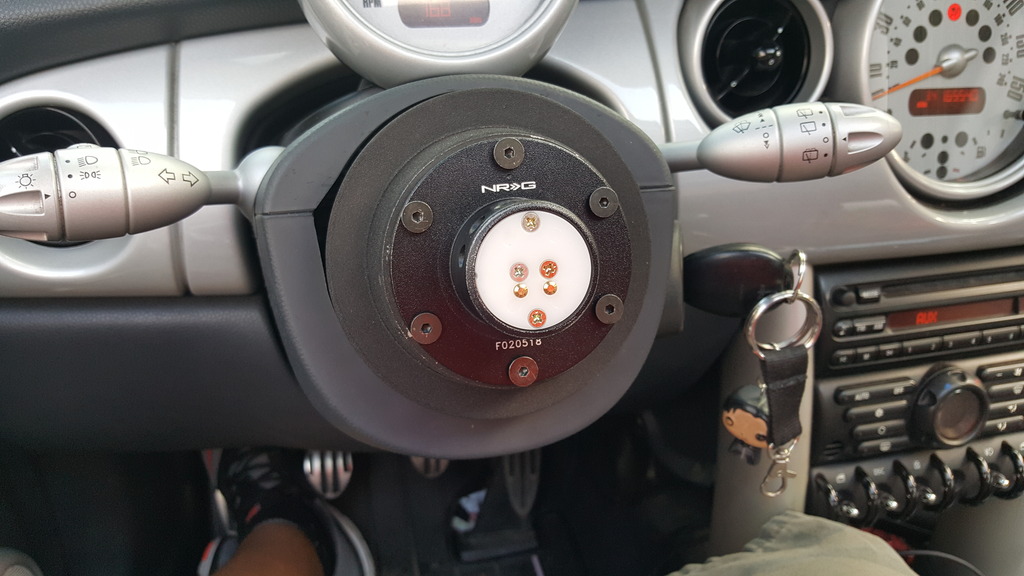
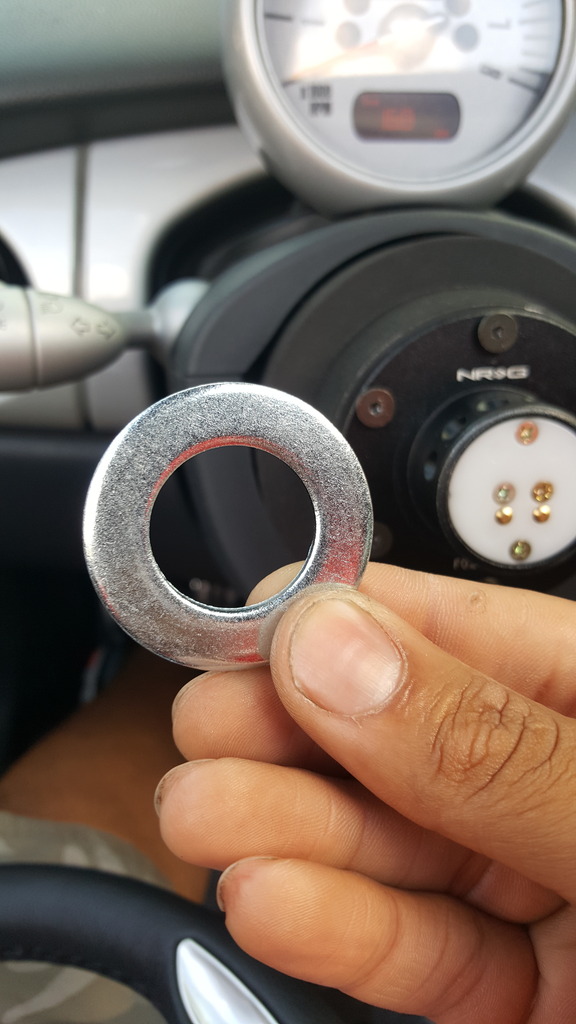
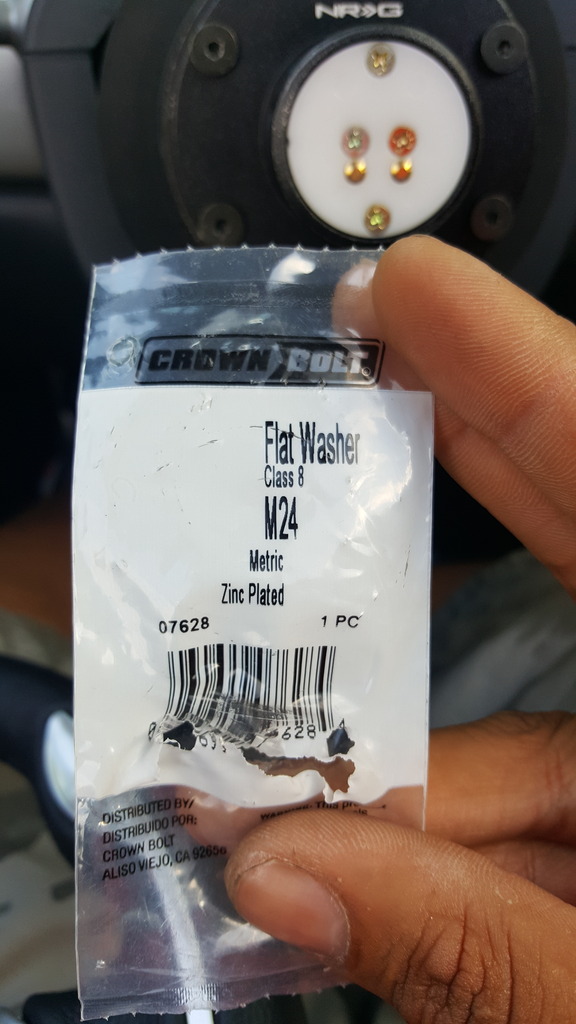
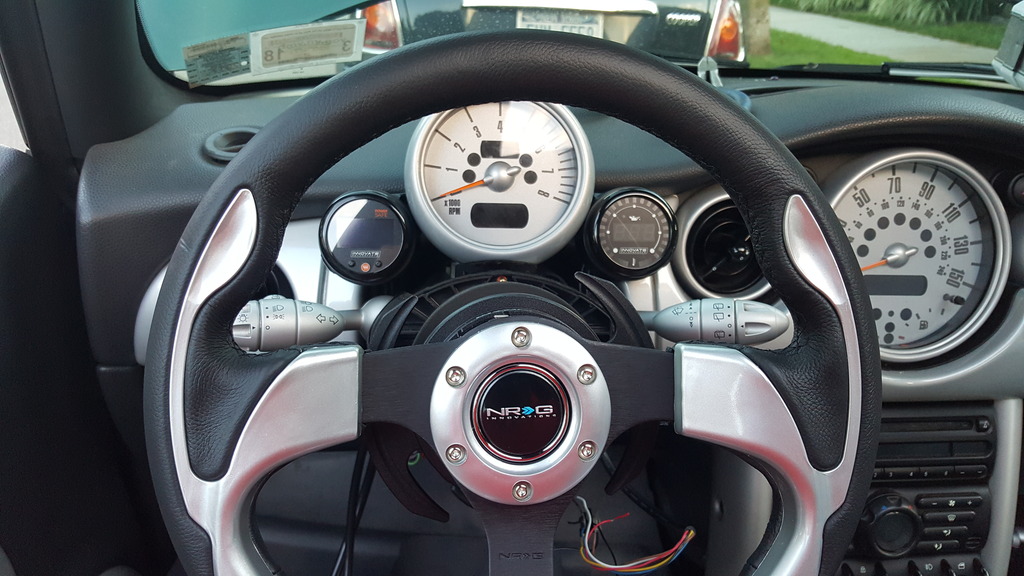
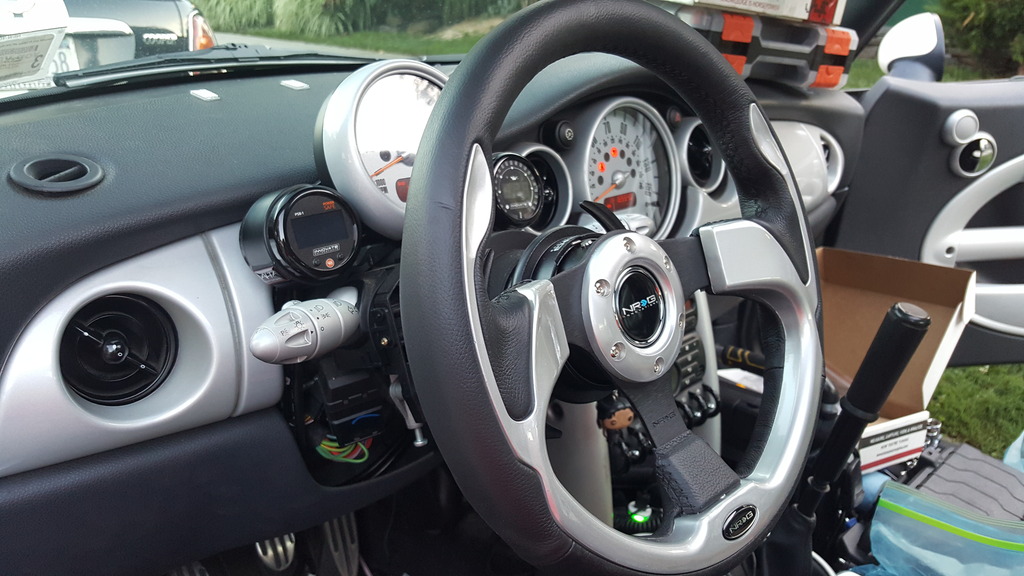
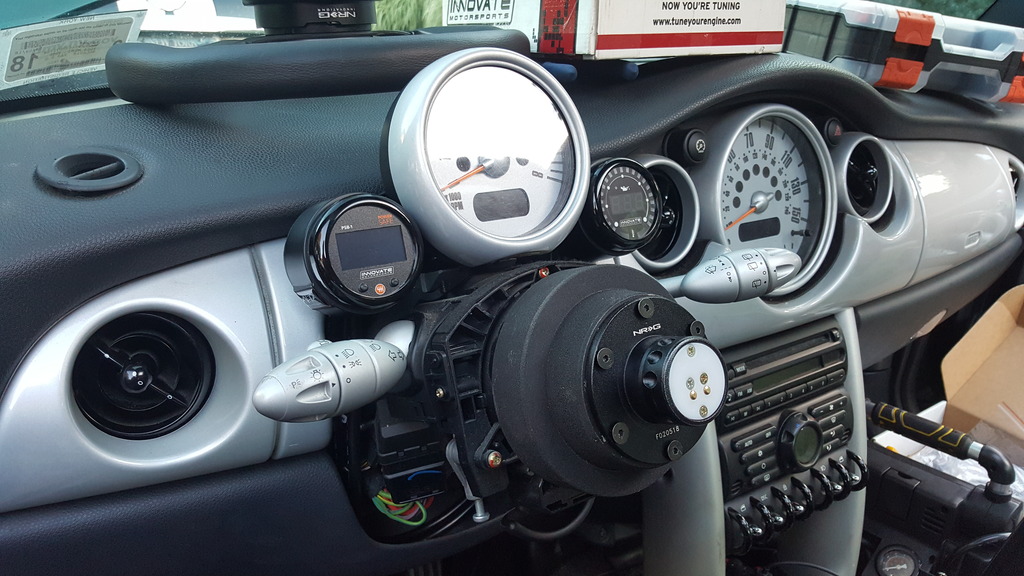
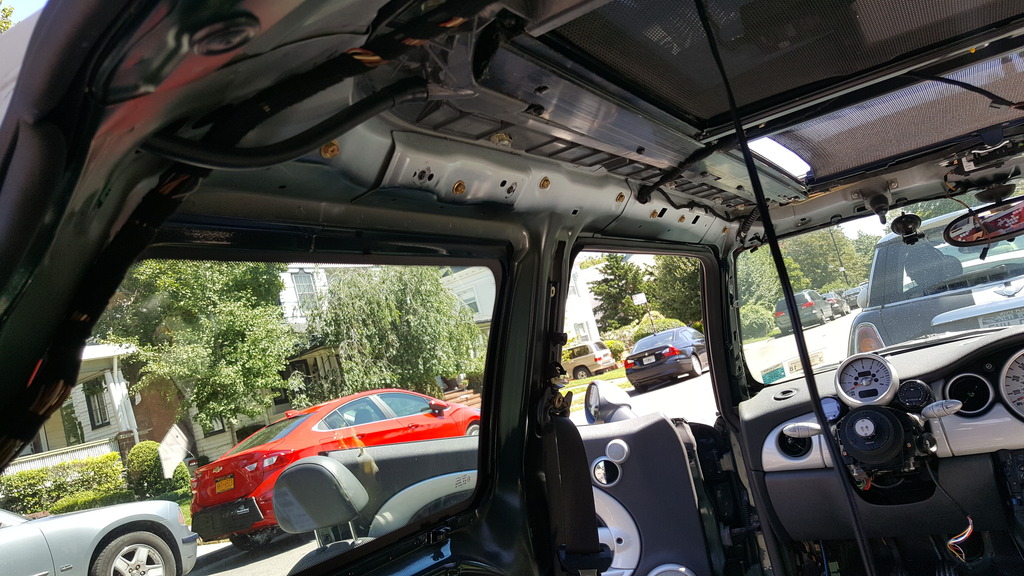
So After 3 tries, seems like the saying is right. 3rd time is the charm. Went to HD and got a 24mm washer (only need 1 I got 2 just incase, There is a little play so need maybe 1mm or 2mm more to be super tight) and this did the trick. Haven't taken the car for a drive, but i turned the wheel left and right and everything seems to check out. Got the horn to work by using a computer case speaker with 4 pins (picture below). Took the time to route the cables for my gauges today and installed the gauges in the Alta Pods. I will be wiring everything tomorrow, and hopefully getting the roll cage measured into the car and measure where i will need to make holes for the bolts (hope no brake/fuel line are in the way ect).
Computer Case speaker cable


24mm washer
Steering wheel installed

Pods and Gauges installed

Computer Case speaker cable


24mm washer


Steering wheel installed


Pods and Gauges installed


#128
08-04-2016, 10:03 PM
I took yesterday to take out the rest of the interior and It turns out they sent me to wrong cage. so back to waiting.


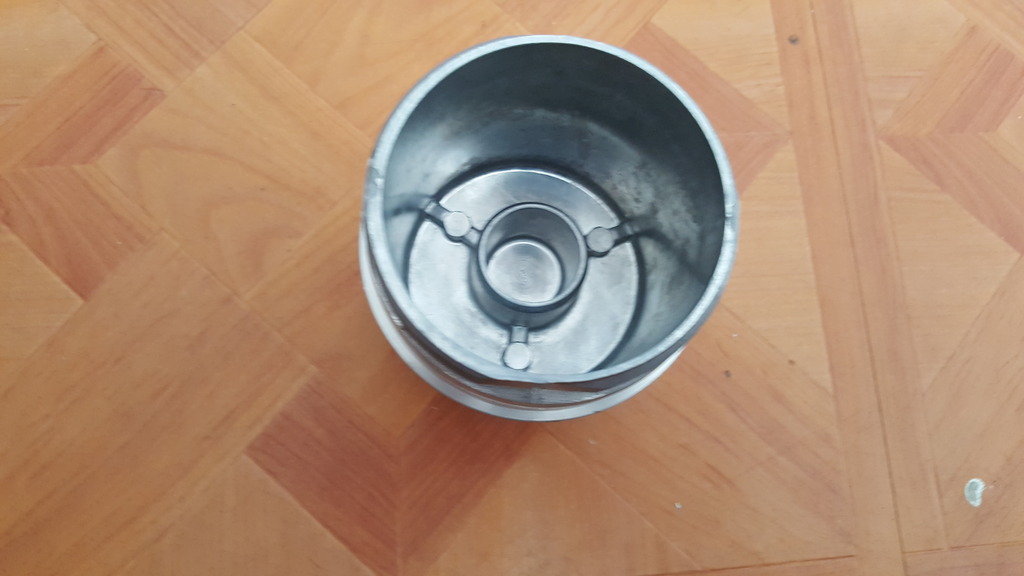
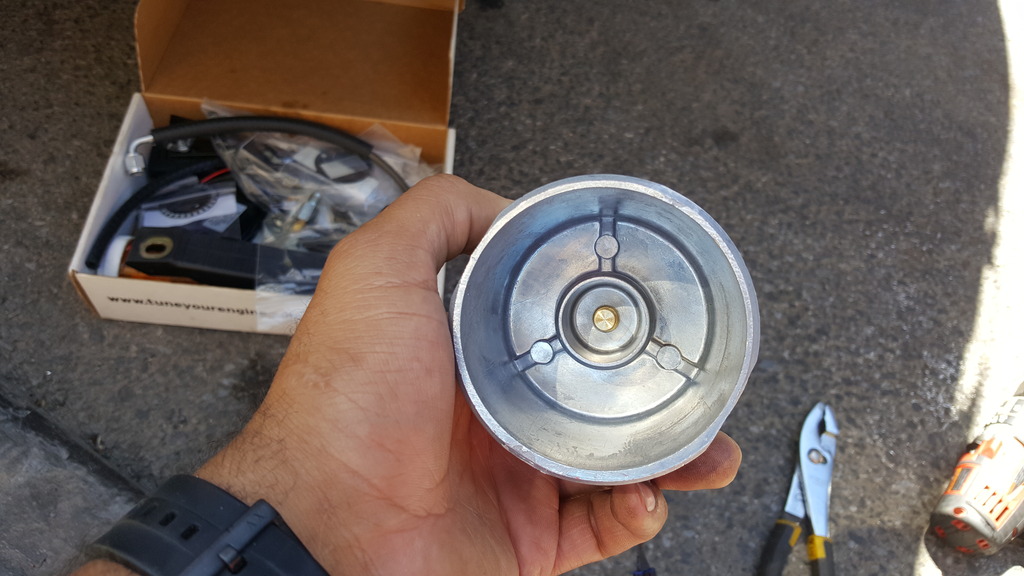
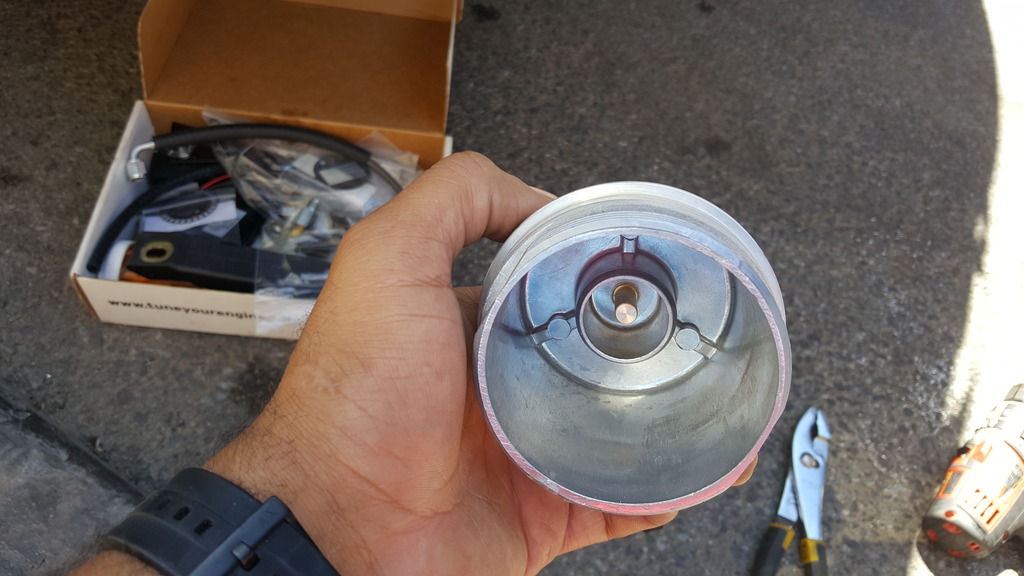
Also Finally got the Mini Mania Baffle. Looks great just one disappointment. I don't think it will fail and if it does i maybe Screwed since some metal may get into the engine, but man why couldn't the builder just tap it on the other side. Let hope it all fit right when i try to install it.
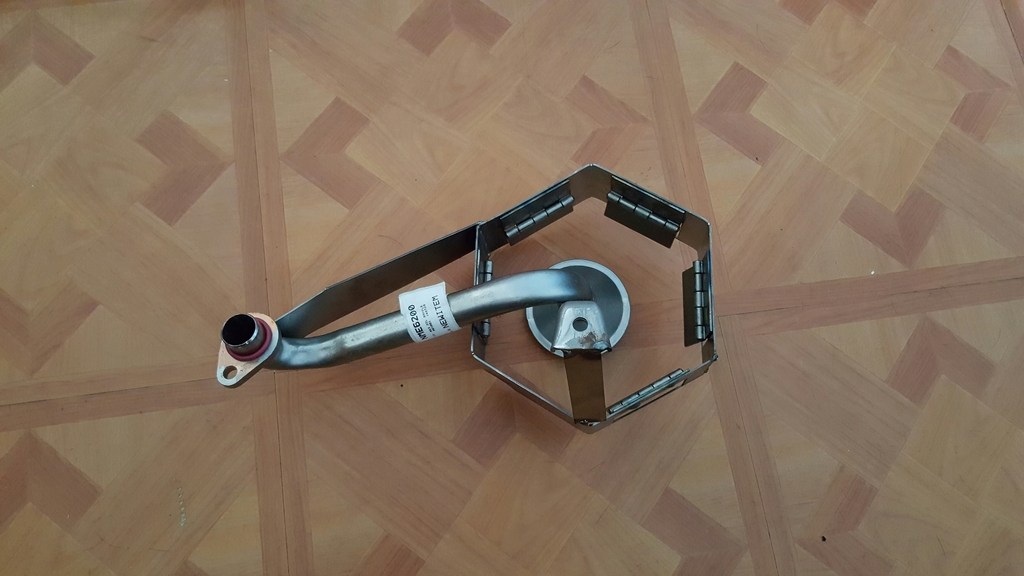

Just a tap would of made it great lol


Last edited by HaveATank; 08-05-2016 at 03:57 AM.
#129
08-05-2016, 06:40 PM
Wow, what a build. 
The steering wheel looks great.
Sucks about the cage.
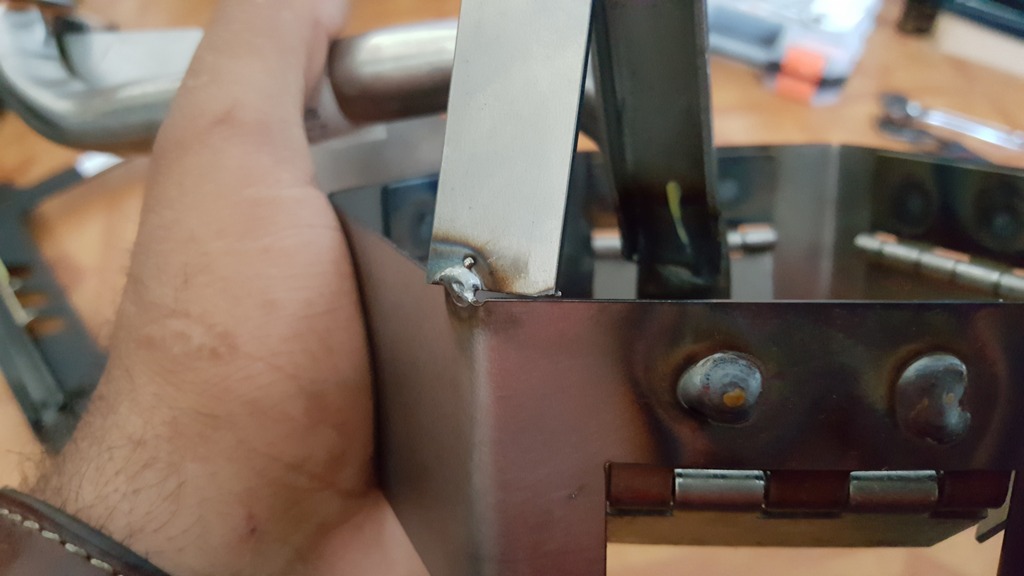
And the oil thing - I would find someone to tack weld the other side of that thing before I put it in. You could do it yourself with a MAPP gas torch and a brazing rod. Honestly I pull 1g corners and had no problems. Just need to keep the oil at the full line.
The steering wheel looks great.
Sucks about the cage.
And the oil thing - I would find someone to tack weld the other side of that thing before I put it in. You could do it yourself with a MAPP gas torch and a brazing rod. Honestly I pull 1g corners and had no problems. Just need to keep the oil at the full line.
#130
08-08-2016, 06:43 AM
Oil Baffle
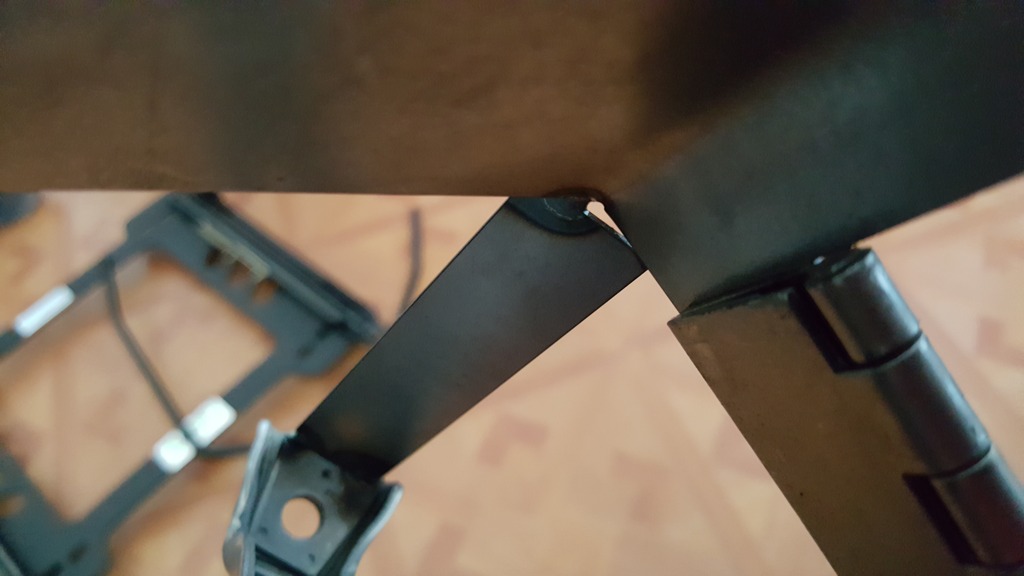
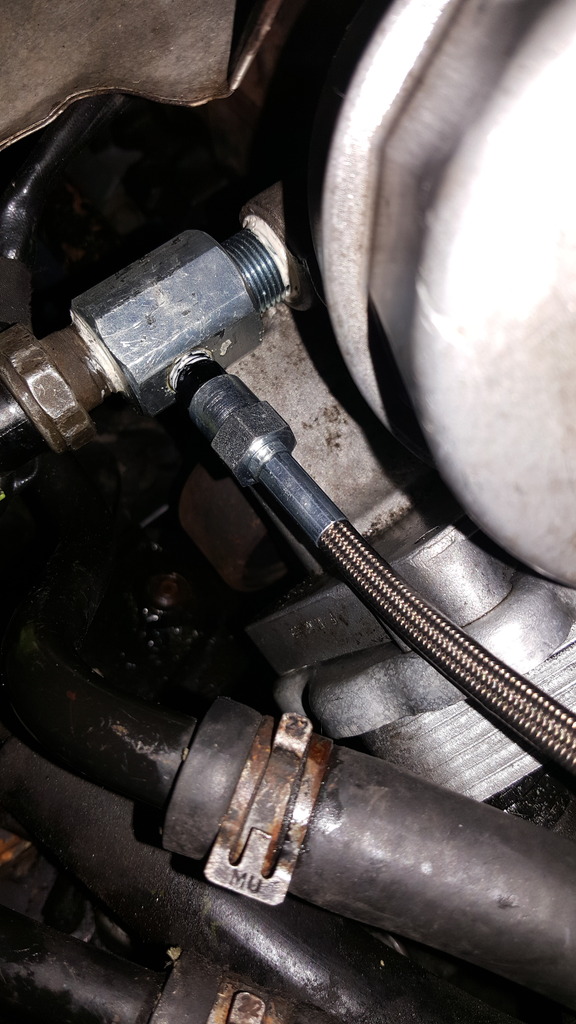
Installed oil Baffle gasket and changed oil over the weekend. Tried to installed the Temp/Pressure gauge sensors, but that was a no go. The Oil Plug i go to install the sensor in didn't fit into the plug hole despite it being the same thread pitch and size and the Oil pressure remote line needs a 3AN to 1/8th NTP for it to work. by the looks of it when you do an oil change it almost seems like you leave about 8oz in the pan. also when i took off the filter there was other 8oz there as well as when i took off the oil pressure sensor. So it seems like you leave about half a liter in the engine doing an oil change. I mean it let that puppy drip for a while until nothing else came out from the the drain hole. while i was taking everything off in the front.


Wired up all the gauges installed the wide band sensor, as well as most of the other things like the USB charger/Radar Detector/DashCam/BT trasmitter/BT Speaker (hands Free) ect. Will try to install the WMI. waiting on the Self sealing thank since i will be using the light washer tank.


AFR is up and running and i have been monitoring so make see where it falls. So far it been good at WOT it been around 12.x and idle to moderate acceleration it been anywhere between 14.x - 15.x. When i install the WMI i want to see what it goes too when boost kicks in and depending what i see ill just reset the adaptive value so it can adapt to the extra fuel and if this doesn't work i will just have to wait for the tune.
Here the pictures

Wiring
#131
08-08-2016, 06:47 AM

#132
08-08-2016, 07:45 AM


#134
08-08-2016, 02:25 PM
It is a clean and easy to trouble shoot method, I would only like to make a couple observations.
Make sure its FUSED.
Make sure the binding post are secured by more that just doubt sided tape. You could used a zip tie or screw the strips in place, but you do not want a unprotected 12v+ lead floating loose doing a race or even regular driving.
Make sure its FUSED.
Make sure the binding post are secured by more that just doubt sided tape. You could used a zip tie or screw the strips in place, but you do not want a unprotected 12v+ lead floating loose doing a race or even regular driving.
#135
08-08-2016, 06:47 PM
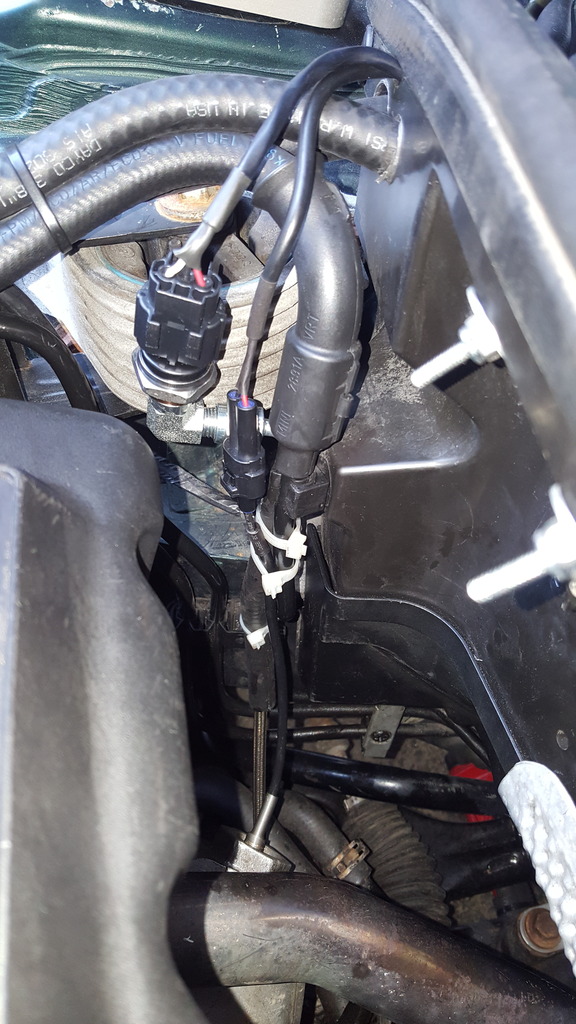
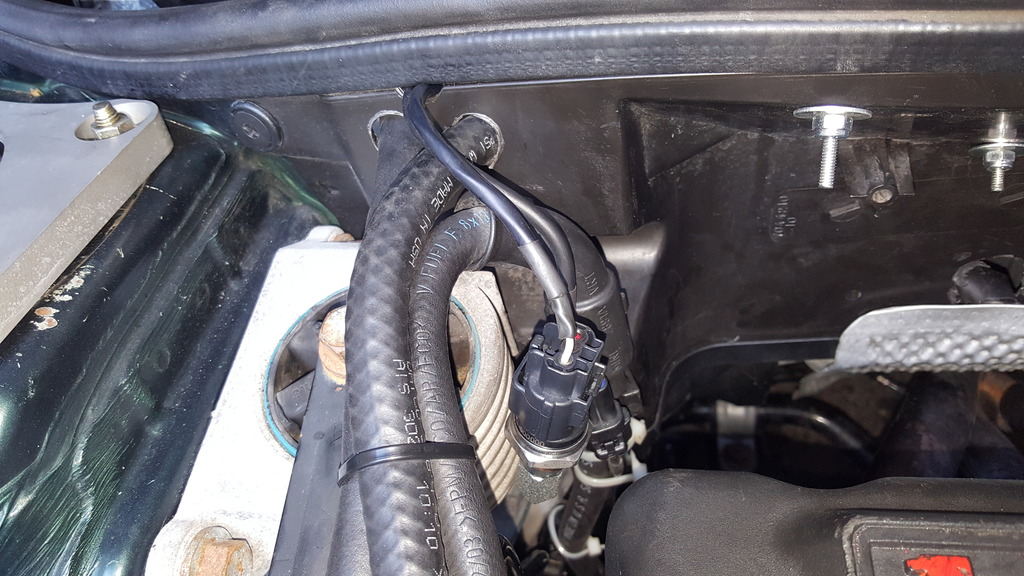
Everything is fused. Add-a-fuse is your biggest friend. Not fusing your add ons is a big a no no in a car, you must always fuse your circuits. Install anything without fusing it first, its just asking for it. On the positive side, I have the first 3 position Oil/Temp Gauge/AFR Gauge and the WMI Arm Switch. Which are on a circuit the will only turn on when the ignition is turned to the on position. The USB are on a different circuit which is always on. Since i will be running my Dashcam and to keep other things charge like the BT Transmitter and BT Speaker. Ill take more detail picture. I still have to finish wiring the WMI and installing the controller and pump.
I'm working on a protection for the fuse box, since yesterday i kicked off the Fuel relay while shifting into second when i went to rest my feet (it will make more sense when i take a picture).
The double sided tape will hold. Have been using it for years, it suppose to hold a 20lbs object vertically mounted and in the elements. That's why i use the outdoor one. It will even hold a turn signal resistor which gets to 255f when you put the Hazard light on. The key is to make sure the surfaces are nice and clean, But i guess ill add zip ties. More security wont hurt and since i need to go back to it to wire up the WMI controller why not.
It is a clean and easy to trouble shoot method, I would only like to make a couple observations.
Make sure its FUSED.
Make sure the binding post are secured by more that just doubt sided tape. You could used a zip tie or screw the strips in place, but you do not want a unprotected 12v+ lead floating loose doing a race or even regular driving.
Make sure its FUSED.
Make sure the binding post are secured by more that just doubt sided tape. You could used a zip tie or screw the strips in place, but you do not want a unprotected 12v+ lead floating loose doing a race or even regular driving.
#136
08-13-2016, 07:35 PM
Took off the oil pan again to take off the sticker from the baffle. While i was there i tried to install the oil Temp sensor using a craven speed Oil plug sensor adapter, but this was a no go. i was not able to make this screw in the hole nicely like the stock plug does. Didn't was to force it and strip the hole so i stopped while i was ahead. I don't get it the screw looks the same like everything should work but it just wont thread in. Here is some pictures.
I'm i crazy and this bolt threat pitch is different or what? Please take a look.

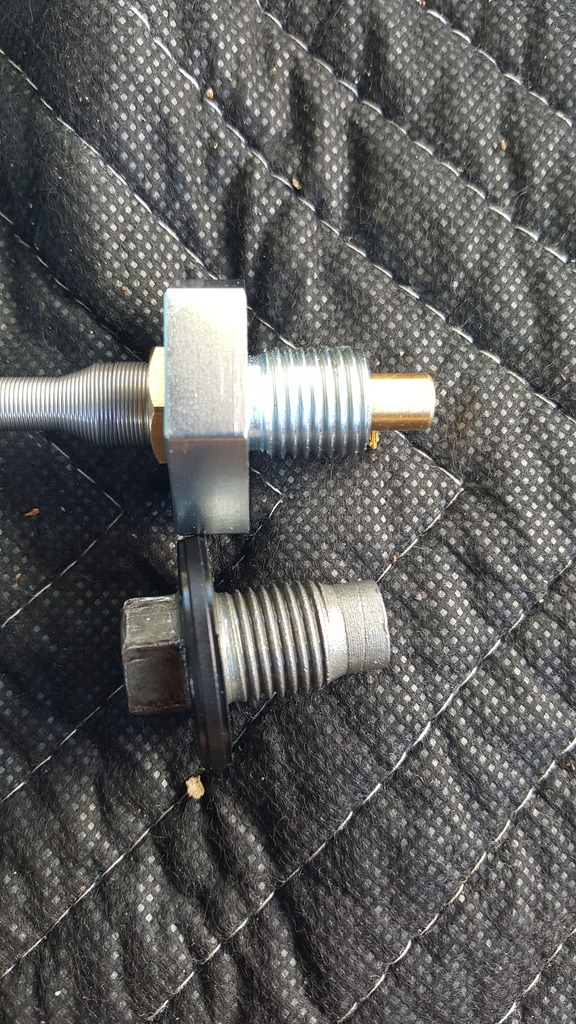
Any idea besides Drilling into the engine or the oil pan which other way i can install it. I will be sending this back to Craven Speed and hoping this have a different one.
Took the time and Finished wiring up the WMI kit and mounted the Pump and controller. Last thing to wire up would be the Lever sensor wires, but dont even know if this will fit into the headlight washer tank guess will find out. Disconnected the controller because the system wont be in use for now.


for the fuse box picture and see how close the foot rest is to the fuse box and relay. Will be making a Plate to go to cover the fuse box. Will coat the fuse facing side with Plastic drip just in case.

Still need to wire the RD/Dashcam and the BT Transmitter and BT speaker (handsfree).
#137
08-14-2016, 05:42 AM
It is hard to tell from the pictures whether the two are the same thread. I know that some metric and inch threads are almost the same, to the point that you can almost thread them together.
It may be that it has the correct thread pitch but the diameter is just a hair too large. You need some calipers to tell for sure.
It may be that it has the correct thread pitch but the diameter is just a hair too large. You need some calipers to tell for sure.
#138
08-14-2016, 08:04 AM
I started to looking last night just to make sure and some people used the Oil cap as seen in this picture. Promini sells it, but i couldn't find it on there site, So I placed an order for a new Oil filter cap and I'm just going to tap it. I read people saying that it too thin, but i think i would be fine since my sensor doesn't ground to the metal at the sensor side. Most of the threads i was able to find are like 10-12 years old on multiple forums, so the probability of this people still owning the car are slim to non.

I also looked at the plug size and it suppose to be a 14mm x P1.5 or 14mm x 1.5 Don't really know what the P stands for I'm just going to assume it stands for Pipe.
I had ordered and Autometer which also didn't work. Then purchased the expensive Craven Speed which I assumed will work since it so expensive figured they did there HW and same thing.
Here is the video i made to send to CravenSpeed.
http://vid1271.photobucket.com/album...8219116290.mp4
http://vid1271.photobucket.com/album...4254178455.mp4
http://vid1271.photobucket.com/album...9997608313.mp4
It is hard to tell from the pictures whether the two are the same thread. I know that some metric and inch threads are almost the same, to the point that you can almost thread them together.
It may be that it has the correct thread pitch but the diameter is just a hair too large. You need some calipers to tell for sure.
It may be that it has the correct thread pitch but the diameter is just a hair too large. You need some calipers to tell for sure.
#139
08-14-2016, 02:09 PM
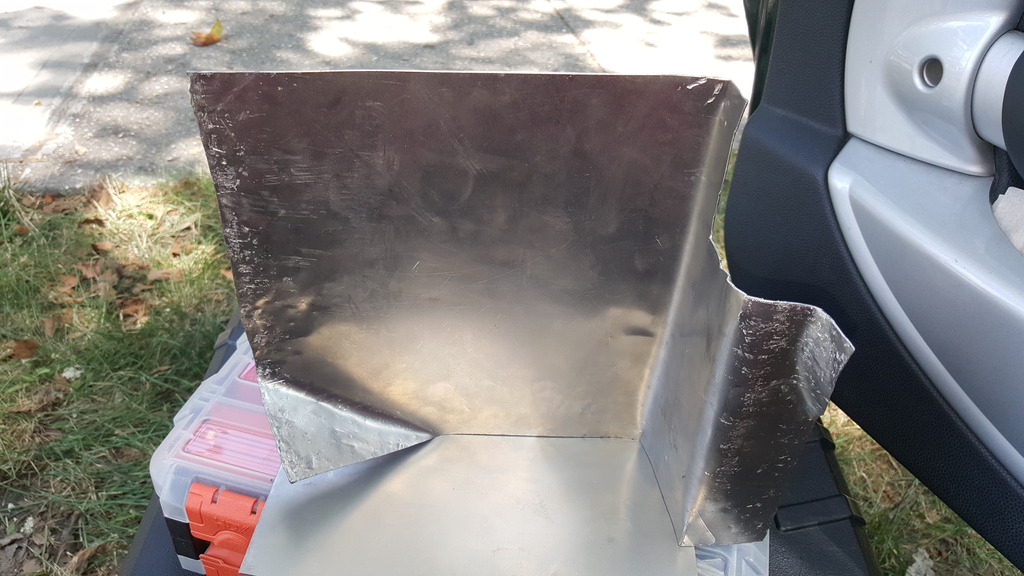
So Wired up the RD and made the Fuse Plate. Still need to finish it up, but here is what it looks like. I will be smoothing out all the ruff edges and painting it black, then I'm going to plastic dip the side that will be facing the fuses. Unless anyone has any better idea?
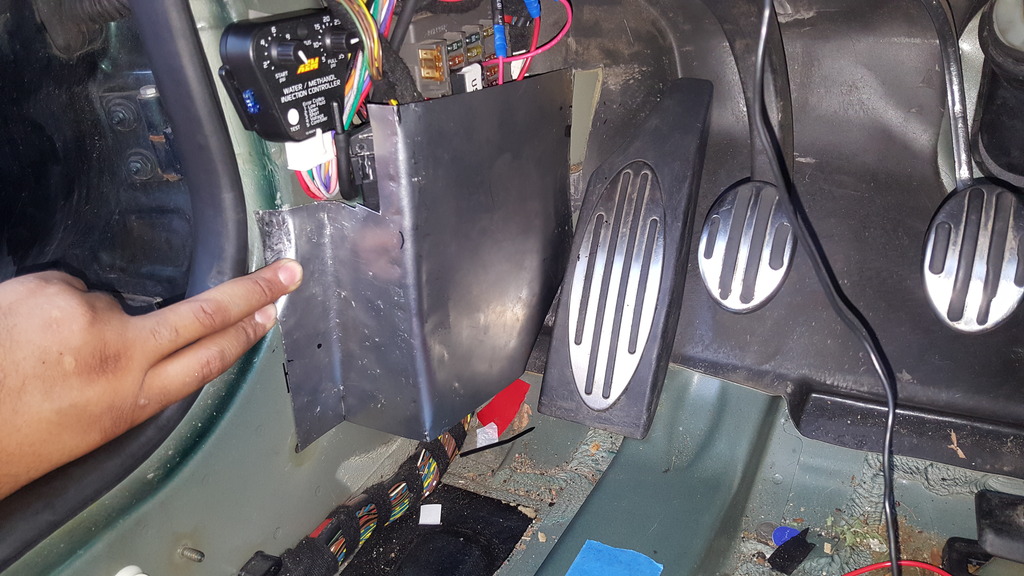
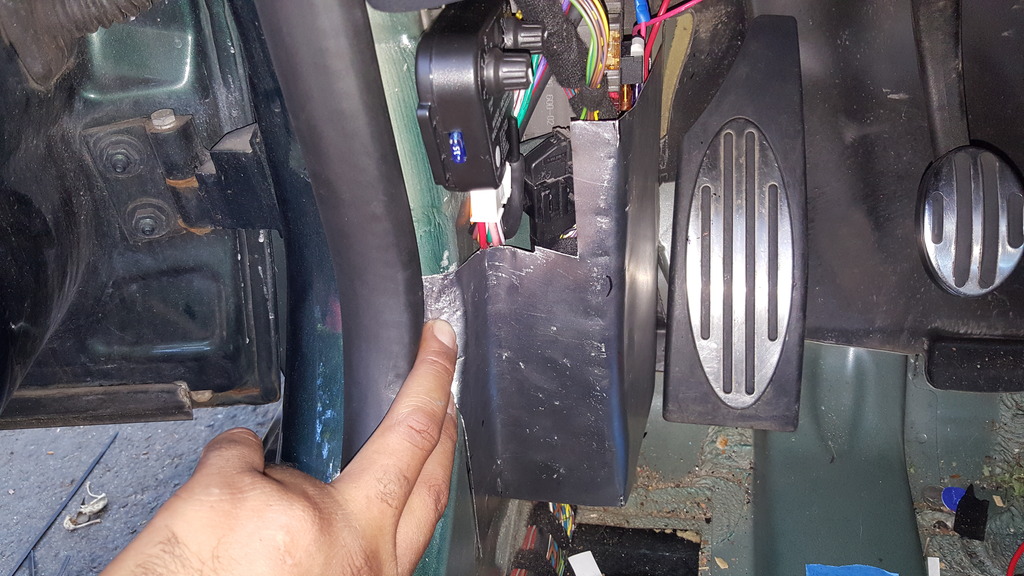

This is how close it is


After i packed it all up, i took the car to the car wash and there was water on the drive side floor any idea. Checked the sunroof to make sure it wasn't clunked or anything and that checked out, But what i don't understand is where the water came from. I don't see any holes in the floor or anything. Any ideas?
#140
08-14-2016, 03:41 PM
#141
08-14-2016, 04:07 PM
#142
08-14-2016, 04:24 PM

#143
08-14-2016, 04:28 PM
Yah I'm also going to double check the door rubber to make sure it not coming from there or maybe the window was open. i just dont remember ever seeing water before. I hope it something dumb lol. I just got alittle scared because the fuse box is exposed and all.
#144
08-14-2016, 04:42 PM
#145
08-14-2016, 04:51 PM
I'm going to double check that again. this time ill throw water and see how it drains.
#146
08-17-2016, 05:54 PM
I have a question hopefully one of you can answer it. Does it really matter if i get a W10 vs a W11 engine to build? Meaning i will be replacing the Pistons/Rods ect. Is there a difference between the two engine. Is the short block the same and the head the same just different size rods since they have different compression Rations and the crankshaft being different. Is there any extra/different oil/coolant Passages ect between the two. JCW seems to be the same just has a modified Head. But the W10 and W11 seem to be the same engine just that the S is supercharged. Maybe the internal of the S is better but i don't care since I'm thinking of replace that it wont be a problem.
Are the cylinder head different from a MCS VS MC. Does anyone have a resource of a break down between the two. My version of the Bentley doesn't seem to have much info. I know the compression ratios are difference.
I was looking for a broken engine (maybe broken rings), but it seems they are hard to come by and the only thing i can find is a "working" engine, but they want some crazy money for it. $1,700-$4,000. Around my area i can buy a whole car MCS for about $3,000 running which I may be able to part out and sell everything else and get back my $3,000 for it. minus the engine.
Last edited by HaveATank; 09-13-2016 at 01:22 PM.
#147
08-17-2016, 05:57 PM

#148
08-17-2016, 08:47 PM
So finally got all the fittings and Oil cap. Tapped the new cap and it didn't work since it didn't sit flush with the Filter housing, so i said Buck it and just did my stock one and everything worked out. Also connected the boost line and now all my gauges are operational 100% (maybe not 100% since I'm still trying to figure out the shift light part). Tried to install the Alta boots for the Supercharger IC and OMG what a Piece of Shyt. They didn't even fit. it wasn't even wide enough and didn't even fit over the horns. After wasting 20 mins of my life on that, I just gave up and since i purchase this back in May i guess there is no refunds LOL. guess it works better with a stock IC or something. maybe ill put it up on the marketplace.
Roll Cage is coming in tomorrow, so I'm hoping the weather behaves. I can install cage/harness and the seats which have been waiting patiently in my living room.

Tried to install the Alta POS boots. Still wrapped and everything.


Here is the Gauges up and running.
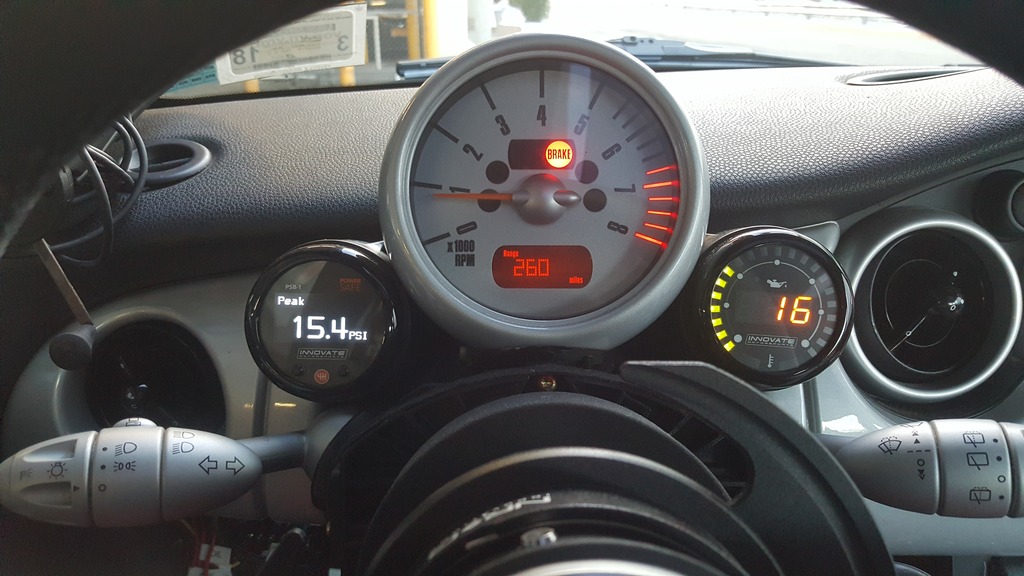
Saw about 55-64 PSI (I'm going to assume PSI since i didn't change the set up the gauges with the computer yet) at wide open throttle. Boost maxed out at about 15psi. so far so good. Don't know if the boost should be more or less, but I'm not complaining.
Roll Cage is coming in tomorrow, so I'm hoping the weather behaves. I can install cage/harness and the seats which have been waiting patiently in my living room.


Tried to install the Alta POS boots. Still wrapped and everything.


Here is the Gauges up and running.

Saw about 55-64 PSI (I'm going to assume PSI since i didn't change the set up the gauges with the computer yet) at wide open throttle. Boost maxed out at about 15psi. so far so good. Don't know if the boost should be more or less, but I'm not complaining.
#150
08-18-2016, 08:02 PM