When you click on links to various merchants on this site and make a purchase, this can result in this site earning a commission. Affiliate programs and affiliations include, but are not limited to, the eBay Partner Network.
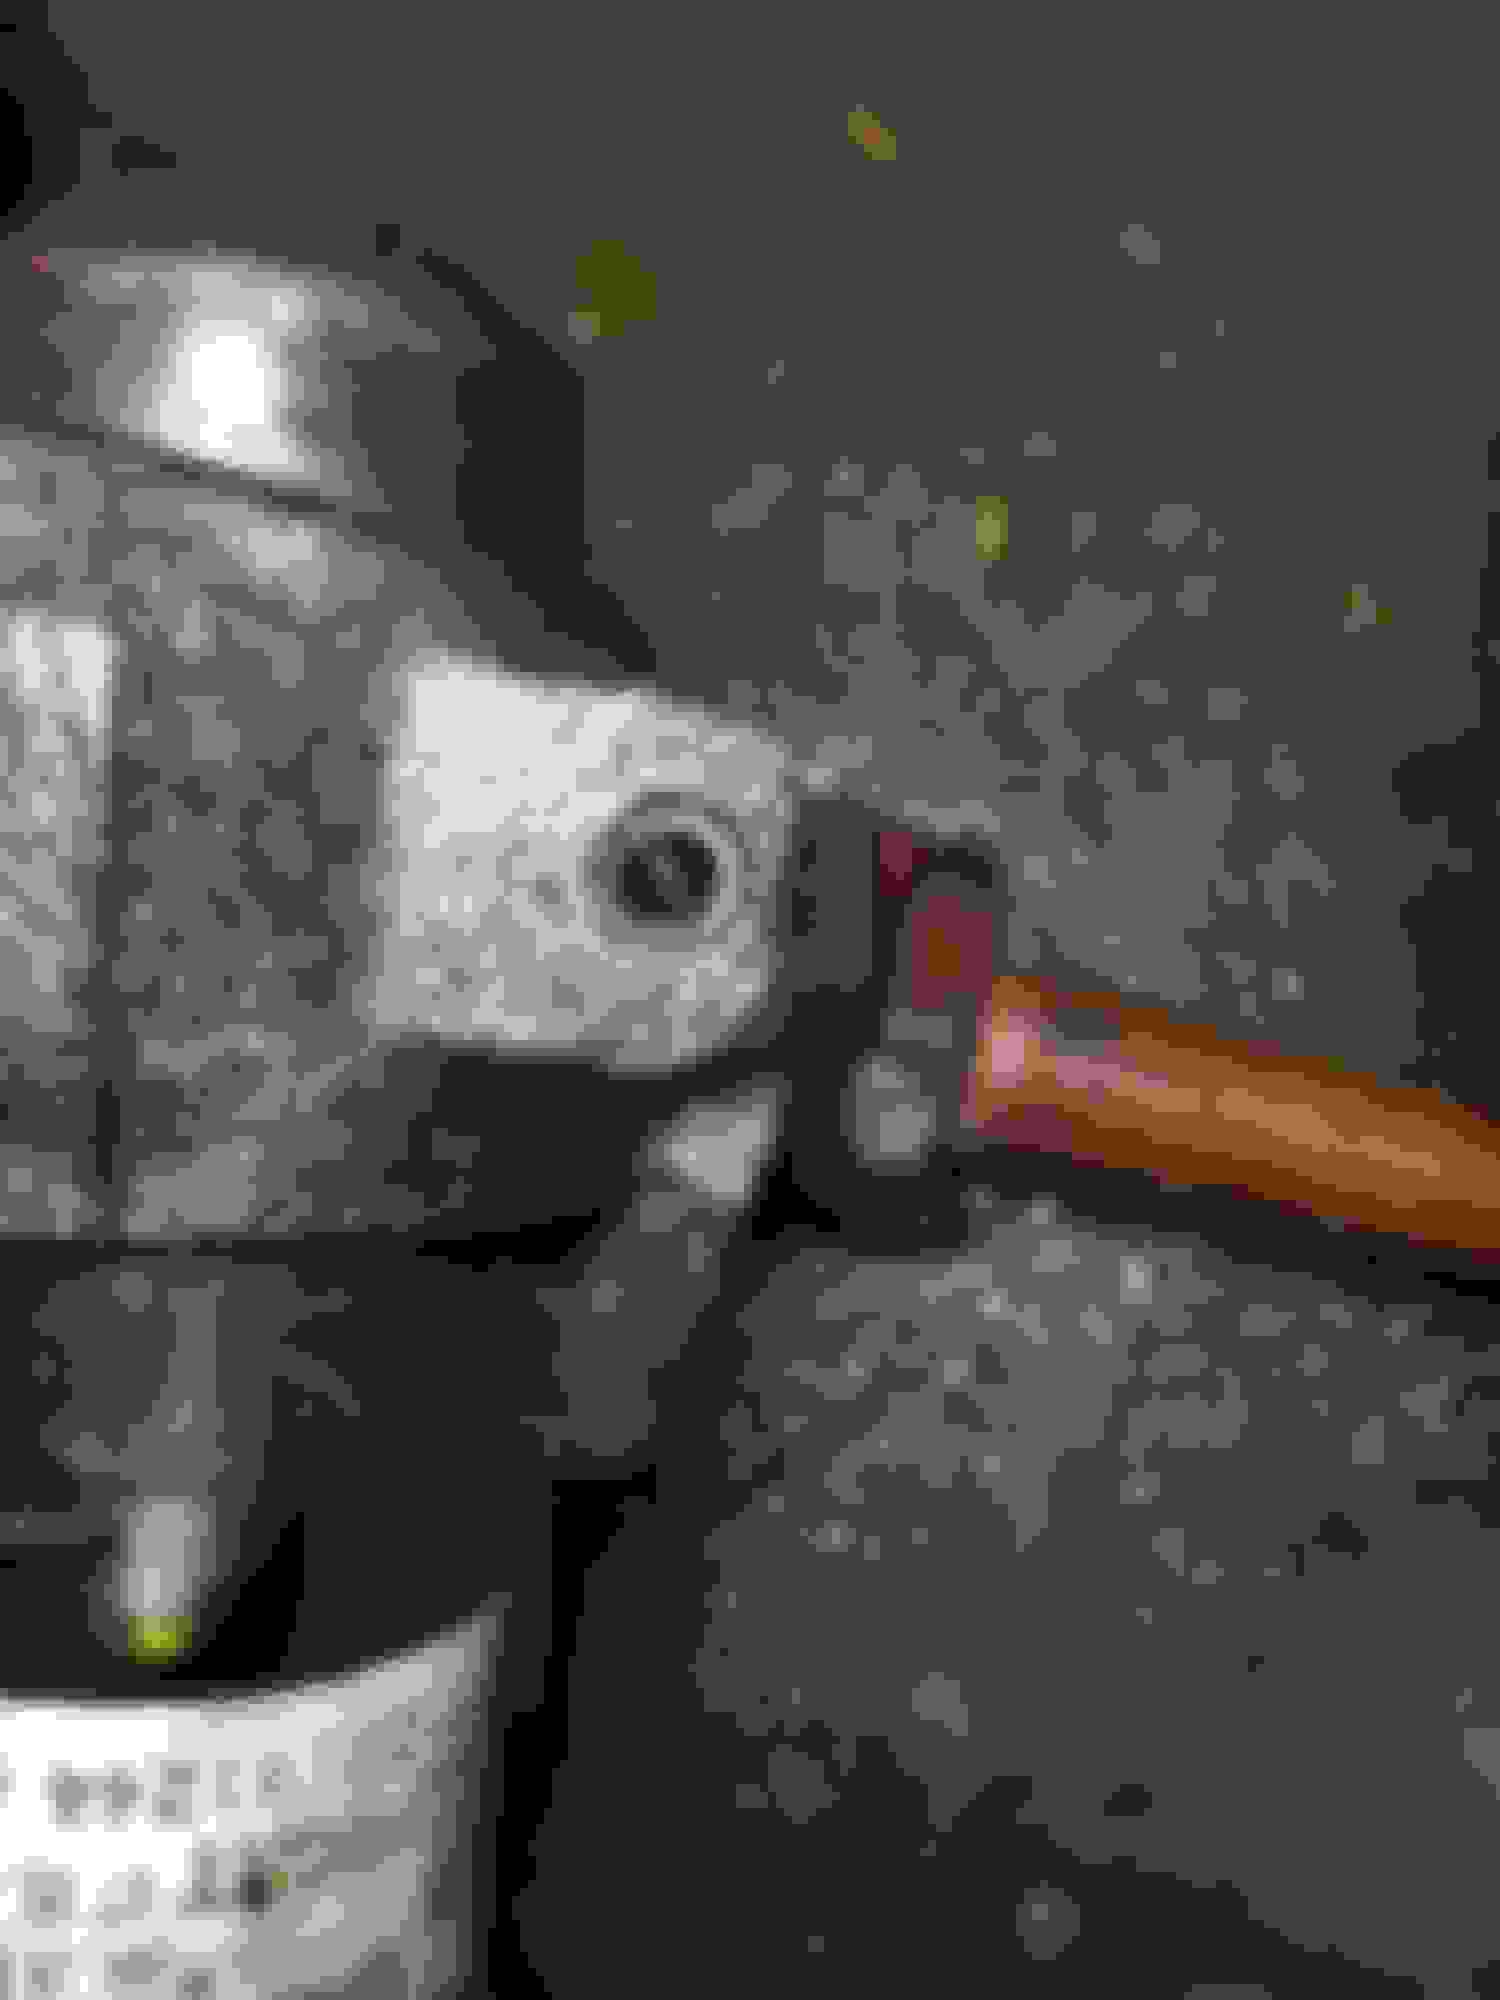
Im in the process of changing my clutch 03MCS and I was able to lower the subframe with no problems until I tried to remove the inner ball joints two mounting bolts . One had apparently snapped off, probably due to rust , with the full threded section still in the subframe . Ive never had this happen before so Im at a loss as to how to remove the threded section . Any advice greatly appreciated
You can drill and used an easy out tool (Reverse bit)... but if you break the easy out, then it is going to be hard because that is hard metal.. You will need to use a lot of PB blaster or maybe heat to loosen the rust in that thread.. Drilling and tapping the hole can work too.
You can drill and used an easy out tool (Reverse bit)... but if you break the easy out, then it is going to be hard because that is hard metal.. You will need to use a lot of PB blaster or maybe heat to loosen the rust in that thread.. Drilling and tapping the hole can work too.
i literally dealt with this exact problem last month.
Use a metal chissle tap to smack a dent into the exact center of the metal bolt you sheared the head off of.
start a hole slowly drilling with PLENTY of pb blaster or motor oil as lube for the metal on metal contact. (Small metal bit)
worl your way up gradually with bits to drill holes straight through.
this will easily take you 8 hours
look into metal shanks. You can use them to shave an existing hole to a larger size, but your best bet is many drill bits, tons of time and tons of lube.
for now on use heat for thirty seconds on every section of the metal you�re working on and lots of pb blaster left for several hours. Pb blaster will smoke if you hit it with flame.
good luck and expect to spend an entire day drilling this hole. Look up on utube how to drill holes through metal.
Thanks guys .. the problem is the bolt broke inside the hole about half way down . I ordered a hardened m12 bit and I'm hoping I can just drill it out and put a bolt and nut in its place . Or I could try to tap the upper half and use a shorter bolt but I dont know if the metals too hard to tap fresh threads into .
Let me be perfectly clear. Do not use the easy out on such a large bolt inserted in metal. They work better with the screw being in wood or plastic.
Get hardened bits and drill holes into and through the broken bolt. Start with a punch in the very dead center. Use a small bit, then work your way up two sizes at a time. Anticipate tapping new threads.
Drilling in metal, Especially bolts that are normally harder metal.
#1 Despite the fact they are called "high speed drill bits" this is the last thing you want to do, ie; Stick the bit to the surface and just pull the trigger on the drill. What you actually want to do is apply pressure and and have the drill turning soooo slowly that you can count the revolutions. I mean really, really, really slow. You are going the correct speed, and applying the correct pressure when you get 2 little "curls cues" of metal, like 2 springs coming off each flute of the bit. Perfect is 2 "curly-cues" that are continous and 3-4 inches long or more. That's a little hard to achieve without a brand new, correctly sharpened bit, which most hardware store and overseas junk are not.
I get all of my bits from McMaster-Carr, and usually get the short "jobber bits". I keep bags of each size and when I'm down to 1-2 I order 5-6 more. I'm still not past toasting a bit here and there and it good to have spares.
On my Bargain Mini thread there's a post about drilling out valve cover bolts that goes into this with photos.
#2 if you are pressing really hard with the drill spinning really fast, and are just getting "metal flake" size bits of metal, just stop. Throw that bit away or sharpen it, [a whole different skill level] as it's toast. And, by spinning a worn out bit at high speed with lots of pressure, all you're doing is "work hardening" the bolt you are trying to drill out.
#3 To be honest, going slow enough, with a sharp bit, you really don't need oil as you are drilling so slowly you're really not generating any heat. Plus you end up pausing the give your arms a rest. giving things time to cool off
I mean you are drilling so slow you can count the revolutions. Patience is the keyword! If you get the "curly-cues, right speed, right pressure, if not, dull drill, and too fast a speed, or sharp drill and not enough pressure [and too much speed].
#4 increasing drill bit size, [one step at a time]. I used to do the same thing. then had a long discussion with a machinist friend who not too kindly explained why I was being a dumb sh*t.
It would seem logical to "creep-up" on a hole. but you can end up seizing the bit and maybe snapping it off. It's really better to go up at least 2-3 sizes, even more, once you have a straight pilot hole. The next bit after the pilot can be 2-3 times the size of the first hole as long as the pilot hole is large enough that the flat spot between the 2 flutes fits in the hole. and your going sloooow. [notice the theme here?]
Awesome guys . Thank you
If I drill from the top down I have to deal with the fact the top of the broken sfud is about an inch down inside the hole so I might have to drill from the bottom up
Here's a link to the original post. Take a careful look at the photo at the bottom. If you're not getting the spring like "curly cues" your bit's dull or you're drilling too fast or not applying enough pressure..
I think I would work from the bottom rather than down in a hole. I'm trying to remember if the bolt protrudes from the bottom or not but it it does I would probably grind it off flush and make sure to center punch in the exact center and drill parallel to the bolt. And go slow! Really slow.
I would start with maybe a 3/16 and go up 2-3 sizes each time. When there is about an 1/8 of an inch of the bolt left, try an easy out after heat. But if it doesn't want to move, don't go overboard and snap the easy-out. What sometimes works at that point is to take a really narrow chisel, even a small flat tip punch and tap an edge of the bolt inward to reduce it's size. If that doesn't work you can drill it out and put a Heli-coil in the hole. You can get them in a "kit" with the correct size bit and tap.
McMaster-Carr also sells really good 'jobber length" drill bits. They're shorter and don't break as easily when applying the pressure to get the "curly cues". The uncoated ones are fine. McMaster-Carr is the best ever. Order online and their shipping is terrific next day or day after.
Another thought.
The best way to fix a broken off bolt is to not break it in the first place. I've told my kids so many times, "heat before hammer".
By that I mean when you feel like a bolt or nut isn't coming apart, STOP.
Apply some heat, [if possibly without screwing up surrounding parts] trying to heat the "outside" threads, not the bolt. You're trying to get the outer threads to expand from the heat, keeping the heat away from the bolt. Try again and if no movement STOP. BP blaster, [my favorite and I've tried a lot] overnight.
One thing I have done, [when heated] or even the next day after soaking in penetrant is instead of just pulling on a wrench is putting the wrench on, turning it to take up the slack and giving it a smart rap with a hammer. sometimes the "shock" if the hit will break it loose without snapping it. but 1 maybe 2 "medium hits" not like you're driving a railroad spike as too hard can snap it as well.
The problem with all this is it all depends on developing a "feel" for how much is too much and developing that "feel" results from breaking enough bolts.
I've been doing this stuff for fun for 55 years and just broke one of my strut pinch bolts. [In my defense however, it was the non-threaded side that was seized, Pretty unusual]
This has become such a common issue on the forum, maybe I should do a thread, [pun intended] on stuck bolts.
I havent started yet due to a touch of the flu but I planned on putting a thru bolt with a nut rather than a helicoil . Is there a reason that wouldn't work ? As far as breaking the bolt thats great advice but the second I touched it I realized it was already broken probably for quite some time
I'm in a small garage and I'm still not sure how to get the subframe from under the car . Would be easy to slide out the back of the car except for the power steering reservoir . Wish I had a lift instead of jack stands. What a pia and I still havent gotten the trans out so I can replace the clutch.
Thanks again for the help
Not to hijack, but as I am replacing my driver knuckle and spindle I noticed two washers on the main outer ball joint stud but not on my donor knuckle/spinde.
They have step by step tech articles covering all of these procedures and are very helpful. They sell the same thing in a book form.
I would at least try to get the bolt out and preserve the threads. You can always drill it out later if that fails. I'm sure a nut and bolt would work as well but I would make sure both are grade 8. McMaster-Carr has them as well.
If you're pulling the subframe to do a clutch I'm wondering if you should wait on the bolt until the subframe is out as you could flip it over and have room to work rather than trying to work up from the ground.
Of course once the subframe is out there's a whole litany of things you should probably do, not the least of which are the lower control arm bushings which you can only do with the subframe removed. And the subframe does need to come out the front.
Also, when removing the subframe make sure your wheels are pointed straight ahead and the steering wheel is locked. On the steering connection between the steering shaft and the steering rack, there's a bolt to remove and the link/connection flips up. When you lower the subframe make sure to mark the position of the shaft on the rack. That way you can re-install with the steering wheel in the correct position.
Take lots of photos of what you are taking apart and get a box of zip lock bags to mark, tag and bag the bolts for each sub-assembly. It'll save you lots of head scratching later on.
robj
This is what comes out when you remove the subframe. This was mine ready for re-intsall. The only part thats a little tricky is snaking the PS tank up into position, but jack it up a little at a time stopping to check it's path.
"Not to hijack, but as I am replacing my driver knuckle and spindle I noticed two washers on the main outer ball joint stud but not on my donor knuckle/spinde."
Does anyone know which is correct?
Thanks!
I'll take a look at mine tonight. to be honest I can't quite remember. You're referring to the two bolts that attach the ball joint to the carrier correct?
rob
I'm changing ball joints inner and outer also Lca's as a matter of fact I think the reason that bolt snapped is because of me pounding on the outer ball joint . Now the right inner is refusing to come out so I bought a propane torch and I'll try again tmo .
I didnt mark the linage and the sub frame is half way down . I hope I can get it back correctly.
Cant express how much I appreciate your help and patience.
My outer ball joints have no washers
So the one inner ball joint refuses to come out . Broke the tool I rented so I heated and pounded on it and I think I mushroomed the shaft so I cut it off and drilled into the stud hoping to relieve the pressure. ^$$^&%$ still wont come out . Machine shop wanted 160 ...wtf... back to the drawing board .
 01-24-2020, 07:11 AM