When you click on links to various merchants on this site and make a purchase, this can result in this site earning a commission. Affiliate programs and affiliations include, but are not limited to, the eBay Partner Network.
The gaskets and engine mount were shipped from Atlanta to Wisconsin last Tuesday. On Thursday they arrived in Minneapolis. When I went to bed last night, USPS tracking still showed the package in Minneapolis. When I got up this morning, tracking showed it in Mobile, AL. That doesn't seem like the most efficient routing. Now I assume it will be at least a couple more days until it gets here.
Since I have some down time while waiting for my prodigal gaskets to return from their brief Southern vacation, I decided to paint the timing chain cover. Cleaning it just didn't make it look as good as I'd hoped. So a few coats each of Dupli-Color primer and cast aluminum engine paint produced the desired result.
Alabama seems to be a major hub. I see stuff I ordered in Atlanta and then goes right pass my house to Alabama then delivered the next day.
The timing cover looks great! Looking forward to hearing your progress reports on getting that beauty back together.
Taking a little break from new Mini stuff right now, trying to get the motorhome generator up and running again. Could be as cheap at $600 for new batteries, $1000 for control board repair or $2400 for a new control board. Hoping it's just the batteries.
I believe Atlanta and Minneapolis are major distribution centers. It probably got mis-sorted in ATL, the pallet it was supposed to be on went to Minneapolis, and then someone scanned the actual package in Mobile.
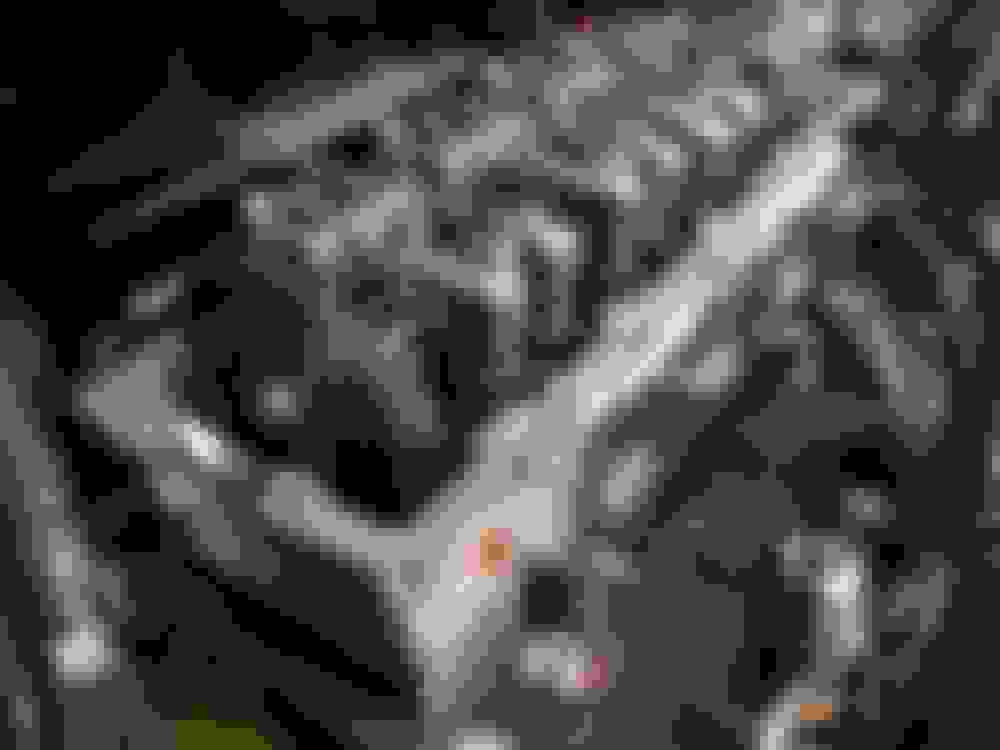
Happy New Year! The gaskets and engine mount finally arrived on Thursday so yesterday my son and I started putting things back together. We got the cylinder head on and new timing chain, guides, and tensioner installed, as well as putting the timing cover and harmonic balancer on. The exhaust manifold is also attached. Surprisingly the biggest PITA was the chain tensioner. The oil cooler is in exactly the right location to make it difficult to get to the tensioner. We struggled for a while with every socket and wrench in the tool drawers -- in the end, we removed the oil cooler.
The rebuilt head makes the rest of the engine look really dirty.
More progress today. The garage was 22 degrees when I got up -- better than the -3 degrees outside but still a little cold. Had to let the propane heater run for quite a while to get the temperature to a somewhat chilly 42. I left the Bentley guide in the house so that I'd have an excuse to go inside once in a while.
First order of business was to install the belt tensioner. Then I had to fix a small problem with the oil cooler. When my son re-installed it on Friday, he didn't notice that one of the o-rings fell out (they don't stay in very well). Yesterday, I noticed that it was leaking oil but wasn't sure why. This morning, I saw the o-ring in the drain pan that we had used. Was happy to see it since that solved the mystery.
Then some of the big pieces went in: intake manifold and supercharger (photos below). Inspired by Steve (smschriefer here on NAM), I painted both of them, as well as the engine mount, while waiting for the gaskets last week. Used DupliColor primer and Cast Coat Aluminum engine paint. Three coats of each. Am very happy with the results.
I think I made a mistake with the wire coming from the knock sensor. I thought I knew how to route it to the connection at the front of the intercooler but it came up about an inch short. Can anyone tell me the correct way to run the wire around/through the supercharger?
That looks fantastic!! I'm glad that it's finally coming together for you. I would love to have a garage to work in but it's probibly good for my marriage that I don't !
It was 78 degrees here New Years day here but old man winter has returned. We had a little dusting of snow yesterday morning and the low was 26 this morning. Supposed to be even colder by this weekend.
It was warm today (by Wisconsin standards in January) so I was able to get the garage to about 56 degrees. Very pleasant.
So the engine is back together. Unfortunately, it doesn't start. It cranks just fine but won't run. The obvious candidates are fuel and spark. I think fuel is more likely. After the car was apart, I changed the fuel filter and haven't had the opportunity to run the car since. I'm not going to mess with it more today.
If you have suggestions for troubleshooting, please share.
It took a while to bleed the air from my fuel system after I changed the filter on mine. I even cycled the key a few times before I tried to start it but it didn't seem to make a difference. It was to a point I was thinking I maybe I had done something wrong. I'm sure you will figure it out. Dang that was quick on getting the engine back together, a man on a mission!
It started!! I had to purge air from the fuel rail via the relief valve on the end. I only let it run for about a minute -- seemed to be running pretty well. There's coolant leaking from somewhere but I'm not going to let that rain on my parade. Can deal with that tomorrow.
It started!! I had to purge air from the fuel rail via the relief valve on the end. I only let it run for about a minute -- seemed to be running pretty well. There's coolant leaking from somewhere but I'm not going to let that rain on my parade. Can deal with that tomorrow.
Today, and the last couple of days, are too cold to work in the garage. It's -16 now with a predicted high of 6. Even with the propane heater I couldn't get the garage close to a comfortable temperature. Tomorrow we will have a very brief heat wave (high of 28) so I should be able to look for the source of the coolant leak.
It was 77 degrees here on New Years day. Old man winter came back with a vengence and it does not look like we will get above freezing here today. Thats why I went hot and heavy on the R50 before winter hit because I hate working in the cold.
Turns out there wasn't a coolant leak. Long story but today I pressure tested the cooling system and it seems good. I ran it for much longer today -- about 30 minutes -- to flush bleed air from the system and ensure that the fan came on. That's all good. An occasional rough idle, which was there before I tore down the engine, persists. I cleaned both the MAP and TMAP sensors but didn't have time to test. Will dig deeper into the problem in about a week. I expect that I'll have to replace at least one of the sensors. Things are mostly buttoned back up for now.
I just want you to know I blame all this Indi Blue Cabrio lusting on you. I love the color of your car and when I saw the 2005 I just knew I had to have it.
Indi Blue is the best color, imho. Years ago, I swore that when I got a Mini it would be British Racing Green. I think it was mostly because I used to lust after BRG British roadsters when I was a kid. But I'm a sucker for blue cars and Indi Blue is a really good blue.
I hope it goes well when you see the car tomorrow.
Today was the highest temperature we'll see for a while so I spent a couple of hours in the garage. First, I wanted to track down the cause of the rough idle I mentioned when I worked on the car last. At that time, I had cleaned both the MAP and TMAP sensors but didn't have time to test. So today I cleared codes and ran the car for about 10 minutes. There were no codes, no stumbling, and the idle seemed smoother in general. I'm not ready to call it fixed but I'm hopeful.
Next, I began installing the new shift and e-brake boots that one of my sons gave me for Christmas. Got the shift boot done but the e-brake is still in process. I really like the blue stitching and the leather is much nicer than the stock vinyl. Oh, and the shift **** is new too.
Finally, inspired by MCS4FUN's beautiful car, I decided to remove and refresh the rear pan, a bit of cladding between the exhausts at the rear of the car. His looks as shiny as the day his car left the factory, mine somewhat less so. All I did today was remove it. It's attached with nuts onto studs mounted in the body. Very small, soft studs. Unfortunately, one of them sheared off with impossibly little effort. I guess I'll have to drill it out and fit a new stud in its place. Cleaning this piece is going to take some effort but it's a good Winter project because I can do it indoors.
^^^ Thinking now I was incorrect on mentioned method on the rear pan(s). Instead of 3M Scotch-Brite Green, I used a fine steel wool pad in combo with Zep concentrated citrus cleaner sprayed as lubricant and burnished lightly in linear direction to achieve lightly grained finish appearance. The aluminum stamping is soft, so shouldn't take much effort. You might prefer to experiment on the normally hidden underside.
Today is a good day to work inside -- so far, the temperature has made it UP to 0. So I cleaned the main pan. Used P21S Metal Polished Soap with a green scotch brite pad (because I don't want the piece polished). It's not perfect but certainly a big improvement. Some of the oxidation just doesn't want to come off.
Here's a "during" shot that shows the difference:
And here's the finished product. I'm debating putting a couple of coats of clear on it to keep it looking good.
A couple of days ago, I hot-glued the e-brake boot to the frame. Last night, I installed it in the car. Very happy with the result.
Picked this up in the NAM Marketplace. Mini designed this with a flap that opens above 4500 RPM to increase airflow. I've read that a lot of guys run it without the flap for full airflow all the time, with the added benefit of more supercharger whine. Yesterday, I cleaned it up and made a seal (the gray bit at the back) from window weather stripping. Not sure when I'll be able to install it given the weather. Doesn't really matter since I won't take the car out of the garage until Spring.
Today I installed the JCW airbox. Looks good with the other parts of the JCW kit -- the kit didn't include an airbox when the first owner had it installed on my car.
Started the car afterward and let it get up to temperature. Will the ECU need to adapt to the increased airflow? Anyway, after 10 or 15 minutes, a clicking/tapping noise started from the right side of the engine. It seems to be coming from up high and at the front. It's a fast and very regular sound. After a few minutes it stopped for about a minute and then came back. The timing chain, guides, and chain tensioner are new so it shouldn't be those. And when I listen near the crank pulley (which is a new ATI unit) it doesn't seem to be coming from that low. The idler pulley is new also. I'm hoping that it's the belt tensioner or tensioner bushing. Audio file is linked below. Any thoughts on causes?

 12-27-2021, 01:53 PM


 Waiting for more updates. I'm happy for ya!

 I had to purge air from the fuel rail via the relief valve on the end. I only let it run for about a minute -- seemed to be running pretty well. There's coolant leaking from somewhere but I'm not going to let that rain on my parade. Can deal with that tomorrow.