When you click on links to various merchants on this site and make a purchase, this can result in this site earning a commission. Affiliate programs and affiliations include, but are not limited to, the eBay Partner Network.
Just a quick update. I found the source of most of the "clunk" in the rear. When I installed the exhaust I used new rubber hangers and due to past issues fighting with exhaust hangers, I lubed them with a little silicon grease. Everything installed super easy. However, the mounting arms slide back and forth in the hangers too easily and the exhaust moves from side to side. Additionally, I noticed that I had adjusted the mounting bolts to keep the exhaust tucked up as high as possible. This also caused it to bang on the bottom of the trunk a little. I adjusted everything and go like 90% of the movement out of it so I'm ok with it for now.
Also, found some of the source of the buzzing noise:
1) one of the bolts from the header to the exhaust flange worked itself loose and departed- so there was an exhaust leak. Fixed.
2) the anti fouler for the 02 sensor had also backed off (I wonder if too much vibration) fixed for now (going to be swapping in one with a baby cat)
3) the flex joint on the header appears to be the main culprit for the buzzing. It's quieter, but still there and annoying. I've not had a header with a flex joint before so not sure if this is a manufacturing issue or just something they do. Maybe it needs to be "broken in" ? No idea.
Only other issue I have is a little creaking from the front end. I think it's all the new bushings not being broken in. Again not sure, but it's not causing any issues so I guess it's ok for now.
Car: 2006 R53 MCS Manual, 153k miles. (Build date 05/2006) (recent mods/fixes include: new a/c compressor, new starter, new belt tensioner, new timing chain tensioner, 17% pulley and 2% crank pulley, colder plugs, r56 brakes and SS braided lines, fan relay repair, oil pressure sensor, power steering pump and hoses, Serviced the S/C and added a new T-stat, parking brake cables, one brake line, rear brake calipers, crank position sensor o-ring, new fuel filter, CravenSpeed strut tower indurators, both rear wheel hubs)
Issues: A few leaks that are hard to reach and it's easier to pull the engine. (stupid oil filter housing!)
Plan: Pull engine, reseal everything. Also thinking I'll drop the sub-frame and redo the bushings, ball joints, etc. I am going to also pull the injectors and send them out to be rebuilt.
There is nothing wrong with the way the car drives or handles, but I suspect that everything here is original for the most part so I am going in to do a complete refresh. This will likely include new shocks and springs and any other odds and ends that might be worn. The idea is to make the car trouble free for next 150k miles. For example the clutch is fine but I'll check it and replace it if it's starting to look worn... Side note, exhaust is still stock (with the rusty mufflers). This car is used for DD duty and the occasional long drive (a few hours). No track time. Just would like to maximize the sporty go-kart feel of the car.
So, I am hoping fellow NAM members might chime in with ideas of things that they might do if they were in the same position. So little things like replacing the few rusty valve cover bolts, cleaning the block, replacing the front and rear main seals, the oil pan seal,etc. are some of the the things I am thinking about. Maybe, just maybe I may be inclined to swap in a Quaife LSD while I have everything apart- depending how much I end up spending... The sway bars are stock and there are no additional support braces.
Right now, I have a good idea of what seals I'll need and I am looking at the suspension stuff. My other mini got the Bilstein B4 shocks and we kept the stock springs. It rides fine, but it sits a little high and does not feel as "planted' as some of the other cars. So I was thinking B6 or B8 (If I could find them) and maybe an H&R spring?
Trying to get some opinions and maybe a few resources as to where to find all the bits I need at reasonable prices. My usual "go-to" is FCP, but I am willing to look elsewhere for a decent deal.
Please chime in. Any thought on what "you would do" while going in are helpful as I am sure I will miss something.
If people are interested I can take pics and document the fun.
RealOEM has all the parts diagrams you need on their website. You go to the website, select the chassis code (check wikipedia) and select the system you need. You can get the seals (part number from realoem) on pelicanparts.com, and always look for the manufacturer that the OEM used, I can't remember what it's called (OEM supplier?). For oil leaks, expect to either be sticking your entire body in an uncomfortable position for 10-20 hours, or to fully front end service mode and remove the engine. You will need an engine stand and a hoist, both of which you can get on craigslist to own during the project and resell after the project is over for the same value you paid.
Oil filter housing is the worst. Second worst is coolant system which travels from the heat exchanger to the heater core.
For oil filter housing, you need to consider ONLY junkyard OEM replacements. There's a little basket in the 2003 pre-facelift post-facelift selloff models that breaks and jams inside the engine. When you buy oil filters, buy only OEM from either rockauto.com or your nearest city's BMW/MINI dealer. Insert it without force, and soak the part that presses onto the filter housing in the used oil, UNLESS THE OIL HAS METAL IN IT!!!! Then use new oil.
Heat exchanger is just annoying. You need exactly the right torx bit, and a 14" straight extension, with a hand ratchet wrench outside of the fender. The exchanger does not have a groove/place/recession for the seal, and you should consider having a second person hold the exchanger while (in a star pattern) you hand tighten>torque to one twist> torque to three twists> torque to five twists> torque to factory specification the stupid little bolts. If ANY ONE STRIPS (this goes for all bolts touching aluminum), go to the dealer and get a new full set (they are sold individually, so but the same number as you need, maybe plus 10%-50% of the quantity of bolts, for your friends when they screw up). (This also goes for all hardware touching aluminum, except for head bolts. If this has happened, you have screwed up and need a new engine. These engines are designed to never be opened, if you have resurfaced the head expect imperfections and to thrash the **** out of it until it blows up :thumbs up: )
As for seals in the oil leak department, take the car to front end service mode and look below the seal in question for oil that is seeping. In the high pressure (oil filter housing and like department), look for ejected spray on the surfaces surrounding the seal. If you see any gunk, it's time to replace. My advice is to do all seals that leak at once, which in the case of a slipping or uncertain transduction of acceleration, could be the rear main seal, it is essential to monitor the development of the symptom. As it starts to worse, it will accelerate in getting worse at an exponentially quick rate. Once it accelerates, you need to find other means of transportation. Here is my advice for seals. OEM/OEM supplier everything. Oil pan gasket is 20 minutes after the car is jacked up, assuming you also add time to add oil. Valve cover gasket is living hell until you learn to disassemble from the air intake down through the supercharger, and it takes so much time to learn that it is not a bad idea to just service the supercharger yourself without doing anything else if you can afford the time, before the car ever needing to have other services in this area. Otherwise just do what you need to do and do not hesitate to stop before doing something you do not know how to do and consult:
1.) dealer repair mechanic
2.) A good local MINI/euro shop
3.) An automotive shop class
4?) A mentor
Anyways, oil pan gasket > valve cover gasket > any EVAP sensor gaskets, timing chain Hall sensor gasket (which brings me to [see below]
Timing chain on this engine is literally the best system ever. The timing chain is metal and virtually unbreakable. The sensor notices when a certain link passes by it, and the computer does whatever it needs to to adjust. The tensioner is located conveniently on the lower right hand side of the block when viewed from a mechanic's oil-soaked back (please don't lay in ethlene glycol) from under the car, with your legs sticking out the front (more comments on safe under-vehicle behavior later). It is a giant 22mm or something bolt head which is torque to a gazillion ft/lbs, and once you crack it with a 18" breaker bar (or a top-tier ratchet wrench with a 12" lead pipe [from literally any plumbing department] stuck over the end of the handle ) it will be finger loose to remove. The tensioner is a springy little click valve, which is clicked in when the chain slaps the tensioner when the oiling system is without oil pressure. (This is what that red light is. DO NOT RUN THE ENGINE AT ALL UNTIL ANY CAUSE OF THIS LIGHT that triggers the light IS REPAIRED. After you are certain that you have correctly repaired the cause, you will have to run the engine on faith until the system turns the light off (returns that the trigger condition is no longer met). The tensioner is installed clicked on (there is only one position, as in, clicked in [off]), and once the engine runs it will click out quieter than the car is while running. Observe the engine cadence during your ownership prior to mechanical fault and note how it returns to this (or similar if you have separated or replaced the cylinder head) after the chain tensioner gets oil pressure and unclicks to its full glory. When re-installing, hand tighten the giant bolt to as hand tight as it can be, and then torque it to factory specification from not at all > then some > then not some > exactly to factory specification.
As far as the cam sensor, it too is a large bolt head sticking out of the engine, but this one is practically inaccessible and requires some disassembly to access. It is on the top left of the engine bay, also viewed from a mechanic's groaning lower back while standing in front of the engine bay. It is a giant 19mm or something bolt head which is torque to a gazillion ft/lbs, and once you crack it with a 18" breaker bar (or a top-tier ratchet wrench with a 12" lead pipe [from literally any plumbing department] stuck over the end of the handle) it will be finger loose to remove. It is on the top of the cylinder head on the back side of the cam passageway, which viewed from the common person's perspective is the side where all the pulleys are. The cam sprocket is inside the valve cover, covers the end of the cam (just as a crank pulley covers the end of the crank) and the timing chain runs down the timing chain passage (which on this engine runs through the cylinder head and into the monoblock) and also runs over the crank sprocket on the inside of the lower block (some engines have different pieces of block which bolt together, sandwiching gaskets and are called upper or lower or middle or whatever the something -blocks), and back around to the cam. Always oil any seal which deals with internal oiled compenentry (which includes the this timing chain sensor with the used (once again, NOT FULL OF METAL SHAVINGS) oil, and install with your fingers by pressing one part of the seal into the groove and running around the circumference of the component with minimal (as little oomph as necessary to complete the task) until the seal is seated good.
The crank does not have a sensor on this engine.
The EVAP system also leaks. The open centers of the engine pass air through as well as house the rotating assembly connected to the engine internals. The EVAP system senses air pressure (or flow in some USDM/AUDM systems). The supercharger takes mechanical momentum from the crank pulley and transforms it to compressed air (which is dependent on engine speed ). The pressure differences between each step:
from the intake (not applicable on our cars)
from before the supercharger (MAP sensor)
from after the supercharger (evilsupercharger plunger tube sensor) more on THIS
from after the engine (post-MAP sensor)
and on the O2 measuring-side
from before the catalytic converter (pre-cat sensor)
from the catalytic converter (not applicable on our cars, catalytic sensor)
from after the catalytic converter (post-cat sensor)
Finally, the computer takes measurements from the various sensors and does calculations for short-term and long-term fuel trim. Short-term fuel trim looks at instantaneous (moments?) regarding relationships between the sensed data. Long-term fuel trim looks at the short-term fuel trims over time. Problems will show when the data varies a lot; for instance a short-term fuel trim could be inconsistent (failing sensor), or a long-term fuel trim would be different than other banks (failed sensor).
The supercharger tube is the most sensitive part to replace. You do not need tools, but you do need 1-4mm of fingernails. Press down on one side of the red tube clip and tug on the tube to reset the clip, then press on the other side of the red tube clip and tug on the tube to reset the clip to see how it works. Then fiddle with both sides of the tube clip (may take forever) until both sides disengage, and tug on the tube to reset it. Finally, evenly press both sides of the tube clip and gently remove the tube from the supercharger while maintaining even pressure on the tube clip. If anything happens to the tube clip, tug on the tube to reset it.
These threads are clunky and take some getting used to, so didn't mean to post here (instead under the relevant post) but can't delete. Anyway, getting my build started now and yeah, those valve cover bolts were crumbs and super glad I held onto a 7mm socket. Thanks for the great posts and feedback from all.
Last edited by OutlandishnessDue; 01-03-2024 at 12:00 PM.
^indeed! I would have liked to go SS but I was trying to keep the $$ in check, Now I just make sure I keep them lightly covered with that metal protector stuff. All should be good.
This is definitely the way to go, I've mentioned this before somewhere on the forums, but 3M makes a sweet "quick restore" product that comes with a 3M 3000 grit pad plus a wipe-on 3M clear coat (dries in 15 mins), yes one packet successfully treats two MINI headlamps, got it from the local NAPA. I still recommend knocking the old faded plastic down with at least 800 then 1000 before hitting it with the 3000. Mine came out looking like NEW after 18 years of road trip bug-guts and scorching Texas heat. I disagree with the ceramic coat though, get a protective film instead, the pre-cut by Laminx is quality thick and available in several tinted options. As I did the sanding, I noticed that I was revealing some etched in bug splatter marks, as I wet sanded they would go away, then others would appear. Once I ground it all down to nice clear look under wet-sanding, I realized it's not just the sun killing the plastic; it's the bug guts. Slapping some pro-film over your work will keep them looking new for the life of the bulbs.
Since I also paint my own cars and trim I just use the same materials: I've had the best luck starting 800 and then going well above 1000 on wet sand, working some 1500 or 2000 along the way (may not need this intermediary step) before a final 3000. Finished it off with 3M ultra-fine machine polish and my fogged over headlights look they look like they came off the lot; visibility is literally night-and-day. It's easy enough a project to come back to if they cloud again, but I like the film idea.
A quick thanks to you sir. I thought I had fond the clunk with the moving exhaust. It seemed to be hitting the bottom of the car when I drove around. Still after shoring it up I still had the clunk. I checked everything it all looked good. I got frustrated and started rocking the car side to side in the driveway and the clunk was finally able to be located. It was, in fact, the oem end links. They were tight but needed to be just a little tighter! No more noise. We'll see how long that lasts.
Ok folks need some help here. I started a new thread but no one has jumped in. Hopefully some of you all who have read this far might have some ideas.
The car has been back on the road for a few months- no issues. Recently, the shifter started to become a problem. Felt like one of the cables popped off. Took off the airbox, checked everything and it was good. Put it all back together and the shifter worked perfectly until the car was turned on. Once on, it will fight to get into gear. It was cooperating with some like working with the odds and not engaging with the evens- and then just stopped cooperating. With car off, shifts are smooth as butter.
Checked the MC. It was full. Looked at the slave and figured it might be original so we ordered a new one. Bled several times (pushing fluid down and pushing fluid up as well) and finally got a very nice firm pedal. Started the car and while there was more travel with the slave than before (OE would move like 10mm while the new one was like 15mm), the gears still would not engage without forcing them. (Don't worry I didn't do this too much as I don't want to damage anything)
I unfastened the slave and went to compress it again thinking there might still be a little more air and it basically fell apart leaking all over the place. I'm working on sourcing another (the brand I removed was FTE and this new was was also FTE). Also did a visual on the slave in the car, no leaks or noise.
Car is lifted and was tilted in both directions to try and remove all of the air. I know these are supposed to be a PITA but this is next level. Wonder if I am missing something. Not sure what else it could be. (I recall mod mini saying something about a cracked/damaged fork) but I had that piece out for some time and would have seen if it was damaged. I'd really like to avoid removing the trans or the combo once again.
Looking for some ideas. PLEASE!!! give me some ideas.
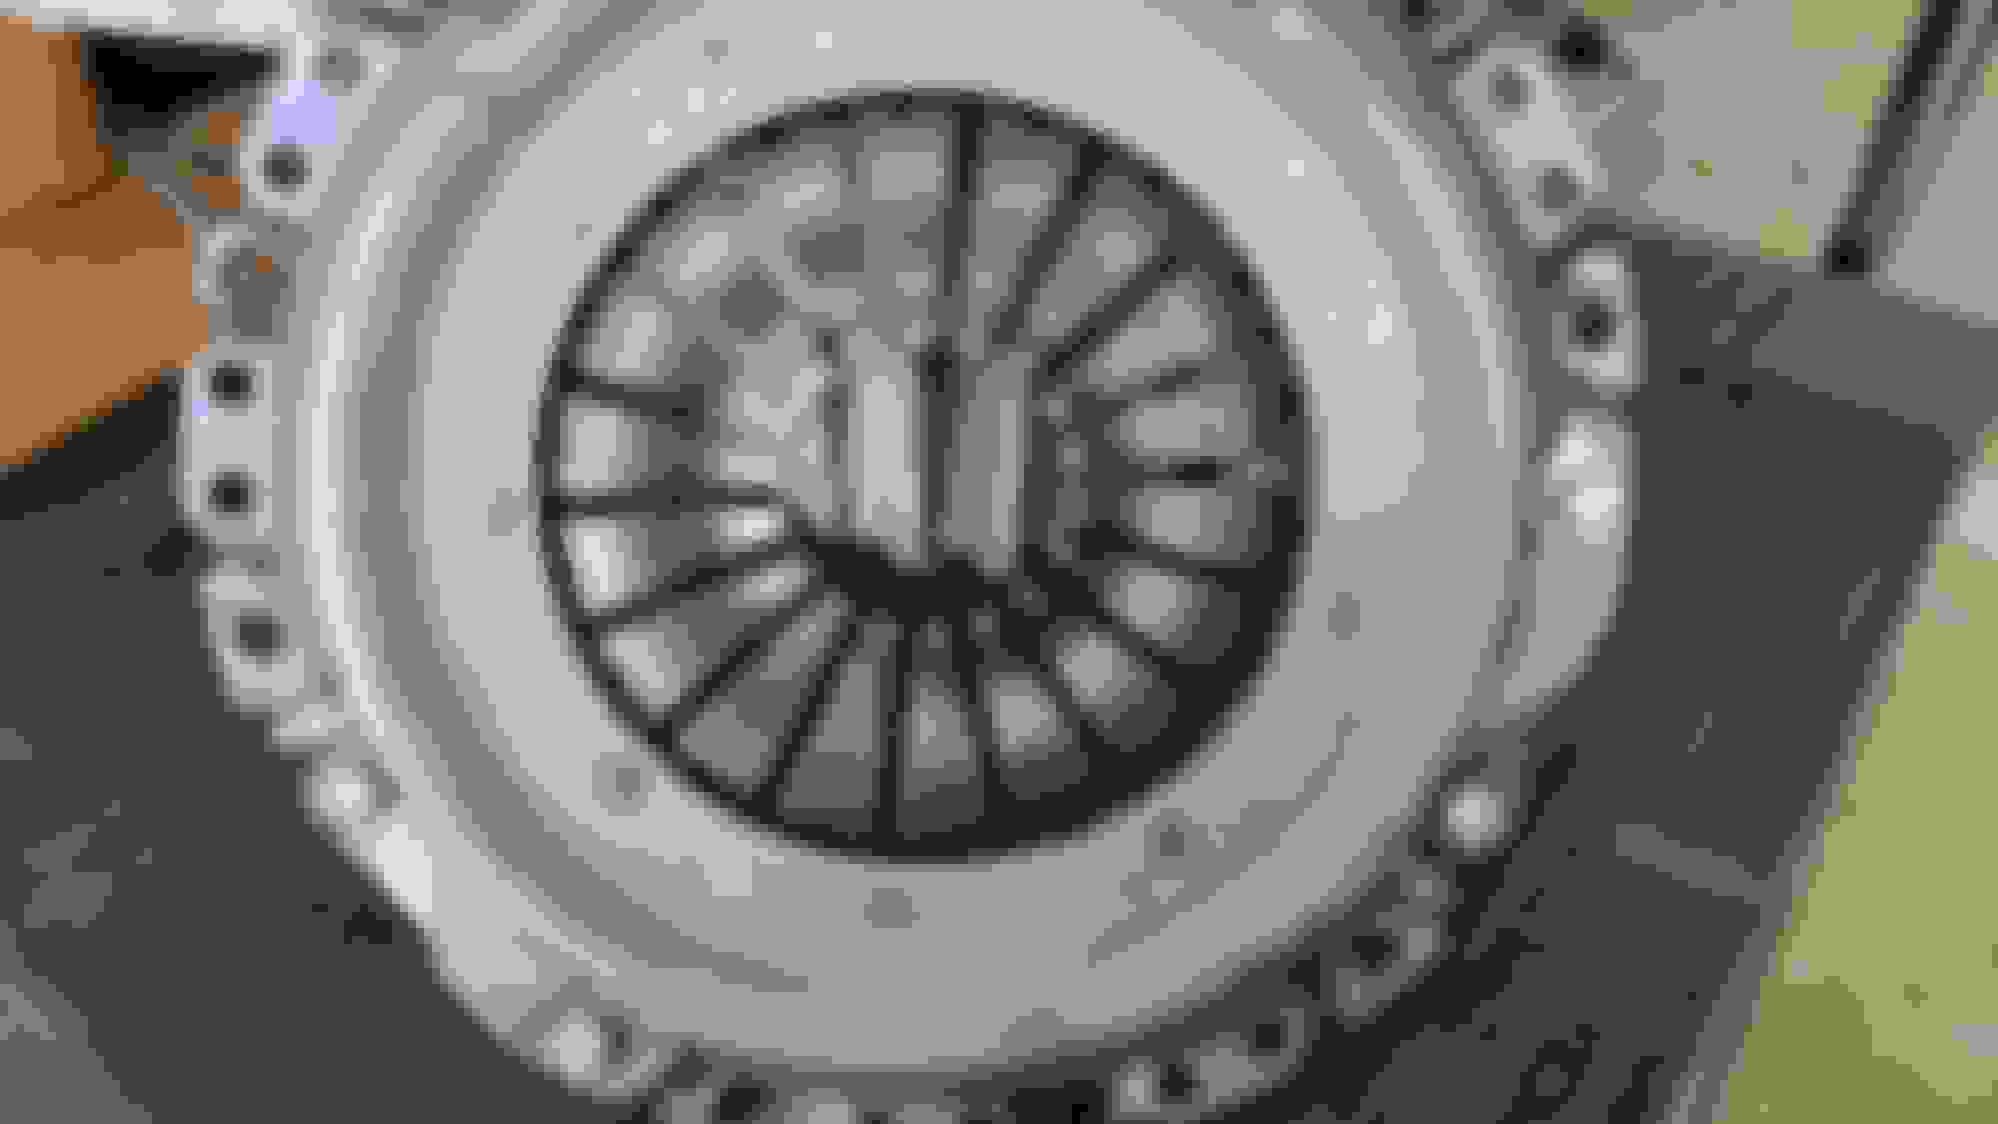
Here's a pic of the fork I just found: Just a reminder- this has a new LUK clutch kit with pressure plate and throw out bearing.
Last edited by Boostmaster; 02-26-2024 at 05:19 PM.
If the transmission feels good when the car isn’t running, but won’t engage or is really hard to engage when the engine is running is usually a sign that the clutch isn’t fully disengaging.
I am pretty sure that it is the stamped steel arm that hold the throw out bearing that cracks, which keeps the clutch from disengaging. That is what I was told when I had the clutch replaced on my R56.As for bleeding of the slave cylinder, I seem to recall that it is done with a tool that pushes the piston in and holds it from moving. This is a really old memory from way back in the day when I had to do that on my 1st car, a ‘59 MGA. Not exactly sure how to do it on a MINI…
Thanks for the response. I've pretty much narrowed it down. I think. As you can see from the pic above, the fork is a different design than the ones that used to crack- (I think those may have been pre- face lift ). Anyway, in the pic you can see no issues with the fork. The throwout bearing is new and the slave was new as well. AS for the bleeding of the slave- you are correct. It gets compressed and then you can depress the clutch and have the fluid drain down or you can introduce fluid at the bleed nipple and "push it up" - thereby forcing any air bubbles up into the reservoir.
I performed both methods and did eventually secure a very nice firm pedal. However, even with a great pedal and a little more "throw", the clutch would not properly engage. Wondering if maybe the throwout bearing has popped off of become twisted on the fork? Not really sure what else it could be. Finding myself wondering if I should stick with *gasp* an automatic. LOL
From all that you are describing, most definitely a clutch issue. Unfortunately, sounds like it will require a transmission removal to diagnose. If you are 100% sure you have all air removed from the hydraulic system, then, like you, I would assume the throw-out bearing or pressure plate has gone south. If there are no bearing noises when the pedal is out, I would lean towards pressure plate failure.
Man, that's tough news after such extensive work! Really hope you get it sorted without going into the tranny - with an all new clutch set up and your attention to detail I'm suprised.
^^ Me too. The worst part is that it was all working fine. Wonder what the issue is. I can pull the engine/trans pretty quick. However, I'd prefer not to. I've never tried just the trans- looks like an unreasonable PITA. We'll see. Need to wait till weather starts to stabilize a little. It was 70 yesterday, today T-storms, tomorrow 30*. UGH
In my experience, the pressure plate can let go without warning. I had a car where the pressure plate spring just cracked into many small pieces. No warning, just all of a sudden wouldn't release.
Same weather in Chi town but at least there's this weekend. My subframes are fully treated and will be ready to reinstall.
If you need a silver lining, no stuck, rusty bolts or even grease on your hands this time around. If I had to go that far into a Mini round two, it'd be yours. GLTY.
I am preparing for the worst case scenario. The good news is that we can pull the engine and trans in about an hour (we've done it a few times now)- Gonna time it to see if we can beat mod mini (yes, there's two of us but we're old and slow so I still think it might be fair) LOL
Once we pull the trans we can assess the anticipated damage. I kinda hope the clutch assembly is damaged because if it's not, then I'm stumped...
Anyway, I had gone with the OEM LUK brand I used on Red Thunder some years ago (which btw is still going strong)- When I had Adrian tune the car he said I should be around 220hp. I have no idea if that is the case but the car is SIGNIFICANTLY faster. So, maybe the power was too much??? (Sounds funny just writing that )
I avoided getting away from the Dual Mass because I went with a cheaper lightweight kit in my E39 and while it was smooth, it chattered at idle like a tractor. So I am not a fan of a ton of NVH if I can help it.
If I do move up a step or two in clutch strength/quality, is there a brand or brands I should be looking at? I don't want to drop a ton of coin on a stupid clutch as I am not racing or auto-crossing. This is just a simple peppy DD. Currently looking at the FX kit that miniman adam suggested in another post. I think he probably has much more power than me and his are holding up, I should be ok...
Thoughts? Recommendations? Opinions? I'm all ears.
Last edited by Boostmaster; 02-27-2024 at 05:37 PM.
Very interested in the outcome and feedback from others!! I'll be rivaling you on power, or even more if you haven't done the head and port work. The clutch was replaced and is basically new from when I got the car, so I planned to keep what I have. Perhaps there's a cautionary tale to do otherwise...
For what it’s worth, I have a ClutchMasters FX100 kit with steel flywheel in my R55. I’m stage 2 tuned by Lou at PrototypeR. I now have maybe 60k miles on the kit, and I’ve been very pleased with it. It has never given me cause for concern that it couldn’t hold the extra power, and the FX100 disc has always felt very much like the stock disc. I went with this choice because I wanted a stock feel, and I think it very much hits that spot.
All that being said, if the car is not your daily, then wait until you pull the gearbox before deciding which direction you go. Maybe best case is you only need to replace the pressure plate and disc.
Outlandish: We did not pull the head to do any work on it. I was tempted, but I was already knee deep ($$) into this project and I have a few other "projects" that also require attention so I figured that a few minor upgrades would be acceptable. Not really sure how much the head work would give us but the BVH's that are out there are simply way too expensive for what what you get. (unless you are racing or running Mini's exclusively). I did port the intake and have a 4-2-1 catless header with the resonated Milltek and a tune (550cc injectors) and it moves out quite well. While the car is classified as a DD, it's in a rotation with the other DD's so it can remain on stands indefinitely.
NJ: I concur. I will not be ordering anything until I pull the engine/trans and see what's up. No real hurry. I would just be nice to be able to have this one wrapped up and move my focus onto one of the other projects. I'll take a look at the clutch set up you are running as well. I like to have options.
Thanks again for the input. Really helps to be able to bounce some ideas around.
I avoided getting away from the Dual Mass because I went with a cheaper lightweight kit in my E39 and while it was smooth, it chattered at idle like a tractor.
Shame that was the case on your BMW. I've read great things everywhere about the Valeo single mass setup and am giving that a try - your post scared me into not using whatever setup is in my car now (which I'll know soon enough)
Last edited by OutlandishnessDue; 02-28-2024 at 02:23 PM.
^^ I think it had to do more with the lightweight fly wheel. The chatter was like a tractor until I depressed the clutch. Then it was fine and there was no noise while driving. Just an annoyance for me.
Finally got around to pulling the engine and trans. Clutch disc looks good. Throw out bearing seems to "catch" when the clutch fork moves to the upper-most position. It seems to "stick" when it goes too far. Felt a little squiffy to me when installing, Now, I need to find something that will cooperate.
Thoughts?
Clutch kit is stock style LUK brand kit that includes everything. All looks good save for the throw out bearing seeming to "catch" at the top of the throw.SO, what it boils down to is that the throw out bearing seems to be too loose as it connects to the shift fork. It's been awhile since I did the other car but this one seems really loose and it's the only thing I can think of that is "catching".
Thoughts???
Last edited by Boostmaster; 03-14-2024 at 05:22 PM.
Spoke with LUK tech today. No help. No one seems to know what the issue is. Sending unit back for a refund. Ordered a Valeo kit with new flywheel and also have a new slave cylinder on hand. Hopefully, it's a matter of a bad pressure plate because nothing else makes sense.
If anyone has any other ideas or thoughts on this please chime in. I won't have the clutch parts till Monday.

 11-15-2023, 05:47 AM


 ) it will be finger loose to remove. The tensioner is a springy little click valve, which is clicked in when the chain slaps the tensioner when the oiling system is without oil pressure. (This is what that red light is. DO NOT RUN THE ENGINE AT ALL UNTIL ANY CAUSE OF THIS LIGHT that triggers the light IS REPAIRED. After you are certain that you have correctly repaired the cause, you will have to run the engine on faith until the system turns the light off (returns that the trigger condition is no longer met). The tensioner is installed clicked on (there is only one position, as in, clicked in [off]), and once the engine runs it will click out quieter than the car is while running. Observe the engine cadence during your ownership prior to mechanical fault and note how it returns to this (or similar if you have separated or replaced the cylinder head) after the chain tensioner gets oil pressure and unclicks to its full glory. When re-installing, hand tighten the giant bolt to as hand tight as it can be, and then torque it to factory specification from not at all > then some > then not some > exactly to factory specification.


 )
)