

R56 DD/HS Build Thread
#26
 04-10-2013, 05:54 AM


I don't think so, but unless the club involved is unusually stringent in Tech I would not think it a problem. There might be three points to consider:
1. no competitive advantage (adds weight, does not affect geometry)
2. is the car winning trophies at this stage of the game, and finally
3. would the other competitors in the class object? (ask them).
I wouldn't necessarily try it at a National Tour, but there's usually a pretty big difference between NT and Regional competition.
Cheers,
Charlie
Can you guys confirm the plastic pin to pull out is that white one? I'm going to do a before and after alignment today and tomorrow. I got an alignment sheet from last year from the prev owner of the car, the alignment was kinda all over so hopefully that can be taken care of a little.
#27
04-10-2013, 09:38 AM

6th Gear
Just a reminder that the purpose of tech is not to determine if a car is legal for the class entered but rather whether or not it is safe.
3.3.3 Safety Inspections
All vehicles must pass safety inspection on the following points prior
to competing. Entry fees, if already paid, will be refunded if a car fails
to pass safety inspection. Safety inspection is not concerned with the
legality of a car.
3.3.3 Safety Inspections
All vehicles must pass safety inspection on the following points prior
to competing. Entry fees, if already paid, will be refunded if a car fails
to pass safety inspection. Safety inspection is not concerned with the
legality of a car.
#28
04-10-2013, 10:16 AM
well i scanned through the rulebook, couldn't quite find anything specifically allowing a defender, but I wonder if it could fall under:
13.2 BODYWORK
A. Accessories, gauges, indicators, lights and other appearance, comfort
and convenience modifications which have no effect on performance
and/or handling and do not materially reduce the weight of
the car are permitted.
As an accessory or convenience modification - a part strictly to prevent doming/mushrooming which has no effect on performance or handling? Is that a stretch?
#29
04-10-2013, 10:21 AM

6th Gear
Are the defenders even needed on a 2nd-gen MINI? I had thought those were primarily to address the strut top mushrooming problem that the 1st-gen MINIs had, and that the 2nd-gen cars were not prone to that.
You can try to argue them as an accessory, but I don't think you'd be successful. Since it reinforces one of the suspension mounting points, I think you'd lose on the "no effect on handling" argument.
You can try to argue them as an accessory, but I don't think you'd be successful. Since it reinforces one of the suspension mounting points, I think you'd lose on the "no effect on handling" argument.
#30
04-10-2013, 10:23 AM
the previous owner's dealer actually installed this part after the strut tower did dome due to a really bad pothole. i'd never even heard of this until i saw it on his (now my) car
#31
04-10-2013, 12:51 PM

#32
04-10-2013, 12:53 PM


#35
04-10-2013, 04:30 PM
#36
04-10-2013, 04:57 PM

Kyoo - Here is Charlie's HS build thread...it is a great read:
https://www.northamericanmotoring.co...kin-powah.html
And, yes, those white pins in the holes of the M7 plates are the ones you pull. Then loosen the 3 nuts on the top, jack the car up just enough to allow you to push the top of the strut towards the engine and while holding the strut in place, tighten one of the nuts. That is just so the strut doesn't move when you tighten the other two nuts. Remember you will need a wheel alignment for toe-in. If you can do it yourself, you will need to turn the tie rod in by 1/2 turn on each side. That will get it back to approximently the same place it was before you made the camber change. If you don't adjust the toe-in you will have too much toe-in and lose the advantage the camber change gave you.
As Charlie said...Great to have another MINI out there in the autocross world
#37
04-10-2013, 05:07 PM

2nd Gear
#38
04-10-2013, 05:23 PM
Kyoo - Here is Charlie's HS build thread...it is a great read:
https://www.northamericanmotoring.co...kin-powah.html
And, yes, those white pins in the holes of the M7 plates are the ones you pull. Then loosen the 3 nuts on the top, jack the car up just enough to allow you to push the top of the strut towards the engine and while holding the strut in place, tighten one of the nuts. That is just so the strut doesn't move when you tighten the other two nuts. Remember you will need a wheel alignment for toe-in. If you can do it yourself, you will need to turn the tie rod in by 1/2 turn on each side. That will get it back to approximently the same place it was before you made the camber change. If you don't adjust the toe-in you will have too much toe-in and lose the advantage the camber change gave you.
As Charlie said...Great to have another MINI out there in the autocross world
https://www.northamericanmotoring.co...kin-powah.html
And, yes, those white pins in the holes of the M7 plates are the ones you pull. Then loosen the 3 nuts on the top, jack the car up just enough to allow you to push the top of the strut towards the engine and while holding the strut in place, tighten one of the nuts. That is just so the strut doesn't move when you tighten the other two nuts. Remember you will need a wheel alignment for toe-in. If you can do it yourself, you will need to turn the tie rod in by 1/2 turn on each side. That will get it back to approximently the same place it was before you made the camber change. If you don't adjust the toe-in you will have too much toe-in and lose the advantage the camber change gave you.
As Charlie said...Great to have another MINI out there in the autocross world
 , but I hadn't actually considered the defenders to be any sort of performance booster - just don't want the strut tower tops to dome.
Thanks for the tips all:
Last edited by kyoo; 04-11-2013 at 08:02 PM.
#39
04-10-2013, 05:26 PM
Pre-adjustment Alignment - 4/10/2013
As I mentioned earlier, I try to purchase lifetime alignments for all my cars. This is especially pertinent with the evo now that it's got coilovers, but I think the Mini can benefit from this as well - especially if I get adjustable dampers, etc soon (barring that they void the lifetime alignment for swapped dampers).
Here is the pre-adjusted alignment - not as bad as I thought it would be, and strangely a lot of camber in the right wheel. These are with 15"ers on winter tires though, so I should probably put on the other wheels when I go for the alignment.

It is still a little "all over the place" for me, but like I said - not as bad as I thought.
Here is the pre-adjusted alignment - not as bad as I thought it would be, and strangely a lot of camber in the right wheel. These are with 15"ers on winter tires though, so I should probably put on the other wheels when I go for the alignment.
It is still a little "all over the place" for me, but like I said - not as bad as I thought.
Last edited by kyoo; 04-11-2013 at 08:12 PM.
#40
04-11-2013, 06:31 PM
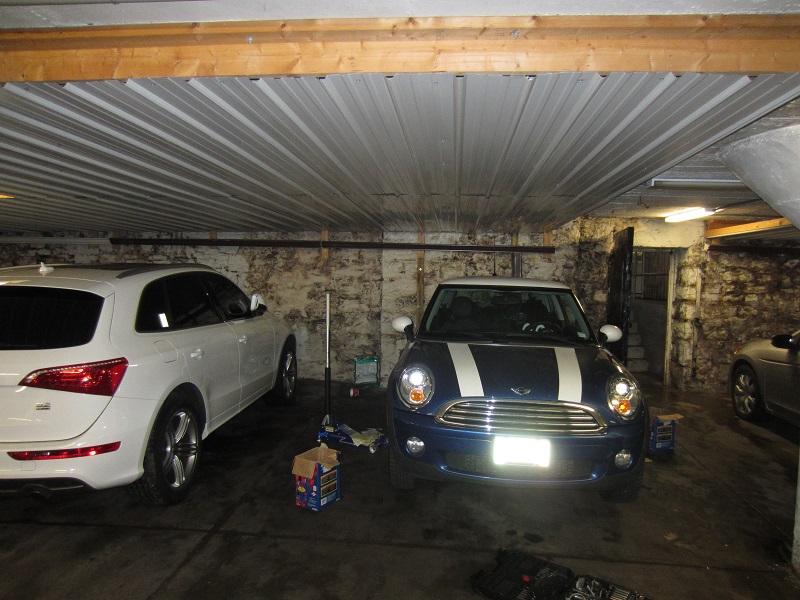
Under the Car - 4/11/2013
Finally jacked up the car and put it on stands today to get a good look at everything underneath - I'd say the car is fairly clean given its mileage - few spots of rust here and there, but more or less what I expected. Kind of funny how close the stands ended up being together. I'd say the chassis is fairly stiff too, a little stiffer than I expected.

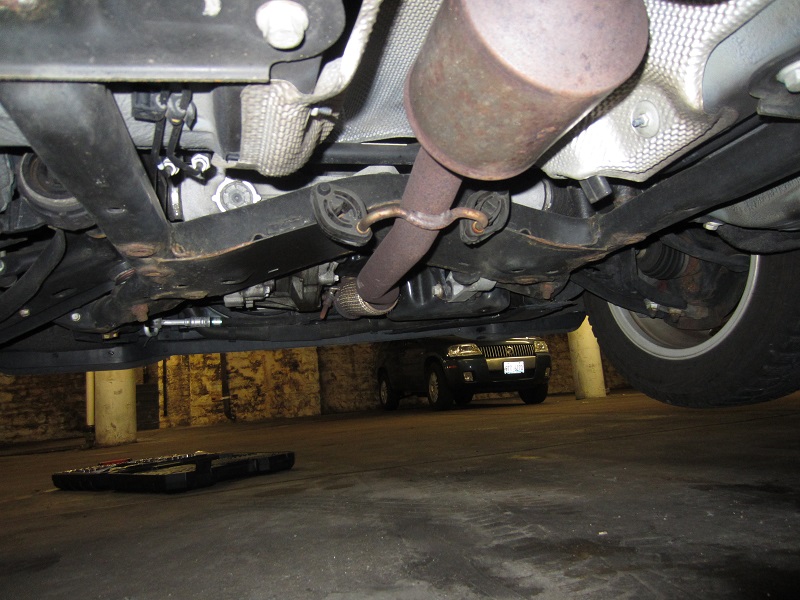

Bolt regarded as NOT missing:


Trans with "lifetime" fluid sticker (pfft):
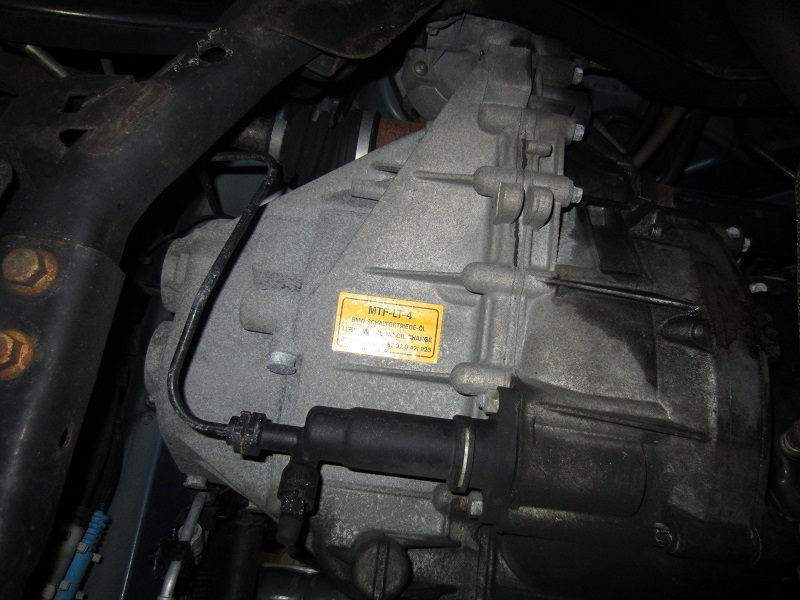
Drain and fill plugs:

Can't make heads or tails of where the oil is on this car...:

Bolt regarded as NOT missing:
Trans with "lifetime" fluid sticker (pfft):
Drain and fill plugs:
Can't make heads or tails of where the oil is on this car...:
Last edited by kyoo; 04-19-2013 at 12:31 PM.
#42
04-11-2013, 07:47 PM
Free Camber Mod - 4/11/2013
Step by step of how I did the free camber mod:
Disclaimer - I have strut tower defenders, but the procedure is the same, may just look different. Eventually I'm gonna have to take them off and clean everything though.. just didn't feel like it today.
(1) I got the car lifted up (previous post) and loosened the strut tower bolts.
(2) I actually did screw a screw into the plastic pin - I tried it the other way the second time and it basically wouldn't work.

I personally ended up tearing the pin the first time, which initially I panicked about:
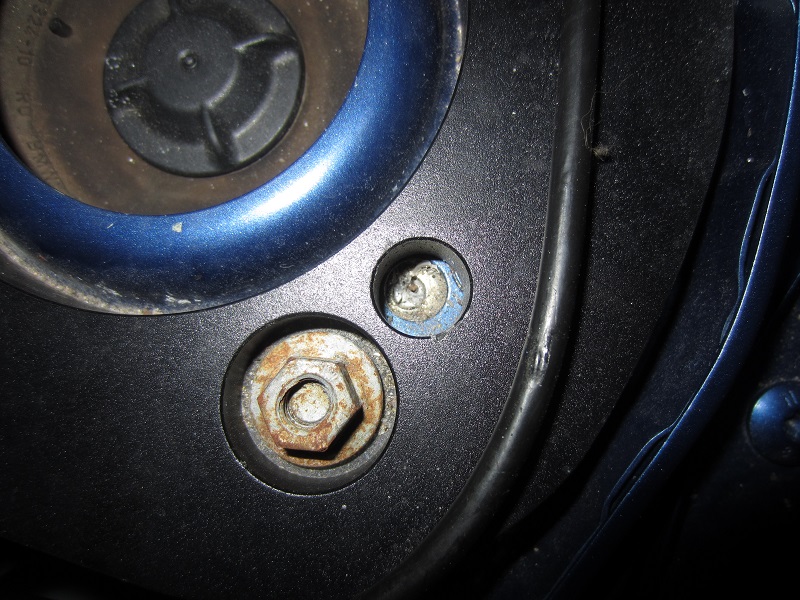
Until I realized it just poked through:
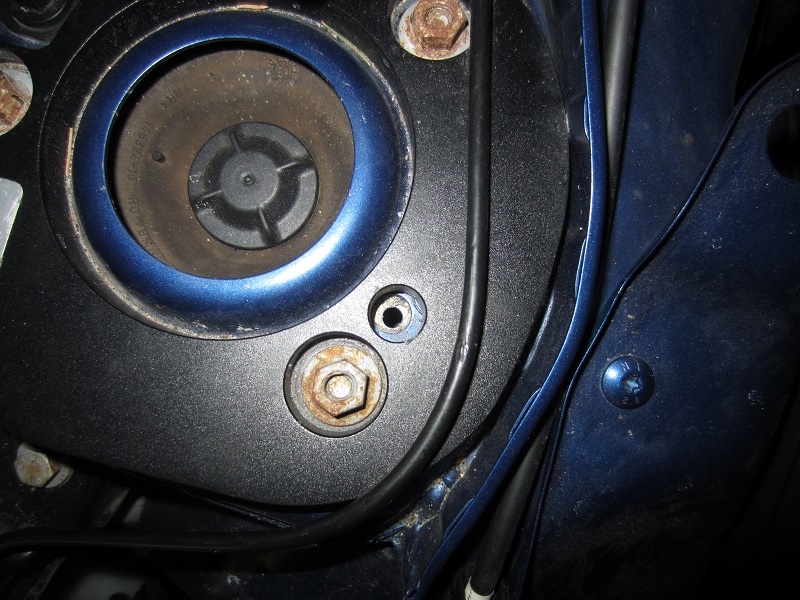
^ This picture is pretty good for showing you where the position at least initially was.
(3) Push the entire strut assembly towards the center of the car. It moves surprisingly easily. As someone recommended, I began bolting down one side before letting go. I did not use a torque wrench, I just tightened a good amount and I'll retorque it later after the car's been driven around a little. I think especially in my case, the STD may help "equalize" the pressure on the strut tower.
After:
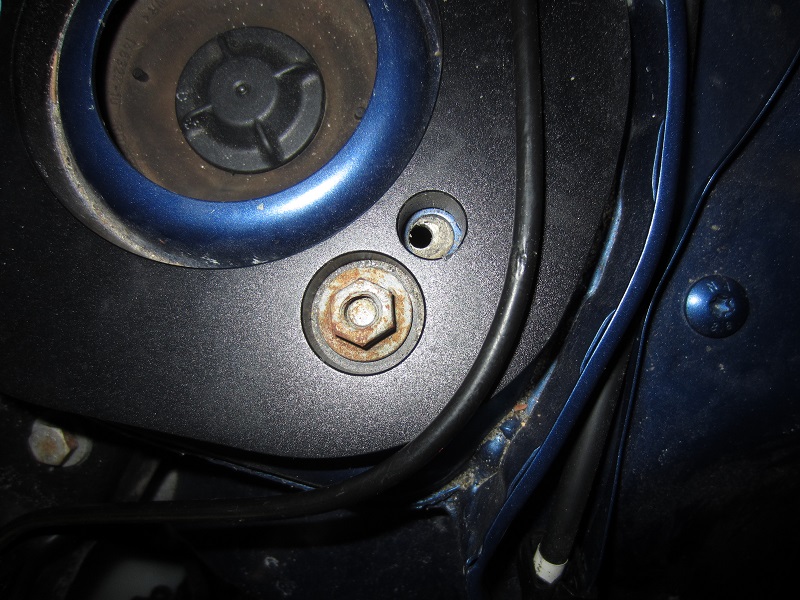
(4) Repeat for the other side. This time I screwed in the screw much less, and I used the backside of the hammer to pull the pin out - came out extremely easily this time.

*Something fairly important to note: with the wheel/strut assembly "hanging" this is as far as I could get:

**But using a jack to hold the wheel/strut assembly up, I was able to eke out a little more:
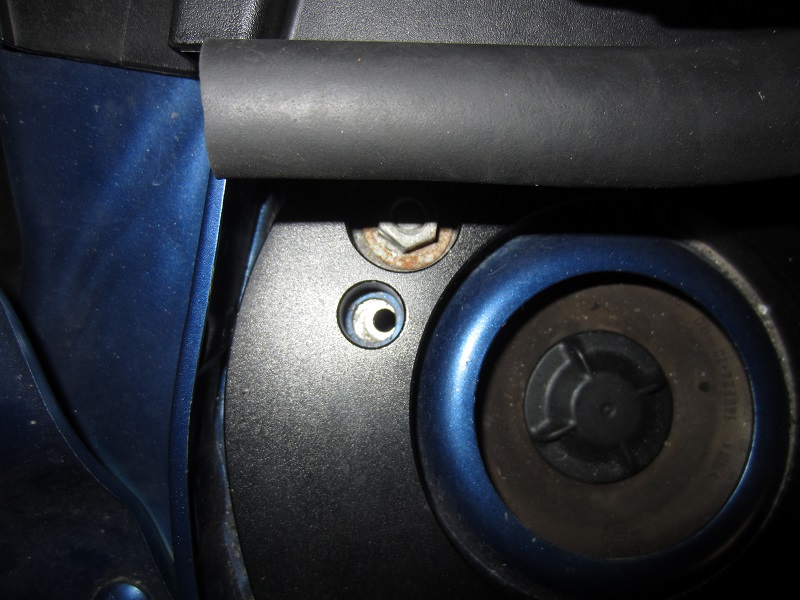

The process was fairly easy actually! I'm pretty excited to see how this turns out when I get the car realigned next week to compare the front camber. Honestly, like people said, doesn't seem like I'll get much - even a half a degree seems like a stretch looking at the pics, but we'll see how it comes out. I'm definitely gonna have to look for some rubber grommets to cover that hole though
Disclaimer - I have strut tower defenders, but the procedure is the same, may just look different. Eventually I'm gonna have to take them off and clean everything though.. just didn't feel like it today.
(1) I got the car lifted up (previous post) and loosened the strut tower bolts.
(2) I actually did screw a screw into the plastic pin - I tried it the other way the second time and it basically wouldn't work.
I personally ended up tearing the pin the first time, which initially I panicked about:
Until I realized it just poked through:
^ This picture is pretty good for showing you where the position at least initially was.
(3) Push the entire strut assembly towards the center of the car. It moves surprisingly easily. As someone recommended, I began bolting down one side before letting go. I did not use a torque wrench, I just tightened a good amount and I'll retorque it later after the car's been driven around a little. I think especially in my case, the STD may help "equalize" the pressure on the strut tower.
After:

(4) Repeat for the other side. This time I screwed in the screw much less, and I used the backside of the hammer to pull the pin out - came out extremely easily this time.
*Something fairly important to note: with the wheel/strut assembly "hanging" this is as far as I could get:
**But using a jack to hold the wheel/strut assembly up, I was able to eke out a little more:
The process was fairly easy actually! I'm pretty excited to see how this turns out when I get the car realigned next week to compare the front camber. Honestly, like people said, doesn't seem like I'll get much - even a half a degree seems like a stretch looking at the pics, but we'll see how it comes out. I'm definitely gonna have to look for some rubber grommets to cover that hole though
Last edited by kyoo; 04-11-2013 at 08:11 PM.
#43
04-11-2013, 08:14 PM
2nd Gear
#44
04-11-2013, 08:22 PM

Transmission "missing" bolt regarded as normal, not missing.
Last edited by kyoo; 04-12-2013 at 04:21 PM.
#45
04-14-2013, 07:52 AM
So on my window sticker I've got things like the sport package, which gives me Dynamic Stability Control, and under standard features there are ABS, CBC, EBD, TPM, and ASC for all season traction control. I'm assuming ASC is not the same as DTC?
Basically I just wanna know how to turn everything off - I've held the "DSC Off" button for 1 second, 3 second, 10 seconds - doesn't seem to matter, it looks like it always does the same thing?
Basically I just wanna know how to turn everything off - I've held the "DSC Off" button for 1 second, 3 second, 10 seconds - doesn't seem to matter, it looks like it always does the same thing?
#46
04-14-2013, 08:34 AM
Press and hold for 3 secs. Message in Tach says "DSC Off". The system is not fully disabled with the 1 second press, not does the Tach message appear. Note that I ordered a "Code 5DT - Dynamic Traction Control" on the Vehicle Inquiry Report when purchasing the car, so your system many not be identical.
#47
04-14-2013, 01:31 PM
Press and hold for 3 secs. Message in Tach says "DSC Off". The system is not fully disabled with the 1 second press, not does the Tach message appear. Note that I ordered a "Code 5DT - Dynamic Traction Control" on the Vehicle Inquiry Report when purchasing the car, so your system many not be identical.
btw I did auto-x on this mode accidentally at one point, which resulted in, at least what felt like, a power cut.
Last edited by kyoo; 04-14-2013 at 03:32 PM.
