R56 R56 MCS Forged Low Comp Build Thread (with questions!)
#1
R56 MCS Forged Low Comp Build Thread (with questions!)
Hi all,
In this thread I’ll try and cover off the background to my ownership of my mini, some of the testing we have carried out, the modifications to date, plans for my current forged engine rebuild and raise any questions that I would appreciate some input on.
Background:
In January 2014, I was running around in a BMW Z4Mc and a R53 Cooper Automatic, when I realised it was time to reduce costs of car ownership and trade both away for one single car that attempted to cover all of the bases that I previously had to a reasonable degree (fun, sporty, some form of practicality, cheap to run etc.). At the time I took a test drive in a 2013 MCS at a friend’s BMW dealership, enjoyed the experience (it had all the fun of the less powerful R53 with good steering and generally good handling but with more in all the right departments). I then started my search at the cheaper end of the BMW Approved Used Car scheme for something that suited me. I found a 2007 R56 MCS with 47k miles in red with white stripes, white roof, white mirrors and white wheels at the Bradford Mini Dealership. I sold the Z4 privately and then headed down to Bradford with the aim of trading in my R53 if the car met my expectations.
On my arrival the R56 was very well turned out with shiny red paint, immaculate white wheels and quite a surprisingly posh tan leather interior and piano black dash in near perfect condition. I test drove the car and was very happy with the fact it felt like a nearly brand new car, very taught and no rattles. I also had confirmation that the dealership had found the cam chain death rattle a couple of days before I headed down and had the workshop complete the upgrade to the newest solution with new cam chain, guides and tensioner. I was provided a receipt for this along with a complete service including all the appropriate parts (Spark Plugs, air filter, oil filter, pollen filter, oil and windscreen wipers as well as fuel filter iirc).
Modifications:
Having had experience in modifying a couple of turbo cars in previous years, I knew it wouldn’t be long till I started work on this one…
The rolling road tuning and analysis we do is based on static load. This is where you carry out static RPM load tests at each 500 RPM increment and measure the power. It is a much more stable way of taking the BHP readings however does put the cooling under a much heavier intense test as the amount of time on full throttle is much longer than a standard shootout test. What this does tell you though, is that if your intercooling is good enough in this situation, it is good enough in more than likely any condition you will experience on the road. IE built in safety net.
Standard specification on 99 RON fuel which is the best we can get at UK pumps it ran 165 at the wheels, which is about 185 BHP at the engine via estimation. Please keep in mind we don’t use the same RON scale for fuel as in the states, so this is probably similar to your 93 RON fuel at a guess.
In the UK our spec of MCS comes with one single Catalytic Convertor in the downpipe, we don’t have a second cat later in the system.
We measured the back pressure of the exhaust before and after the single Cat and found that the Cat was restrictive, however the rest of the exhaust was not at this BHP.
We removed the standard Cat and whilst the back pressure had gone done, the horsepower stayed exactly the same. Zero improvement which was a bit of a surprise.
We then added a remap to the car that ran around 1bar boost, dropping to .9bar boost. This saw 195 at the wheels (215bhp engine estimate). At this point the rev limit was raised to 7,000rpm by the remap.
We found the standard intercooler was doing a very good job on the road considering how small it is and was managing to keep the air just under 40 degrees c (104f) during flat out runs (30 mph to 150mph) with an ambient of 10 degrees c (50f) but we knew as summer came or track days, we would get higher temps so wanted to build in some better cooling and more room for greater cooling as BHP was being further increased. So I then added a very large front mount intercooler that required subtle chopping of the front cross member, the front bumper and a few other parts to make it fit. I will add pics later. It has an efficient core and is regularly used in cars producing up to 400 BHP at the wheels and beyond.
Interestingly enough the BHP curve improved even from low rpm (where the temp wasn’t actually better). This shows that our bigger intercooler is less restrictive than the standard one. It also held better temps higher up the range and the final improved BHP figure was 205 BHP at the wheels at the same boost level.
We knew the standard MCS turbo was beyond its safe and happy capability so sent it away for modifications. We had the inlet compressor housing machined out to JCW spec and replaced the inlet wheel with a larger compressor wheel made from Billet Alloy. We also had the exhaust housing machined to JCW size and replaced the exhaust wheel to the same size as the JCW spec. At the same time a 360 bearing was added for reliability.
At this point during testing the new turbo we had an issue where around 5,000 RPM the boost would drop to near zero. We found that the standard inlet pipe that led to the inlet of the turbo had a rubber washer/neck that was being dragged in towards the turbo and was collapsing under the level of “suck” from the turbo. Unfortunately when we found this issue, a small amount of this rubber had fallen off and gone through the compressor wheel denting several of the compressor wheel blades. We cut the rubber so that it wasn’t an issue anymore and had the inlet wheel replaced on the new turbo and had it re-balanced.
We then turned the boost up to 1.2 bar mid and 1.1 bar held and made 225bhp at the wheels (245 to 250bhp engine). We have seen 235 at the wheels which is around 260 to 265 engine. This was at 1.3 bar mid and 1.2 bar held.
Mods done to the car to date:
Quaife ATB LSD
3 Piece Helix 4 Paddle Cerametalic clutch kit
Lightened Alloy one piece fly wheel
Eibach Anti Roll Bars front and rear
Uprated Powerflex Engine Mount bush
Updated Black Powerflex front wishbone rear bushes
Michelin Pilot Super Sport Tyres (205 x 45)
OZ Leggenda 17 x 7 in white
Front AP 4 Pot front brake kit on 330 x 28 mm. Pagid Yellow Pads
Rear 280mm disc from JCW with JCW pad carrier to space standard calliper out far enough with Mintex 1144 pads
AP Racing Brake Fluid
Uprated turbo to JCW spec and 360 degree bearing
Miltek De-cat front downpipe
Removed Turbo Re-circulate valve
Remove vacuum driven wastegate actuator and replace with regular pressure driven wastegate actuator
Replaced boost pipes with new silicon ones that remove the inlet baffle and the strange noisemaker that goes to the bulkhead
Peugeot RCZ-R sparkplugs
Remap
Defi dark glass boost gauge, controller and Alta rev counter pod
JCW Steering Wheel
Recent items replaced or work carried out:
Starter Motor replaced due to failure
High Pressure Fuel Pump replaced due to failure
Crank Pulley replaced due to rattling on idle (failure?)
Aux belt replaced (sold to me with cracked tired aux belt..)
Coil Packs Replaced (Dealership felt they were tired)
Turbo Oil Feed Pipe due to leaking (failure?)
Inlet ports walnut blasted at around 55k miles
Standard Airfilter
Oil Filter
Castrol RS synthetic oil
Up to date:
We felt that the car was getting to the point where each .1 bar extra boost added beyond 1.2 bar mid and 1.1 bar held gave a smaller than desired BHP increase. We also had been measuring the exhaust manifold back pressure which was starting to raise higher and higher with each .1 bar added showing that the turbo was getting to the point it was heading out of it’s efficient zone. We measured the pressure just in front of the inlet compressor wheel of the turbo and there was a negative pressure showing that the standard inlet setup was causing some form of restriction. So at that point we were planning on adapting the inlet to remove this restriction which may have allowed the turbo to work a little less hard for the same boost, thus increasing efficiency.
During this further testing (in late April) the ring lands of piston #4 cracked and a section about 1 inch across and half an inch tall dropped off the piston. There was nearly no damage to the bore wall however a very light mark was visible. IE you couldn’t feel it with your nail but it had a visible marking.
Currently we have the engine out and in bits to solve this issue and to prepare the engine for higher BHP.
Work/Modifications planned for the engine:
Re-bore to 77.5mm
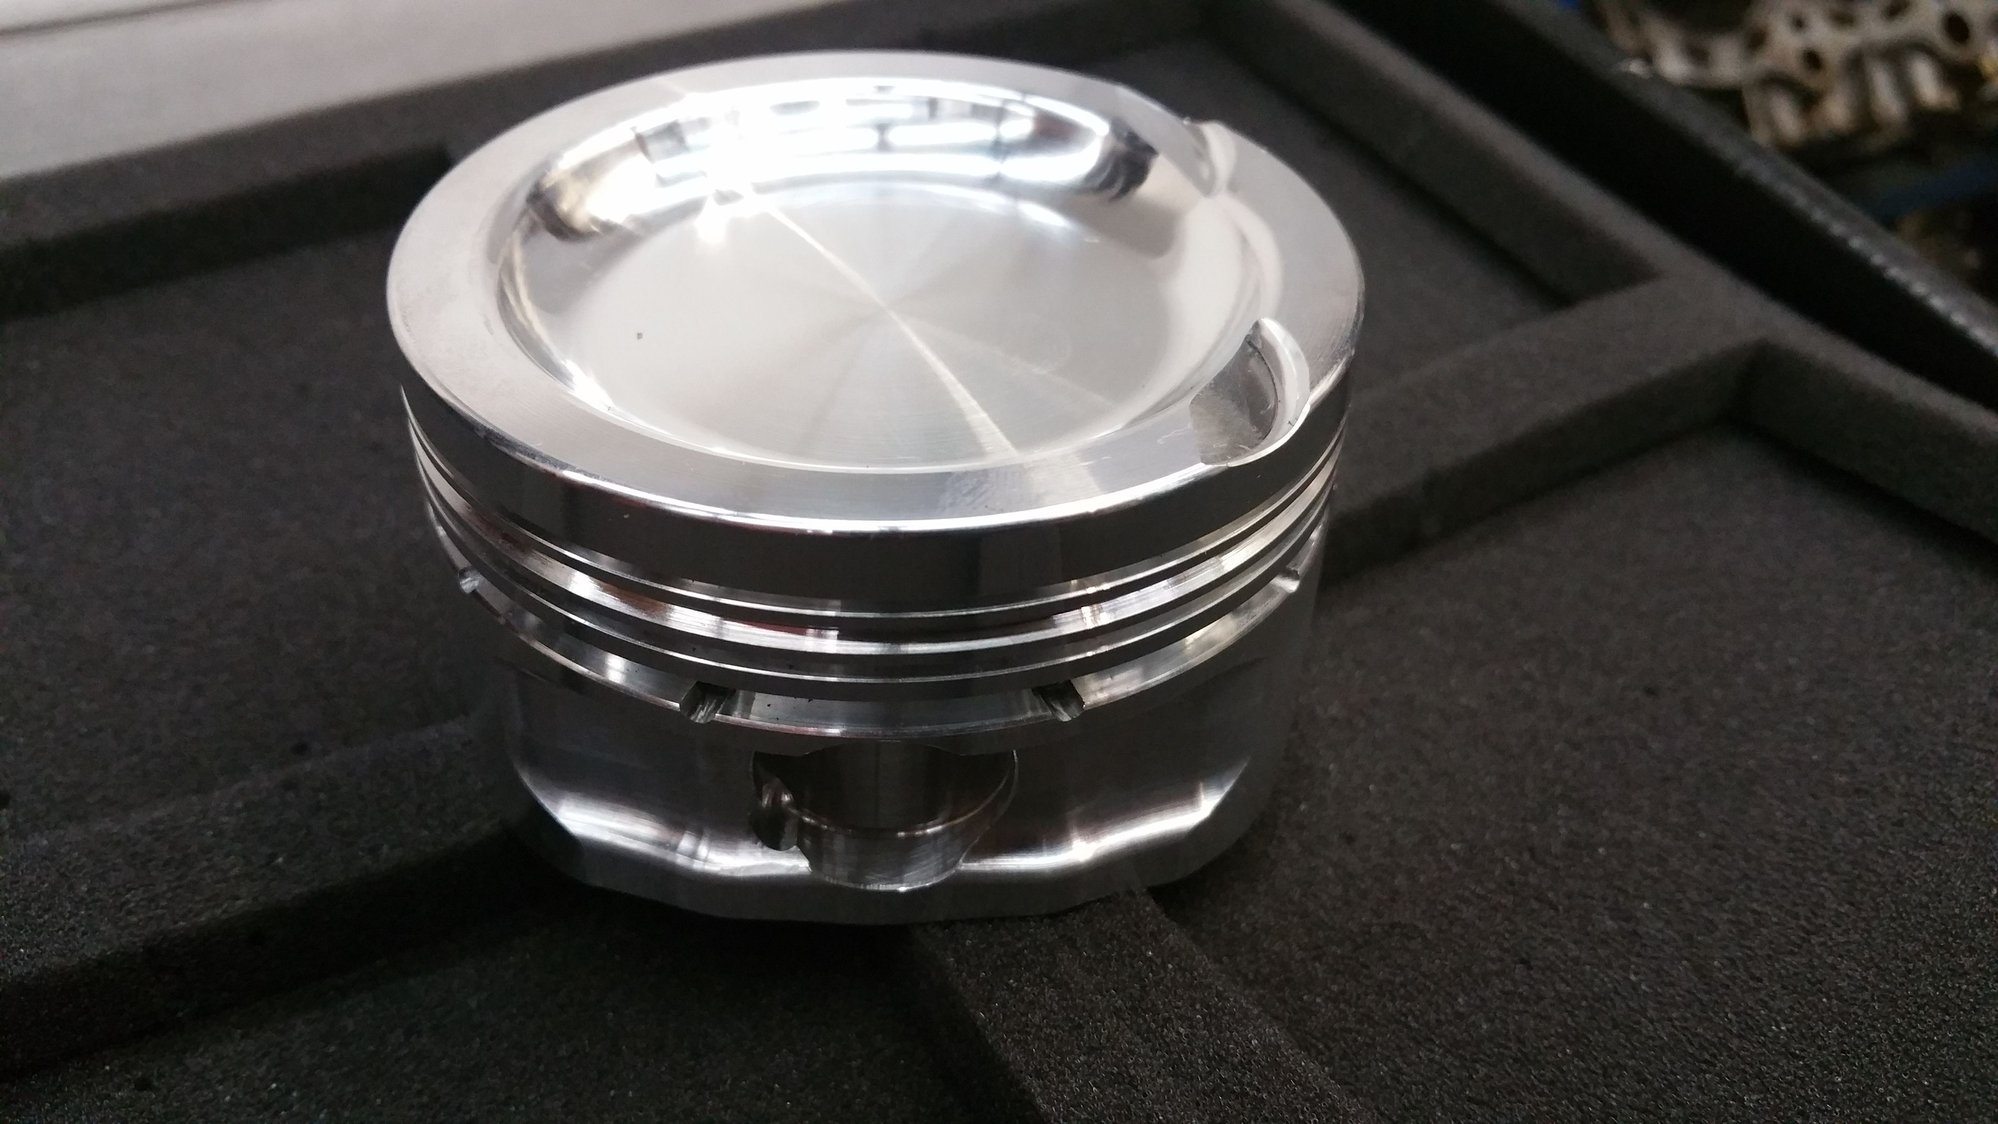
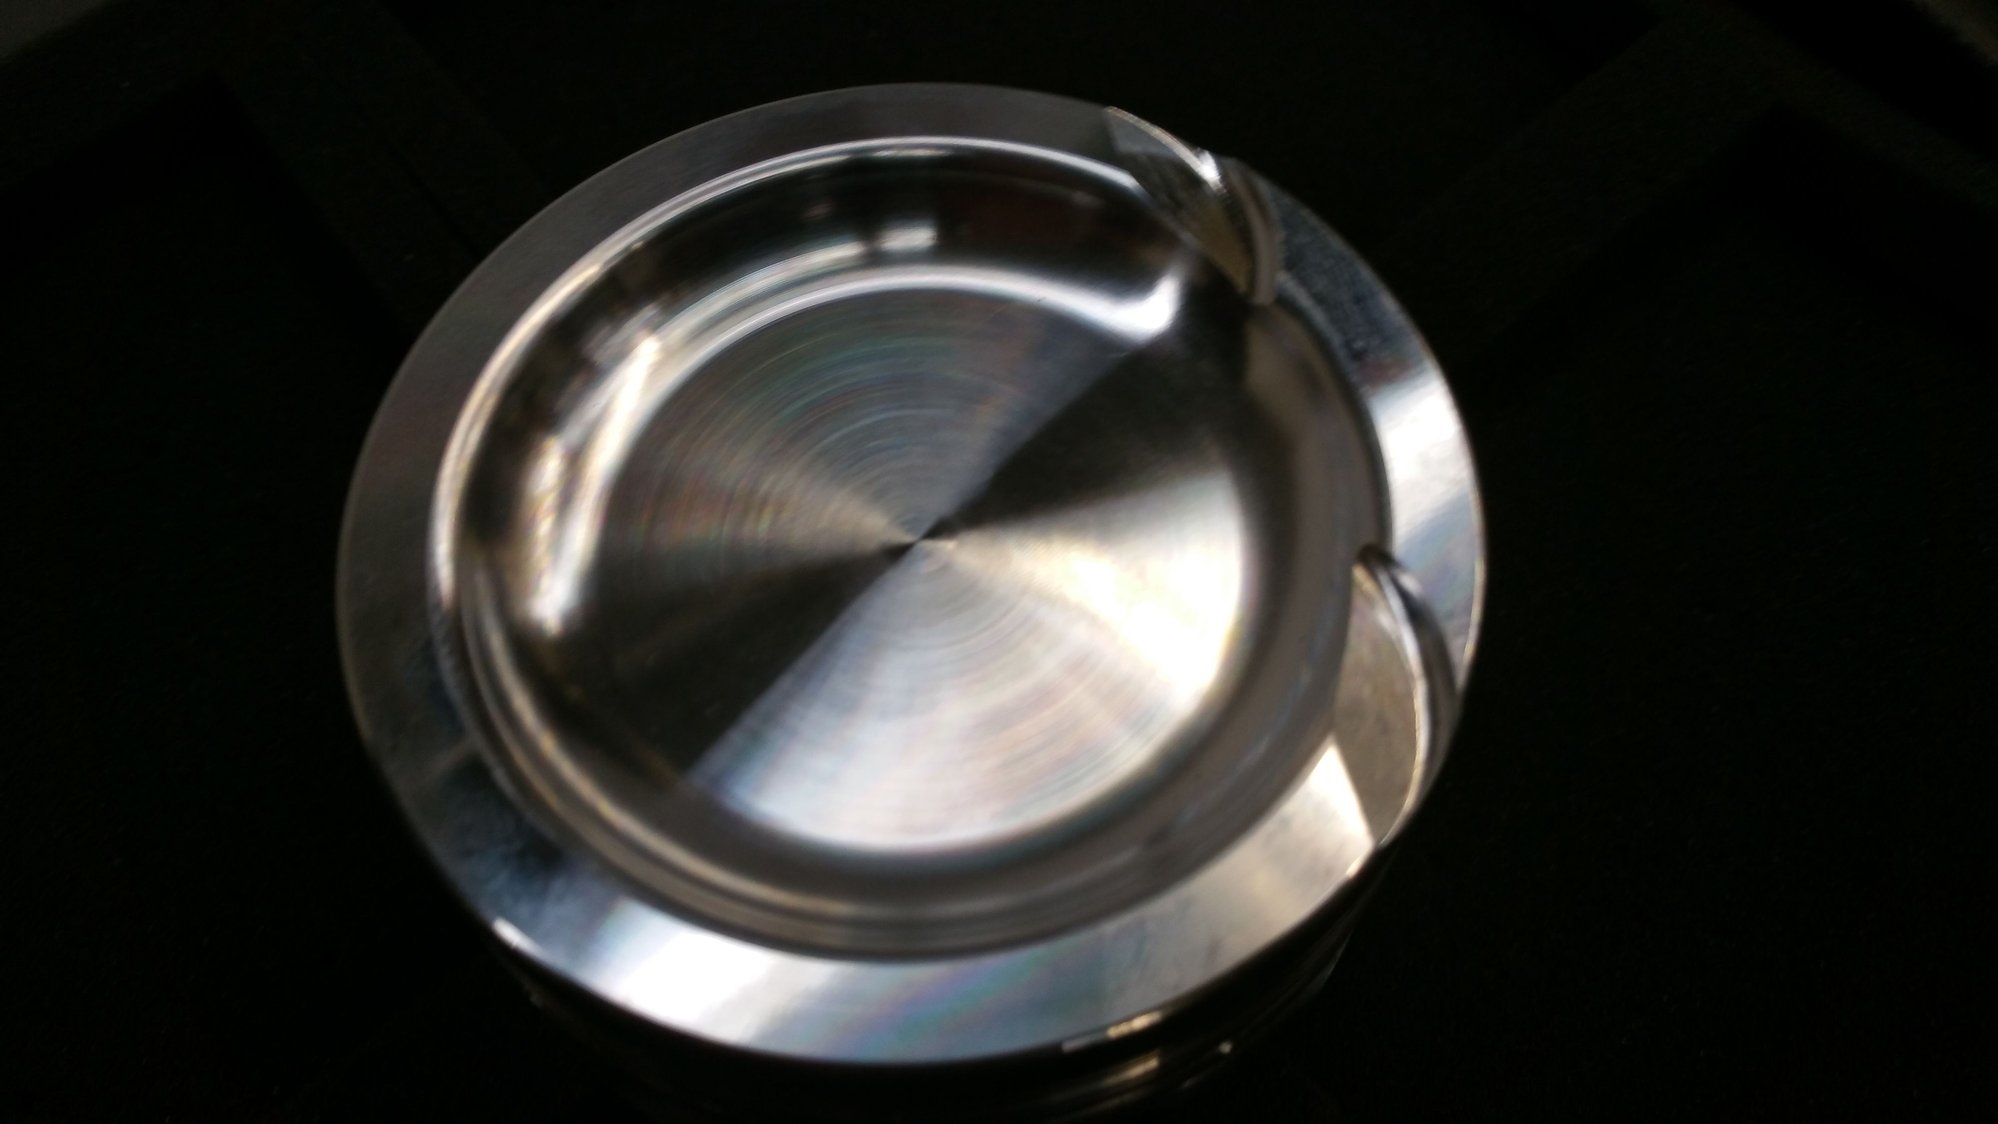
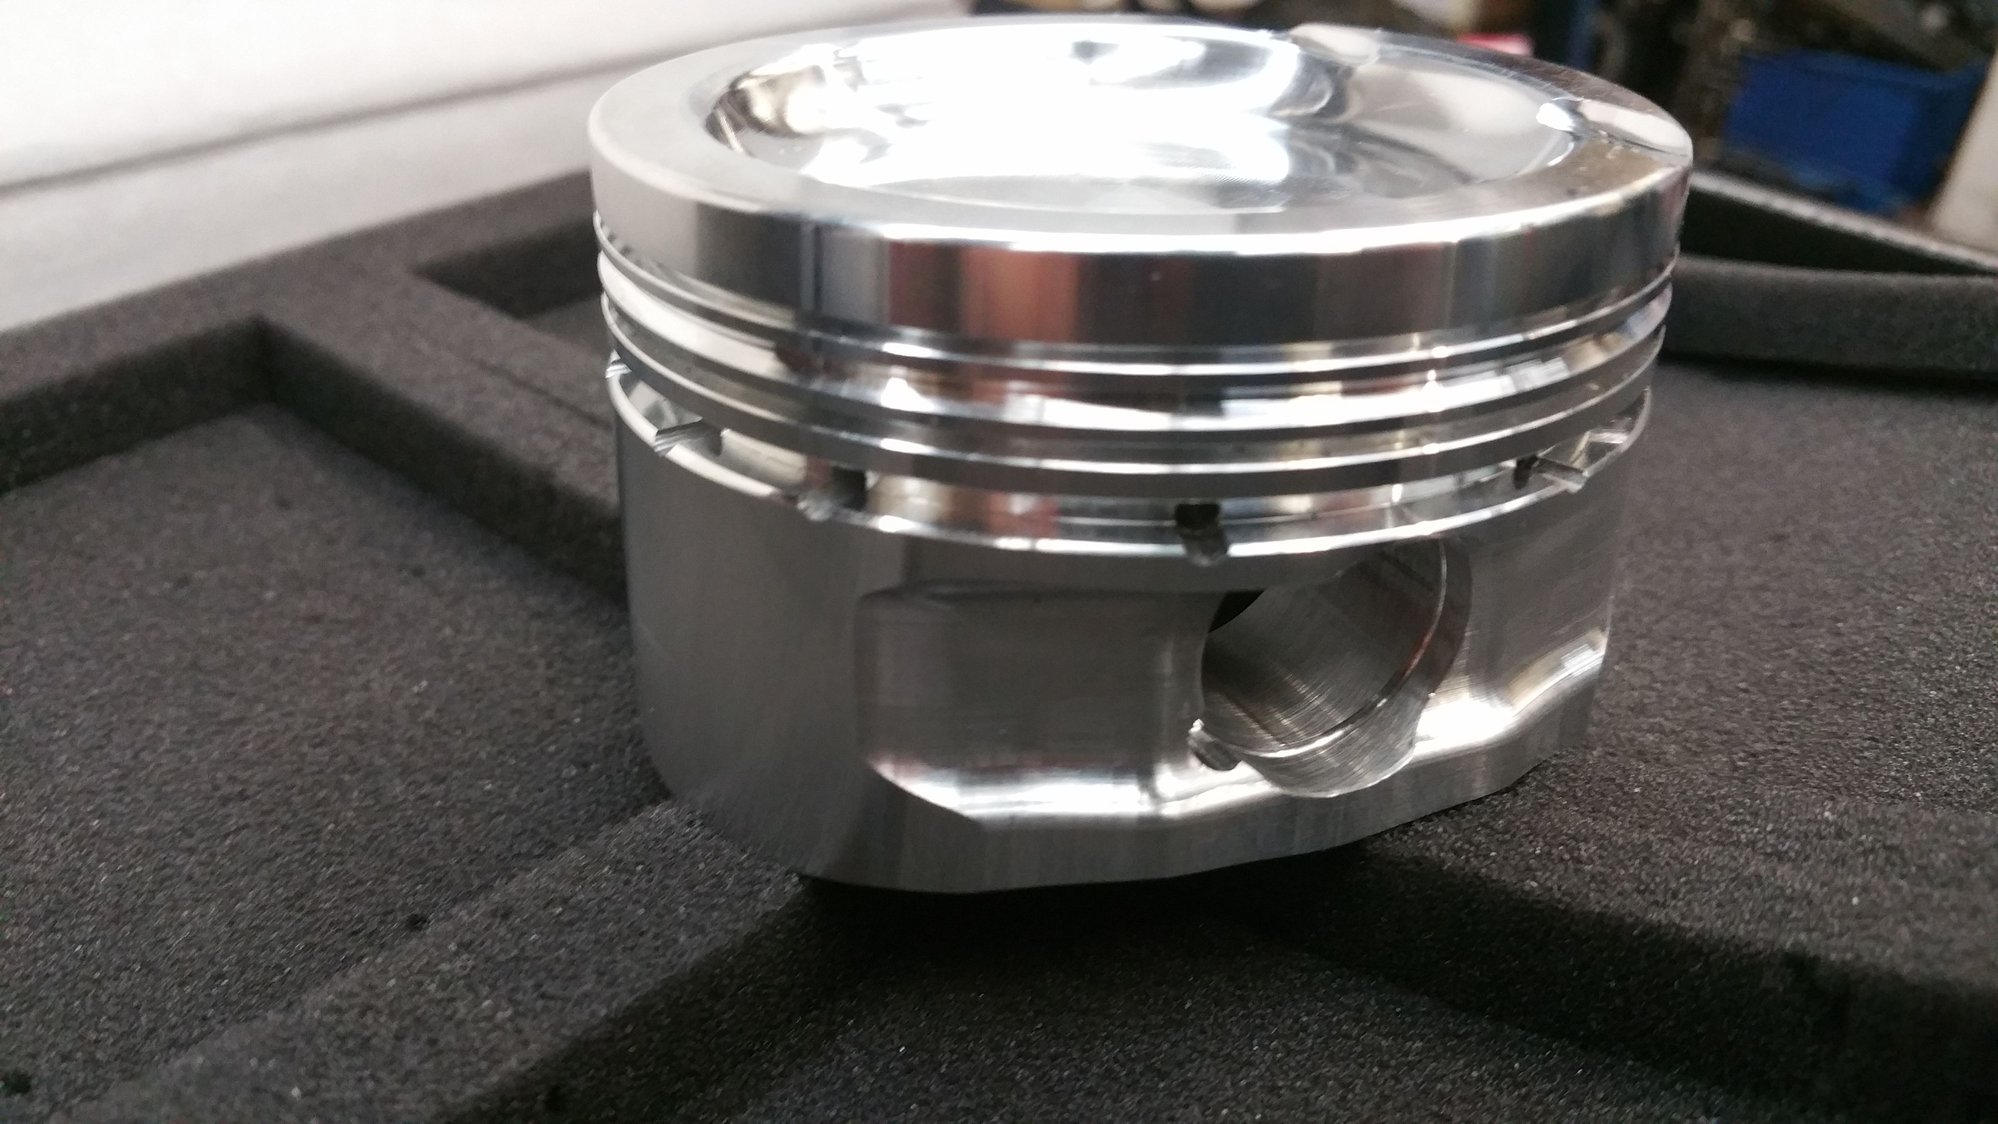
Custom CP billet alloy pistons for 77.5mm Compression lowered 8.0:1 retaining the tear drop shape in the piston crown for the direct injection
Carrillo forged rods. The off the shelf ones with CARR rod bolts
Cylinder head cleaned up with valves cut as appropriate
Something to improve the breather setup. Catch Cans basically, that work
Upgrade to the turbo system to get past the limitations of the JCW spec turbo. Some pretty cool ideas for testing out here from replacement turbo through to compound charging
Questions I would welcome any views on:
Has anyone looked into a better solution for clamping the head to the block, designed for higher boost? Bigger head bolts? Replacement head studs and nuts that are stronger or bigger?
What are the standard valve angles that they are cut to? I’m not sure I see the need for 5 angles on a turbo car, so wanted to know what standard was so I can request this is carried out.
That is my first post on the subject. Welcome any questions and I know folks like pictures so I will find a way to update with some pics as we go. I also have all the graphs of the power figures from each stage of tune.
Cheers,
Steven_RW
#2
#3
Hi.
We had previously seen different boost levels. At one point the vacuum controller was struggling to hold a consistent boost figure and I saw a fluctuating boost figure literally watching the boost gauge flap between 1.1 and 1.4bar. Occasionally hitting 1.5 or just about a t 1.6 for short periods. This wasn't a state of tune I ran the car very long or hard in.
It was running 1.2 mid range and 1.1 held when it failed. We think it was standard detonation. Ie not heat driven as the big intercooler had inlet temps at a sensible level and the car wasn't running lean. This was in line with the damage: Sparkplug fine and not melted. Piston crown fine with no pits or smoothing off usually associated with running lean/melting.
We had been experiencing a strange issue where we occasionally experienced a serious single miss fire (not a rapid succession of misses but like a full ignition shut for a tenth or two of a second at 5,600 rpm on full load. This had been consistent since our first remap. We are wondering if that was the ecu sensing det and shutting down.
My car did see some proper usage. Meaning lots of full rpm shifting and holding of heavy loads. We have the right sort of quiet roads here. Not making that as an excuse for the breakage just more stating it had seen proper race track like use without failure ahead of its final failure...
We think it detted due to too much compression for the boost and the det wave went down the side of the piston. That's why we are properly decompressing the engine to allow more scope for higher boost.
Thanks
Steven
Last edited by Steven_RW; 06-03-2015 at 04:27 AM.
#4
Nice work to date and I applaud the meticulous approach you are following.
The ARP stud kit for the head is pretty beefy with much higher tensile strength. In addition they are not single use like the factory bolts. Retaining the tear drop shape on the cylinder head will not be an option at 8:1 compression due to the reduction in piston crown height necessary. According to CP there is simply insufficient distance between the crown and wrist pin. That was their answer when I asked why their 9.5:1 pistons didn't have it. During a later conversation I was also informed that the tear drop made almost zero difference in atomization above idle.
The standard static compression pistons of 10.5:1 at 1.3 bar results in a dynamic compression ratio of 15.85:1 at sea level. To reach the same dynamic compression using 9.5:1 pistons would require 1.7 bar of boost but produce much more power with the higher charge density.
The ring land failure in an unfortunate side effect of the shoddy design and construction of the factory pistons, and the cumulative effects of even minor detonation has proven to be their greatest enemy. With the difference in material thickness and alloy the CP 9.5:1 pistons should fit most high power build needs.
#5
Hi.
Thanks for the reply.
I'll definitely look into the ARP stud kit.
I asked the same question re why their 9.5:1 didn't come with the tear drop shape. I was told they felt it wasn't necessary really. I decided to keep it. I was asked if I did or didn't want it. The pistons are ordered already and I've given them my proposed boost levels bhp levels and rpm levels. I appreciate your views and as such I'll check whether the piston will still have enough strength with it down at 8.0:1 and the tear drop. This was discussed during the specification but I'll seek extra reassurance.
I appreciate your point regarding the lower compression at 9.5:1 and the 1.7bar. We aim to go quite high on the boost with this engine so wanted to build in some leeway. I'm not sure if you noticed the comment regarding possible compound turbo charging. We have some ideas and are looking through them but the initial build is the starting point up and running with the existing turbo then we can mess with other potential solutions.
I expect our issue will be lack of scope with the standard ecu. I've been in contact with John Robbins at DNA tuning with at minimum the aim of getting rid of the weird miss fire ignition cut we had and will also cover what is possible at the higher boost end with this ecu.
All good fun
Regards,
Steven
Thanks for the reply.
I'll definitely look into the ARP stud kit.
I asked the same question re why their 9.5:1 didn't come with the tear drop shape. I was told they felt it wasn't necessary really. I decided to keep it. I was asked if I did or didn't want it. The pistons are ordered already and I've given them my proposed boost levels bhp levels and rpm levels. I appreciate your views and as such I'll check whether the piston will still have enough strength with it down at 8.0:1 and the tear drop. This was discussed during the specification but I'll seek extra reassurance.
I appreciate your point regarding the lower compression at 9.5:1 and the 1.7bar. We aim to go quite high on the boost with this engine so wanted to build in some leeway. I'm not sure if you noticed the comment regarding possible compound turbo charging. We have some ideas and are looking through them but the initial build is the starting point up and running with the existing turbo then we can mess with other potential solutions.
I expect our issue will be lack of scope with the standard ecu. I've been in contact with John Robbins at DNA tuning with at minimum the aim of getting rid of the weird miss fire ignition cut we had and will also cover what is possible at the higher boost end with this ecu.
All good fun

Regards,
Steven
#6
#7
Hi,
Thanks for this. I heard Lohen racing in the UK talking about using MOTEC on a mini challenge car. I've now looked up the motec site on your recommendation and found the appropriate ecu and software. Looks like it is £3,300 ($5,070 is the direct translation £ to $).
I will see how we go with the standard stuff and what limitations we hit and then start hunting down a MOTEC if and when.
What is your current situation car wise? Do you have a tuned up mini running or being worked on?
Cheers,
Steven_RW
Trending Topics
#8
#10
#11
Hi.
Thanks for the picture. I'm not sure on final horsepower aims. We're thinking somewhere around 2 bar running efficiently within the 7000rpm range. Assuming it's a 130 bhp 1.6 na equivalent at 100% efficiency that's 390bhp. Assuming that's not possible or that it's not the equivalent of a 130 bhp na 1.6 then somewhere around 350bhp would be good. The current turbo I have is not capable of that bhp so the aim is base engine built strong and lower comp and then run with current jcw spec turbo and then add something more interesting if the compound option works.
I like your decked block. How much effort is this? Is it filled for say the first 10mm ? .5 of an inch? I've seen this on subaru engines and others before. Have you seen the blocks fail yet?
I saw the arp kit you mentioned. I assume it's based on 10mm studs. I'm now looking into 12mm same size and bigger ones. Not at my pc at the moment so can't review the actual arp kit details.
Do u know what turbo you want to run on the one you are building for your customer?
I see Mahle make rod bearings so was thinking those would do for my build.
I was steered towards boring my engine with a torque plate in place to make it perfectly aligned/accurate when the head is bolted on. Have you seen the need for this?
 . My crank is looking like it's received a clean bill of health so I don't need undersized bearings after a regrind. I can also re use the mains.
Steven RW
Thanks for the picture. I'm not sure on final horsepower aims. We're thinking somewhere around 2 bar running efficiently within the 7000rpm range. Assuming it's a 130 bhp 1.6 na equivalent at 100% efficiency that's 390bhp. Assuming that's not possible or that it's not the equivalent of a 130 bhp na 1.6 then somewhere around 350bhp would be good. The current turbo I have is not capable of that bhp so the aim is base engine built strong and lower comp and then run with current jcw spec turbo and then add something more interesting if the compound option works.
I like your decked block. How much effort is this? Is it filled for say the first 10mm ? .5 of an inch? I've seen this on subaru engines and others before. Have you seen the blocks fail yet?
I saw the arp kit you mentioned. I assume it's based on 10mm studs. I'm now looking into 12mm same size and bigger ones. Not at my pc at the moment so can't review the actual arp kit details.
Do u know what turbo you want to run on the one you are building for your customer?
I see Mahle make rod bearings so was thinking those would do for my build.
I was steered towards boring my engine with a torque plate in place to make it perfectly aligned/accurate when the head is bolted on. Have you seen the need for this?
 . My crank is looking like it's received a clean bill of health so I don't need undersized bearings after a regrind. I can also re use the mains.
Steven RW
#12
UPDATE: I now have my CP pistons and my Carrillo rods. The pistons were of a custom design on the basis we wanted a 8.0:1 compression ratio to allow scope for extra boost in the long run.
The block was sent over to Jeff at CNCWERX (http://www.cylindersupportsystem.com/) to have the deck closed. It has now returned.
The rest of the re-build is underway with a plan to run the car with the previous turbo for a while and design some sort of compound turbo setup and install this afterwards.
Last time we had 270bhp and 285lb ft.
Should be fun :-). Glad it is all finally making progress.
Regards,
Steven RW
#13
Looks like a serious build project. Hope you give it the benefit of other members efforts, including mistakes made and admitted, like mine. Here's a link to my on-going thread. https://www.northamericanmotoring.co...ml#post3240122 It hasn't been updated in awhile --- soon tho. No pics, just a long, detailed, pdf "journal". When you find the time, another great thread is by "ThePenl" --- http://www.minitorque.com/forum/f272...47/#post447094 It's ungodly long, but has lotsa pics and details. Last time I checked, it was still an up-and-running vehicle. Not many of us with 300+ numbers.
I've read where a popular turbo is sourced in GB --- Owens Development --- they rebuild the Mini OEM and the result is quite reliable. There's also Manic Tuning, based in the same part of the world, that built their reputation on the Owens turbo. At least this is how I understand these two suppliers. I haven't yet used either one of them, but seriously considering a Manic tune. I want to get my PCV issues fixed first.
In spite of my mistakes, I still have a pretty nice street "sleeper". Power curve is not where I want it, but there's more than enough to enjoy --- dyno charts are in the linked thread.
#14
Hi OBW,
Thanks for the post.
I read all of Thepnl's very long thread previously. Interesting and great that he shared so much and so much detail!
I also read yours too. (both previously before I took my engine to pieces).
The issues that I see with the mini that most people crash in to are:
1. The std ecu isn't the most friendly once you start messing around with non standard turbos. By that I mean ones that are not on any factory mini, be that Cooper S or JCW.
2. The compression ratio is high for a turbo car as standard and needs to be addressed if you want to push further.
3. I expect the fuel system runs out at some point and not sure how many people have really messed around with direct injection to any reasonable point.
As for the Owens comment, I agree with you. I happen to have the exact same turbo as an Owens build on my car currently. It ran very well but the compression ratio was too high and it detted causing piston land damage.
I have been in touch with the gent who runs Manic Tuning and we had a good chat. He is a solid petrol head and it was a fun conversation.
In my case I think i will finish my build, run my current turbo for a while, maybe mess around with a different manic map but after that move to the Motec ecu so that we have proper control which should suit the bigger plans.
:-)
Glad you are still having fun.
Regards,
Steven RW
#15
#17
Head and Main Stud and Nut update:
ARP list their uprated head studs at 10mm which would replace the standard head bolts. This would mean no machining was required however we wanted to replace the standard head bolts with 12mm studs which will produce much more clamping force for future increased cylinder pressures from higher boost.
ARP didn't have an off the shelf 12mm option that they felt would fit my application and wanted to charge me $150 per stud to produce the exact same length of stud as my engine would need but in 12mm.
As we were already machining the block up from 10mm to 12mm we were open to carrying out further machining that would allow us to use an off the shelf 12mm ARP stud and nut kit and found one which means that it cost $250 all in for the whole kit which, even when adding the extra machining to increase the counter sink to suit this off the shelf 12mm kit, is still much better value for money.
I have ordered the standard off the shelf ARP main stud and nut kit for the bottom end as we are not planning on revving much higher than standard, we felt that the standard ARP uprate would be enough. This has now arrived.
Re-bore update:
The simple option is to just re-bore the block to +0.5mm oversize on its own. However depending on what you read and learn up, some people feel that to bore the block perfectly, you must allow it to feel the clamping forces that it will be under with the cylinder head on DURING the re-bore. On the basis that bolting the head on would get in the way of the re-boring tool you create something called a torque plate which is a large slab of alloy with 4 cylinder holes cut in it (to allow the boring machine to get access) and then clamp this up using the new stud and nut kit to the desired torque before the boring. It is potentially overkill but with all the effort put into the engine so far we decided to do it. The torque plate is currently at the shop getting machined. I believe it is getting cut by water jet.
Cylinder head gasket update:
Increasing the stud size from 10mm to 12mm means you need to machine up the holes in the head gasket to suit. This is quite a delicate task as cutting the extra 2mm often leads to little burrs and imperfect edges. This is being looked at by the water jet cutting shop too.
I think that is it for now.
Cheers,
Steven RW
#18
Update.
Piston to wall clearance:
Lot's debate over how much clearance is needed between the cylinder wall and the piston. I requested my CP pistons to be 8.0:1 compression and designed for up to 7,500 rpm and 350bhp at 2bar on a hard driven fast road / track car.
The spec sheet arrived designed for me to overbore my block by 0.5mm and the clearance to be 3 thou.
With the latest chat about a second turbo charger and potentially up to 3 bar on inlet pressure with long sessions on the dyno during development, we requested further advice from CP as the 3 thou clearance seemed a little bit tight. The risk being that the pistons grow under extended WOT and nip the cylinder wall. We also made it clear we would be machining the block with the use of a torque plate which means we can accept tighter tolerances than a non torque plated re-bore.
CP came back with 3.5 thou to 3.7 thou clearance as their final guidance.
Piston Wrist Pins:
The wrist pin (which is the pin that connects the piston to the rod) needs to have a thicker wall (it is a hollowed out cylinder..) as the power and rpms go up as the loads on the pin go up in line.
I was originally provided 0.160 inch pins but on the basis of the larger horsepower CP have decided to provide 0.180 inch pins which have been order and are on their way.
Update over for now. All parts are at the engineering firm with the current order of work expected.
1. Machine the torque plate flat and sort out some of the holes that have been cut in it for the head studs
2. Machine the block to take the 12mm ARP head studs
3. Install the studs, bolt up the torque plate and bore for the desired clearance
4. Clean up of the cylinder head and recut of the valve seats to ensure a perfect seal
Cheers
Steven RW
#19
Update 6th Feb
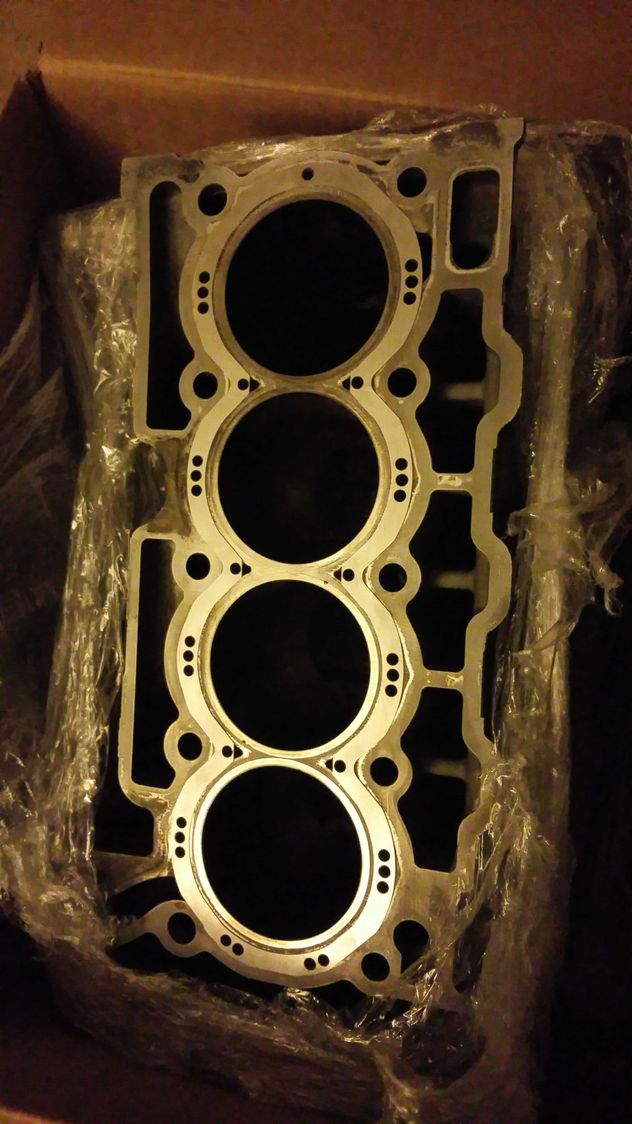
Cylinder Support System R56 Cooper S engine modification carried out by Jeff at CNCWERX in NH USA
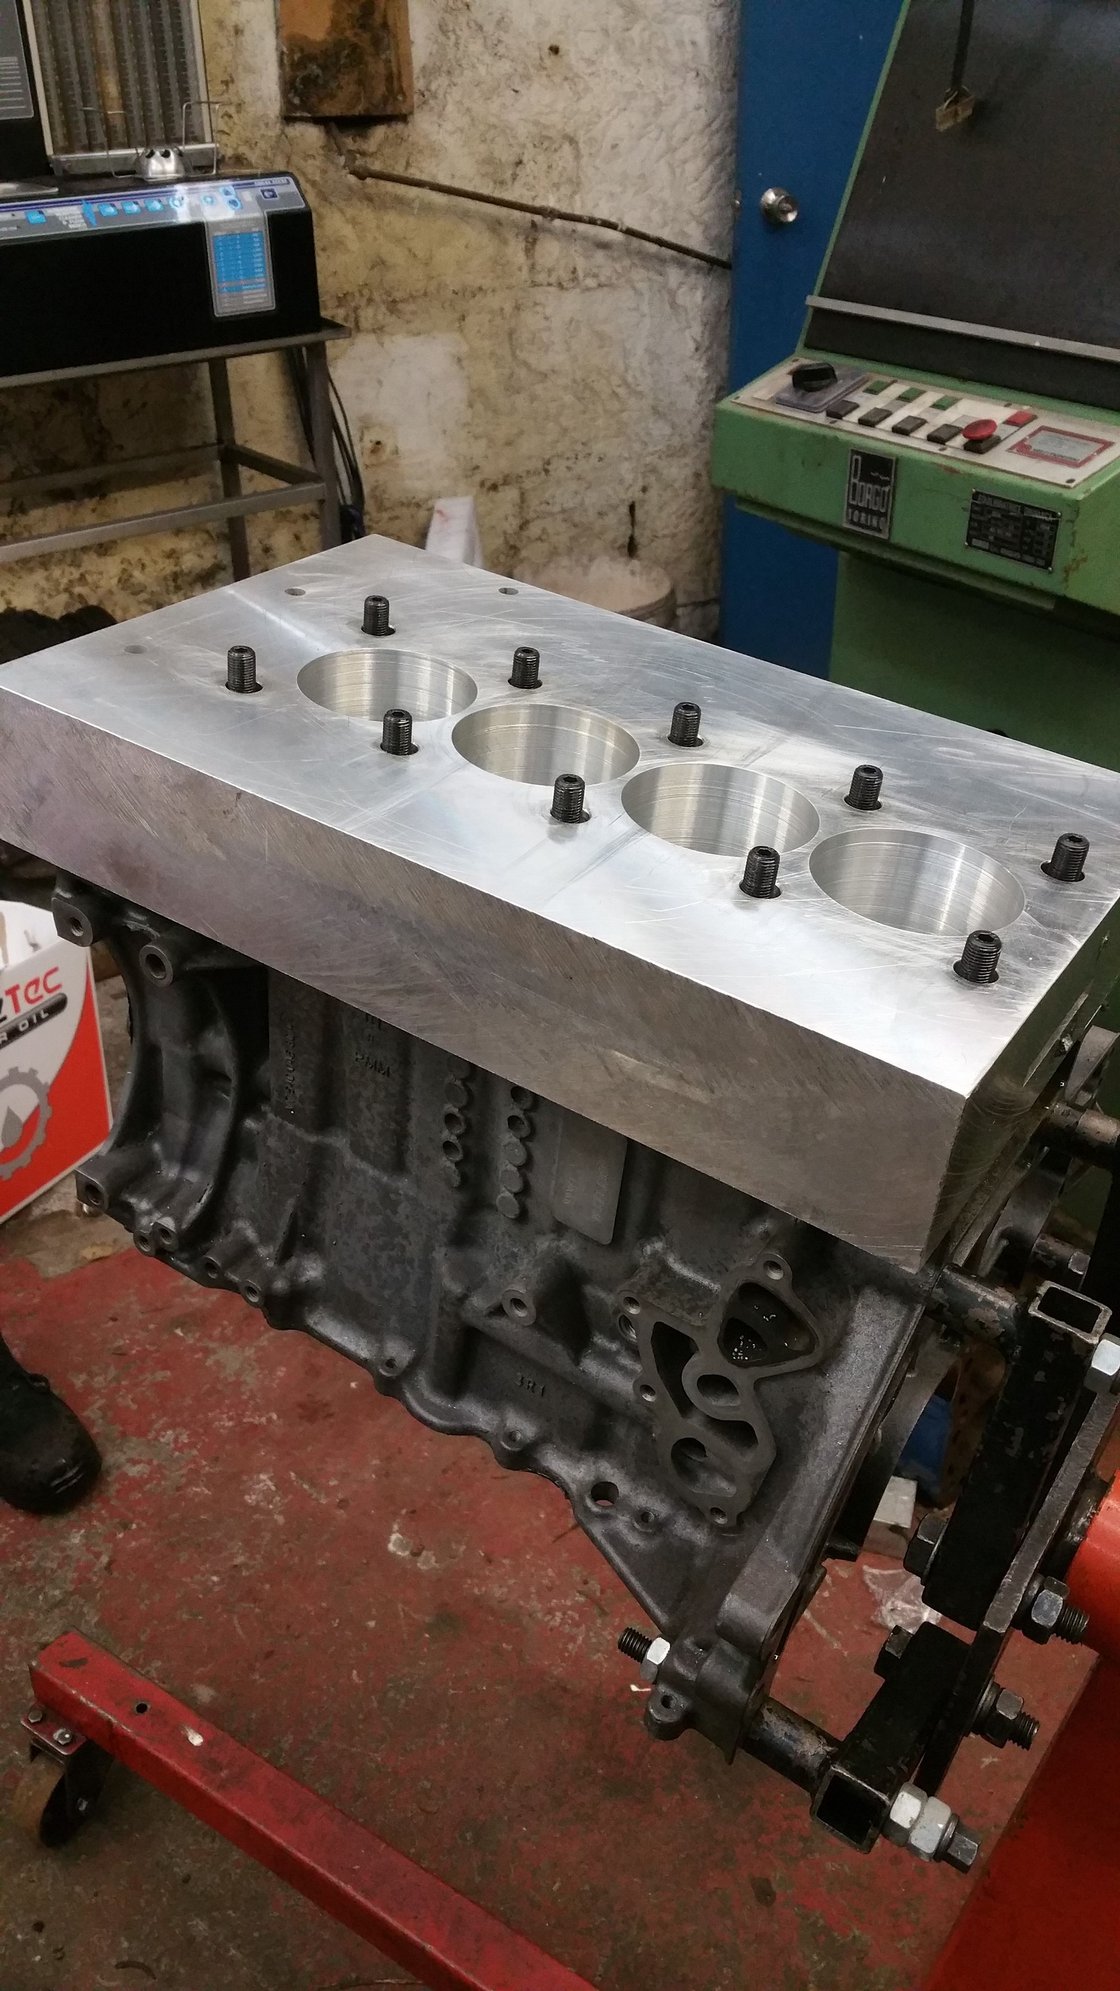
Torque plate that was used to torque up block during re-bore
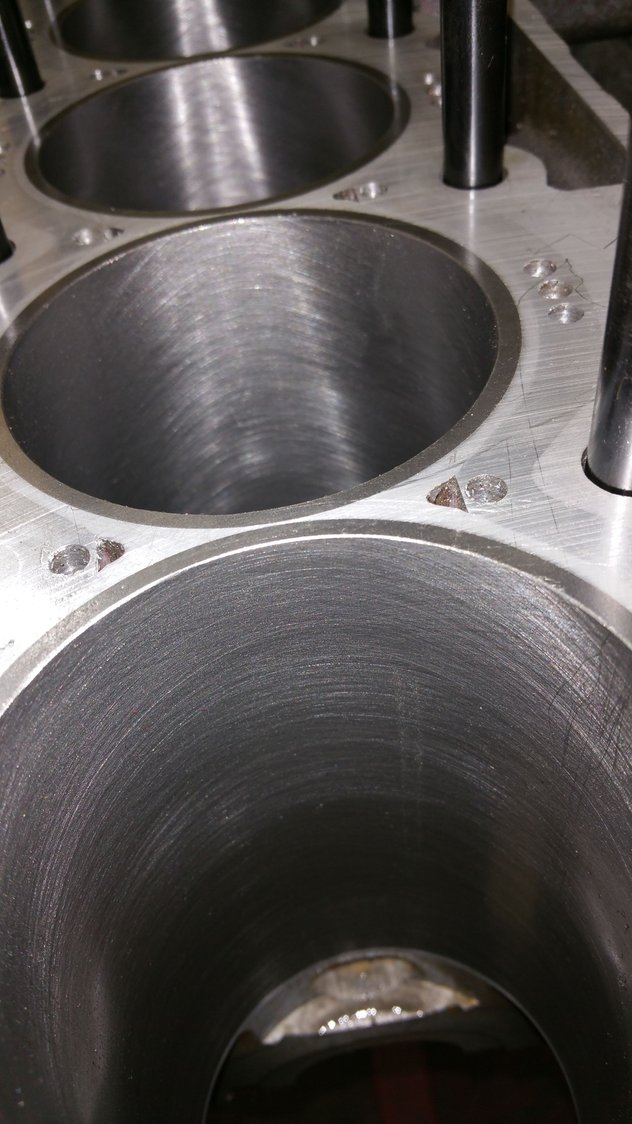
0.5mm overbore with a 4 thou clearance for the CP Pistons
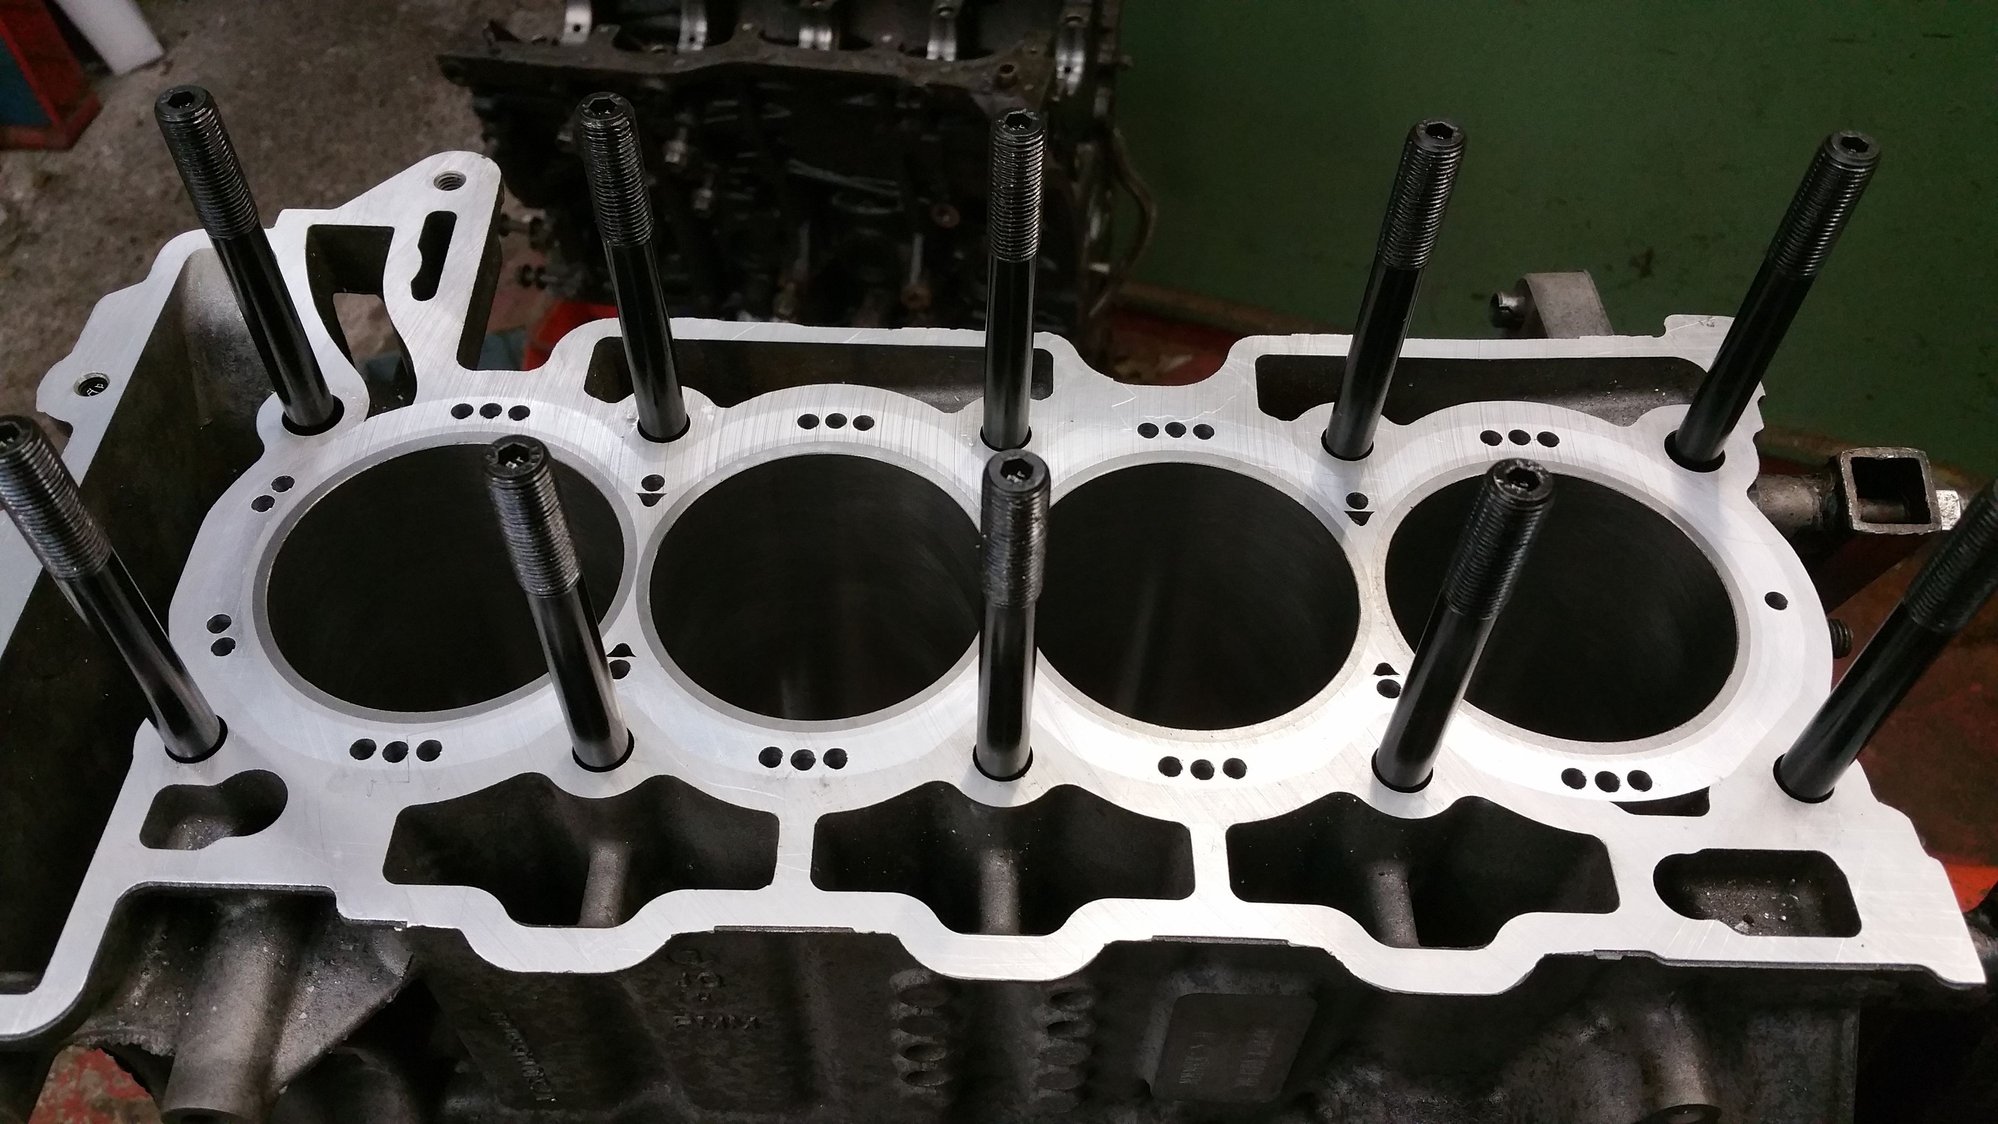
12mm ARP head studs. Standard ARP kit is 10mm. You can also see the CNCWerx Cylindersupportsystem to close the deck of the block
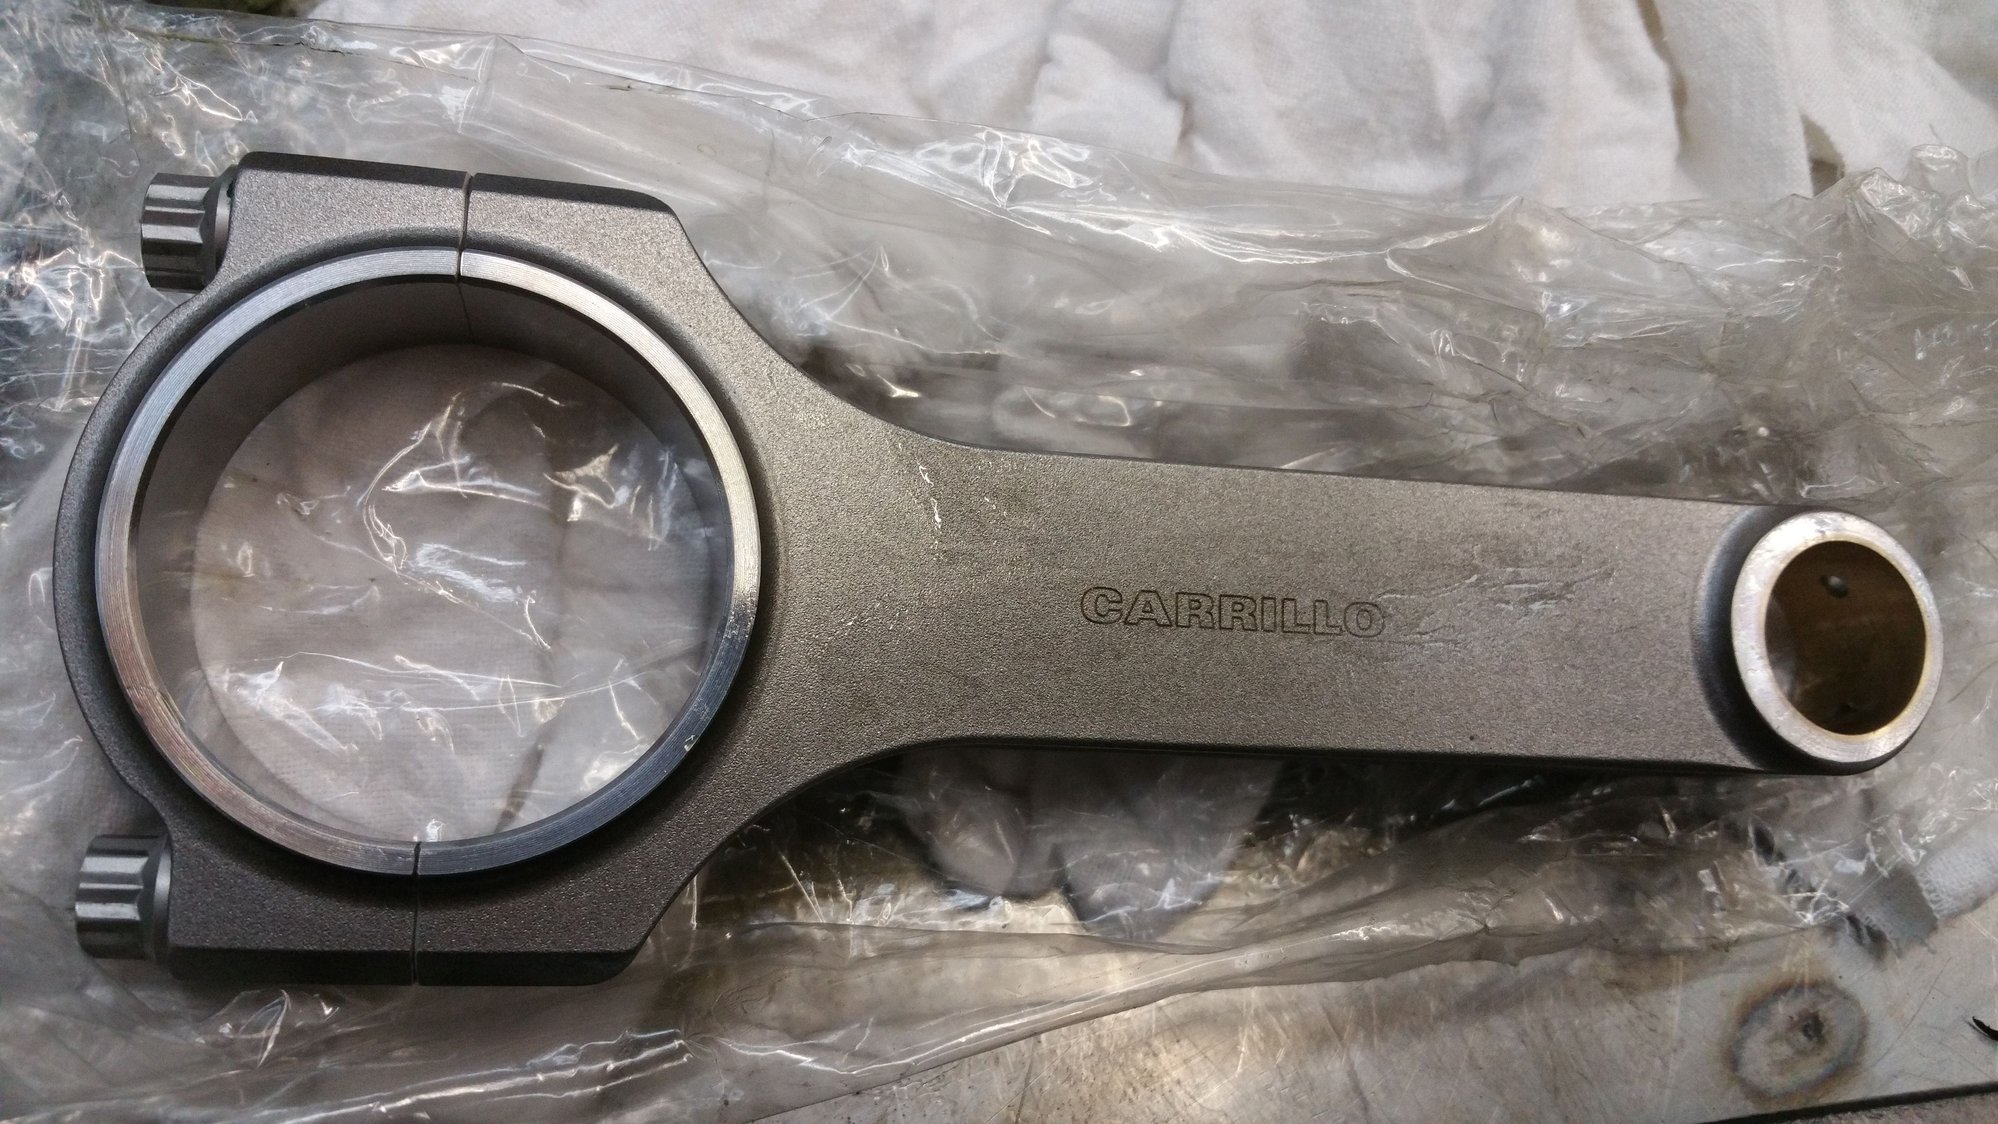
Carrillo H Section rods with Carr bolts
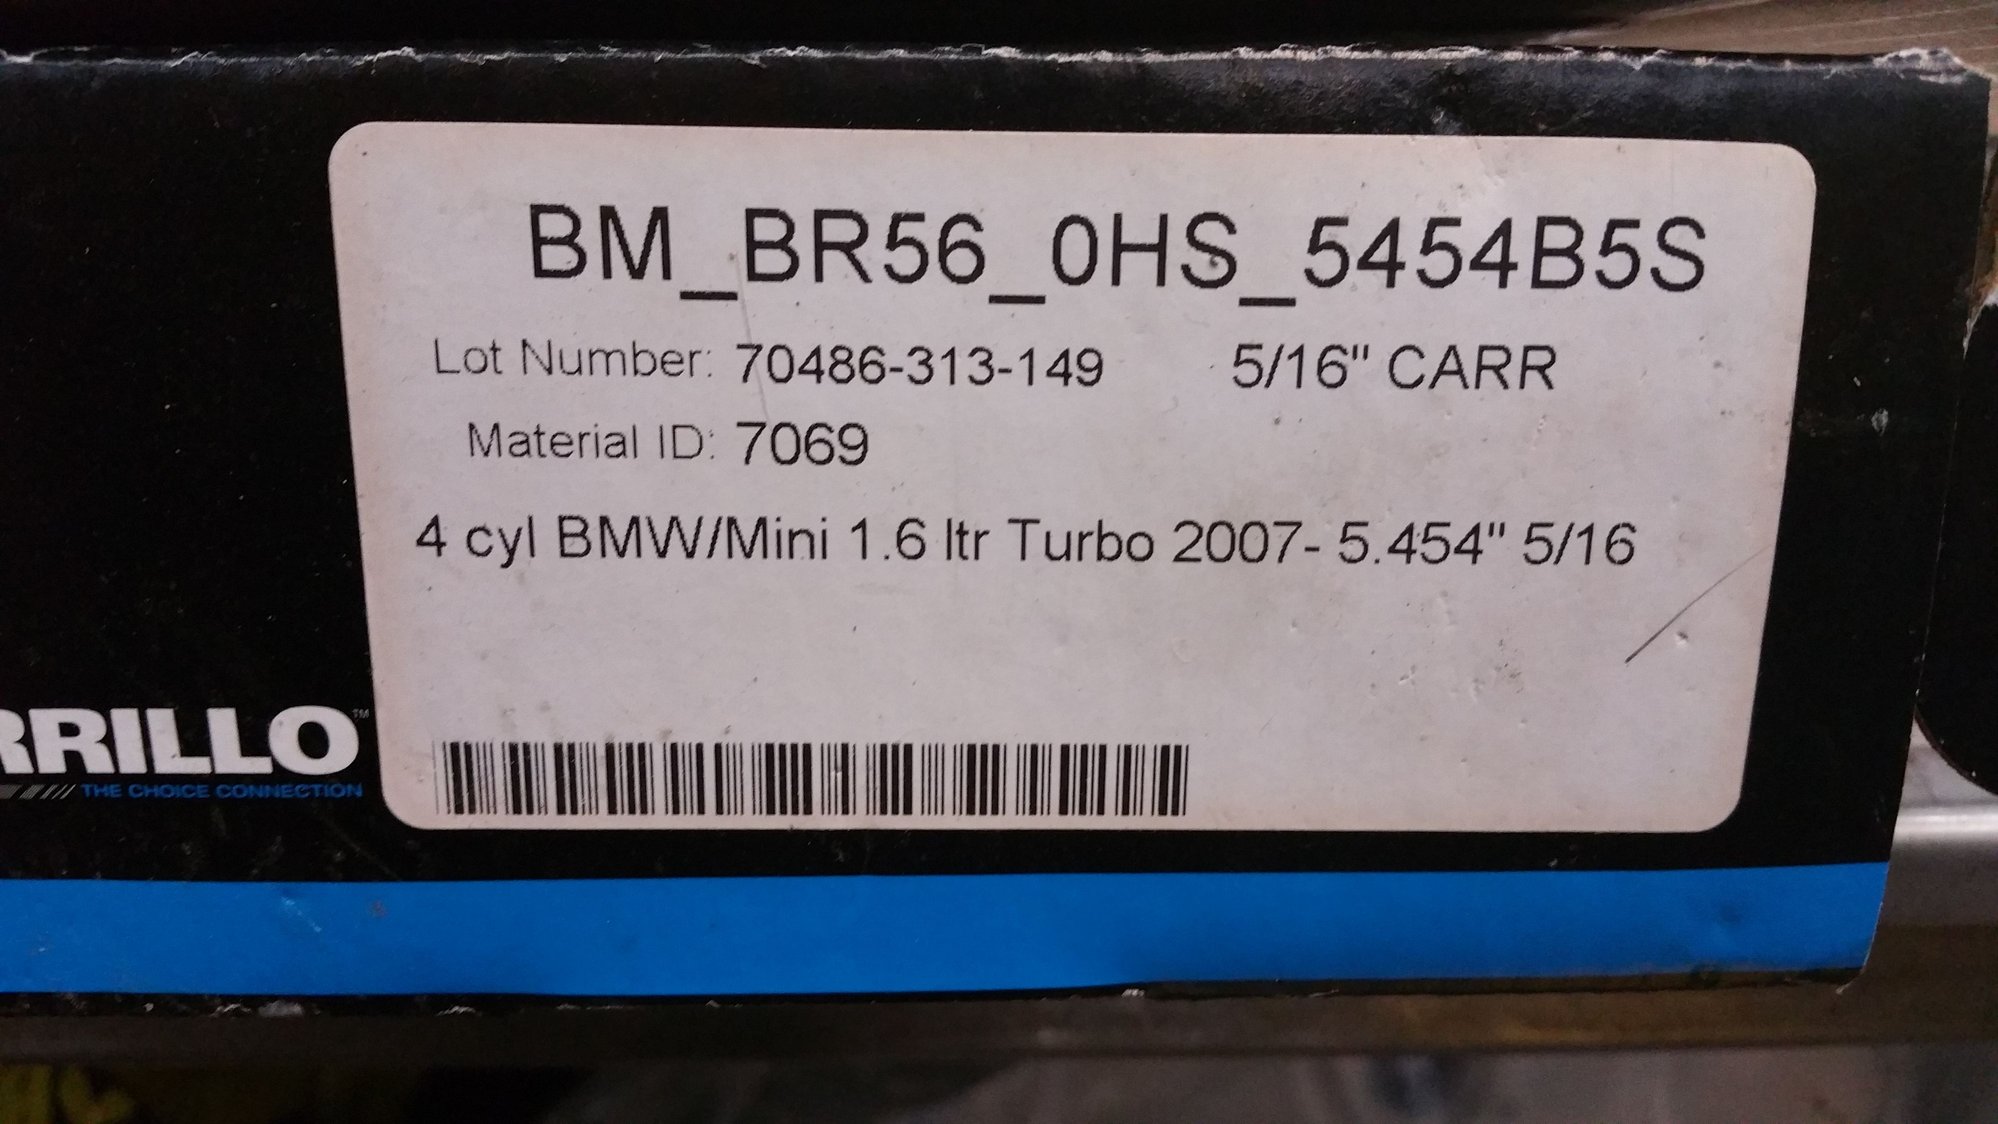
Carrillo H Section rods box with details
#21
#22
#23
#24
That is all for now. Next steps are to clean the cylinder head. For info the inlet and exhaust valves were sealing perfectly even after 60k miles usage. The inlet valves have gunk on the back of them even after Lohen walnut blasted them only a few k miles ago (pointing out that they must build up gunk quickly). I need a new oil pump (std BMW) and a head gasket (JCW thicker version to lower compression a little further again) and then start building it all up. Edited to add, with LOADS of cleaning of every item before build, of course, in case the photos worried anyone ;-).
Any questions, ask away.
Oh yeah, supertech Beehive springs and Ti retainers should arrive within next 10 days.
Cheers
Steven RW
Any questions, ask away.
Oh yeah, supertech Beehive springs and Ti retainers should arrive within next 10 days.
Cheers
Steven RW
Last edited by Steven_RW; 02-06-2016 at 10:45 AM.
#25
There didn't seem to be much interest in projects here so I did a big update and will continue to update on another mini forum called "Minitorque" which has a section for project builds.
I think the link below should work. It's too much work to keep two threads going! :-)
http://www.minitorque.com/forum/f272...-ideas-116426/
Steven RW
I think the link below should work. It's too much work to keep two threads going! :-)
http://www.minitorque.com/forum/f272...-ideas-116426/
Steven RW


