

R56 The Major
#1
 10-25-2016, 08:50 AM

The Major
*WARNING, THIS IS A LONG READ*
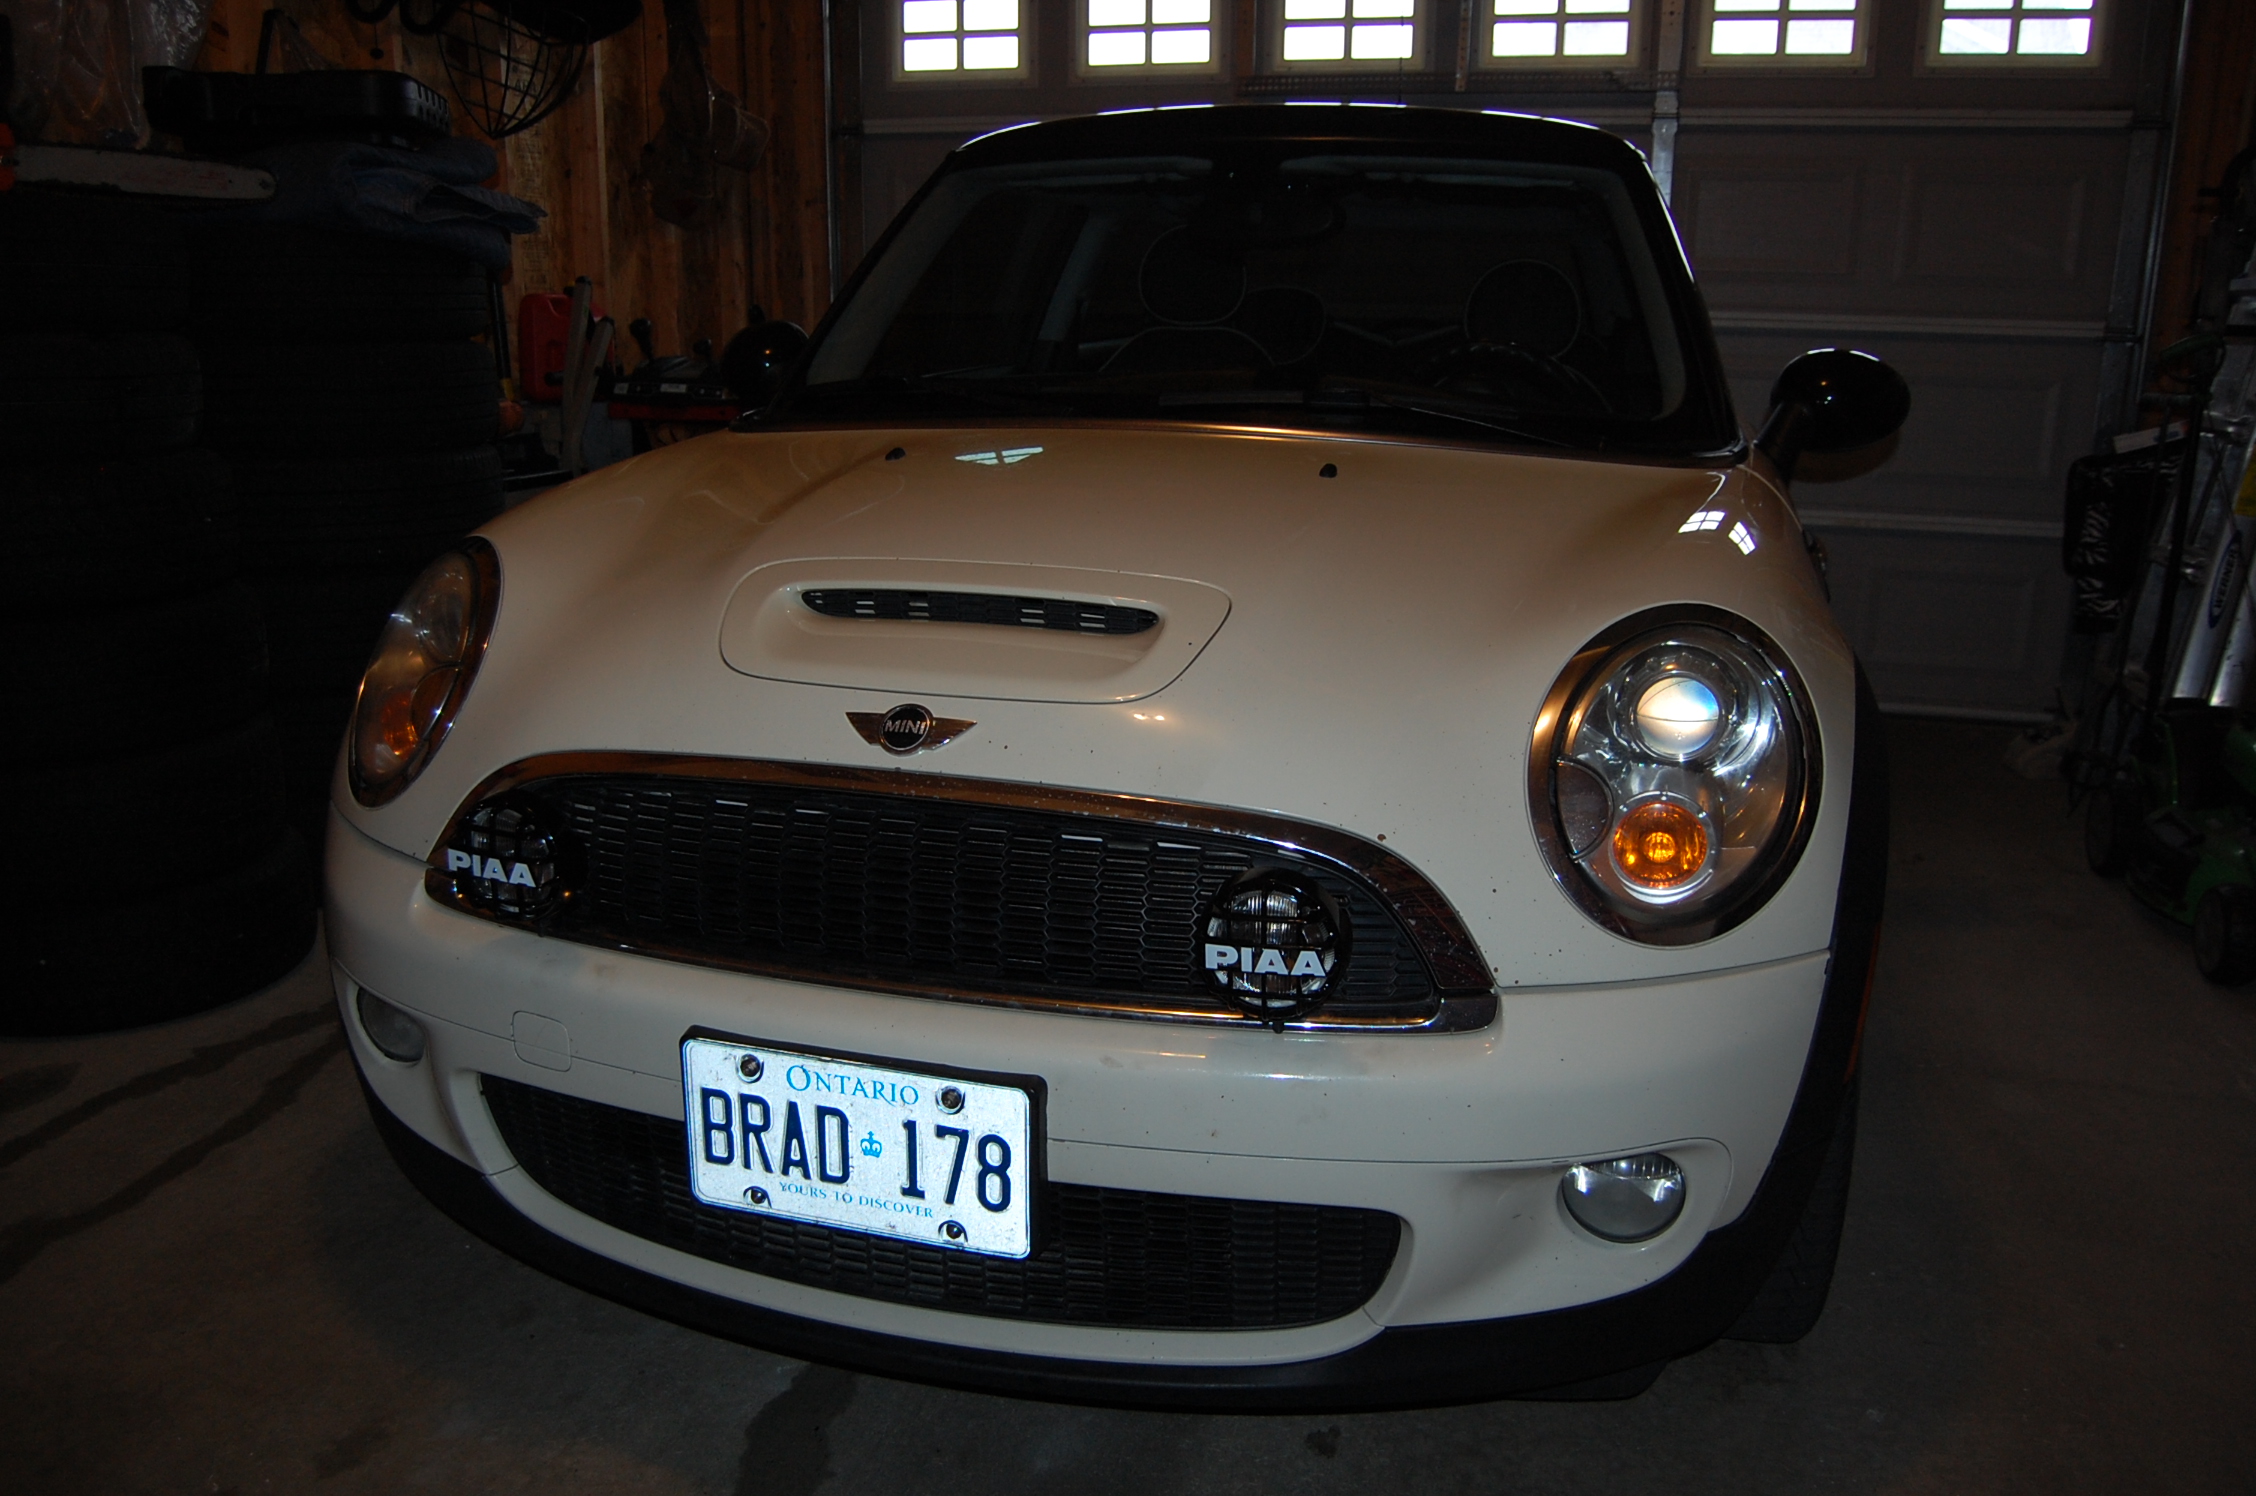
Have any of you ever played the “What if” game? You know the one where you imagine that you won the lottery and all the stuff you would do if that day ever arrived. Well this story isn’t at all like that so don’t get your hopes up! It also isn’t another doom and gloom, “my mini broke whatever” story so you can stop worrying about that too. No, this is a story about our 2007 Pepper White MCS which we purchased used a few months back with no maintenance history (insert shock and awe here). “Pepper”, as we have rather uncreatively named her, is our fourth mini cooper and our second R56 MCS. When we found her I was captivated by the condition of her body, the way she ran and her extensive list of options which included real leather, wood steering wheel and Navigation. Yes she wasn’t just another pretty face and even though she didn’t have a maintenance history it seemed that she warranted the investment and ongoing love $$$$ we would shower upon her.
Flash forward a few months and Pepper has performed well providing many hours of pleasure over the summer months but she developed and bad clutch release bearing early on that gets louder every day. About a month ago I parked her till I had time to replace the ailing bearing and that time has finally arrived. The basic Valeo clutch kit, purchased on-line arrived last weekend along with a bunch of brake parts for an Audi RS4 that I’ve been working on. With the Audi all done, the garage is now open and with that Pepper shuffled in and was promptly established on jack stands for the work to begin. I only have a single garage so it’s a bit tight but if you have to do it the mini is the perfect car for tight spaces.
BTW, I’m writing this partially for your entertainment but also because I will eventually get into topics that some of you may not have tackled and I haven’t seen them documented or photographed here yet. In addition, I’m an aircraft technician with a strong background in motorcycles and cars. I may do things here that you may not agree with and you are entitled to your opinions. All I can say is that I have 30+ years of technical experience on a wide variety of products and generally I have good reasons for doing things the way I do.
So moving forward, I have Pepper on the jack stands and I have begun to gain access to the transmission to facilitate the replacement of the clutch and release bearing. I’ve never run into a vehicle that required so much disassembly to do this relatively simple task. I’ve come to the conclusion that pulling the engine is the way that it should be done but since I don’t have the space to use my hoist I need to go the other way and drop the sub-frame so the transmission can be removed out the bottom. I removed the front bumper cover and bumper as well as both headlights and the left strut and spindle plus the airbox, ECU, inner fenders etc etc. As I’m getting deeper in the engine bay I keep find things installed incorrectly. Wires misrouted, not clipped, chaffing, tubing not connected, items not sitting on their mounts and even wires melted through exposing bare copper. Whoever was in here last time did a **** poor job on the details. I’m convinced that Pepper has seen a complete engine swap at some point in her past and I don’t suppose it matters why but now is my chance to have a really good look at everything.
It’s at this point I sit back and start to re-evaluate the scope of my simple project. I was just planning on doing the clutch but now I’m thinking, “what else could I or should I do” with the engine bay so disassembled? Well with everything being unknown including the mileage on the engine I decided to create a wish list of what I would do, in addition to the clutch, if time and money wasn’t an issue. Pepper isn’t daily driven which means that she can sit as long as it takes to get this done, leaving money and my time are the real limitations. This is how the “what if” statement ties in from the first paragraph and the following is what I came up with, somewhat in order of priority;
It all made sense to me. Why continue to drive the car with all these unknowns when I can investigate them now and sort them out so we can drive the car with some level of confidence. Justification over, the clutch job has now become “The Major” and with that I began to hunt for parts and tools, using a number of our many sponsors. I won’t mention names as I’m not here to promote or disparage any of our sponsors without whom our site wouldn’t function. All I can say is, ”thanks for your continued support guys”!
This is a big first post already so I’ll bring it to an end by saying that I will attempt to document my progress and answer any questions of comments you guys / gals may have as I go. I’m really bad for just getting it done and then thinking that I should have taken a picture or two. I'll do my best to slow down and take good pictures to support my reports.
Have any of you ever played the “What if” game? You know the one where you imagine that you won the lottery and all the stuff you would do if that day ever arrived. Well this story isn’t at all like that so don’t get your hopes up! It also isn’t another doom and gloom, “my mini broke whatever” story so you can stop worrying about that too. No, this is a story about our 2007 Pepper White MCS which we purchased used a few months back with no maintenance history (insert shock and awe here). “Pepper”, as we have rather uncreatively named her, is our fourth mini cooper and our second R56 MCS. When we found her I was captivated by the condition of her body, the way she ran and her extensive list of options which included real leather, wood steering wheel and Navigation. Yes she wasn’t just another pretty face and even though she didn’t have a maintenance history it seemed that she warranted the investment and ongoing love $$$$ we would shower upon her.
Flash forward a few months and Pepper has performed well providing many hours of pleasure over the summer months but she developed and bad clutch release bearing early on that gets louder every day. About a month ago I parked her till I had time to replace the ailing bearing and that time has finally arrived. The basic Valeo clutch kit, purchased on-line arrived last weekend along with a bunch of brake parts for an Audi RS4 that I’ve been working on. With the Audi all done, the garage is now open and with that Pepper shuffled in and was promptly established on jack stands for the work to begin. I only have a single garage so it’s a bit tight but if you have to do it the mini is the perfect car for tight spaces.
BTW, I’m writing this partially for your entertainment but also because I will eventually get into topics that some of you may not have tackled and I haven’t seen them documented or photographed here yet. In addition, I’m an aircraft technician with a strong background in motorcycles and cars. I may do things here that you may not agree with and you are entitled to your opinions. All I can say is that I have 30+ years of technical experience on a wide variety of products and generally I have good reasons for doing things the way I do.
So moving forward, I have Pepper on the jack stands and I have begun to gain access to the transmission to facilitate the replacement of the clutch and release bearing. I’ve never run into a vehicle that required so much disassembly to do this relatively simple task. I’ve come to the conclusion that pulling the engine is the way that it should be done but since I don’t have the space to use my hoist I need to go the other way and drop the sub-frame so the transmission can be removed out the bottom. I removed the front bumper cover and bumper as well as both headlights and the left strut and spindle plus the airbox, ECU, inner fenders etc etc. As I’m getting deeper in the engine bay I keep find things installed incorrectly. Wires misrouted, not clipped, chaffing, tubing not connected, items not sitting on their mounts and even wires melted through exposing bare copper. Whoever was in here last time did a **** poor job on the details.
I’m convinced that Pepper has seen a complete engine swap at some point in her past and I don’t suppose it matters why but now is my chance to have a really good look at everything. It’s at this point I sit back and start to re-evaluate the scope of my simple project. I was just planning on doing the clutch but now I’m thinking, “what else could I or should I do” with the engine bay so disassembled? Well with everything being unknown including the mileage on the engine I decided to create a wish list of what I would do, in addition to the clutch, if time and money wasn’t an issue. Pepper isn’t daily driven which means that she can sit as long as it takes to get this done, leaving money and my time are the real limitations. This is how the “what if” statement ties in from the first paragraph and the following is what I came up with, somewhat in order of priority;
- Timing set, inspect and replace if necessary (parts and tools required)
- Intake Carbon, inspect and clean as necessary (tools required)
- Turbo Coking, inspect and clean / rebuild as required (parts required)
- Turbo Oil feed line, replace with aftermarket no “O” ring line (parts required)
- Oil Catch Can, research and install on PCV (parts required still debating ROI $$$)
- Spark Plugs, inspect / replace (parts required)
- Friction wheel, inspect and action as required
- Thermostat housing, inspect and action as required
- Accessory belt, replace (parts required)
It all made sense to me. Why continue to drive the car with all these unknowns when I can investigate them now and sort them out so we can drive the car with some level of confidence. Justification over, the clutch job has now become “The Major” and with that I began to hunt for parts and tools, using a number of our many sponsors. I won’t mention names as I’m not here to promote or disparage any of our sponsors without whom our site wouldn’t function. All I can say is, ”thanks for your continued support guys”!
This is a big first post already so I’ll bring it to an end by saying that I will attempt to document my progress and answer any questions of comments you guys / gals may have as I go. I’m really bad for just getting it done and then thinking that I should have taken a picture or two. I'll do my best to slow down and take good pictures to support my reports.
#2
10-25-2016, 09:08 AM

Vendor
Got to love when a simple clutch job project turns into something much bigger. I definitely like the list you have so far and we have a lot of tech articles that cover clutch replacement, timing chain/tensioner, carbon cleaning (without having to buy the wand and adapter), turbo oil line, catch can install, spark plugs, friction wheel, thermostat, and much more. So, if you need help while tackling all these jobs (or even if you add more) be sure to check out how we can help here: http://www.pelicanparts.com/techarti...r_R56_Tech.htm.
If you run into any issues or have any questions during your project please do not hesitate to shoot me a PM.
http://www.pelicanparts.com/catalog/...29_catalog.htm
If you run into any issues or have any questions during your project please do not hesitate to shoot me a PM.
http://www.pelicanparts.com/catalog/...29_catalog.htm
__________________
Your Trusted Source For DIY and Parts
FREE SHIPPING over $99 click here
MINI Parts | DIY Help | Facebook | Twitter | Instagram | YouTube | Promos
888.280.7799 | 6am - 5pm PST

FREE SHIPPING over $99 click here
MINI Parts | DIY Help | Facebook | Twitter | Instagram | YouTube | Promos
888.280.7799 | 6am - 5pm PST
#3
10-26-2016, 07:46 AM
I've ordered a bunch of stuff for the mini. Everything except an oil catch can is on its way to me at the speed of UPS ground. In the mean time I've been pondering the subject of oil catch cans. There is plenty to read on the subject and the vast majority of it supports the need for such a device and I concur with their thoughts on the subject but they all have one thing in common and that is a lack of consideration for the rear PCV line. Some folks have capped it off and reported no ill affects but I have some concerns about this particular action because it could result in crankcase pressures building up and premature seal failures.
The Mini PCV system has two lines because one functions as a vent when the intake has a vacuum (no boost) then this closes and boost builds to protect the crankcase from the high pressure. Then the front opens and vents just upstream of the turbo which is the line we typically see people install their catch can. I suspect that this is where the vast majority of oil is expelled due to the boost causing internal blow-by on the rings so it makes sense. However the catch can is only catching a portion of the vented gasses and oil.
I propose to install a catch can on the front line (M7 or BSH) and then route the rear PCV line over to the can and "Tee" it into the line coming from the front PCV. In this way both vents are captured by the catch can, neither are capped and none are vented to atmosphere. Naturally I would need to install a cap on the intake manifold where the rear PCV currently taps in. The only thing that would make it better would be a return line off the bottom of the catch can to allow accumulated oil to return to the sump.
Anyone see an issue with this logic? Please chime in!
#4
10-26-2016, 09:48 AM

Nice post, looking forward to the rest!
What were the signs of the bad clutch release bearing? My 2010 sometimes makes a rattle when the clutch pedal is not pressed in and the car is in neutral. Goes away with very slight pressure on the pedal. Not sure if this is the throw out bearing or normal flywheel chatter.
What were the signs of the bad clutch release bearing? My 2010 sometimes makes a rattle when the clutch pedal is not pressed in and the car is in neutral. Goes away with very slight pressure on the pedal. Not sure if this is the throw out bearing or normal flywheel chatter.
#5
10-26-2016, 09:52 AM
Nice post, looking forward to the rest!
What were the signs of the bad clutch release bearing? My 2010 sometimes makes a rattle when the clutch pedal is not pressed in and the car is in neutral. Goes away with very slight pressure on the pedal. Not sure if this is the throw out bearing or normal flywheel chatter.
What were the signs of the bad clutch release bearing? My 2010 sometimes makes a rattle when the clutch pedal is not pressed in and the car is in neutral. Goes away with very slight pressure on the pedal. Not sure if this is the throw out bearing or normal flywheel chatter.
I guess I should add a few pictures since I promised to do so yesterday.
Here she is all jacked up

The front end is pretty much apart, just the rack to deal with before dropping the sub frame.

She's in pretty good shape considering her age and that she is up here in Canada.I'm contemplating having the sub frame blasted and painted while its out.

Yah, nothing looks new in here.

Last edited by NB Cooper; 10-26-2016 at 05:08 PM.
#6
10-28-2016, 11:24 AM
Just a quick update,
Parts and materials ordered include;
Timing tool set
Complete timing chain set
Walnut shell blaster tool and media
Spark plugs
M7 Oil Catch Can with hoses
New GP2 shifter **** with boot (mine was pooched)
Turbo Oil Feed line (braided)
Overhauled K03 Turbo center section
Valeo Clutch kit with release bearing
All shipped to Ogdensburg NY to save shipping and brokerage to Canada. Bad enough with the exchange rate and 13% HST. Some parts are in and others won't arrive till next week so this weekend will be all about the clutch and blasting the carbon. Should be fun!
#7
10-29-2016, 05:33 PM
Just a quick update,
Parts and materials ordered include;
Timing tool set
Complete timing chain set
Walnut shell blaster tool and media
Spark plugs
M7 Oil Catch Can with hoses
New GP2 shifter **** with boot (mine was pooched)
Turbo Oil Feed line (braided)
Overhauled K03 Turbo center section
Valeo Clutch kit with release bearing
All shipped to Ogdensburg NY to save shipping and brokerage to Canada. Bad enough with the exchange rate and 13% HST. Some parts are in and others won't arrive till next week so this weekend will be all about the clutch and blasting the carbon. Should be fun!
Parts and materials ordered include;
Timing tool set
Complete timing chain set
Walnut shell blaster tool and media
Spark plugs
M7 Oil Catch Can with hoses
New GP2 shifter **** with boot (mine was pooched)
Turbo Oil Feed line (braided)
Overhauled K03 Turbo center section
Valeo Clutch kit with release bearing
All shipped to Ogdensburg NY to save shipping and brokerage to Canada. Bad enough with the exchange rate and 13% HST. Some parts are in and others won't arrive till next week so this weekend will be all about the clutch and blasting the carbon. Should be fun!
Trending Topics
#9
10-30-2016, 03:22 PM
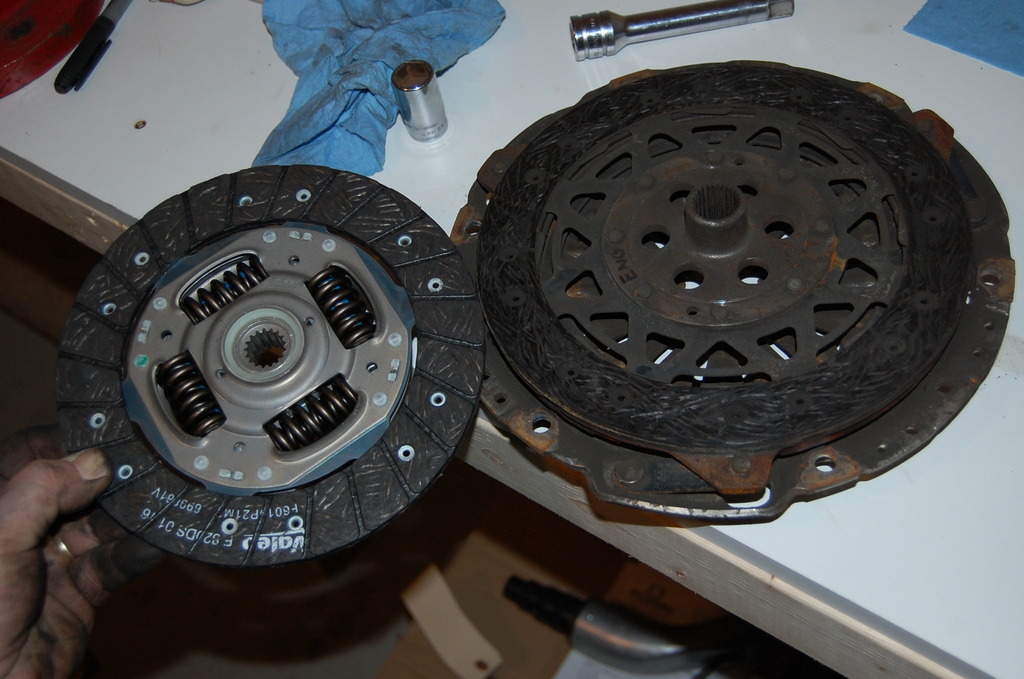
Sunday afternoon update,,,,,After spending the day doing stuff for everyone else I finally got back to the garage at around 4pm. I had everything ready to drop the transmission so twenty minutes later it was on the floor. The release bearing was really bad as I suspected but the pressure plate and flywheel show almost no wear in fact the machining marks are still visible in spite of the worn disc. Interesting but what threw everything for a loop was the new clutch kit was too small. Obviously for a Justa or lower HP application. Now begins the whole claim / return and get the right kit cycle.


#10
11-05-2016, 05:49 PM
Well I finally found some time to get back to the mini. With the transmission out and no new clutch in sight for another four days or more I figured I would move on to blasting the carbon of my valves. I purchased the blaster kit off Bavarian Autosport and it had arrived in three boxes so some assembly was required. If you buy one, make sure that you allow for an hour or so of assembly. You need to go over it thoroughly and even check the pieces that come assembled because some are not tight enough. The instructions are pretty weak so some experience with sand blasters is an asset. Note that it comes with ceramic tips and a nozzle so you can use this tool as a blaster for other projects after the mini is cleaned up.

Once I had it assembled, I did a dry run with 50 PSI to make sure there were no leaks and that all the valves worked properly. The one area of concern I have is the top cap on the tank. It's sealed with a large "O" ring that is a bit too big so it kinda oozes out as you tighten the cap down. I think I will go shopping for a better one tomorrow as this one just isn't the right item and as a result it leaks a bit.


Despite the small leak I was determined to forge ahead to see what my new toy could do for my icky intake valves. I pulled the spark plugs and rotated the engine to close the valves on cyl #1, checked to ensure I had lash on the rocker arms, and fired up the shop vac. The compressor was set at 120 psi which is the top limit for this rig. In fact it was just starting to bleed from the pressure relief valve. I opened the air and blast media valves all the way and gave it hell. Well about fifteen seconds of hell and then the compressor cut in and I decided to have a gander to see if anything had happened. So I shut the valve on the nozzle and grabbed my light to access the damage. What I saw was a bunch of blast media on the one valve and what appeared to be some progress on the other. It seemed like I was giving her too much media so I cut the flow in half and gave it another go. Then I ran out of media. I had only added three small scoops of walnut shells to the hopper so they didn't last very long.
While the compressor caught up I had another look down the intake and I was very pleased to see that the one valve is about half clean (woo hoo) and the other is pretty much untouched because the nozzle was directed at the one valve. But it's working and I couldn't be happier.
Something worth mentioning is the fact that my compressor is 2.5hp with a 20 gal tank so its not very big but it is getting this done. Sure a bigger one is better but not everyone has access to a huge compressor.
With that I had to shut it down to make diner. Tomorrow I will finish the job and then move on to the timing chain.
#11
11-05-2016, 07:19 PM

Banned
#12
11-06-2016, 04:25 AM
That is a good question. By the time it was imported (13% tax) and taking into account the exchange rate, which is close to 30% right now, it was $418 CDN which is a lot of cash but compared to $600 plus tax (or more) to have it done locally, this is still a deal and this way I get to see the actual results. This isn't my first Mini and I'm sure it won't be the last so even if I just use it for my own needs I'm money ahead. I may offer it on a loan out basis but I can't say I'm fond of lending tools to folks I don't know. Forum members are another story because they are accountable to the group and as such I've loaned tools to members before with no qualms.
#13
11-07-2016, 05:20 AM
I was able to complete the intake carbon removal yesterday morning. Once I got the flow rate set on the blaster it made short work of my carbon mess which was substantial! The ports are as clean as can be now so I have to endorse this tool as it works very well.

I did make one more improvement to the top cap / "O" ring area of the hopper. The cap itself is quite rough on its lower surface which makes it bite into the "O" ring as you tighten it down.
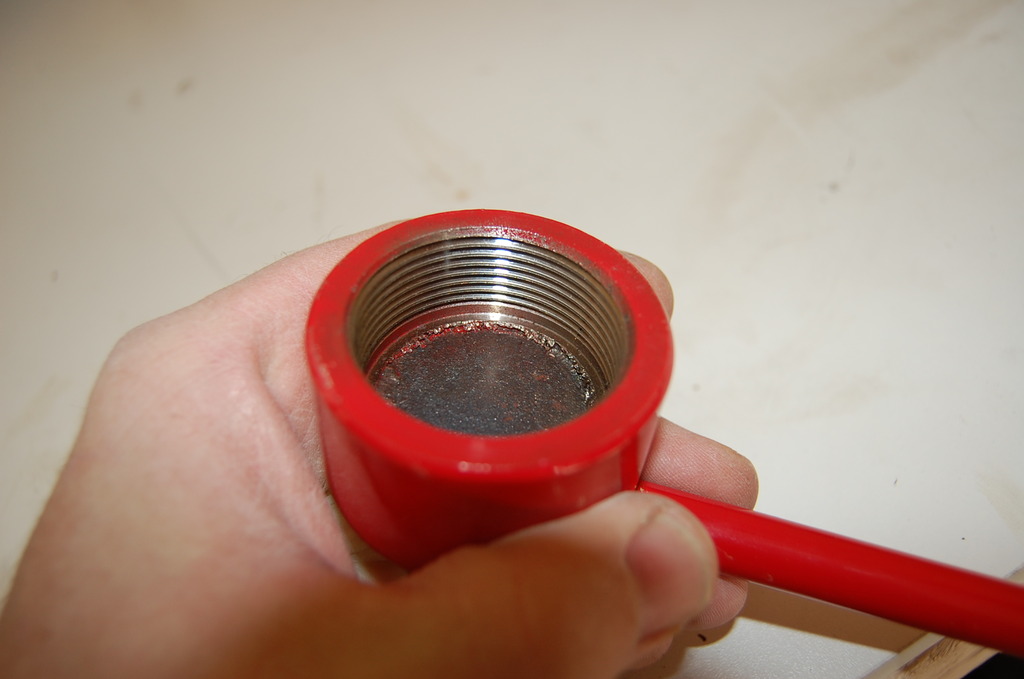
I used my DA sander to smooth this surface out and now it mates with the "O" ring with no drama and holds the pressure well. The "O" ring is still too big so I'll be looking for another when time permits.

Last edited by NB Cooper; 11-07-2016 at 03:09 PM.
#14
11-14-2016, 11:53 AM
Another weekend in the books and plenty of progress on "The Major" to report.
Firstly, the new Valeo clutch, pressure plate and release bearing are in and working like a charm. Not much to report on that other than make sure you have the disc oriented properly (it's marked) and everything should go fine.
Moving on to the timing chain job, I used the EWK tools timing set from e-bay and it worked just fine. One piece of the kit fouled against the turbo housing so I had to trim it a bit and the flywheel lock pin is a tight fit so I polished it with some scotch-brite and it too worked well. I fabricated a holding tool for the crankshaft hub from a piece of flat bar as opposed to dropping another $50 on tools. My chain was well worn at 70mm deflection when measured using the dummy tensioner and my chain guides were all busted to R#T S&^T so I got there just in time. Installation of the new parts went smooth but torquing the crank bolt was quite a challenge. At 36 Ft Lbs plus 180 degrees it's quite a lot of torque. Not something you can do with a standard johnson bar. I used a 3/4 drive with a four foot bar to obtain the 180 degree stretch and you have to hold the crank while you do that. Anyway, it's done and there is no chance it will slip.
Nuf said, pics to follow.
#16
11-16-2016, 06:07 PM
Thank Mini Mania!
On to the next step. I received my All VIP driving light brackets, ironically purchased through Mini Mania. Been waiting a couple of weeks for them so I was intrigued to see how they fit the car and how much trimming I needed to do to the grill.
Started with removal of the grill which is really simple. Just remove the plastic fasteners located along the top edge as shown,

Remove the lower chrome trim starting at one edge and simply pull. It will snap loose and come off quite easily. In fact it's too easy so they recommend that you apply a dab of silicone on either end when you reinstall it so it doesn't fly off. I found that the bolts holding the lights on the brackets will ensure that the piece won't actually fly off but keeping it secure is another question that the silicone addresses.

Then just push the tabs at the bottom of the grill to the side and the lower section of the grill will release.

Now you can get out the brackets and lights to just savor the moment you have waited so long for.

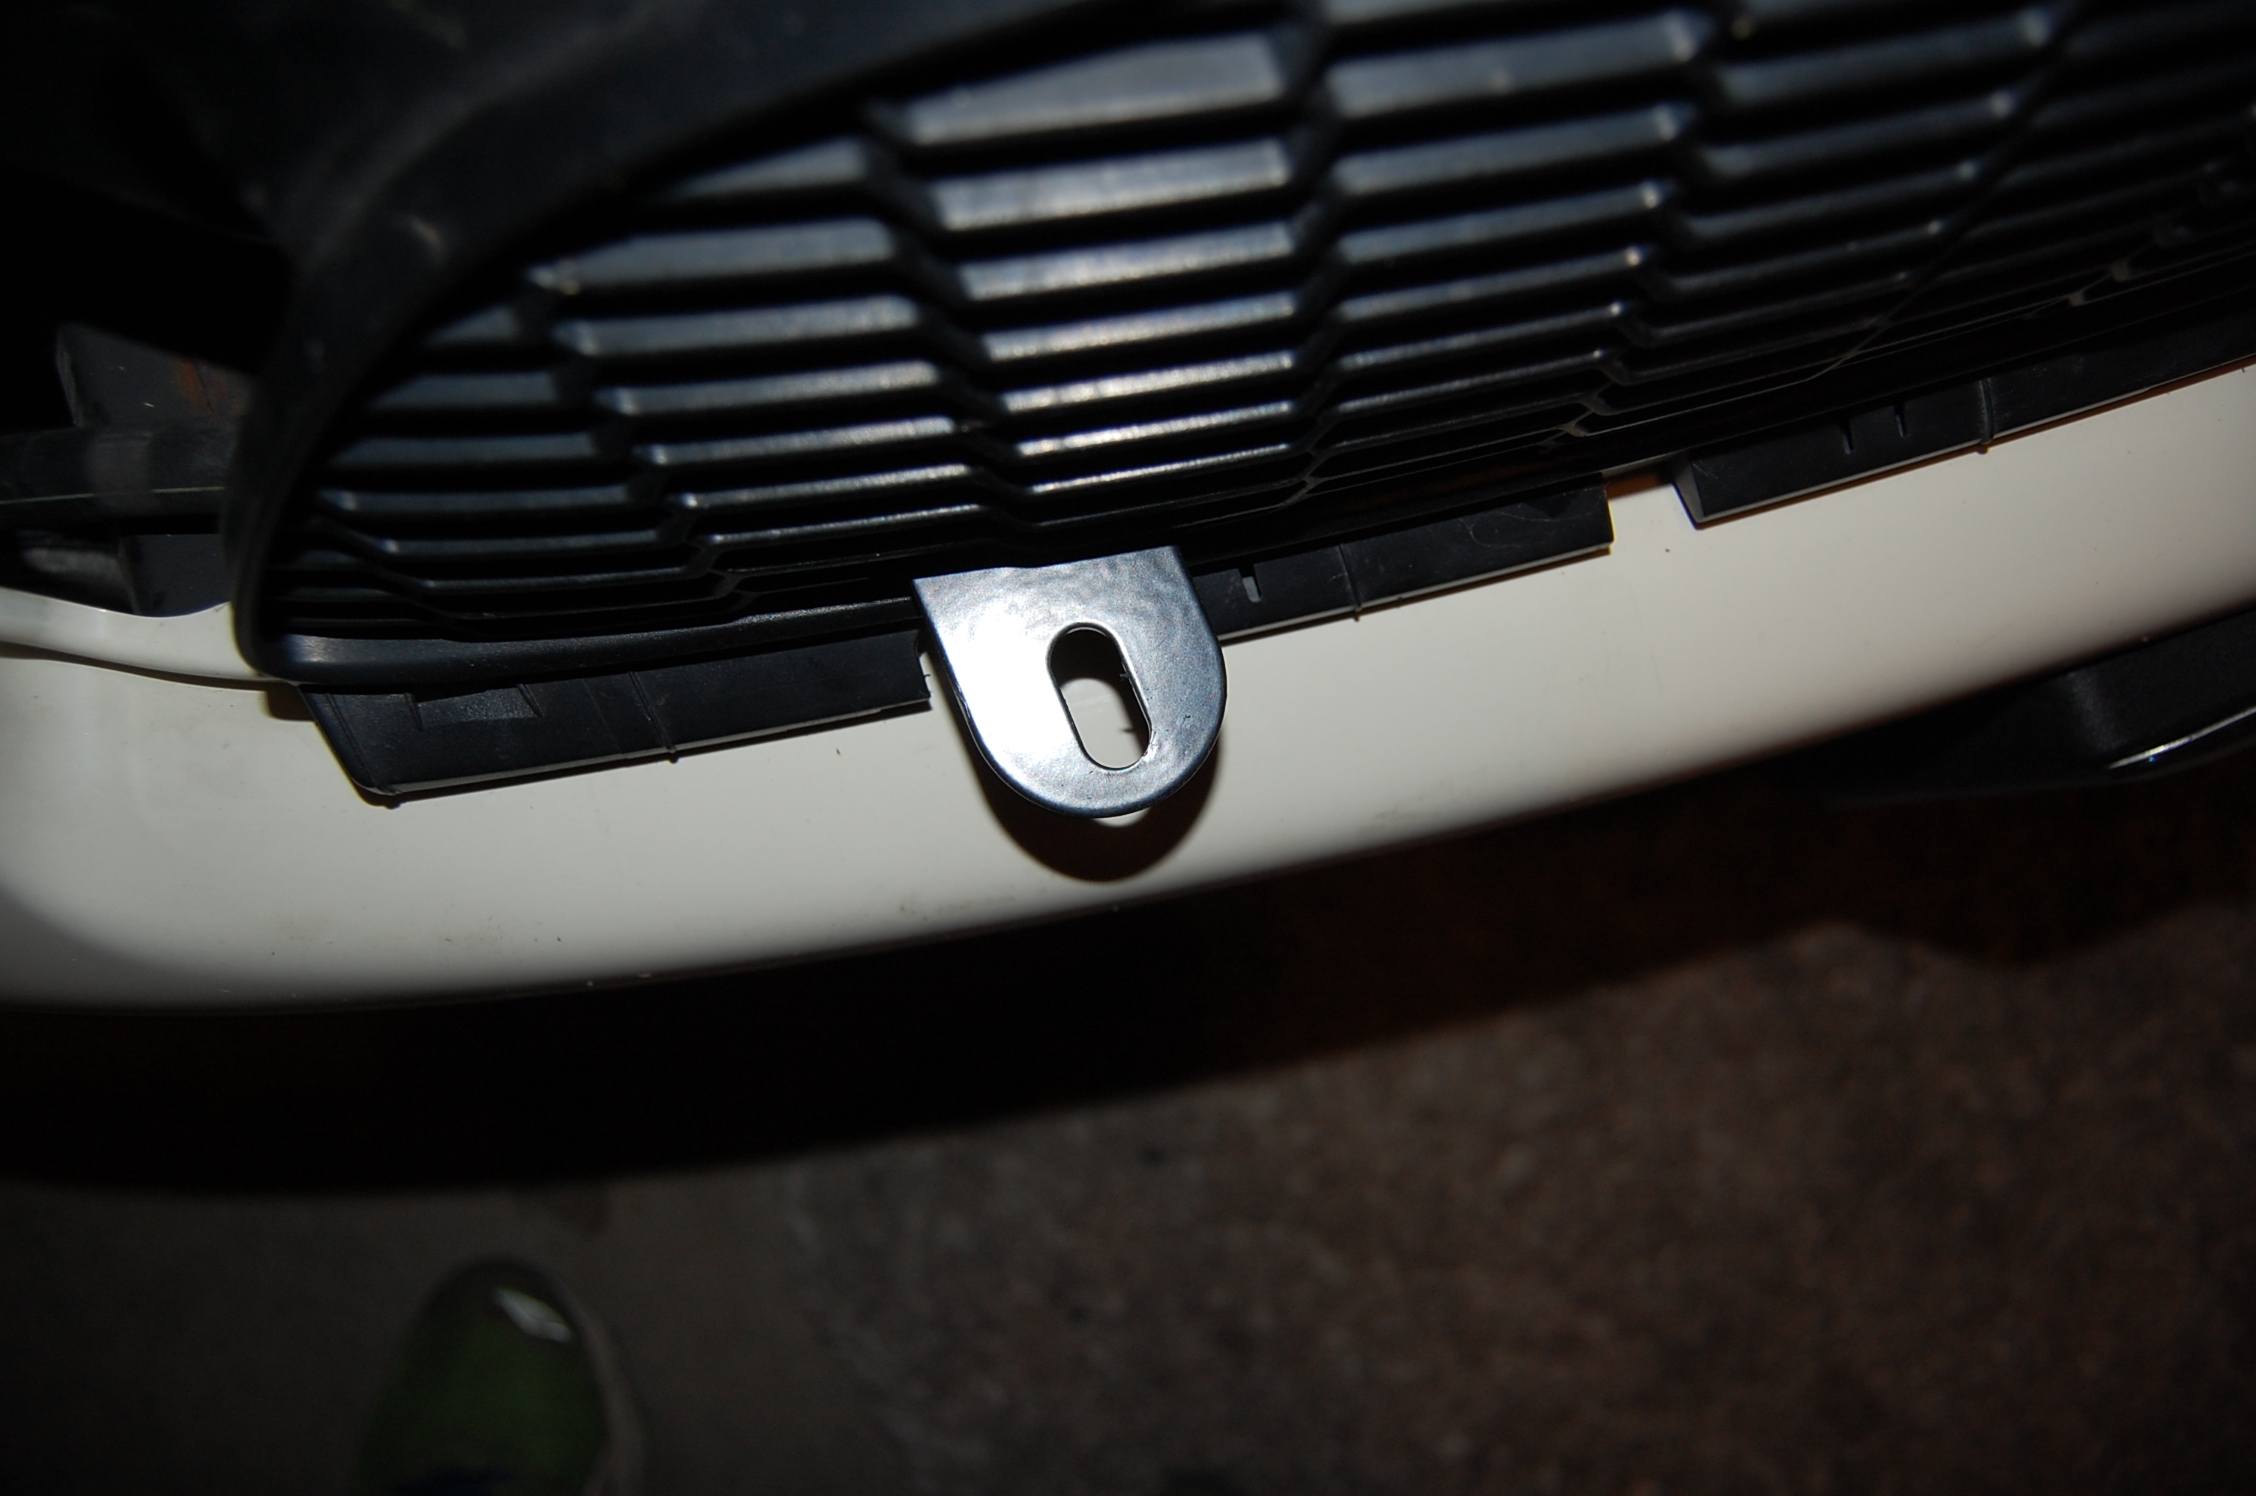
Next step is to install the brackets which are really simple, well made and surprisingly strong. They require removal of one nut and a torx screw, then they just bolt straight on using the same fasteners. The fit is perfect with no trimming or foolishness required.


Next you use the trimming template provided to remove material from your grill to allow the new brackets to pass through. On the passenger side you will also need to trim a small section to clear the bracket in behind. There isn't a template for this but it's pretty straight forward.

Finally you get to install the grill and chrome trim to see what your work looks like.
And you can now install whatever aftermarket lights you wish to enhance the looks and performance of your mini.
My wife is pretty happy with the results of the install. Next weekend I will wire them up but till then I will debate the various options to make sure that they operate when and how she wants them to.
Stay tuned for the new carbon fibre hood stripes!
On to the next step. I received my All VIP driving light brackets, ironically purchased through Mini Mania. Been waiting a couple of weeks for them so I was intrigued to see how they fit the car and how much trimming I needed to do to the grill.
Started with removal of the grill which is really simple. Just remove the plastic fasteners located along the top edge as shown,

Remove the lower chrome trim starting at one edge and simply pull. It will snap loose and come off quite easily. In fact it's too easy so they recommend that you apply a dab of silicone on either end when you reinstall it so it doesn't fly off. I found that the bolts holding the lights on the brackets will ensure that the piece won't actually fly off but keeping it secure is another question that the silicone addresses.

Then just push the tabs at the bottom of the grill to the side and the lower section of the grill will release.

Now you can get out the brackets and lights to just savor the moment you have waited so long for.

Next step is to install the brackets which are really simple, well made and surprisingly strong. They require removal of one nut and a torx screw, then they just bolt straight on using the same fasteners. The fit is perfect with no trimming or foolishness required.


Next you use the trimming template provided to remove material from your grill to allow the new brackets to pass through. On the passenger side you will also need to trim a small section to clear the bracket in behind. There isn't a template for this but it's pretty straight forward.

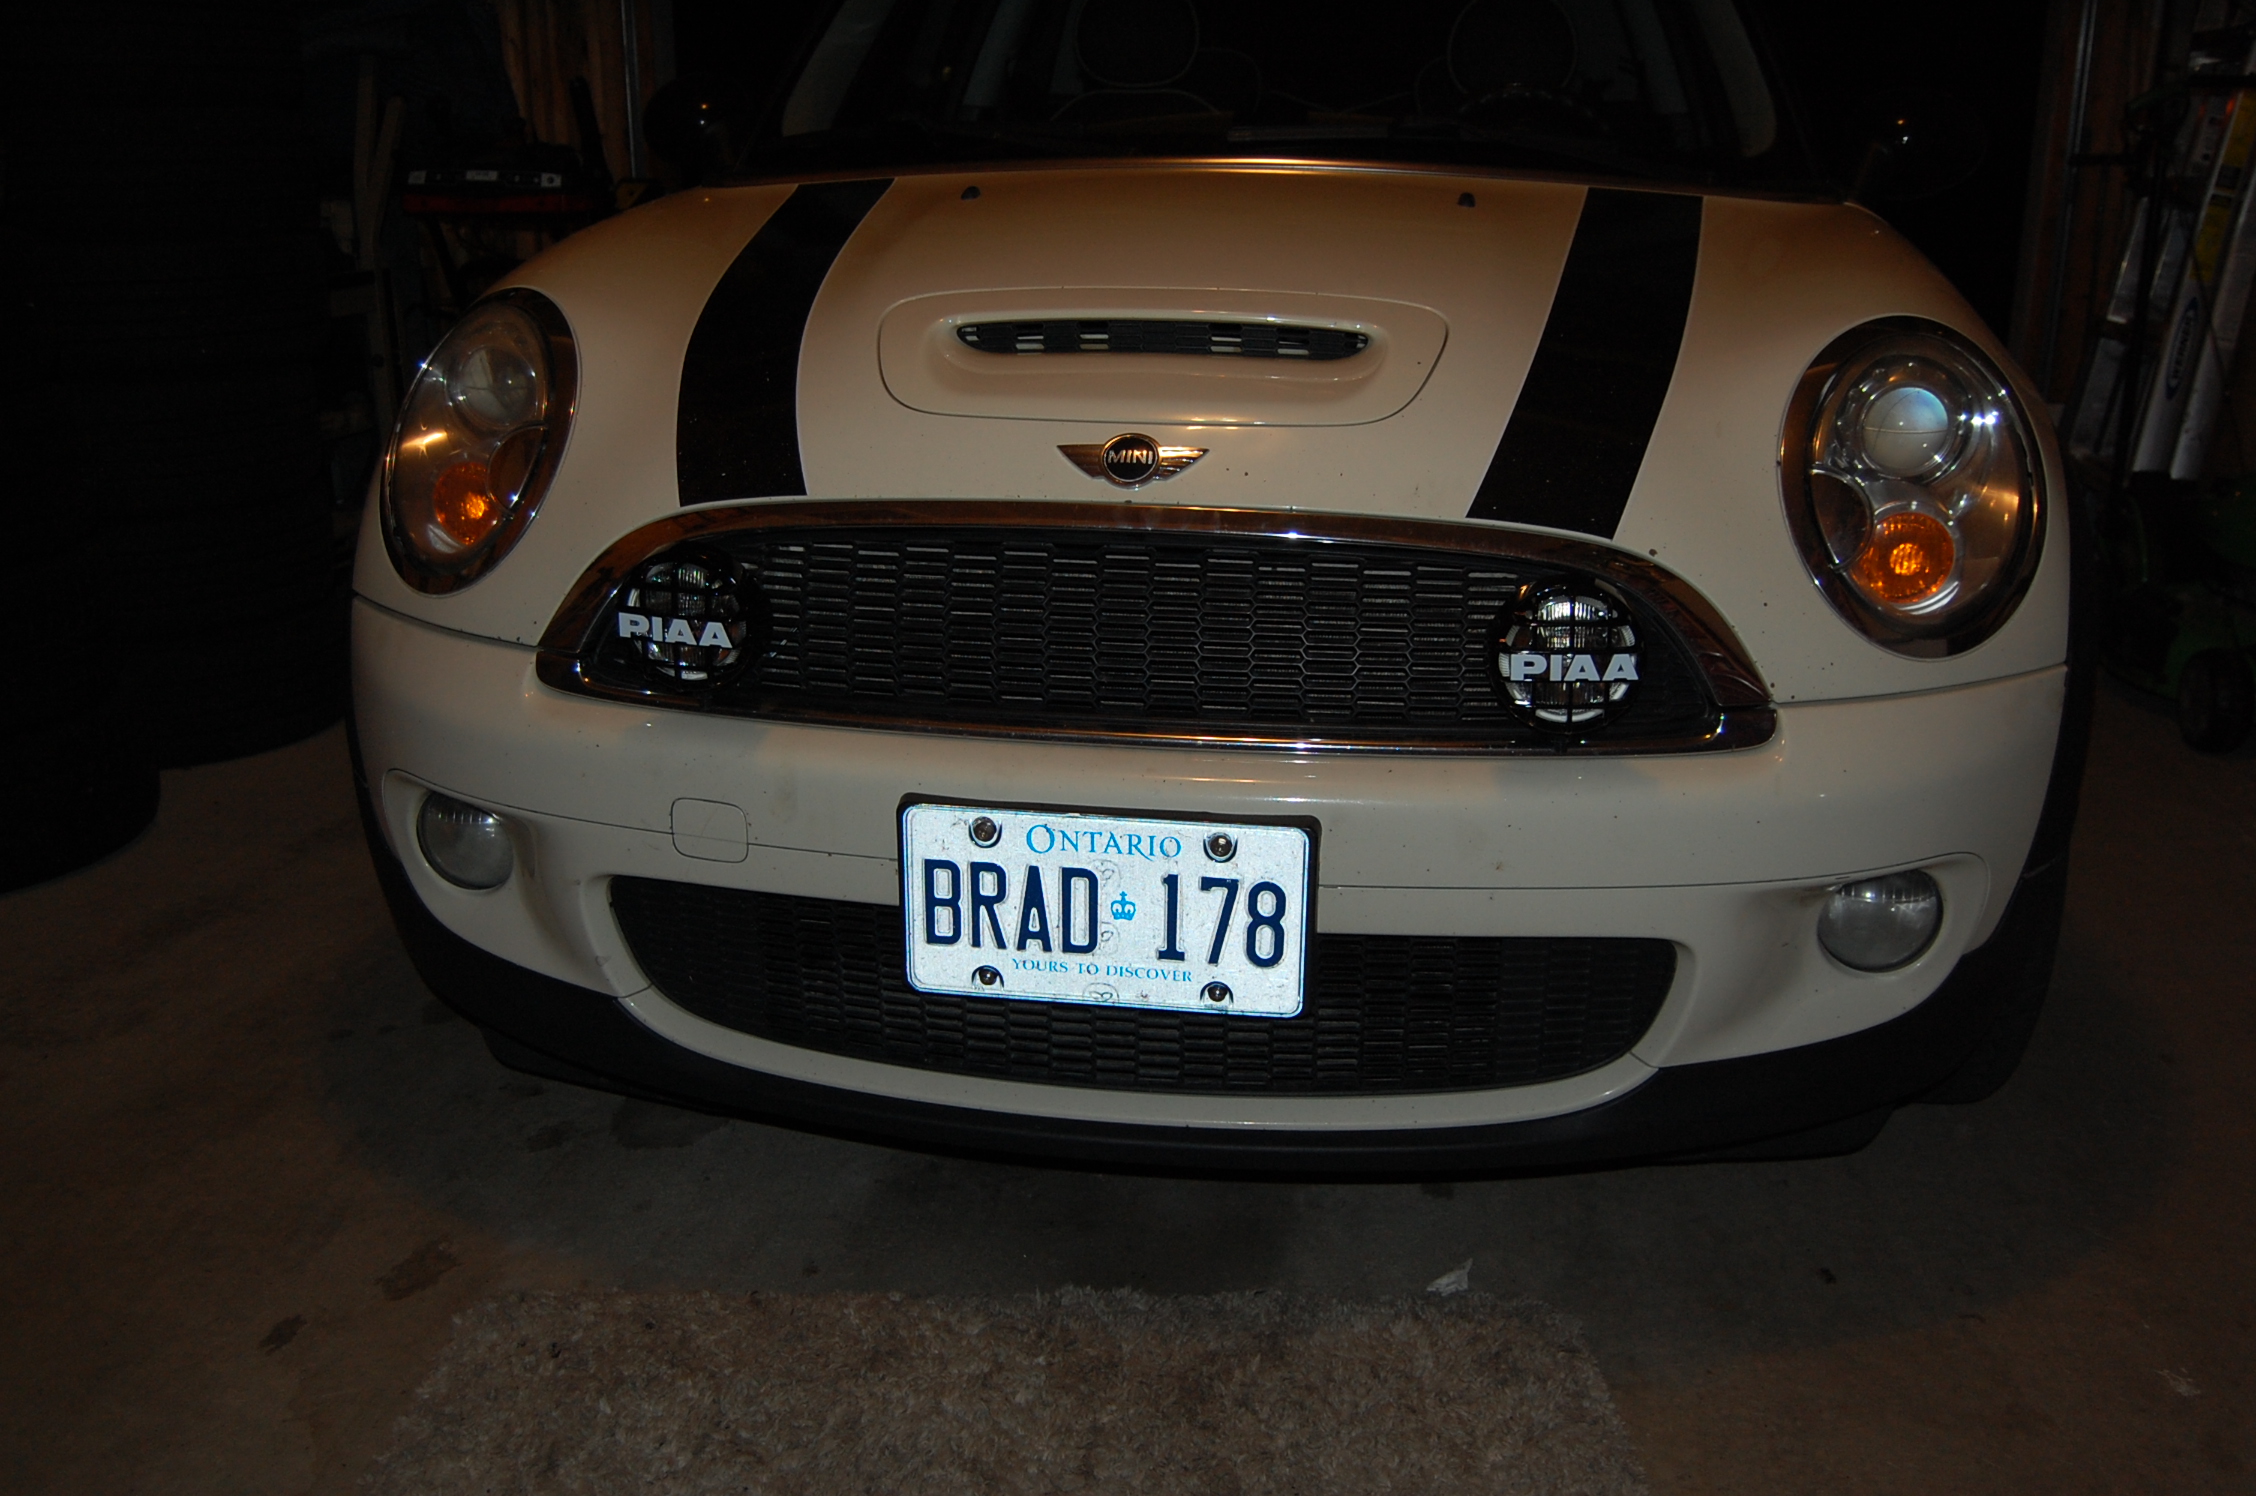
Finally you get to install the grill and chrome trim to see what your work looks like.

And you can now install whatever aftermarket lights you wish to enhance the looks and performance of your mini.

My wife is pretty happy with the results of the install. Next weekend I will wire them up but till then I will debate the various options to make sure that they operate when and how she wants them to.
Stay tuned for the new carbon fibre hood stripes!
#17
11-17-2016, 02:39 PM
Banned
R56
You are more than welcome! Thank you for your order, and great pix/info on getting it all together. It looks really sharp!
We have a dedicated page for R56 Parts & Accessories you and fellow 2nd Gen owners might like:
http://new.minimania.com/MINI_Cooper...nd_Accessories
We have a dedicated page for R56 Parts & Accessories you and fellow 2nd Gen owners might like:
http://new.minimania.com/MINI_Cooper...nd_Accessories
Thank Mini Mania!
On to the next step. I received my All VIP driving light brackets, ironically purchased through Mini Mania. Been waiting a couple of weeks for them so I was intrigued to see how they fit the car and how much trimming I needed to do to the grill.
Started with removal of the grill which is really simple. Just remove the plastic fasteners located along the top edge as shown,

Remove the lower chrome trim starting at one edge and simply pull. It will snap loose and come off quite easily. In fact it's too easy so they recommend that you apply a dab of silicone on either end when you reinstall it so it doesn't fly off. I found that the bolts holding the lights on the brackets will ensure that the piece won't actually fly off but keeping it secure is another question that the silicone addresses.

Then just push the tabs at the bottom of the grill to the side and the lower section of the grill will release.
Now you can get out the brackets and lights to just savor the moment you have waited so long for.

Next step is to install the brackets which are really simple, well made and surprisingly strong. They require removal of one nut and a torx screw, then they just bolt straight on using the same fasteners. The fit is perfect with no trimming or foolishness required.


Next you use the trimming template provided to remove material from your grill to allow the new brackets to pass through. On the passenger side you will also need to trim a small section to clear the bracket in behind. There isn't a template for this but it's pretty straight forward.

Finally you get to install the grill and chrome trim to see what your work looks like.

And you can now install whatever aftermarket lights you wish to enhance the looks and performance of your mini.

My wife is pretty happy with the results of the install. Next weekend I will wire them up but till then I will debate the various options to make sure that they operate when and how she wants them to.
Stay tuned for the new carbon fibre hood stripes!
On to the next step. I received my All VIP driving light brackets, ironically purchased through Mini Mania. Been waiting a couple of weeks for them so I was intrigued to see how they fit the car and how much trimming I needed to do to the grill.
Started with removal of the grill which is really simple. Just remove the plastic fasteners located along the top edge as shown,
Remove the lower chrome trim starting at one edge and simply pull. It will snap loose and come off quite easily. In fact it's too easy so they recommend that you apply a dab of silicone on either end when you reinstall it so it doesn't fly off. I found that the bolts holding the lights on the brackets will ensure that the piece won't actually fly off but keeping it secure is another question that the silicone addresses.
Then just push the tabs at the bottom of the grill to the side and the lower section of the grill will release.
Now you can get out the brackets and lights to just savor the moment you have waited so long for.
Next step is to install the brackets which are really simple, well made and surprisingly strong. They require removal of one nut and a torx screw, then they just bolt straight on using the same fasteners. The fit is perfect with no trimming or foolishness required.
Next you use the trimming template provided to remove material from your grill to allow the new brackets to pass through. On the passenger side you will also need to trim a small section to clear the bracket in behind. There isn't a template for this but it's pretty straight forward.
Finally you get to install the grill and chrome trim to see what your work looks like.
And you can now install whatever aftermarket lights you wish to enhance the looks and performance of your mini.
My wife is pretty happy with the results of the install. Next weekend I will wire them up but till then I will debate the various options to make sure that they operate when and how she wants them to.
Stay tuned for the new carbon fibre hood stripes!
#19
11-17-2016, 09:51 PM
#20
11-18-2016, 04:15 AM
At this point I think I will slave them off the existing fogs (with a relay of course) that way they can be selected when needed and it involves no chopping of the interior to mount a switch. I was thinking about slaving them off the high beams but then they will rarely be used and I want to see them get some use during regular daily driving.
#21
11-20-2016, 06:50 AM
Had a very productive day in the garage yesterday. I managed to complete the wiring of the rally lights with relay and fuse protection. I did slave them off the existing fogs so they work in unison. All joints soldered and protected with environmental shrink tube and all weather connectors at the lamps so I can remove them when the need arises. I took it for a spin last night and the PIAA lights produce good usable light without incurring the wrath of oncoming cars. The boss is happy!
Oh and I removed the old hood stripes as they were a bit beat up and it's time for a change. (That was a PITA)

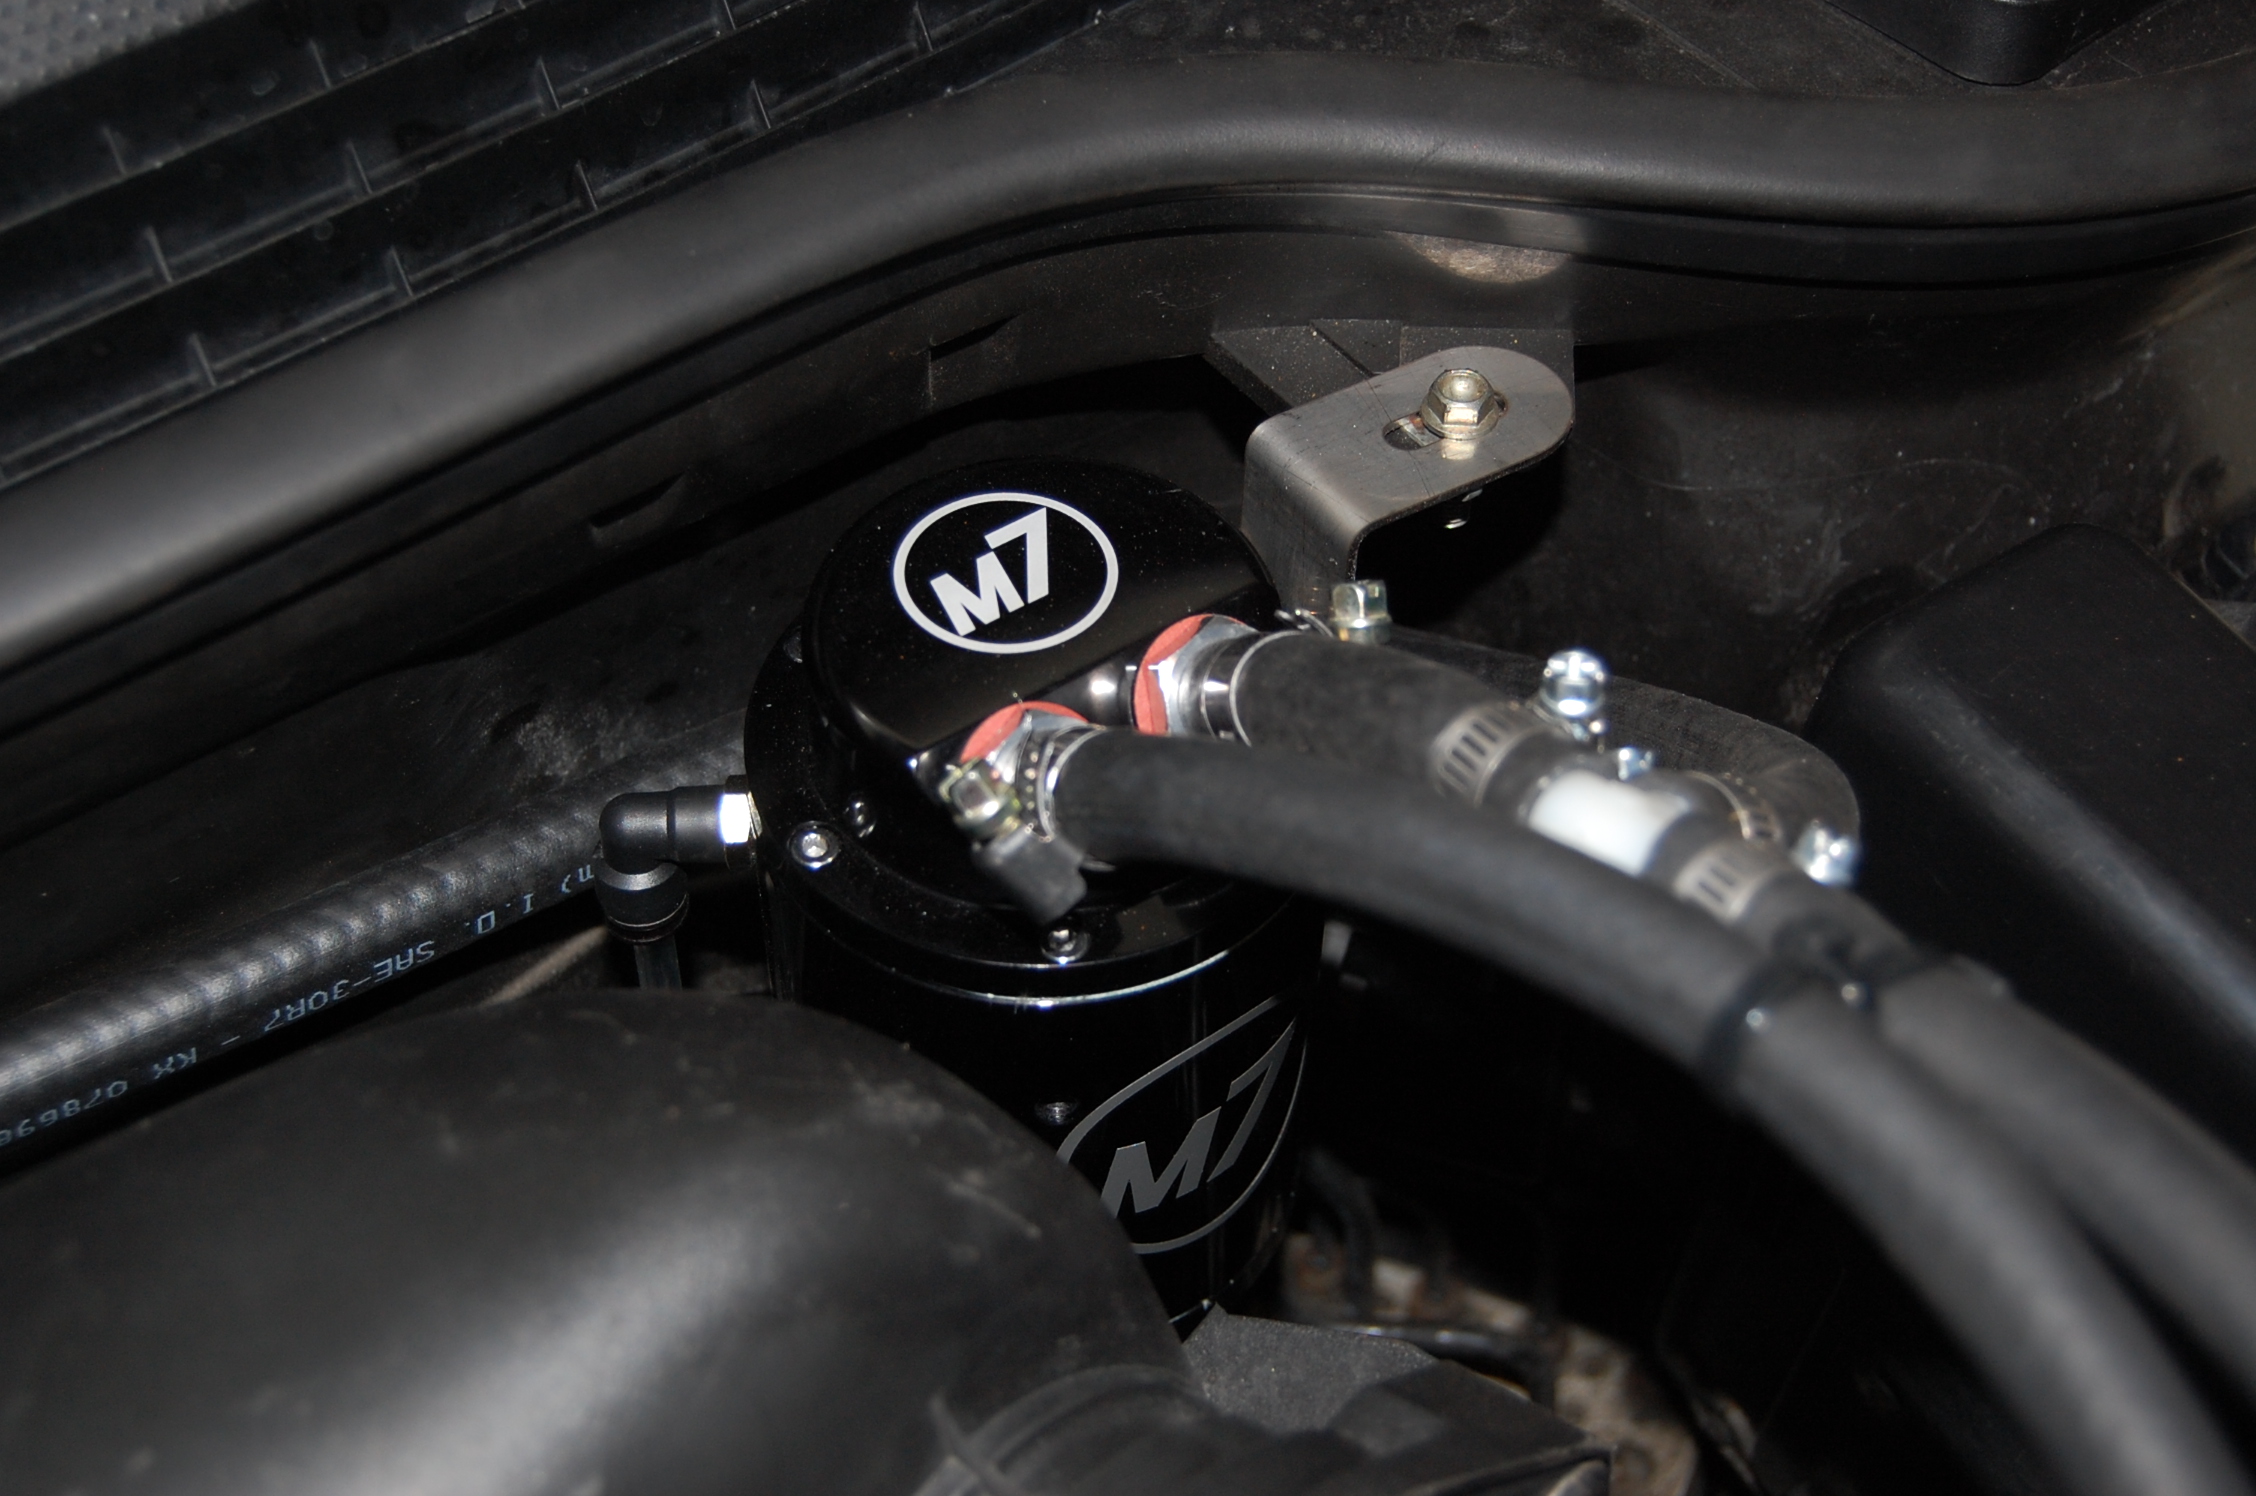
So then I moved on to eliminate the noise maker by capping the port and I capped the PCV port on the intake manifold as well since it was time for the oil catch can install. There is plenty of information regarding oil catch cans and their benefits as well as examples of installations on the web to sift through. I followed the assumption that both PCV ports should be vented to allow the engine to breathe which is a given but I only wanted one catch can as opposed to two in order to reduce the complexity and plumbing. So I capped the intake port where the rear PCV generally hooks up and I routed that PCV to the inlet of the M7 catch can and installed a Tee so both the front and rear PCV vent into the can. The output from the can (hopefully just gasses) is routed back to the intake just upstream of the turbo inlet. The installation looks like this;

The installation has had no affect on the way the car operates thus far and after a day I see no oil accumulation in the can. That said, I wasn't burning any oil so I guess this is to be expected. I did however had immense buildups of carbon on my intake valves which I blasted off a coupe of weeks ago. The car is starting and running super smooth, even my wife has commented on how amazing it feels since all of the work has been done. Definitely worth the effort.
Oh and I removed the old hood stripes as they were a bit beat up and it's time for a change. (That was a PITA)


So then I moved on to eliminate the noise maker by capping the port and I capped the PCV port on the intake manifold as well since it was time for the oil catch can install. There is plenty of information regarding oil catch cans and their benefits as well as examples of installations on the web to sift through. I followed the assumption that both PCV ports should be vented to allow the engine to breathe which is a given but I only wanted one catch can as opposed to two in order to reduce the complexity and plumbing. So I capped the intake port where the rear PCV generally hooks up and I routed that PCV to the inlet of the M7 catch can and installed a Tee so both the front and rear PCV vent into the can. The output from the can (hopefully just gasses) is routed back to the intake just upstream of the turbo inlet. The installation looks like this;


The installation has had no affect on the way the car operates thus far and after a day I see no oil accumulation in the can. That said, I wasn't burning any oil so I guess this is to be expected. I did however had immense buildups of carbon on my intake valves which I blasted off a coupe of weeks ago. The car is starting and running super smooth, even my wife has commented on how amazing it feels since all of the work has been done. Definitely worth the effort.
Last edited by NB Cooper; 11-20-2016 at 07:14 AM.

#23
11-22-2016, 03:48 PM
Banned
#24
11-22-2016, 04:32 PM
But it will make me want to buy an R53 to get that super charger whine......ah hell, I'll risk it.
#25
11-28-2016, 09:34 AM
Just a quick update on the M7 oil catch can installation. The car is running well after two weeks in temps running from plus 5C to minus 4C. I checked the can yesterday and it was half full of emulsified oil spooge and water. Lots of condensation resulting from the cold temperatures and we are just getting started. Now I need to develop a drain system for the can that doesn't require removal. I guess I'll look for a quick drain valve and install that with a line to a low point where I can collect the contents of the can. More on that as time allows.