When you click on links to various merchants on this site and make a purchase, this can result in this site earning a commission. Affiliate programs and affiliations include, but are not limited to, the eBay Partner Network.
Stock Problems/IssuesDiscussions related to warranty related issues and repairs, or other problems with the OEM parts and software for MINI Clubman (R55), Cooper and Cooper S(R56), and Cabrio (R57).
Wrapping up the timing chain job on my N14 and I'm driving myself crazy with the VANOS intake cam timing.
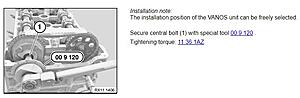
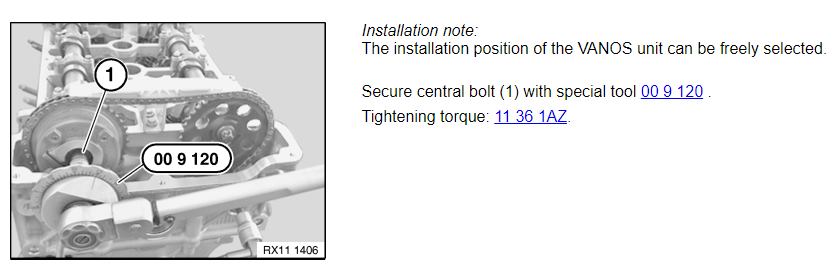
For VANOS installation it says that the position of the unit may be freely selected:
Perfect. With the flywheel and cams locked in place, I installed everything then spun the motor around a few times. When I locked the flywheel back in place, the intake cam is not advanced enough, and the gap between the two tools was 10mm or larger.
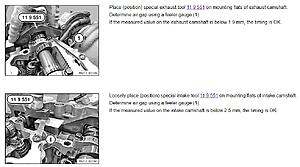
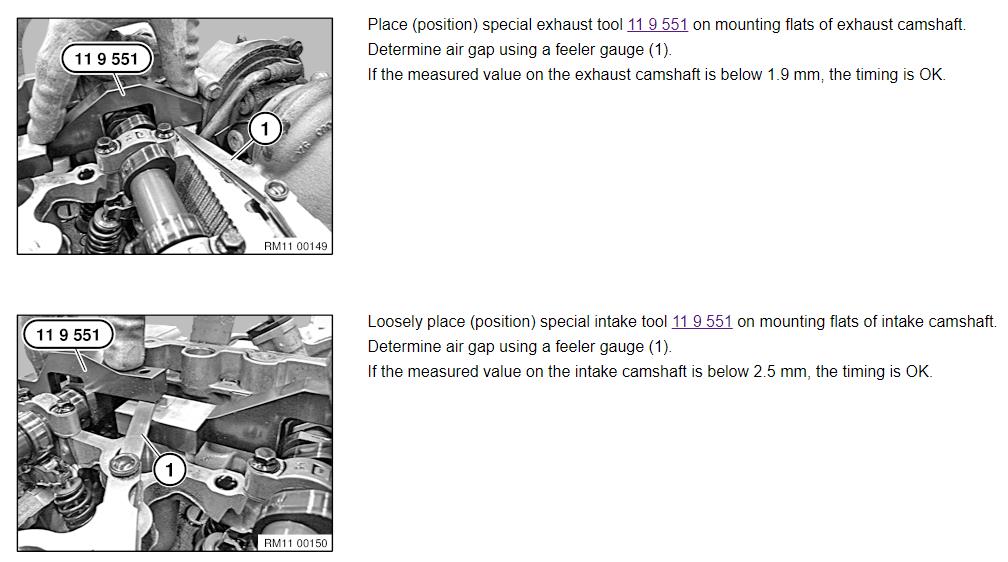
Measuring instructions:
Gap between tools:
The exhaust cam is perfectly in time and there is nearly zero gap under the tool on either side. To make the gap with the intake cam smaller, I remove the intake cam tool and used the 27mm wrench to hold the cam in place while I removed the tensioner to let the intake cam move back one chain link. Now the gap between the tools is 0mm, but at the back of the head the gap is about 2mm, but it does not say a gap here is acceptable.
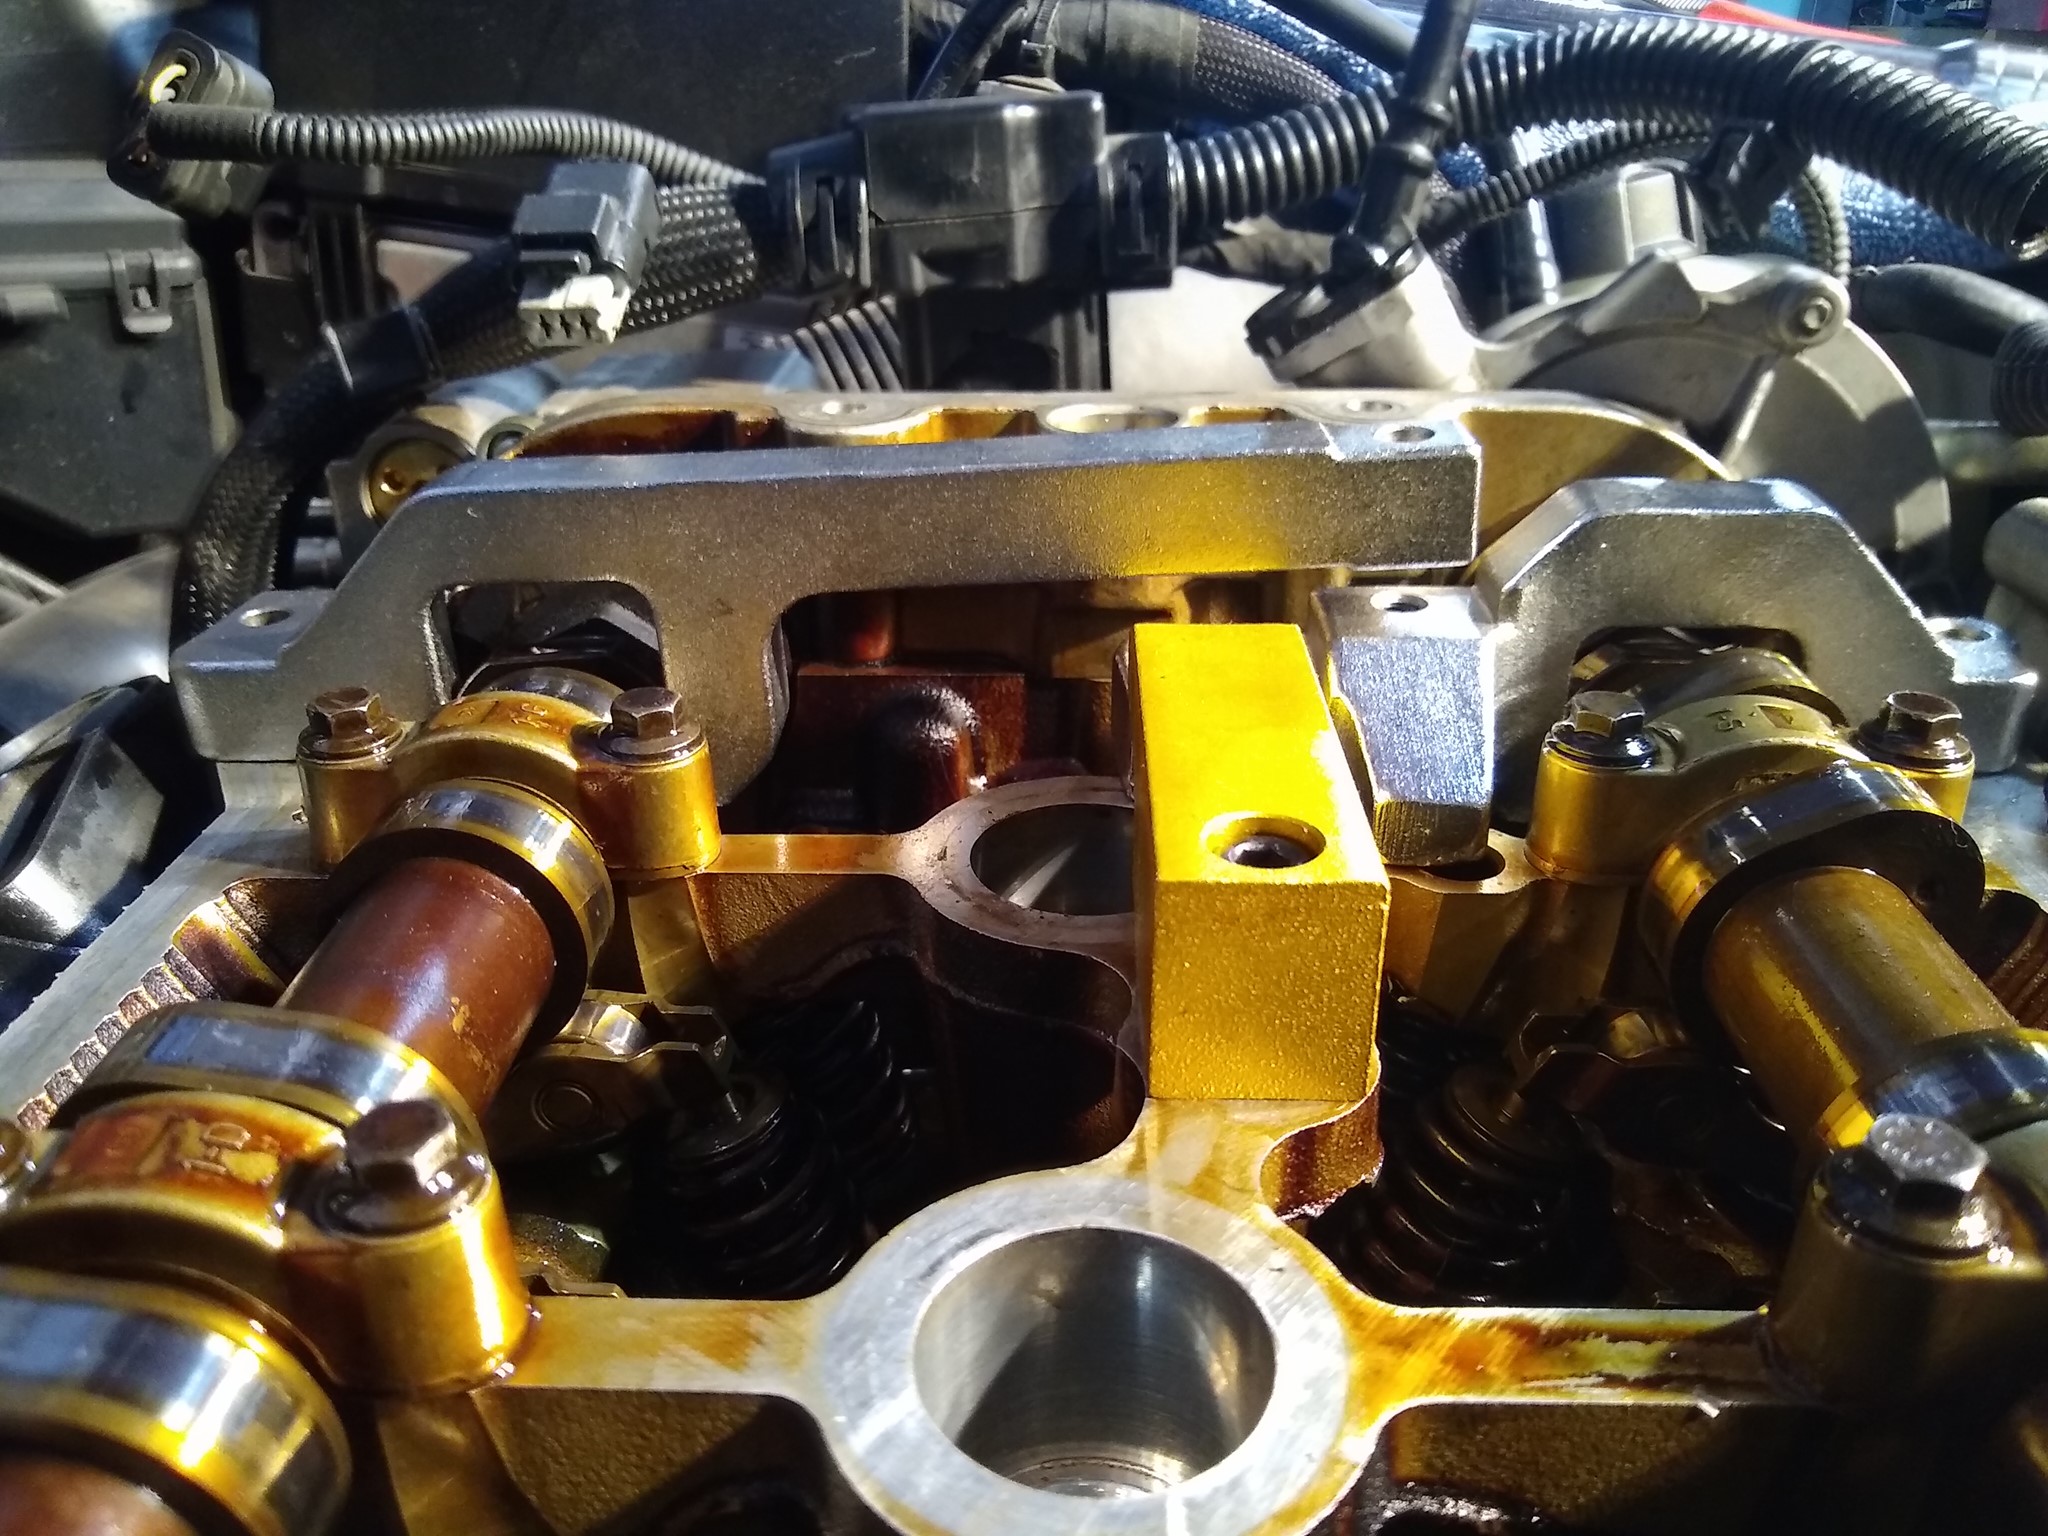
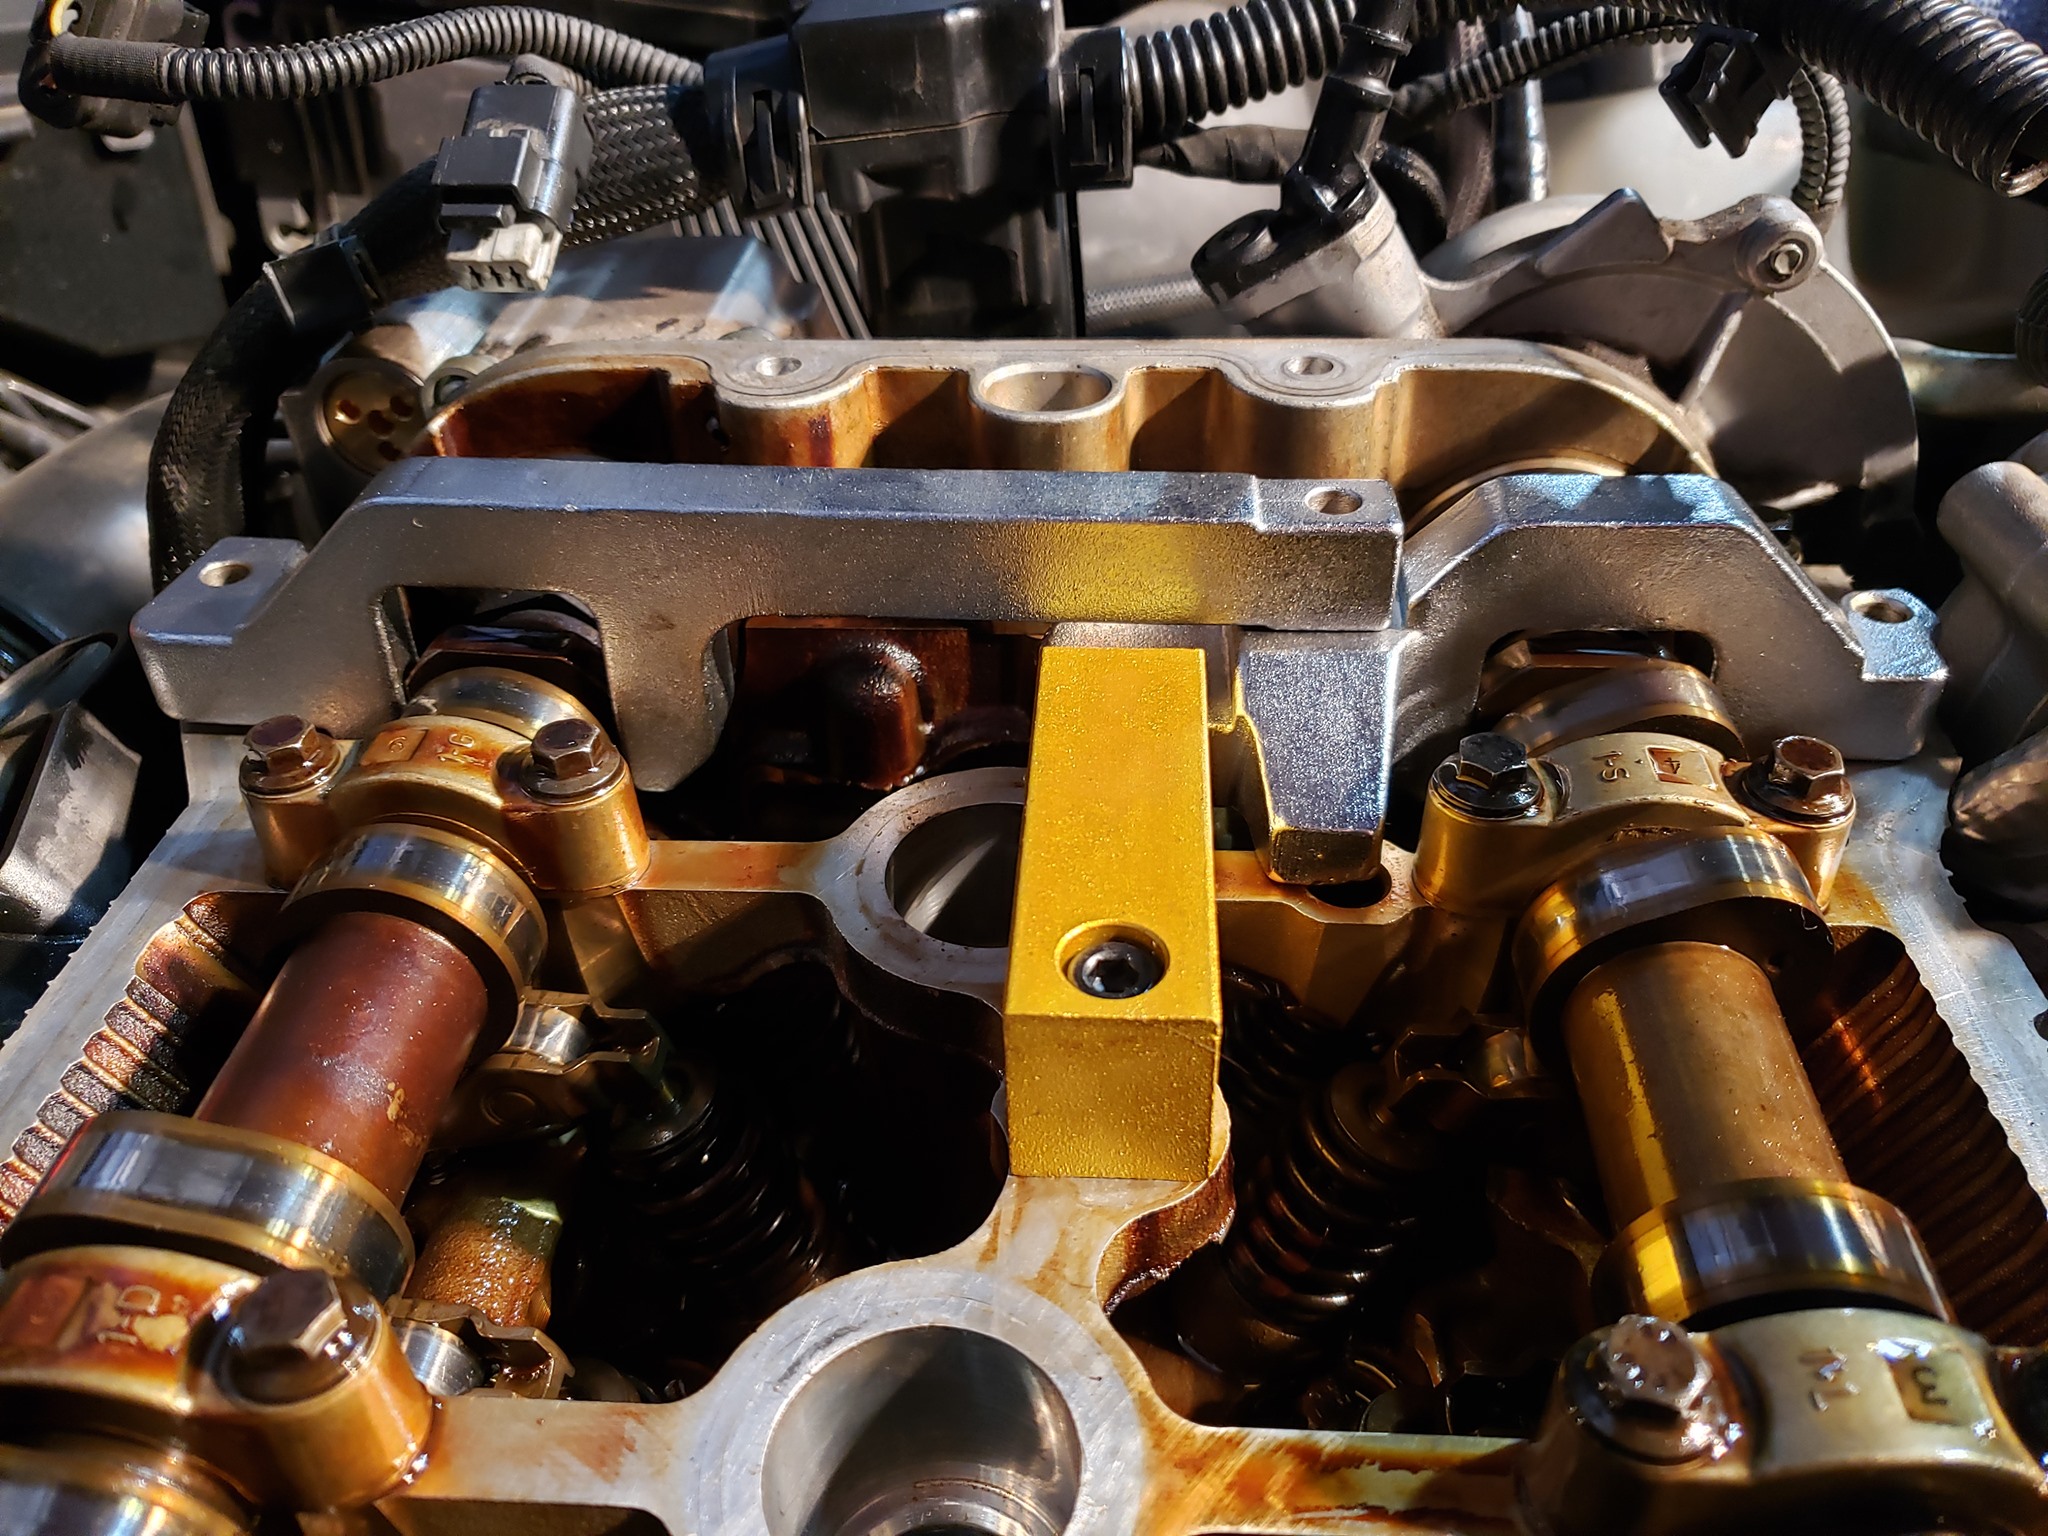
This is with the cam advanced one tooth from the assembled stage. Note the gap on the far left side:
Someone on a facebook group said: "That is occurring because when you rotate the crank without oil pressure the vanos phaser is sliding. If you lined it up with the cam lockers and crank pin in place you're good to go. No need to recheck." Indicating that I should but the cam back a tooth. My foggy memory has me remembering that the gap between the tools was large when I was disassembling the timing components and I rotated the cam (clockwise/advanced) to have the tool fit, which left a lot of slack between gears (worn chain and tensioner).
Looks like I did not preload the camshaft clockwise as indicated in a separate TIS procedure. Someone also mentioned that "when the chain is off and the cam is set with the locking tools the centre of the vanos can move so you need to make sure that it is turned all the way anti clockwise before you put the chain on. The bit that got me was when you set the chain make shore the hydraulic tensioner is in because that will move the chain if you fit it after."
Looks like I did not preload the camshaft clockwise as indicated in a separate TIS procedure. Someone also mentioned that "when the chain is off and the cam is set with the locking tools the centre of the vanos can move so you need to make sure that it is turned all the way anti clockwise before you put the chain on. The bit that got me was when you set the chain make shore the hydraulic tensioner is in because that will move the chain if you fit it after."
...Is that the same as preloading the vanos gear?
I've done a dozen of these N14 timing jobs so far and not one will I need to worry about pre-loading the VANOS gear for some reason. However, I do always put the pretensioner in place and follow the pre-tension method before I tighten everything down. It's after this point that I would replace the pre-tensioner with the main tensioner. Again, never experience having to pre-load like you're describing.
@Yupetc When you rotate the motor back around, do the cam locks just fall into place with no gap? I talked to a tech when I picked up the new stretch bolt today and he said that they do pretension at least the intake cam with vanos. My plan is going to be to install the bolt at 20nm, and turn motor over a couple times. If the cam locks fall into place, I'm going to give it the 180* turn and call it good.
IIRC, I did it them this way:
1. set the flywheel and camshafts all in its place. (gotta make sure to use kabob sticks and insert them into spark plug hole.) The TDC position and BDC position both will allow you to lock your flyhweel pin. TDC is reached when all kabobs are same height (piston positions are all the same).
2. get the chain/guides, sprockets all in place loosely, have something hold the chain up while I hand tighten the sprocket bolt. At this point, you'd still want both sprockets to have slightly resistive play on the camshaft.
3. insert the pre-tensioner and get it set to whatever pre-tension torque is supposed to be ( I don't remember that number), and install the top chain guide, torque the top chain guide down.
4. At this point, the chain should be taught, and that's the point when I begin the torque down procedure on the sprocket bolts. I gave both of them 180 degrees after the final torque just to make sure, I did have an issue before where it comes loose on 90 degree over turn.
5. Release the pre-tensioner and install the actual tensioner and put it to torque spec.
6. Remove the locking tools and rotate the crankshaft and check TDC at least twice. I never had to redo this, except for once when I had to deal with that 90 degree torque instance. It's always good for 180 degrees.
During all this manual engine rotating, I hope you're always turning it CW. There's a couple components that do not want to be rotated CCW. Possibly your "tweaking" the Vanos is causing the slight offset in cam locking tools. The few times I've rebuilt my engine, I've never preloaded / pretensioned either cam with the Vanos, only the pretension tool. Also, when using the pretension tool, you're supposed to be putting tension on the entire chain, not just the section between intake and crank. To do this, at least two of the three TTY bolts must be loose and the top guide in place.
Edit: Yupetc, your reference to TDC can be confusing to a novice Mini mechanic. Top Dead Center is NOT where the pistons are set during timing adjustment, all four are 90 deg off, or halfway between TDC and BDC --- two on the way up and two on the way down. This is done to prevent valves from contacting pistons during assembly, among other reasons.
Last edited by oldbrokenwind; 01-21-2020 at 02:07 PM.
Thanks for the input folks. I'm certainly a novice mini mechanic, but not a novice mechanic in general. I do realize that 90* BTDC is where the crank/flywheel is pinned, and I have only been turning it CW. The only "shortcut" I took was the pretensioning using the special tool; I did finger "tight" (contact) plus a half turn or so since I didn't have a torque wrench that went down that low. I love an excuse to buy new tools, so it's arriving today.
I'm going to slap it all together but not torque the intake cam until after I rotate the engine over by hand to see if the tools fall into place. If they do, I'll install actual tensioner, and rotate motor again and check with tools again until it's right, then giver er the old 180* turn.
Regarding the exhaust cam also torqued to 180*, I cleaned all the surfaces of oil, and I don't feel that 180* is necessary considering the procedure is for 90*.
I've done a dozen of these N14 timing jobs so far and not one will I need to worry about pre-loading the VANOS gear for some reason. However, I do always put the pretensioner in place and follow the pre-tension method before I tighten everything down. It's after this point that I would replace the pre-tensioner with the main tensioner. Again, never experience having to pre-load like you're describing.
Would you be willing to list the exact steps you took to get the cam timing spot on? I just did mine and the intake cam came out about 5-10 degrees retarded. I made the mistake of putting the torque on the bolts so I have to wait for new bolts.
I saw a video where the fellow put about 15 ft-lbs of torque on the bolts and then rotated the crank a full rotation (4X) and when he pujt the cam tools back on it seemed to line up. I don't know if 15 ft -lbs of torque will keep the sprockets from slipping out of place.
@danraabe
For me when i did mine, I had my cam and crank locked using the tools, once the gears were on i removed both locks, did a 360 rotation of the engine, reinstalled all locks, confirmed they fit nicely...(I did have to undo it once, and reset it, i didn't torque my bolts) once i was happy with a 360, I did 4 360 rotations and confirmed once again and was happy with it so i torqued and put it back together.
I think I finally got the cams in position. I took half a dozen tries. After rotating the engine with the tools off I checked each time. At first the intake was a few degrees retarded, so at my wits end I had my daughter hold the wrench with the tensioner in and the cam in the proper position with the tool on and it seemed to work. I torqued the bolt to 20 Nm, and rotated the engine each time. On the last try everything lined up and I torqued the intake bolt to 20 + 90 degrees, rechecked to see if maybe I was just dreaming. After a couple more revolutions I completed the torque an additional 90 degrees to = 180 degrees. Beginning attempt to time the cam Final try

 01-19-2020, 01:24 PM