When you click on links to various merchants on this site and make a purchase, this can result in this site earning a commission. Affiliate programs and affiliations include, but are not limited to, the eBay Partner Network.
Stock Problems/IssuesDiscussions related to warranty related issues and repairs, or other problems with the OEM parts and software for MINI Clubman (R55), Cooper and Cooper S(R56), and Cabrio (R57).
I have a 2007 Mini Cooper S. Car has been sitting for about a year and half. Bad trans, clutch, thermostat housing unit, and wheel bearings those have been replaced. There's probably more just haven't came up yet. I did have the car running for about a month now. Found out super quick that the R56 loves to guzzle oil. So I'm driving probably going like 35 I'm trying to shift and my car just dies. Wont turn over for nothing. My boy came with an OBDII sensor ran the diagnostics and it there are 4 pop-ups. (Vehicle speed, signal; Bypass blow-off valve, plausibility; Inlet camshaft sensor x2) Got it towed. So um yea oh and one more thing I bought new spark plugs for it and whoever the idiot was. Wasn't paying attention to how the spark plugs were put back in so now I have a stripped spark plug that I haven't been able to get out yet.
I've been asking around what could go next and I'm told the High pressure fuel pump would be most likely to change out next. I've been doing the work myself and learning that these cars are um challenging. I've came this far and I'm not stopping.
This is 3hrs later realizing I posted in the wrong thread.
Got the valve cover off and realized that my timing chain went on me. The socket I used for the spark plug has to be a 12pt 14mm thin wall. I was using a regular 12pt 14mm. Didn't know there was a difference. (Spark Plug wasn't stripped )Penetration Oil helps alot and some patience was able to get it out. Im doing this in a parking lot due to Auto center being closed. Do I have to take out the engine to clean and change the timing chain? Best course of action cause I only have 3 months before I move.
Timing chain can be replaced with the engine still in the car, but you'll need to pull the passenger side wheel and lining to access that end of the engine. Definitely not a parking lot chore. There's also a couple special tools you'll need and a couple torque wrenches. Pay attention to the specified torque settings, don't manually rotate the engine CCW, and be prepared for bent valves, common side effect of losing a timing chain. I suggest you watch a couple youtube videos on timing chain replacement, and check with some local R56 owners that have done this repair --- successfully.
Appreciate thank you. I'll be checking out those sites. It will have to be a parking lot job due to the current situation that we're in right now. I have no other choice.
I have recently done my timing chain, this is not a job you want to tackle in a driveway or parking lot, as your engine is open to everything.
There are a few scary bits to it also that are nerve racking. (Removing the crankshaft bolt) I found the easiest way to do this was to remove the air ducting, and frame mount then come in through the top of the engine (make sure to put a jack under the engine to hold the weight) and just work a little at a time... dont forget you need a crank lock tool (i made my own outta plate steel that worked and braced it against the frame but would suggest buying the tool if you dont have a shop to make one in.
Make sure to get the right Cam Lock kit for your car. (got mine on amazon for like 50$ Cdn, worked like a charm!)
Take your time, your about to endevor on a huge job... first time i did it took me 3 evenings, remove one bolt, watch more of the video, do some more...
Important things to get before you start.
Your crankshaft pulley bolt is a Torque to Yield thus you will need a new one.
New Engine mounting bolts for your mounting bracket to car (these are torque to yield and will 90% be stretched when you remove)
Crankshaft Pulley Seal, get a new one, they are a "one time in and one time out deal" no reuses on that one.
Set or Torx sockets both the male and female versions.
Total I used 3 floor jacks to do the work (2 to lift the car, 1 to hold and lift/lower the engine for access of work).
36" 1/2" drive breaker bar (swivel head) for the removal of the crankshaft bolt.
12" & 24" 1/2" drive extension
1/2" socket and ratchet set
3/8" socket and ratchet set
Torx sockets set
E socket set
Deep Creap penetrating fluid (used a whole can)
Needlenose
Vice Grips
New valve cover gasket
Liquid gasket maker (I use the cooper one (best one I could get here)
Above mentioned specialty tools.
My biggest advice....
Lock the crank (which is a PIA) then the cam shafts, put a line on your vanos bolts and a line on your cams to the cam seats to ensure no accidental rotation.
Plan on your car being down for a couple days for this job as the first time it is scary and your into the heart of your engine....
Oh and dont forget to remove your dipstick before you try and pull out your timing cassette. (it wont come out without doing that )
Patiance and a steady hand will get you through, but have all the parts ready to make it as painless as possible.
If you choose to take this on, once youve done it once it isn't nearly as hard, I had mine apart 3 times after because i thought i had made a mistake, but ended up i had fried my DME. (DME only has 1 ground which is on the top of the head right by your coils and apparently i somehow shorted out my DME. Anyways goodluck and take your time!)
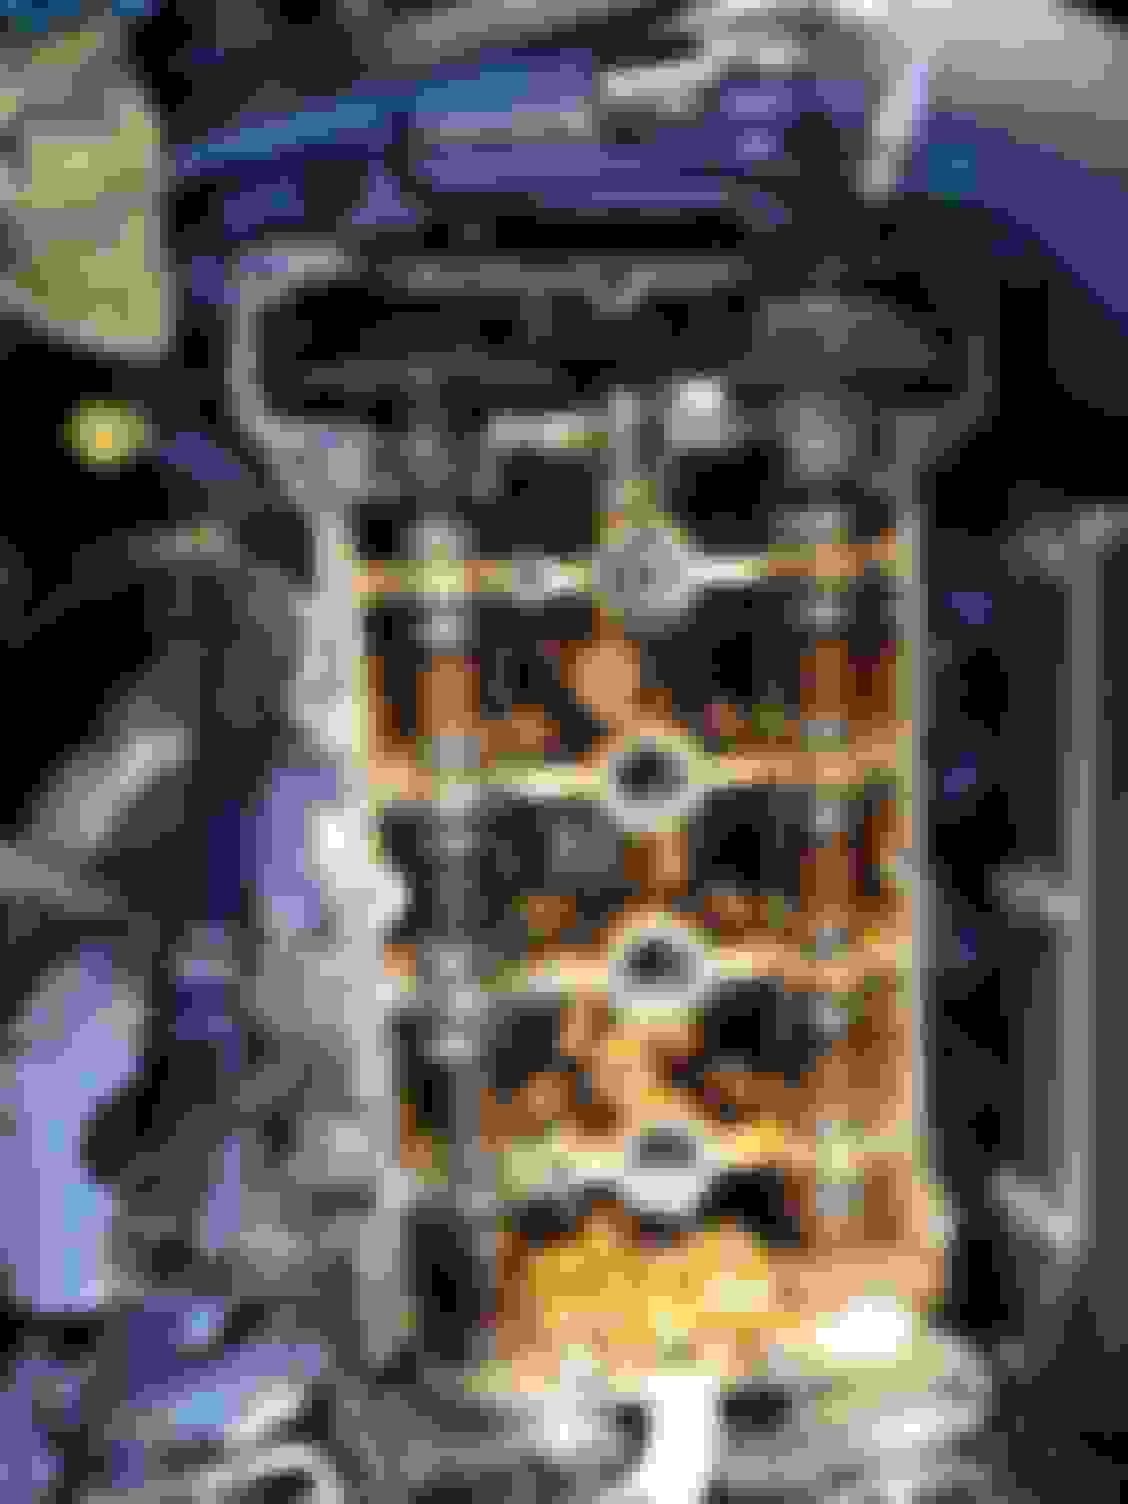
So heres an update. Got the cylinder head off. Pistons look good very minor side wall scorching. Have 4 bent valves on the exhaust side. And also found my oil pump chain to be broken. Plan on putting in new valves myself. Since its raining here i have some time on my hands.
Valves replaced. Lot easier than expected.
Question do I have to change the oil pump chain first before the timing chain? Only because i have the engine mount off at this moment which i cant get to my oil pump chain. Hard to find a video explaining such
When I did my Timing I didn't do the oil pump chain as I couldn't find anything suggesting they both should be done at the same time. @MiniToBe might have some insight! he was a great resource when I was working on mine.
The oil pump chain sits behind the timing chain. So it needs to be replaced first before you do the timing chain.
You might be able to replace the guides and install the guide bolts first then the motor mount. After that, you could replace the oil pump chain and inspect the sprocket. Then you slide the timing chain and make sure it wraps around the sprocket correctly.
Gotta pull the oil pan to change the oil pump chain. That means dropping the exhaust pipe. Pan should be dropped anyhow, to clean out any guide left-overs, and clean the pump screen. Not a difficult chore, just tedious. Best done while doing the timing chain, as both are on the crank hub. Be sure to check all sprockets for excessive wear. NewTIS and / or Bentley should both have all the instructions you need.
I suggest you smooth off the piston domes where valves contacted them. Dents are OK, raised spots / ridges aren't. Just remember to lock the crank again before re-assembly.
I got he old pump chain off since it was broken. Just can't figure out how to secure the sprocket from spinning to get the sprocket off to put the new chain on. And theres really not any videos showing how. I will check out those instructions. Cause once I get the oil pump chain on. Im almost in the home stretch.
So here's my problem. I put everything back together according to specs (Timing is correct) and now the car doesnt turn over. It pops like every 10 seconds. The HPFP works I know that for sure. Pulled out the spark plugs only cylinder 3 spark plug is charred at the end. The other spark plugs aren't. Also on my dash the lights are very dim like battery isn't powering all the way, it's a brand new battery as well. Still have warranty probably will just swap it out and see how that works. Just kinda at an impasse right now.
So here's my problem. I put everything back together according to specs (Timing is correct) and now the car doesnt turn over. It pops like every 10 seconds. The HPFP works I know that for sure. Pulled out the spark plugs only cylinder 3 spark plug is charred at the end. The other spark plugs aren't. Also on my dash the lights are very dim like battery isn't powering all the way, it's a brand new battery as well. Still have warranty probably will just swap it out and see how that works. Just kinda at an impasse right now.
Are you sure the valve cover ground wire is connected? Front center bolt, and wire is under the harness cover --- part of the coil harness. If not connected, I've read that it causes all kinds of damage --- easy to forget it.
Some cars need a new battery to be "registered", to prevent overcharging. ECU tracks battery voltage as it ages, to ensure proper alternator operation.
Super positive that the ground cover wire is connected. I've even tried jumping it with my other car still nada zip. I didn't get new coil packs but wouldnt think that would be a problem due to the fact that they worked previously

 05-04-2020 | 04:51 PM


 )Penetration Oil helps alot and some patience was able to get it out. Im doing this in a parking lot due to Auto center being closed. Do I have to take out the engine to clean and change the timing chain? Best course of action cause I only have 3 months before I move.


 )
)


