Rotor hitting caliper
#1
 06-04-2009, 11:50 AM


Rotor hitting caliper
Hey guys,
I have a Wilwood 11.75" race kit on my car and everything was working fine on the street and my previous two track days. However, on my last track day, when I was changing out my track pads to the BP-10 for the street, I noticed scrape marks where on the caliper. It looks like the rotor was hitting the back of the caliper bridge, but I didn't hear it on the track or feel anything.
Here's a pic of where it is hitting:
Does anyone know what would cause this all of a sudden? Maybe one of my bolts is loose? I can't move the caliper or rotor with my hands, so it doesn't feel loose, but maybe only under hard braking does this occur.
Hopefully someone can chime in.
Cheers,
Steve
#2
06-05-2009, 02:30 AM


#4
06-05-2009, 08:54 AM

I suspect you have a loose bolt. Try prying the caliper with a screwdriver/prybar to see if it will move. I know my wilwood 13" rotor is very close to the caliper and I always worry that it will rub. When I tighten the bolts I try to give as much clearance as possible but I do not have much play at the bolts.
#5
06-05-2009, 10:42 AM
Yes it was. I thought it was debris as well, since it didn't happen until my 3rd track day, but the marks were indicative of a rotor striking it (two marks where the edge of the rotor is and none in the middle where the rotor vents are). Even though the caliper doesn't seem to be moving when I checked it yesterday, I will still tighten the caliper bolts this weekend and see if it happens again.
#6
06-05-2009, 01:09 PM

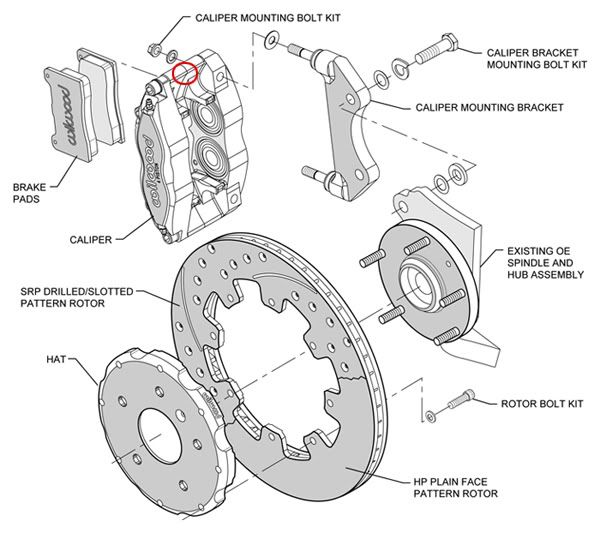
In the directions
http://www.wilwood.com/pdf/ds492.pdf
it is referenced you install one shim (#14) between the bracket and caliper for initial test fit. Additional shims are supplied for use as needed.
How many are you using?
http://www.wilwood.com/pdf/ds492.pdf
it is referenced you install one shim (#14) between the bracket and caliper for initial test fit. Additional shims are supplied for use as needed.
How many are you using?
#7
06-05-2009, 01:47 PM
In the directions
http://www.wilwood.com/pdf/ds492.pdf
it is referenced you install one shim (#14) between the bracket and caliper for initial test fit. Additional shims are supplied for use as needed.
How many are you using?
http://www.wilwood.com/pdf/ds492.pdf
it is referenced you install one shim (#14) between the bracket and caliper for initial test fit. Additional shims are supplied for use as needed.
How many are you using?
I had my shop install them as I was away that weekend for a hockey tournament. I'm taking them in the car on Monday for them to take a look. It looks like there in one shim on both the calipers.
Thanks,
Steve
Trending Topics
#8
06-10-2009, 09:58 AM
#9
06-10-2009, 10:04 AM
Luckily there was just cosmetic damage to the caliper and I noticed this soon enough. I tore my installers a new one as they skipped over certain parts of the install instructions and put me and my car at risk.

#10
06-10-2009, 10:09 AM

#11
06-10-2009, 10:25 AM
Actually both are correct. Shims on the radial stud (and the thick spacer I hope they gave you back) are used to establish the bridge clearance. The data in the pdf calls out usually for 1-2 shims per stud (plus spacer for 12.2) and a clearance check for air gap as necessary.
Lose hat bolts however in this case would clearly cause the rotor to shift on them and make light contact. I'd be concerned at this point about the potential for damage to both the hat and bolts. Properly torqued to 14lbs and wired they should not be lose. I'd look for any out of round damages to the leading thread area of the hat and suggest you replace the hat bolts with new parts. They are considered a torque to yield bolt and should not be reused- especially given the potential rocking nature they may have seen.
Red loctite to the hat is fine, but....keep in mind that removal later could damage the threads in the alum. I have no problems with using it but I'd urge you to heat the head with a torch before removing them in the future.
#13
06-10-2009, 10:44 AM
Actually both are correct. Shims on the radial stud (and the thick spacer I hope they gave you back) are used to establish the bridge clearance. The data in the pdf calls out usually for 1-2 shims per stud (plus spacer for 12.2) and a clearance check for air gap as necessary.
Lose hat bolts however in this case would clearly cause the rotor to shift on them and make light contact. I'd be concerned at this point about the potential for damage to both the hat and bolts. Properly torqued to 14lbs and wired they should not be lose. I'd look for any out of round damages to the leading thread area of the hat and suggest you replace the hat bolts with new parts. They are considered a torque to yield bolt and should not be reused- especially given the potential rocking nature they may have seen.
Red loctite to the hat is fine, but....keep in mind that removal later could damage the threads in the alum. I have no problems with using it but I'd urge you to heat the head with a torch before removing them in the future.
Lose hat bolts however in this case would clearly cause the rotor to shift on them and make light contact. I'd be concerned at this point about the potential for damage to both the hat and bolts. Properly torqued to 14lbs and wired they should not be lose. I'd look for any out of round damages to the leading thread area of the hat and suggest you replace the hat bolts with new parts. They are considered a torque to yield bolt and should not be reused- especially given the potential rocking nature they may have seen.
Red loctite to the hat is fine, but....keep in mind that removal later could damage the threads in the alum. I have no problems with using it but I'd urge you to heat the head with a torch before removing them in the future.
Thanks for the help. I can just get new hat bolts from any hardware store or should I order a set through you? I'm currently using one shim on the caliper studs and I have ample clearance to the rotor.
I would like to say that these brakes with the Poly B compounds are incredible on the track and the other Mini drivers on the track were quite envious of my ability to late brake and not suffer any brake fade throughout the day.
Thanks a ton Todd!
Steve
#14
06-10-2009, 11:38 AM
#15
06-10-2009, 02:10 PM
#16
06-10-2009, 02:28 PM

Thread
Thread Starter
Forum
Replies
Last Post
Mini Mania
Tires, Wheels & Brakes
0
09-10-2015 02:53 PM