Log In
Register
Forums
National Events
United States :: National Events
Miscellaneous Event Discussion
Past Events
Announcements
News
NAM Newsletter Archive
Vendor Announcements
Vendor Group Buys
MINIs in General
1st Gear
General MINI Talk
Tires, Wheels, & Brakes
Classic Mini Talk
European MINIs
Detailing 101
MINI Camera and Video
MINI Collectibles
Travel Stories
the *NEW* Mini Marketplace
Site Feedback
Test Forum
Mini/MINI BUILDS
4th Generation MINIs
4th Generation MINIs
3rd Generation MINIs
3rd Gen FAQs
E-Mini (2020+)
F57 :: Convertible Talk (2016+)
F54 :: Clubman Talk (2015+)
F55/F56 :: Hatch Talk (2014+)
JCW Garage
F55/F56/F57 Stock Problems/Issues
F54 :: Clubman Stock Problems/Issues (2015+)
Navigation and Audio
Wheels/Tires/Brakes
Modifications
MINI Countryman (2010 +)
Countryman FAQs
3rd Gen Countryman (U25) Talk (2025+)
2nd Gen Countryman (F60) Talk (2016-2024)
1st Gen Countryman (R60) Talk (2010-2015)
R61 :: Paceman Talk
JCW Garage
R60/R61 Stock Problems/Issues
Countryman Wheels, Tires and Brakes
Modifications
2nd Generation MINIs
2nd Gen FAQs
R56 :: Hatch Talk (2007+)
R55 :: Clubman Talk (2008+)
R57 :: Cabrio Talk (2009+)
R58 :: Coupé Talk (2012+)
R59 :: Roadster Talk (2012+)
JCW Garage
Stock Problems/Issues
Navigation & Audio
Modifications
1st Generation MINIs
1st Gen FAQs
R50/R53 :: Hatch Talk (2002-2006)
R52 :: Cabrio Talk (2005-2008)
JCW Garage
Stock Problems/Issues
Navigation & Audio
Modifications
Vendor Talk
Interior/Exterior Products
Drivetrain Products
Tires, Wheels & Brakes
Suspension Products
Car Care Products
Accessory Products
Apparel, Collectibles and More
Off Topic
Off-Topic :: Autos
Off-Topic :: Games
Club and Regional Forums
Canada
Mexico
United States :: East Coast
United States :: Midwest
United States :: South
United States :: West
United States :: Hawaii & Guam
Europe, Australia, & Far East
Racing & Competition
General Discussion
SCCA Solo and ProSolo
Driver's School
RSR Motorsports Coverage
Road Racing Discussion
Drag Racing
NAM Alliance
NAM Alliance Membership Info and Support
Archived Content (Read-Only)
Past National Events Archive
NAM Alliance Magazine Feedback and Ideas
1st Gen Marketplace - Archive
Chicago MINI Driving Group
2nd Gen Marketplace - Archive
Countryman Marketplace - Archive
Classic Mini Marketplace - Archive
Marketplace - Archive
Gallery
Tools
Car Payment Calculator
Tire Rim Calculator
Vin Decoder
Recalls
Technical Service Bulletins (TSBs)
Members List
Live Feed
Marketplace
Vendor Directory
Become a Vendor
Mini Marketplace
New Posts
How-Tos
Membership
View Dark Mode
Please register or login to enable Dark Mode.
Log In
Register
Threads
Google
Threads
Posts
Advanced
Dark Mode
Please register or login to enable Dark Mode.
Log In
Forgot your Password?
By logging into your account, you agree to our
Terms of Use
and
Privacy Policy
, and to the use of cookies as described therein.
or
Login with Google
Login with Facebook
Recent
Commented
Albums
My Pictures
Absolutjh22's Photos
View Profile
Sort:
Commented
Most Recent
Most Comments
Albums
Photos
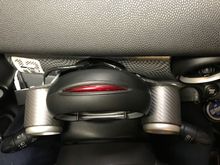
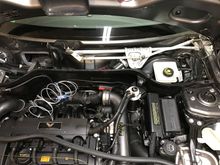
up-close of a similar view at the airbox
0
2017/03/24 16:50:28
164732
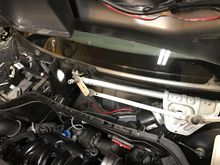
Vacuum / Boost line
0
2017/03/24 16:50:26
164732
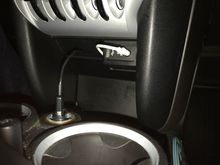
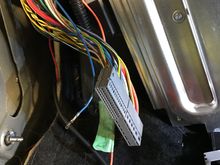
Another view of the audio and power wire routing through the dash
0
2017/03/24 16:48:14
164732
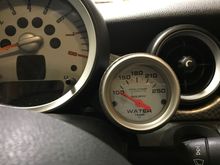
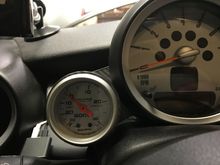
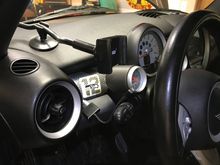
H2O Temperature gauge
0
2017/03/24 16:35:47
164732
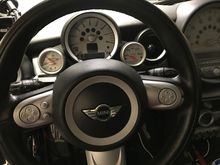
Gauges all wired up and illuminated (though I am going to replace the white LED with AMBER LED bulbs to better match the factory gauges.
0
2017/03/24 16:35:44
164732
Top view of the gauge pods. Routing the wiring very cleanly and making sure to not pinch or otherwise is a bit of a task but worthy of the time to do it right.
0
2017/03/24 16:35:42
164732
If you're looking to get a source for the lighting in your gauges it can be found at the "foot well" module. You want the BLUE 16g wire that is located in the loom closest to the floor. I disassembled the wiring harness lock to get easier access and then soldered my lead wire to this and then covered it in heat-shrink.
0
2017/03/24 16:35:36
164732
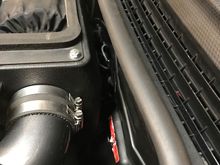
Boost tube tucked in behind the air-box
0
2017/03/24 16:35:31
164732
Boost gauge
0
2017/03/24 16:35:29
164732
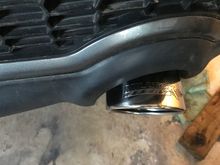
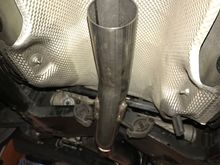
Right polished tip
0
2017/03/24 16:06:46
164732
Me and my daughter's reflection. SO shiny...
0
2017/03/24 16:06:43
164732
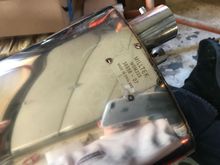
Great build quality (time will truly tell though)
0
2017/03/24 16:06:41
164732
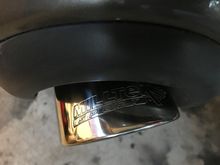
Left polished tip. I have it sticking out a bit; cause I can.
0
2017/03/24 16:06:39
164732
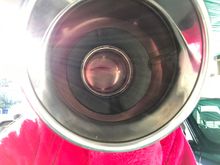
Megaphone. Girls just want to have fun
0
2017/03/24 16:06:36
164732
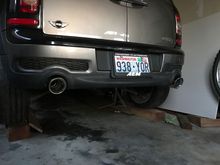
Rear view
0
2017/03/24 16:05:20
164732
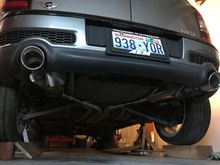
Final fitment, rear-view.
0
2017/03/24 16:04:57
164732
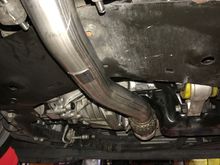
Right muffler w/ tip at Y-pipe (loose fitment)
0
2017/03/24 15:59:08
164732
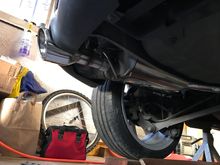
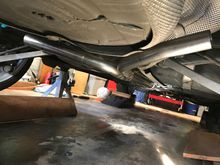
Everything tightened up and set in place.
0
2017/03/24 15:59:05
164732
Left Muffler w/o tip
0
2017/03/24 15:59:03
164732
Left muffler w/ tip
0
2017/03/24 15:59:00
164732
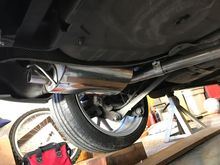
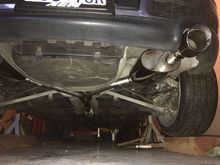
Underside view
0
2017/03/24 15:58:58
164732
Front section at hangars
0
2017/03/24 15:58:55
164732
Catalyst back
0
2017/03/24 15:58:52
164732
Y-Pipe after the midsection which has the resonator (not pictured).
0
2017/03/24 15:57:58
164732
Looks tidy
0
2017/03/13 23:33:37
164732
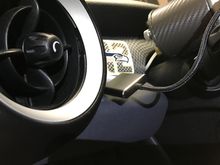
The wires now come out from behind the dash for a much cleaner look. Should have replaced that white 1/8" audio cord with a black one. Hmmm... maybe I still will.
0
2017/03/13 23:33:32
164732
Seahawks!!!
0
2017/03/13 23:33:22
164732
I also routed my audio and power cables discreetly into the dash.
0
2017/03/13 23:33:17
164732
Finished product...
0
2017/03/13 23:33:11
164732
Routing away from heat and desbris.
0
2017/03/13 23:33:06
164732
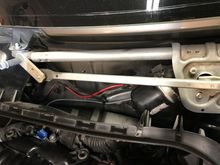
Cover installed, wiring routed with existing wires and zip tied into place. Ideally I would have used wire loom to protect the wire but with no moving parts and a secure mount this should be fine. The portion in the engine bay will have split loom.
0
2017/03/13 23:32:48
164732
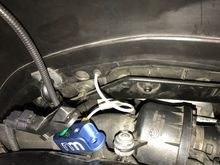
Tube and temp sender wiring.
0
2017/03/13 23:32:37
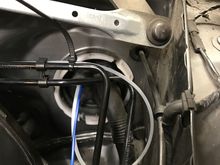
164732
Soft bend to keep from kinking, plus the excess line will move with the engine under hard acceleration. Rubber grommet in the plastic liner to reduce the likelihood of wear on the semi-rigid tubing.
0
2017/03/13 23:32:31
164732
Zip ties to keep things in place
0
2017/03/13 23:32:24
164732
Soft bends to keep the tube from kinking and carefully placed zip ties to minimize movement and chafing.
0
2017/03/13 23:32:06
164732
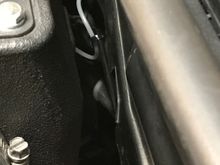
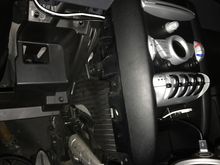
This is where I routed the wire and boost/vacuum tube.
0
2017/03/13 23:31:44
164732
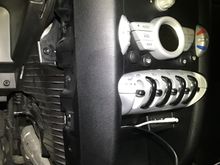
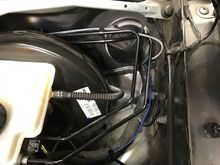
Cowling removed for accessing the wiring harness port (cover removed) in the upper right.
0
2017/03/13 23:31:38
164732
Line thru the plastic liner, with a rubber grommet to keep tubing from chafing or kinking. Routed inside of the cowling to keep it away from heat and desbris. Secured with zip ties.
0
2017/03/13 23:13:39
164732
With the cover back on the wiring harness port, and maintaining our soft bends in the tube. Wiring routed with exiting harness path and secured with zip ties.
0
2017/03/13 23:13:33
164732
Another shot, up close, of how I routed the wire and tubing into the interior.
0
2017/03/13 23:13:27
164732
First
Page
5 of 7
Last
Go To
Page
1
2
3
4
5
6
7
5 of 7
Go To
GO
Go to page
of 7
pages
1
2
3
4
5
6
7