Mini Cooper 2007-2013: How to Install a Radar Detector
A radar detector device is a great upfront investment that could save you a lot of headache down the road. Wiring it up to avoid a long cord dangling out of the power outlet makes it better looking.
This article applies to the Mini Cooper (2007-2013).
While radar detectors aren’t legal in every state, they’re certainly popular–and for good reason. Radar detectors can pay for themselves with the first speeding ticket you don't get. If you’ve received one too many tickets during the course of your drivership, you might want to consider investing in this technology. You could just plug the power cord into your cigarette lighter and suction cup the unit to the windshield, but for a much cleaner installation, you want a dedicated power source. Read on and we'll help you do it.


Materials Needed
- Radar detector
- Torx screwdriver
- Wire
- Electrical tape
- Flat head screwderiver
Step 1 – Remove overhead console
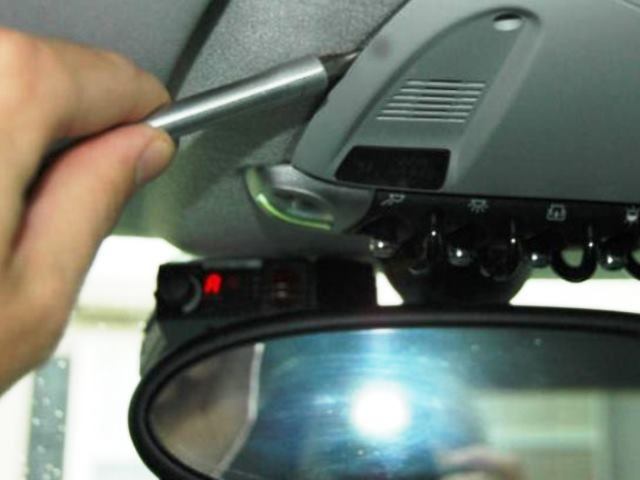
Luckily for anyone wanting to mount a radar detector, or stand alone GPS unit, you can get power from the overhead console in your 2nd generation Mini Cooper. Use a thin flat blade screwdriver and pry around the edges of the console until it pops free from the headliner. Inside you will find a black plastic cover with two Torx head screws that need to be removed. Once those are out, you have access to the wiring harness.
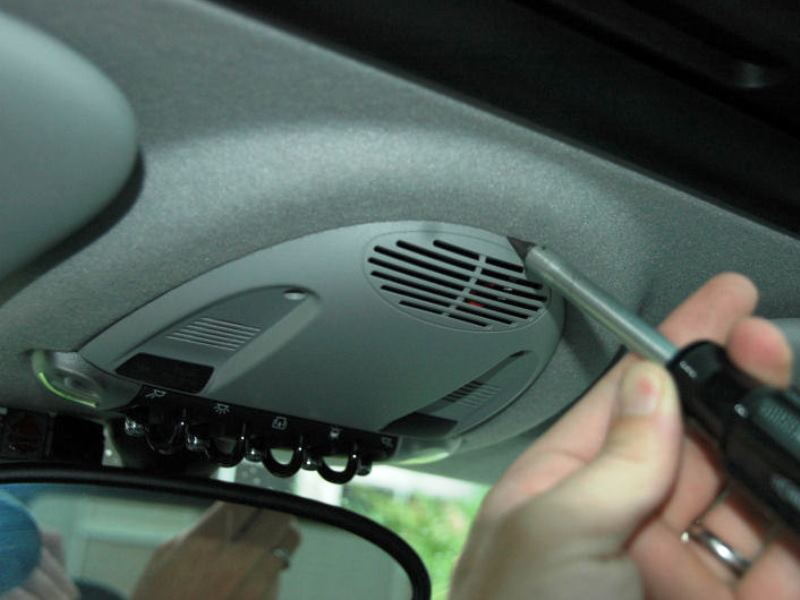
Figure 2. Pry around the edges and remove the center overhead console. 
Figure 3. Remove these Torx screws.
Step 2 – Tap into power circuit
The switches for the map lights and other switches in the overhead console all comes from a purple wire with a light blue stripe on it. The easiest way to power your radar detector is with a T-tap, which clips down on the existing wire without breaking it. You also need a connection to the body for ground, but luckily there is at least one small screw hole in the area where you should be able to attach the negative wire from your connector.
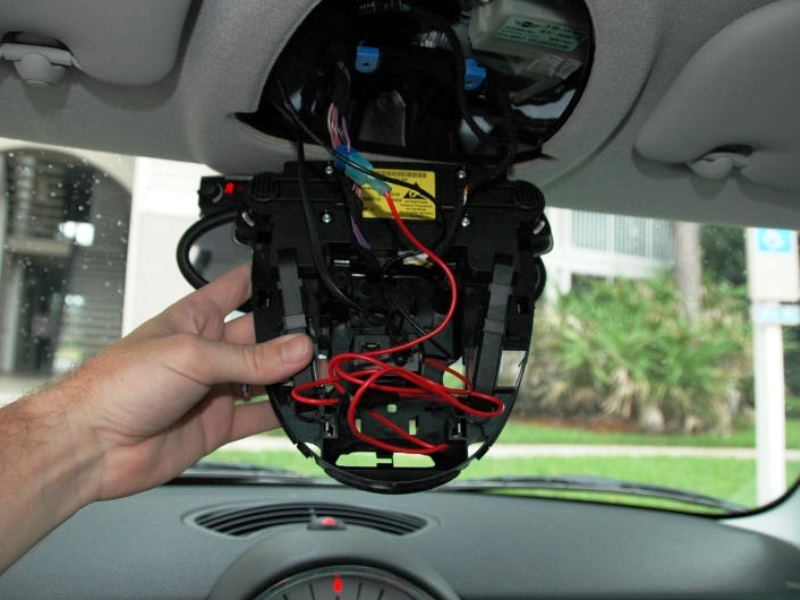
Figure 4. Wiring harness with red power cord already spliced into it. 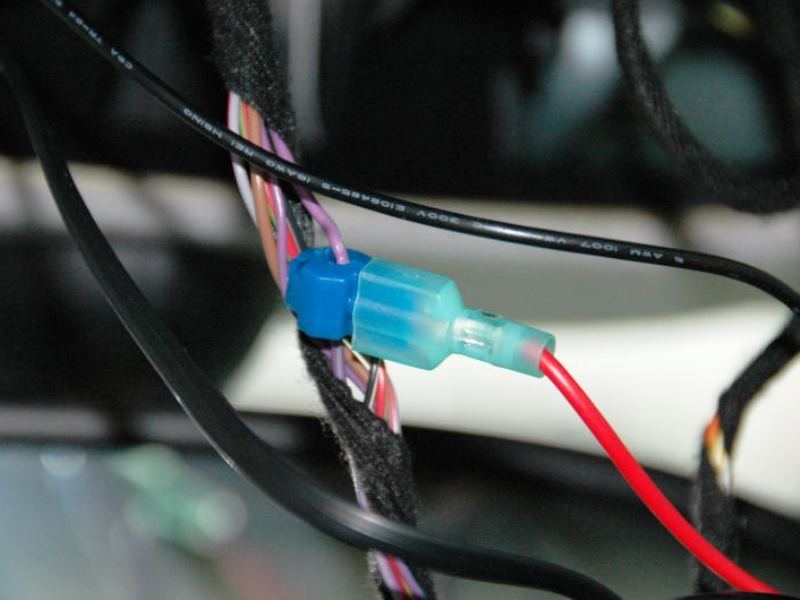
Figure 5. Close up of the T-tap connector.
Step 3 – Splice in power cord
Obviously your radar detector came with a power cord, most likely with a cigarette lighter plug on the end of it. Check with the specs and make sure your unit uses straight 12 volt power, and doesn't have some sort of resistor built into it. Every unit is different, and you may have to check on the site of the manufacturer for this information. You may also be able to buy a dedicated hard wire kit from them, with wires to splice in instead of having to cut into the supplied cord.
Following the manufactures directions, splice the supplied power cord into the ground and power connections you have made. Feed the cord out the edge of the headliner toward the windshield, or out the edge of the overhead switch console opening, and out to where you want to mount he radar detector.
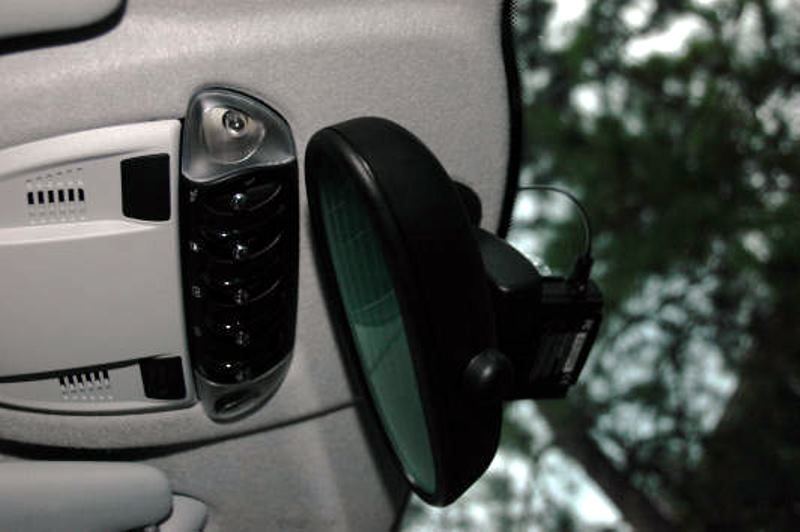
Step 4 – Button it all up and test it
Replacing everything is just the opposite of taking it all out. Before you screw and snap the cover back on, be sure to turn on the key and check that you have power to the radar detector. Becasue you have tied into the dome light circuit, it will be powered briefly even with the key off, but it will eventually shut down, so no need to worry about your battery.
Related Discussions
- Electrical Radar Detector Hardwiring 12v Line Above the Rearview Mirror - NorthAmericanMotoring.com
- DIY Radar Detector Hardwire - NorthAmericanMotoring.com
- Do You Have a Custom Installed Radar Detector - NorthAmericanMotoring.com
- Invisicord in Radar Detector Install - NorthAmericanMotoring.com

