Mini Cooper 2014-Present: How to Install Radar Detector
The hardest part of installing a radar detector is figuring out how to wire it. This article will help you get it done.
This article applies to the Mini Cooper (2014-Present).
The most frustrating thing about mounting a radar detector isn't the space it takes up, it's the wires it leaves behind. You could splice it to one of the existing wires, but then you'd risk losing your warranty. Try this method and you'll have a clean install without ever having to cut the factory wiring.

Materials Needed
- Radar detector
- Ratchet with socket set
- Plastic trim tool
- Add-a-fuse
- Nut and bolt
- Ring terminal
- Zip ties
- Wire cutter
- Wire crimper
- Heat shrink and heat gun
Warning
Whenever working with the electrical parts of the car, it is a good idea to disconnect the negative (black) battery terminal. This way you avoid shorting anything out, which could cause a major problem, like a fried CPU. For this project, we'll be routing the wire through the A-pillar, which has an air bag. Disconnecting the battery will help ensure that the air bag does not accidentally get set off.
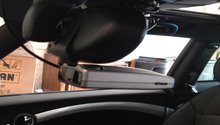
Step 1 – Mount your radar detector
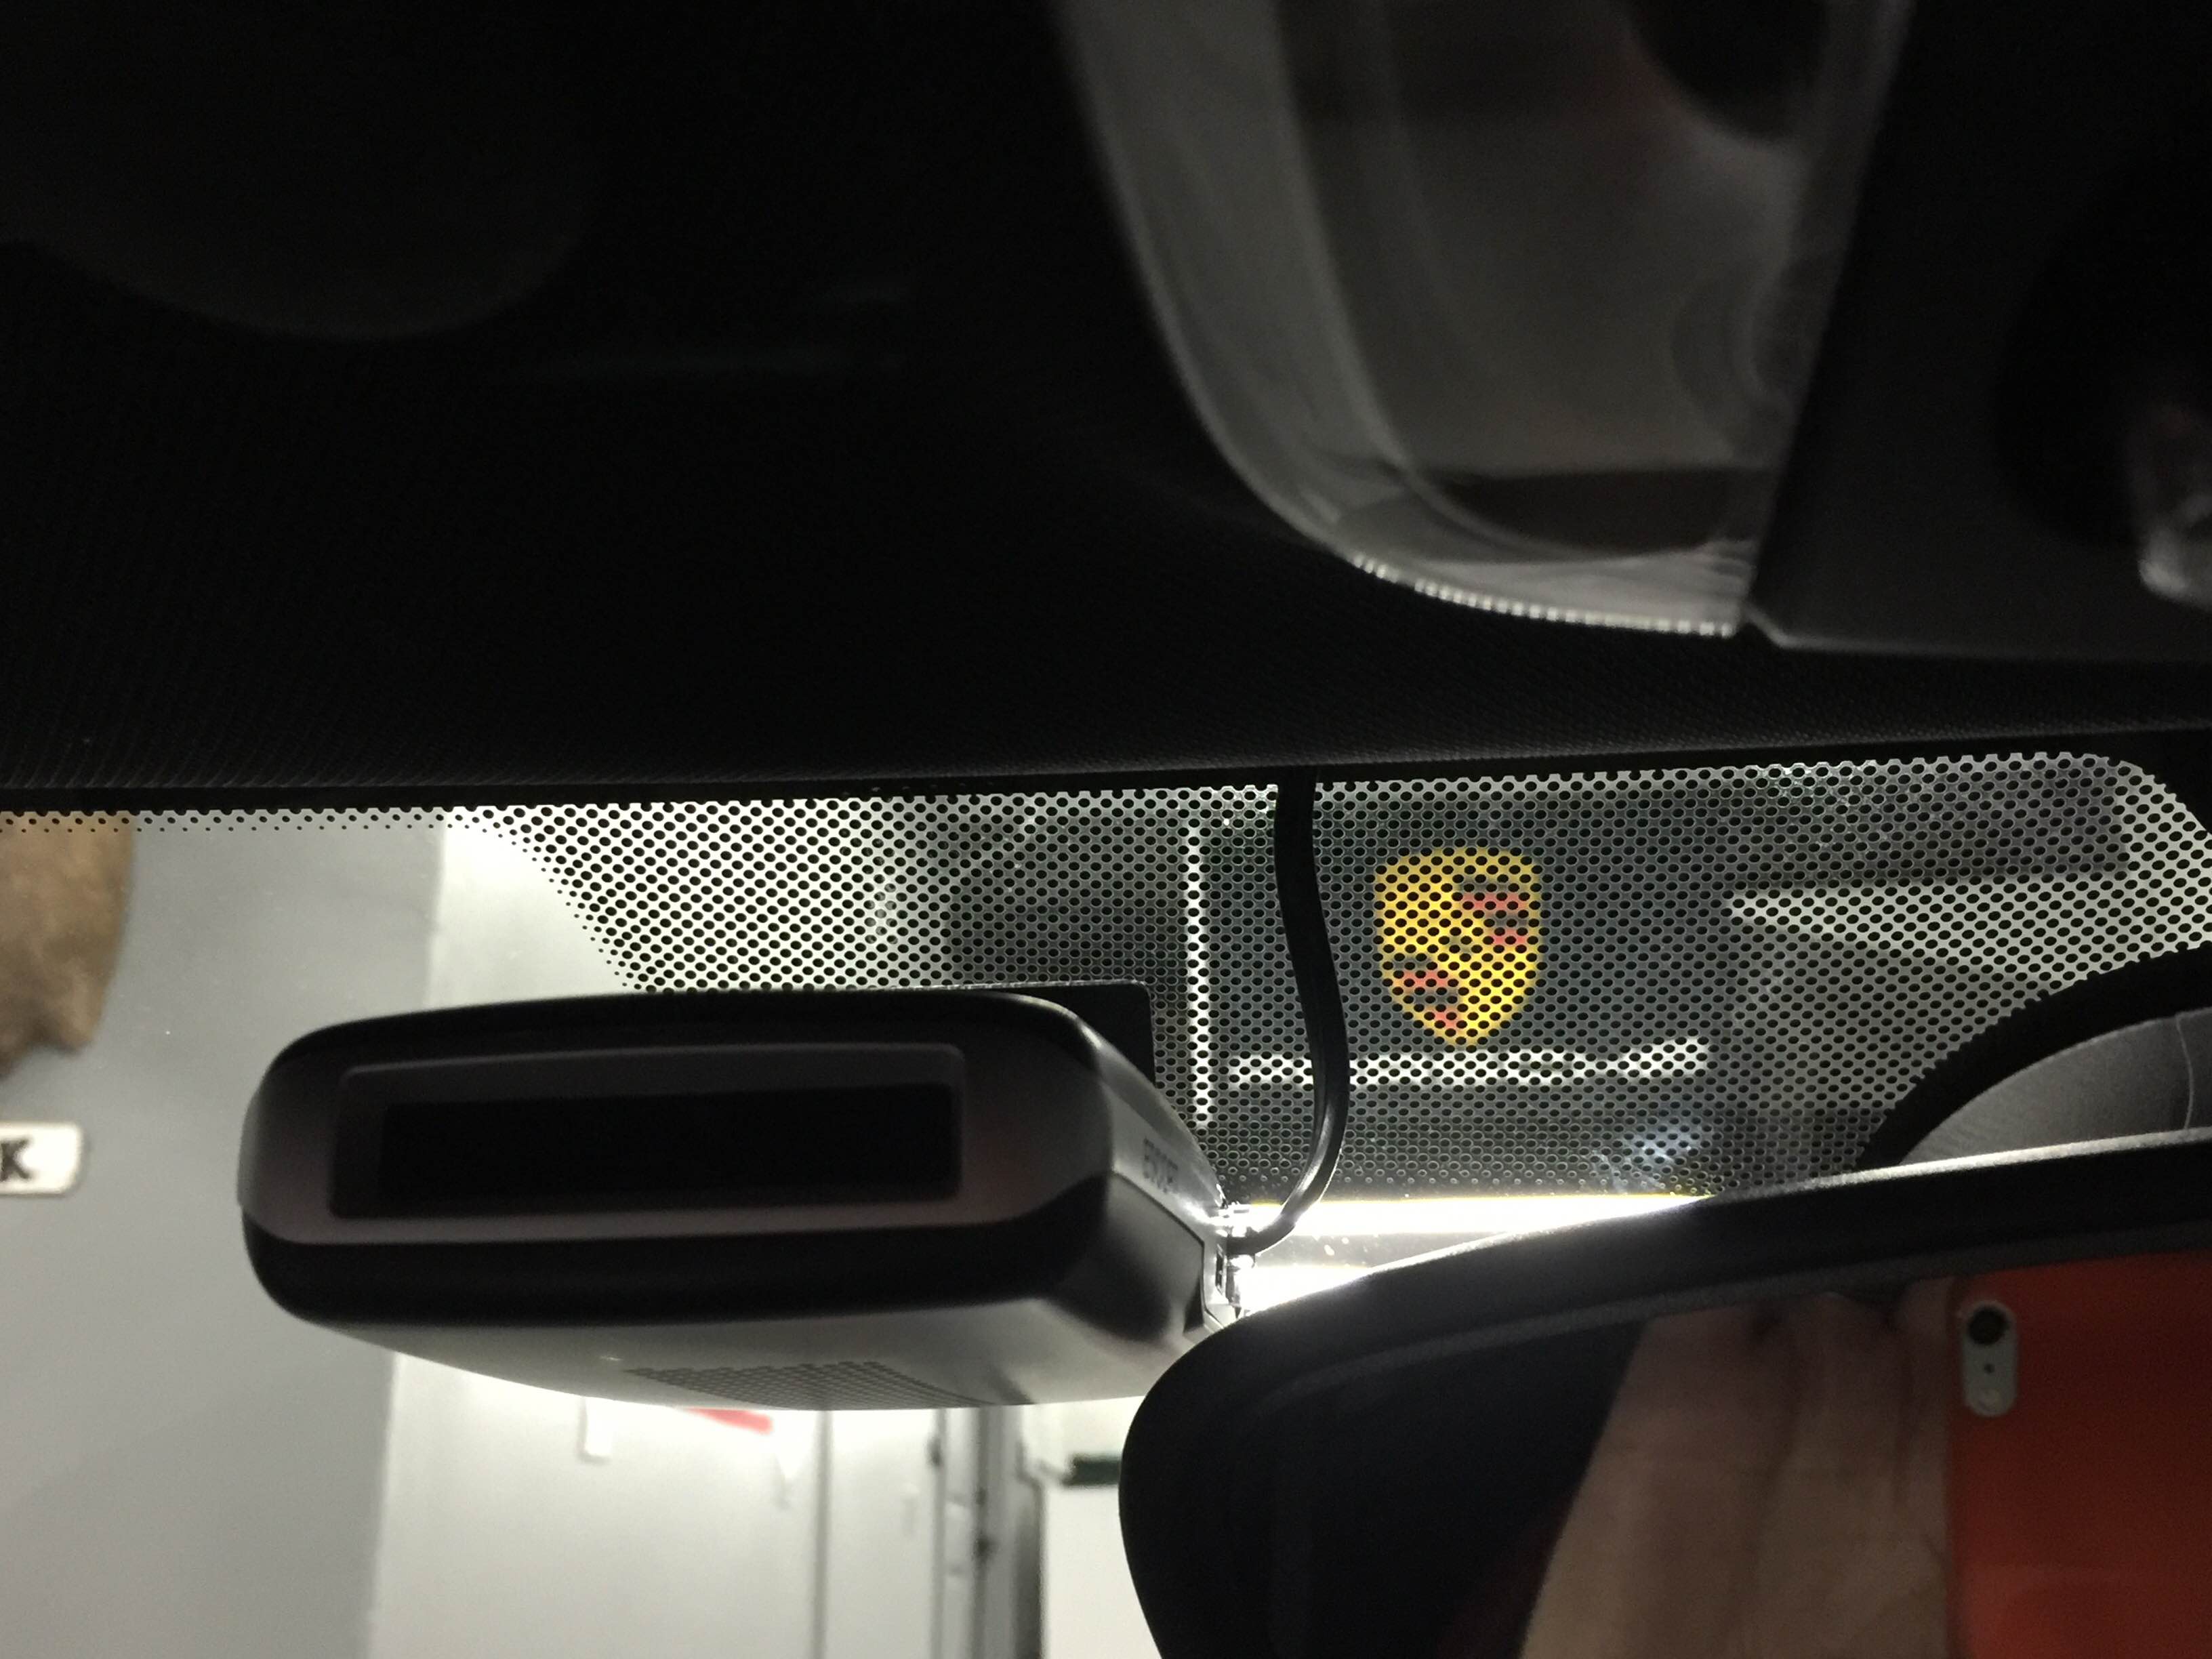
This is the easy part. Just follow whatever recommendation came with your radar detector, whether it's to be mounted to the back of the rear view mirror or stuck to window using adhesive. Typically the important things are that the detector has an unobstructed view of the road out the window and that you can see the alerts, but that is does not block your view ahead.
Step 2 – Remove the interior panels
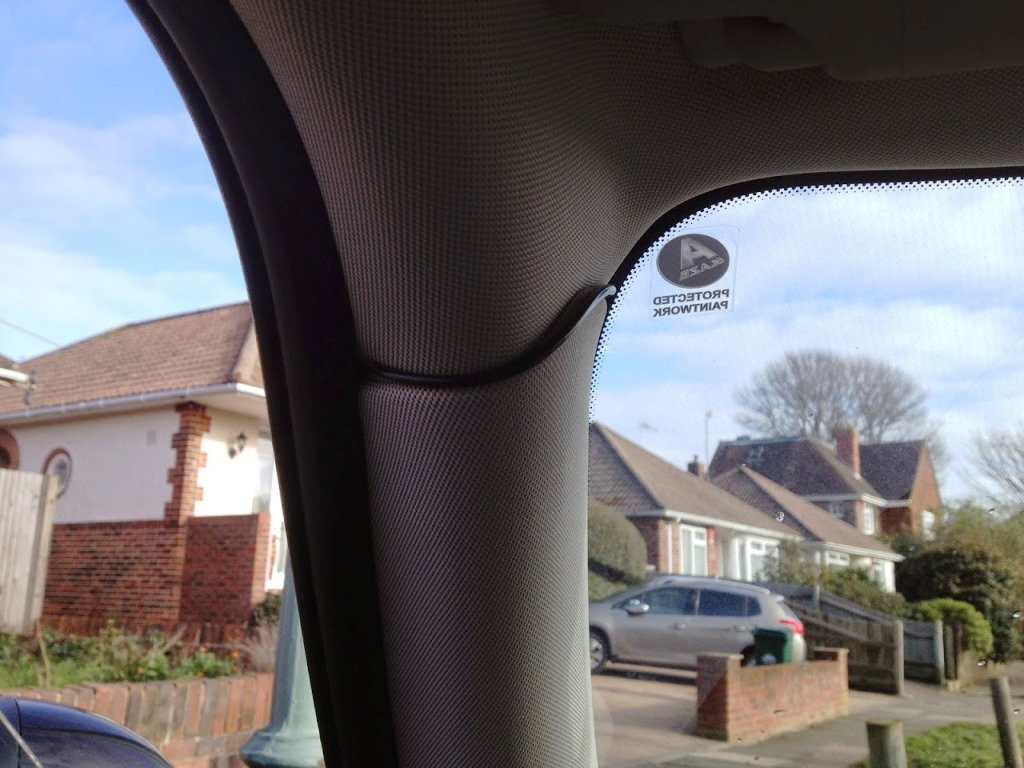
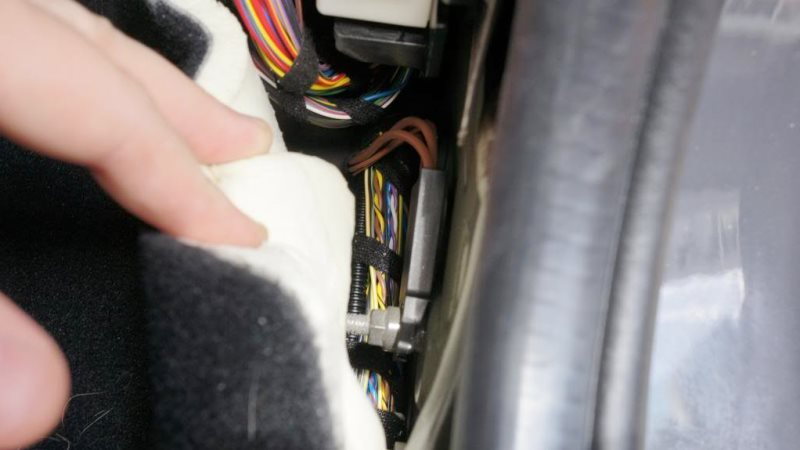
There is a lip on the top part of the A-pillar where you can start to pry off the paneling from. Be careful not to disturb the air bag underneath it. Once the top of the A-pillar trim pops off, you can slide the rest of it up and set it aside. The wiring will be towards front of the car, while the air bag faces the passenger seat.
Prying off the side paneling on the passenger side is fairly simple, but there are a few clips that will be harder to remove. Start with the kick panel on the inside by prying it up from the bottom. For the outer passenger side panel, pry it out from the side. If you're having trouble with the bottom of the outer side panel, you can pull up the door trim a bit to get the side panel out.
Tuck your radar detector's power wire and ground wire above the headliner and route it along the passenger side of the vehicle down the A-pillar and past the kick panel to the fuse box.
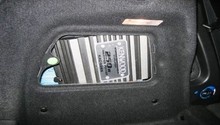
Step 3 – Wire the radar detector to fuse box
The fuse box is located behind the glove box. Reach up, press the tab and pull it down to access it. Locate fuse 52 on the fuse box, which is a switched power source that doesn't stay on when the car is off. Take out fuse 52 and insert the add-a-fuse to the fuse box, then insert the fuse to the add-a-fuse. Consult with your radar detector manual or search online to figure out which wire is positive and which is ground, then crimp on the appropriate connectors. Include heat shrink wrap around the connection for good measure.
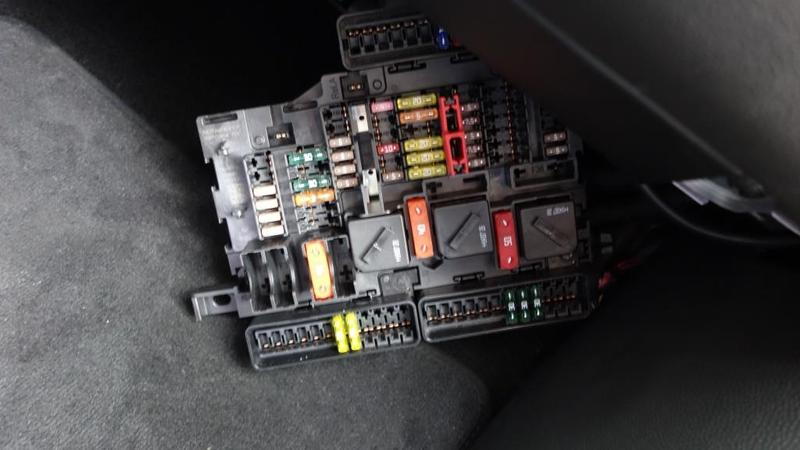
Figure 3. Pull down the fuse panel and locate fuse 52. 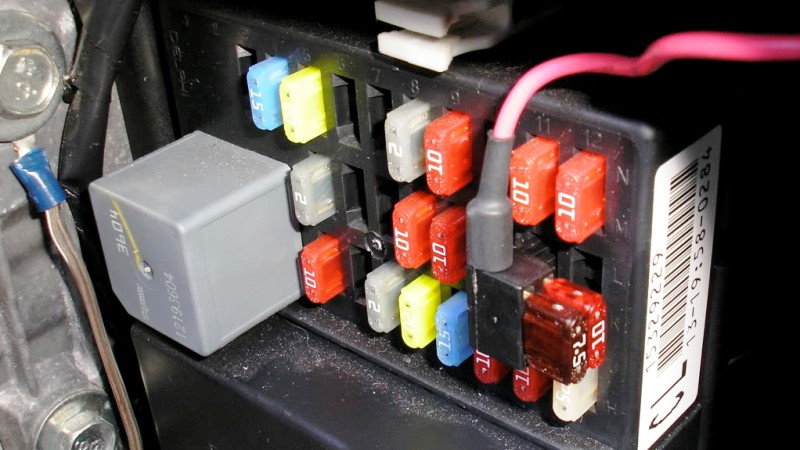
Figure 4. Add-a-fuse installed in a fuse box (not a Mini).
To ground the radar detector, crimp the ground wire to a ring terminal, then find a point that touches bare metal. There is a bolt near the passenger side door where many electronics are grounded. You can either add your ground wire to that, or you can find (or make) your own ground point. Just find a place where you can screw to bare metal and install a screw to hold the ground wire.
Step 4 – Test and button things up
Before you put all the trim panels back into place, test your work. Reconnect the battery, turn on the car and check that you have power at the radar detector. Turn the car off and be sure the power goes out. When you're satisfied with the wiring, return the passenger side panels and interior A-pillar panel. They should all snap back into place. Now use your Waze app to find a local speed trap and test it for real.
Related Discussions and Sites
- Hardwiring in the F56 - NorthAmericanMotoring.com
- Hard Wiring a Radar Detector - NorthAmericanMotoring.com
- Radar Detector Installation - MiniF56.com
- Running Wires for Radar Detector - NorthAmericanMotoring.com