Mini Cooper: How to Paint Rims Using Plasti-Dip
Plasti-dipping the rims on your Mini Cooper is a simple, cost-effective way to make your prized vehicle stand out on the road.
This article applies to the Mini Cooper (2001-2016).
Plasti-dipping rims on a car is a popular trend, especially among Mini Cooper owners, as it can really make one’s car stand out for such little investment of time and cost. What is perhaps most attractive about Plasti-dipping rims is the fact that it’s not permanent. If you change your mind later on, it can always be peeled off. To learn how you can do it yourself, read on.


Materials Needed
- Soap/water
- Brush
- Towel or rag
- Trash bags
- Index or playing cards
- Plasti-Dip can(s)
- Plasti-Dip Glossifier
Step 1 – Protect surrounding area
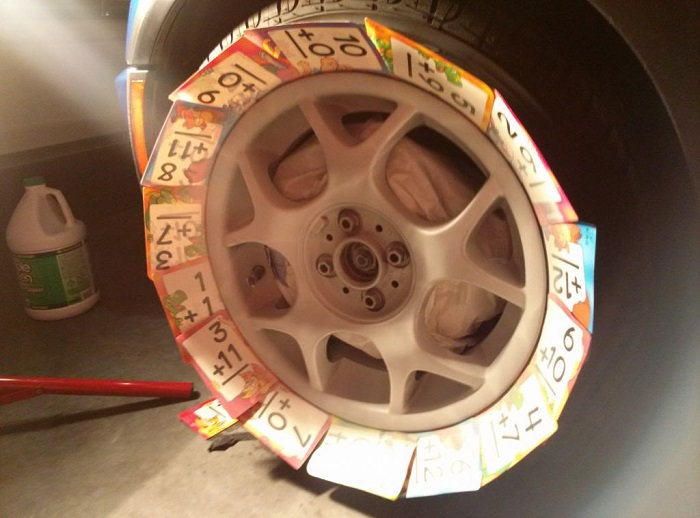
To avoid getting Plasti-Dip on nearby parts like the brakes, rotors, and caliper, take a few minutes to cover everything you don't want Plasti-dipped with a plastic bag (a trash bag works fine). When complete, protect the tires from the Plasti-Dip spray by sticking index or playing cars in the gap between the rim and wheel.
Step 2 – Clean the rims
Thoroughly clean the rims using soap and water and a brush. There should not be any dirt/grime/brake dust left behind, as this can affect the Plasti-Dip's ability to stick to the rim's surface. Dry the rim with a towel or rag.

Step 3 – Apply Plasti-Dip
At a distance of about half-a-foot away, spray the Plasti-Dip onto the rim. Do a light coat that is semi-transparent. Allow to dry, then repeat. Do this again and again, about three to four times, until you have a nice, even look.
You do not want to do a heavy spray – this will cause the material to drip, and not dry evenly. Do make sure to shake the can each time you go to spray.
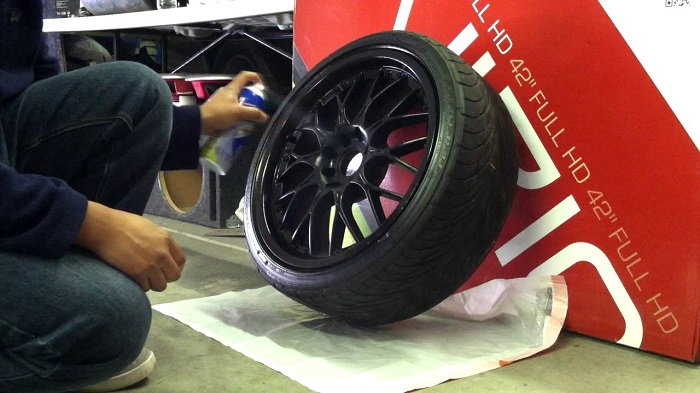
Step 4 – Apply Plasti-Dip Glossifier
Once you have a nice, even look, apply a single coat of Plasti-Dip Glossifier. This protects the plastic, and also gives the rim a nice, finished look.
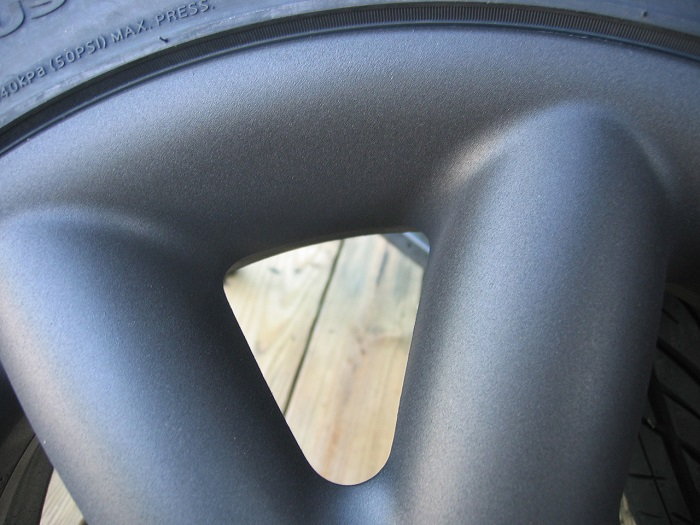
Step 5 – Finishing up
Remove the bag and cards protecting the brake, rotor, and whatnot, and inspect all areas of the wheel for random spray. Peel off as appropriate. When complete, take a soft rag, and rub the wheel as though you are shining it. This will ensure that any unseen bits of Plasti-Dip are removed as well.
Featured Video: How to Plasti-Dip Mini Cooper Rims
Related Discussions
- Plasti-dipped the wheels with pics - Northamericanmotoring.com
- Plasti-Dip mini wheels - Northamericanmotoring.com
- Plasti-Dip rim short write up review - Northamericanmotoring.com
- Plasti-Dip DS lites - Northamericanmotoring.com

