Mini Cooper: How to Replace Your Dome Light
Whether you need to replace a burnt out bulb or you want to add a little color to your interior, changing out the dome light in your Mini Cooper is a simple task.
This article applies to the Mini Cooper (2001-present).
Generally, you won't notice a burnt out dome light until it's dark outside and you drop your keys into the space between the seat and the console (a.k.a. the Bermuda Triangle of the automotive world). But when the sun finally comes back out and you're ready to change out the dome light bulb in your Mini Cooper, you might notice that the method for getting the cover off isn't as obvious as most cars. But before you drag it down to the stealership, ahem, dealership, and pay them good money for a simple job, follow the steps below and you'll have it changed out in no time.

Materials Needed
- Flat head screwdriver
- Replacement dome light bulb
- Tape (optional)
- Piece of 1/2" vinyl tubing (optional)
Step 1 – Remove the dome light cover
Recessed into the plastic dome light cover, right next to the on/off button, is a small notch that has enough space to fit a flat head screwdriver in it. Place your screwdriver in the slot and pry it off gently.
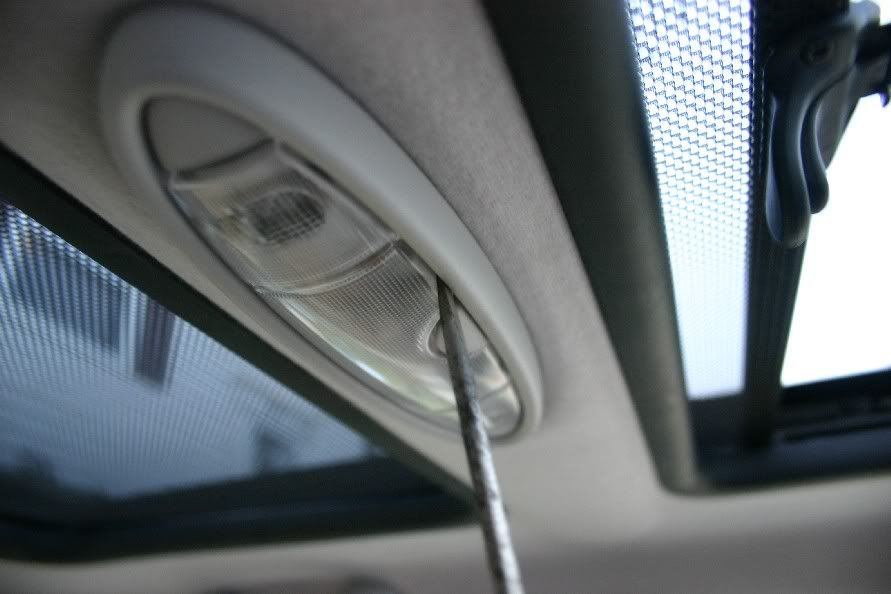
Figure 1. Pry the plastic dome light cover off by sticking a flat head screwdriver in the notch by the on/off button. 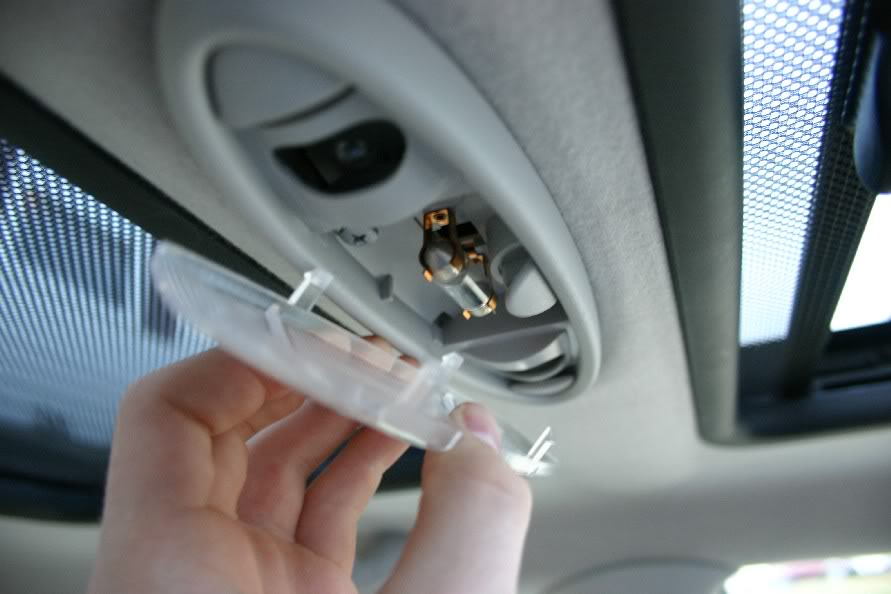
Figure 2. Pull the cover off to gain access to the dome light bulb.
Step 2 – Replace the dome light bulb
The dome light bulb in the Mini Cooper is notoriously difficult to remove. Some have had luck using a piece of duct tape, wrapping it around the bulb a little and then pulling it out. This should provide enough leverage to get it out. Inserting the bulb can prove difficult as well, but you can use a piece of 1/2" vinyl tubing if necessary. Press the bulb into the end of the tubing, twist the bulb to remove it, then press it into place.
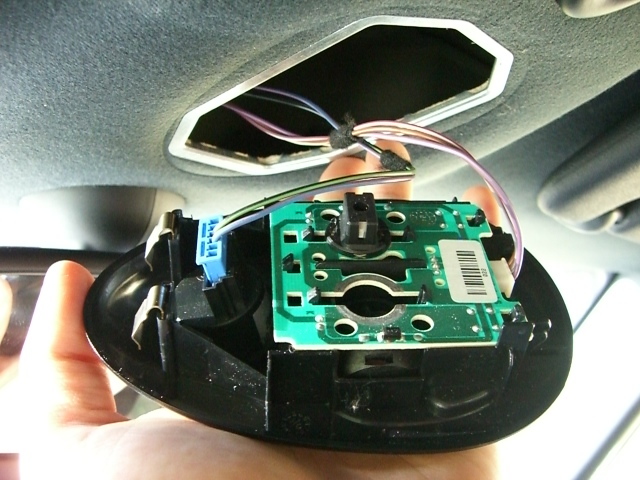
Another method involves removing the entire panel around the dome light. You can do this with only your hands, pushing towards the windshield while simultaneously pulling down on the back end. This compresses the springs on the front and releases the unit from the clips in the rear, which will cause it to fall out. Once out, you can disconnect the electrical connectors and take the unit to a bench, where it will be easier to remove the bulb.
Related Discussions
- Colored LED dome lights - NorthAmericanMotoring.com
- How to replace the map lights - NorthAmericanMotoring.com
- Extremely easy way to change map and dome lights - NorthAmericanMotoring.com